
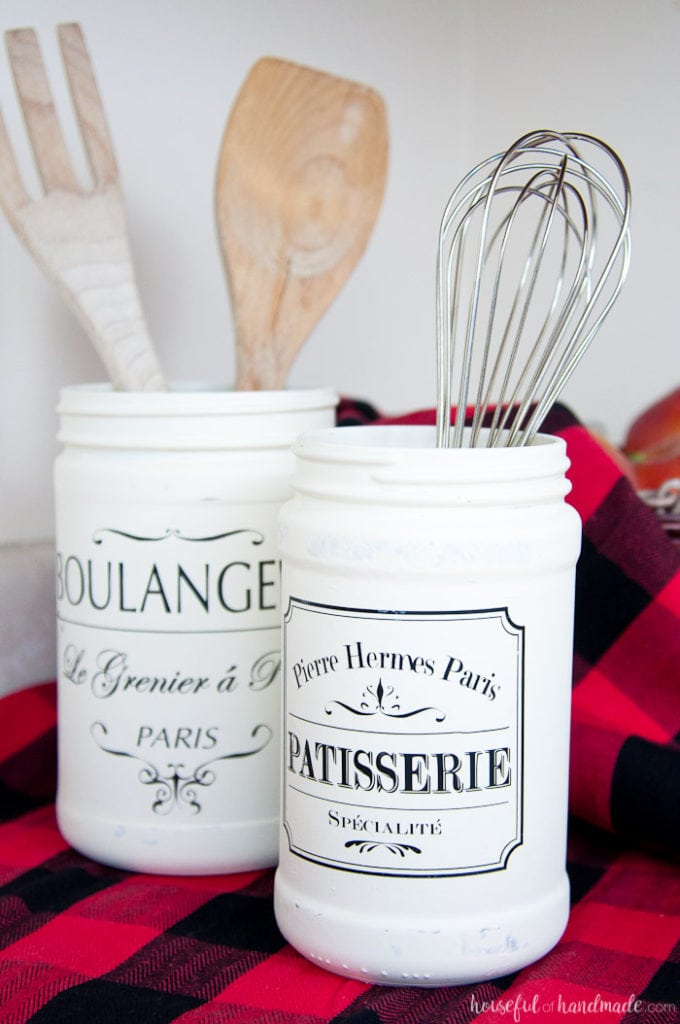
This Farmhouse Kitchen Canister is the perfect way to add some vintage charm to your kitchen without spending a lot of money.
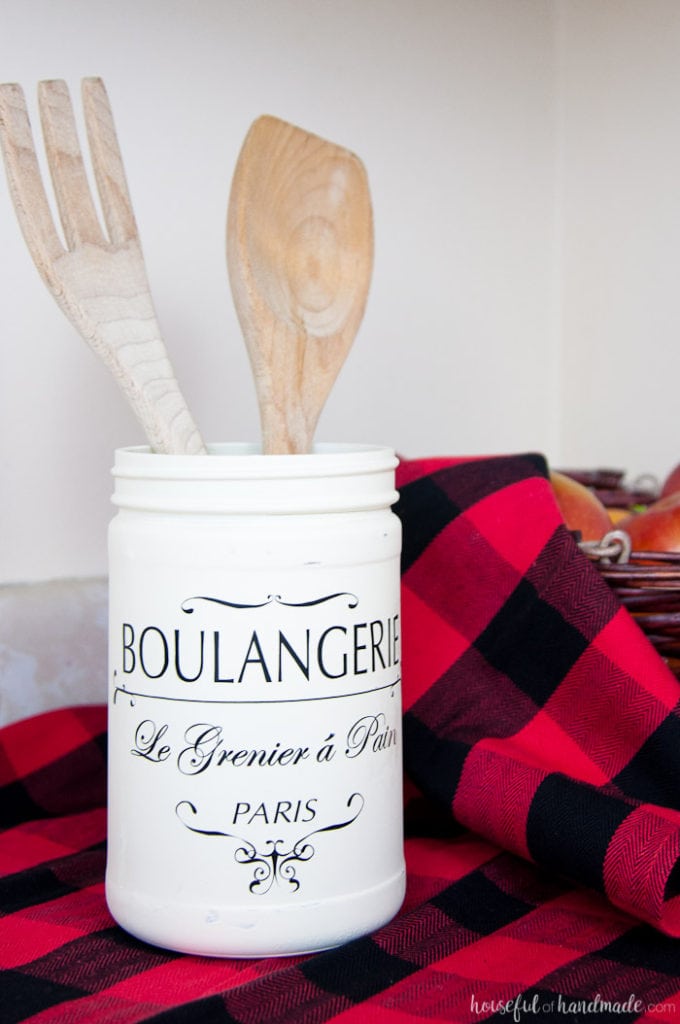
Organize your kitchen with this beautiful farmhouse kitchen canister. Made from old peanut butter jars that were transformed to look like porcelain french bakery jars.
The vintage inspired DIY is perfect for holding your kitchen utensils. Learn how easy it is to make the farmhouse kitchen canister with the help of your Silhouette Cameo.
It’s the first Silhouette Creator’s challenge of the year! I love having the themed challenge to help stretch my creativity and this month’s theme definitely made me think.
This post may contain affiliate links. As an Amazon Associate I earn from qualifying purchases. Click here to read my full disclosure policy.
This month we were suppose to “Refresh” and make something old new again. Sounds easy enough but for some reason I was coming up with some serious brain block. So instead of crafting, I tried avoiding. Ha ha!
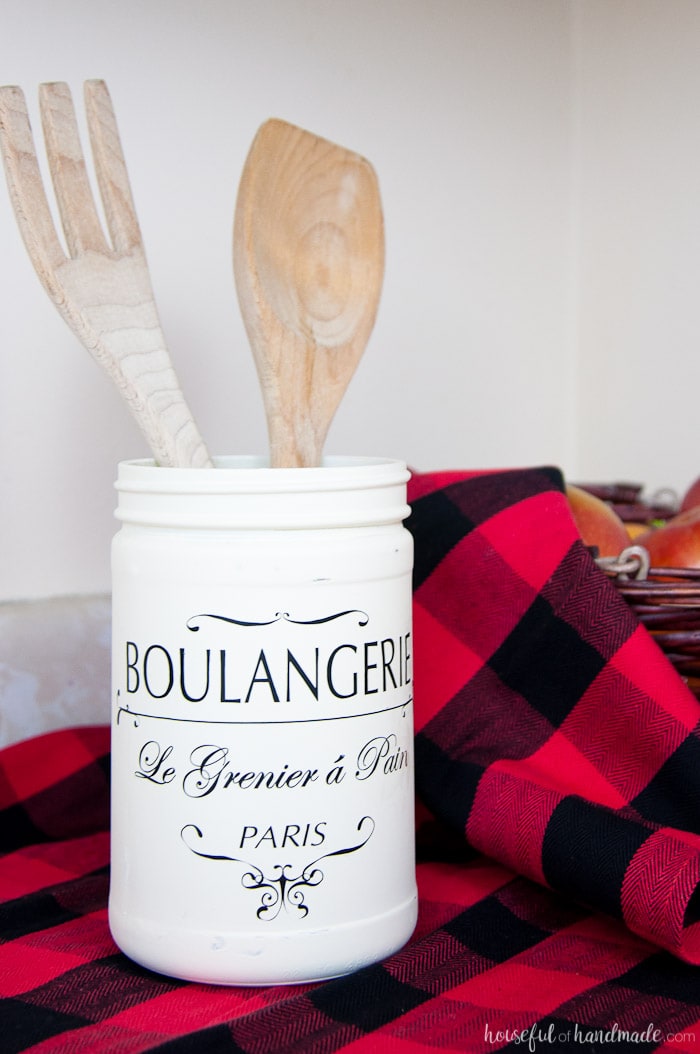
During my avoidance I was browsing the world wide web and stumbled upon the Magnolia Market shop (cause I never spend hours and hours drooling over the beautiful decor there) and saw these beautiful french kitchen canisters.
I loved them so much and then it hit me, I could create my own version for the challenge and I came up with this Farmhouse Kitchen Canister DIY.
Upcycle old food jars into beautiful french bakery kitchen canisters.
Obviously this challenge has to start with the awful before photo since we are refreshing it. Are you ready to find out what these gorgeous canisters started out as? Peanut butter jars!
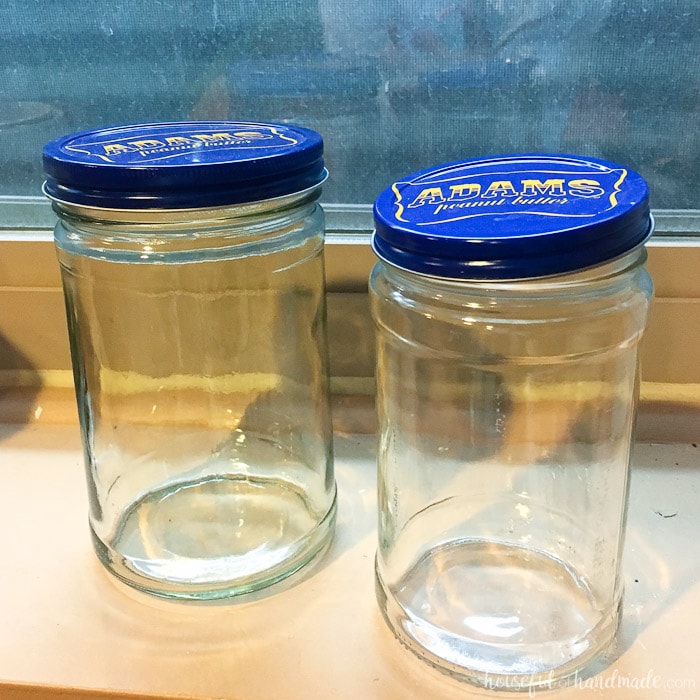
Yep, my family has a slight obsession with peanut butter and our favorite brand (Adam’s) comes in these nice glass jars. I never throw them away when we are done because they are perfect for reusing.
Whenever I make homemade salsa, I use an old peanut butter jar to store it in the fridge. If I have a bunch of craft supplies to organize, peanut butter jars to the rescue!
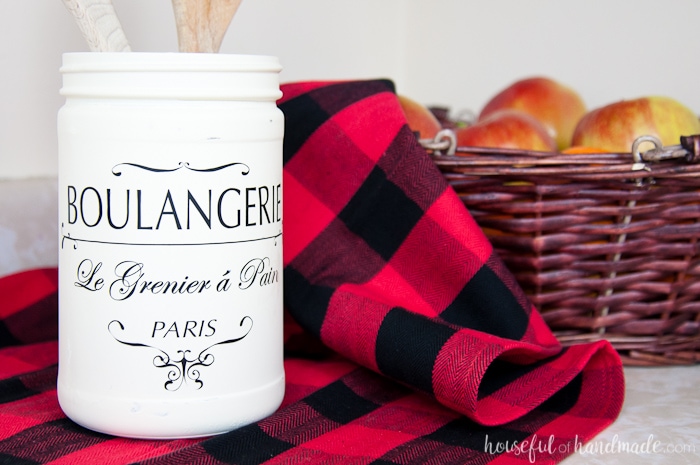
So when I needed a jar for my Farmhouse kitchen canister I knew a couple peanut butter jars would be perfect. With a little DIY, I turned them from glass jars to “porcelain” canisters. Now all that I needed was some beautiful labels.
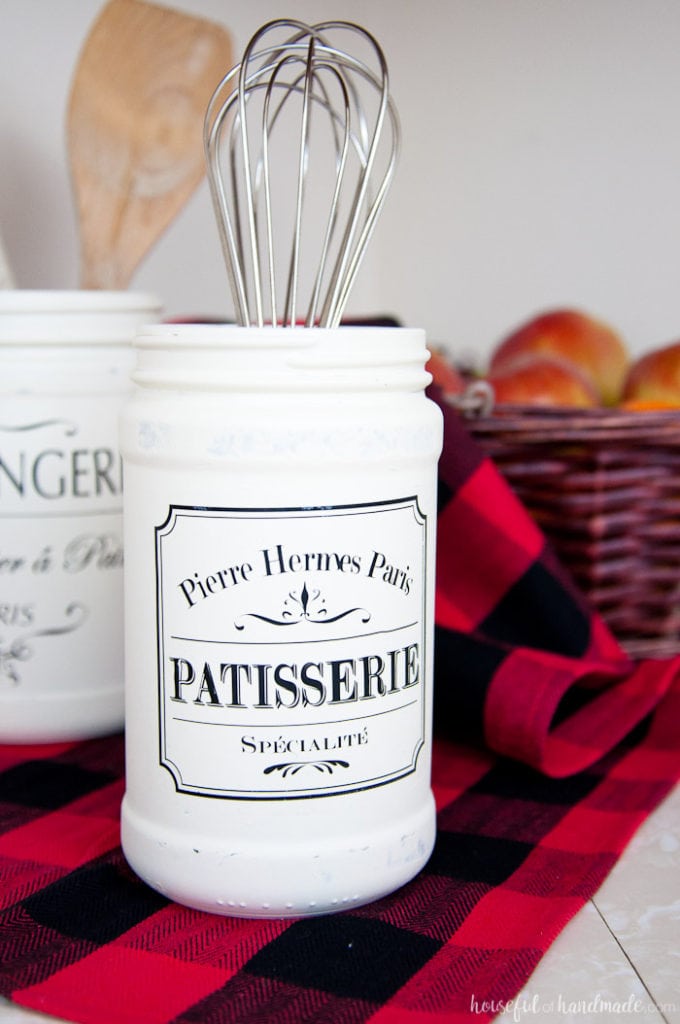
I actually had way too much fun creating these vintage french bakery inspired designs for the canisters. Being able to create whatever I can dream up is my favorite thing about the Silhouette cutting machine.
But after I got everything designed, I realized the detailed label would be a big pain to cut and weed without messing it up with regular vinyl. There are some seriously thin lines and lots of tiny details. I
have yet to try putting heat transfer vinyl onto something hard so this was my first test run. I am happy to report it’s my new favorite way to use HTV and I’m going to be exploring it more.
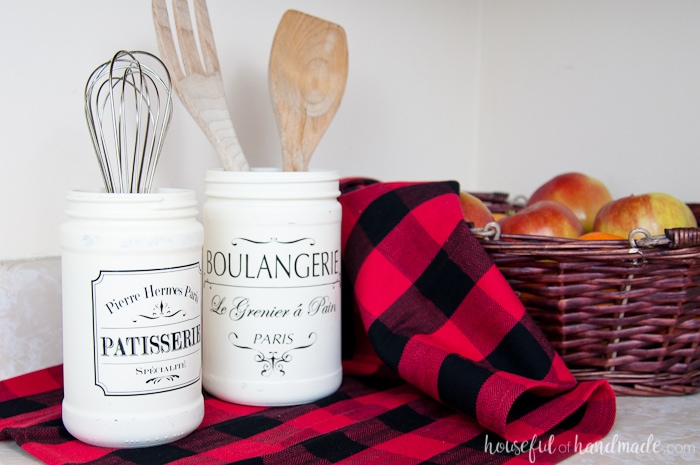
How to Make a Farmhouse Kitchen Canister
Supplies:
- Peanut butter jars
- French bakery cut files
- I am sharing the cut files I created for these kitchen canisters in my library of free printables & downloads. Click here to subscribe to my weekly newsletter and gain access to all the freebies. If you already have your password, click here to download it.
- Chalky finish spray paint
- Heat transfer vinyl (HTV)
- Silhouette cutting machine
- Iron
Start by making sure your peanut butter jars are clean and the labels are removed. Prepare the surface to receive the paint by wiping it down with white vinegar or soapy water.
Lay the jar upside down and start spraying. It took quite a few coats of spray paint to get solid coverage, but be patient. Putting too much paint on at once just causes it to run. It took me 6 coats to get the jars how I wanted them.
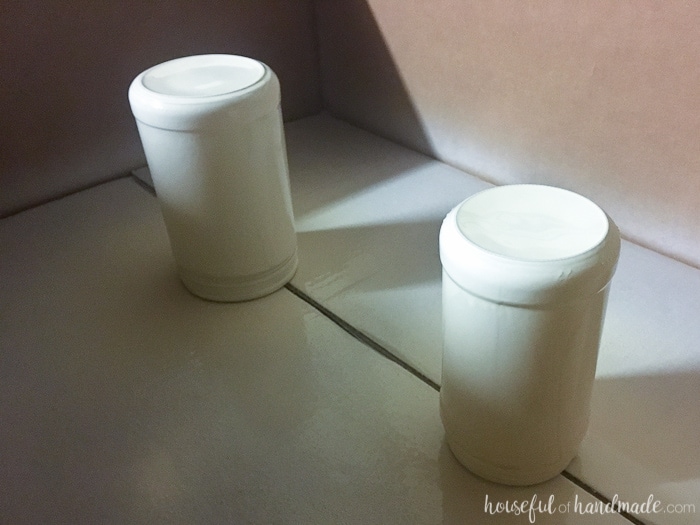
While the jars are drying, cut out your vinyl. When using HTV you always need to mirror your image before cutting. Size your image to fit your jars and cut it out with the HTV vinyl setting in your Silhouette software.
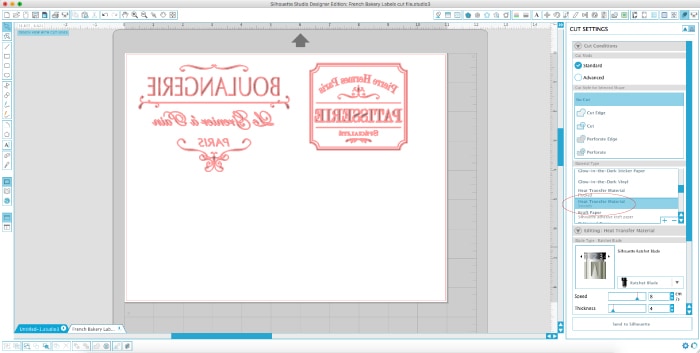
Carefully weed out the excess HTV. I found holding the design up to the light allowed me to easily see where I still had vinyl to be removed.
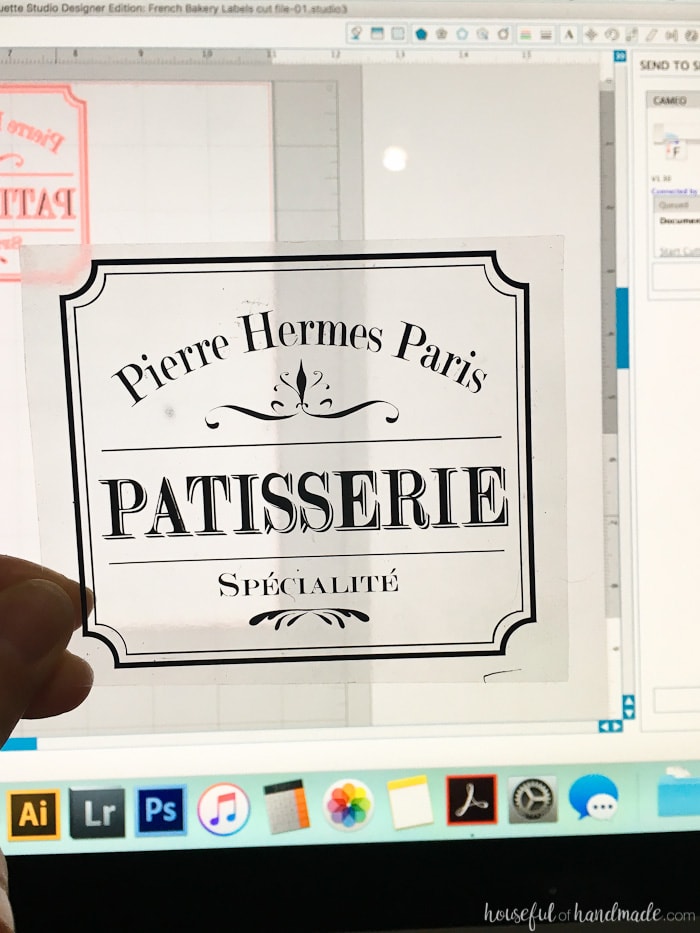
Once your HTV is ready, heat up your iron to the cotton setting and turn off the steam. Grab a towel and roll it up on either side so you can cradle your jar. Place the HTV on the jar.
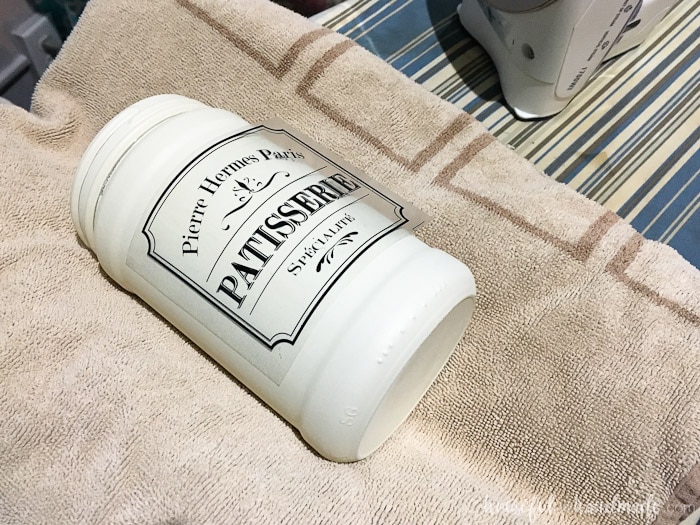
Now before you start ironing, let me tell you what I learned.
I started out using a pressing cloth, but when I removed the pressing cloth I discovered the places the iron hit the jar that didn’t have the plastic HTV backing protecting it stuck to the pressing cloth (I had to repaint the top a bit).
For the second canister, I didn’t use the pressing cloth and tried to carefully iron without getting the iron on any non HTV backing areas.
This worked much easier. The iron on the hard round surface is a little tricky, but take your time and don’t rush it.
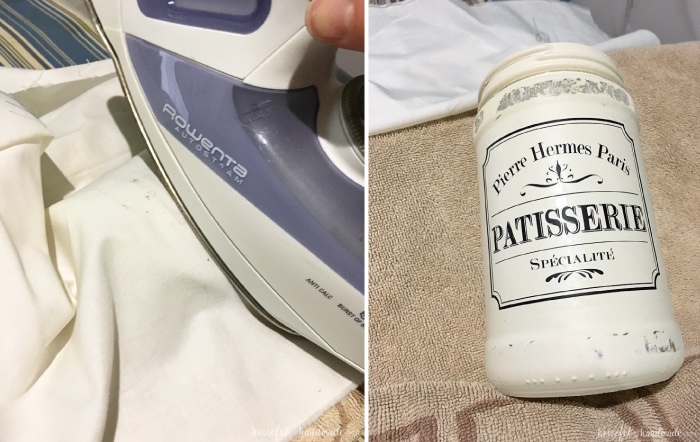
Once the HTV is ironed on, carefully remove the backing. You may have areas that need to be re-ironed so keep the iron handy when removing the backing so you don’t loose any small details.
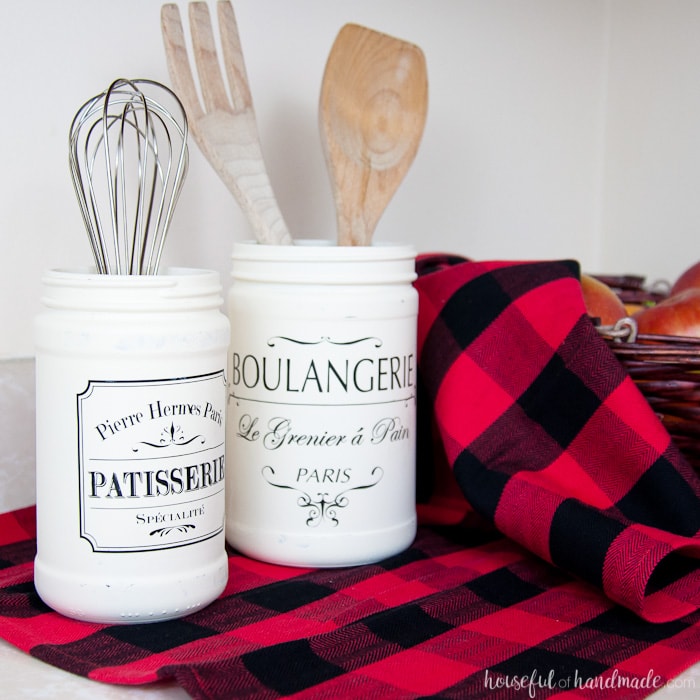
Now all that is left is to put your new farmhouse kitchen canister in the kitchen and admire your work.
No more boring glass peanut butter jars, instead lots of french charm. I can’t wait until I get to remodel my kitchen so it will be full of farmhouse goodness.
But until then I will keep putting fun farmhouse items in our home!
Have a great day!
How to Make Farmhouse Kitchen Canisters
This Farmhouse Kitchen Canister is the perfect way to add some vintage charm to your kitchen without spending a lot of money.
Materials
- Peanut Butter Jars
- Chalky Finish Spray Paint
- Heat Transfer Vinyl
Tools
- Silhouette Cutting Machine
- Iron
Instructions
- Clean your peanut butter jars and remove the labels.
- Prepare the surface to by wiping it down with white vinegar or soapy water.
- Lay the jar upside down and start spraying.
- While the jars are drying, cut out your vinyl.
- Size your image to fit your jars and cut it out with the HTV vinyl setting in your Silhouette software.
- Carefully weed out the excess HTV. heat up your iron to the cotton setting and turn off the steam.
- Grab a towel and roll it up on either side so you can cradle your jar. Place the HTV on the jar.
- Once the HTV is ironed on, carefully remove the backing.
Hi these are awesome! Are they washable?
I would only wash by hand.
WOW! that’s great…I have 1 question….It looks like your vinyl is “Clear” rather than “white”….Is it clear? and where do you get clear vinyl? I looked around on Amazon…. (I just bought a Cricut Explore2 it’s still in the box…I’m a little scared of it so far…lolol) but when I do get started I’d like to do this…. Thanks
Hi Linda, the vinyl is not clear, the one I used here is called Heat Transfer Vinyl. It is black on a clear backing. When you apply heat to it, the vinyl sticks and then you can peel off the backing. Don’t be scared, get it open and start playing!!!
where do I create or get a password for your site?
Once you subscribe to the newsletter, an email will be sent to you.
Can these be made with plastic jars? Using permanent vinyl? I have some coconut oil jars that would look awesome for this.
I definitely would not use heat transfer vinyl on plastic, but I do not see why the permanent vinyl would not work. Because the wording and detail on the image is so thin, make sure you are using a newer cutting blade for clean cuts. I’d love to see them when they are done. Please feel free to tag me on your social media!
I used my glass canning jars and made labels for them. I’ll have to take a picture and post it.
Yay! Glad you made it work. Cant wait to see pics.
Hi! I just found your beautiful web site. I love these jars but I don’t have a cutting machine. Is there any way you could make them pdf files that I can print out and decoupage on? That would be so awesome!
And thank you for your lovely work!
Hello Ann. I do not have a PDF yet, but can add it to my list to get it done hopefully by the end of this month.
Ok thank you. I really love this look!
I, too, do not have a cutting machine yet ???? So I would definitely love for you to add pdf files to this DIY too ???? I cannot wait to make these awesome French Canisters for my kitchen ???? Thanks
This is an intricate design which is why I only included the cut files, but you can download the basic software for the cutting machines for free and then open files to print. This might be a good option for this project and others 😉
This is a beautiful idea! Love the vintage vibe.
Maria
Thanks Maria!
This is very pretty, but just so you know, Pierre Hermé is a real bakery in Paris and is very famous for it’s many delightful and different pastries and breads. The spelling is as I wrote it above….. Pierre Hermé…… no “s” and an accent on the last “é”.
Hi. It’s me again. I just re-read what I wrote above about the spelling and I realized it might have come across as rude. I really didn’t mean it in that way, so I hope you’re not offended. I really do like your jars a lot.
Ha ha! It didnt come across as rude, but thanks 🙂
That is cool to know. Maybe someday I will be able to visit Paris, but for now, I will have to make pastries in my kitchen 😉 Thanks Janie!
I have been using regular and wide-mouth quart mason jars with purchased plastic lids and a DYMO label for my dehydrated food items; parsley, cilantro, basil, parsley, Italian parsley as well as small quantity stock items; i.e. black rice, alphabet noodles, orzo, etc. I want to see larger jar canisters as I have a lot of kitchen utensils to sort by uses; i.e. baking, making pasta, baked food decorating as well as dehydrated fruit from my yard. I made so much jam this last year, I had to purchase cases of jars of all sizes. All of the contributors ideas are great ideas and since I am going to start giving sewing lessons to the neighborhood children (free for them if they can’t afford fabric, etc. as I have an overload from making machine quilts) and I believe this would be a nice way for them to be able to make gifts for their home and contribute their talents. These children will be starting their learning on a treadle machine, and work their way up to using my embroidery machine. I am getting psyched up to make this contribution in my retirement years. Thanks for the ideas!
I am so glad I help spark some ideas! It sounds like you are so creative. I love the idea of helping the neighborhood kids make handmade gifts. Such a great way to enjoy retirement!
Hon, I truly COMMEND YOU, you’re contributions to these children, whom may have NEVER had the blessed opportunity to learn such IMPORTANT skills in their lives just makes my heart smile & melt at the same time! YOU rock!!
May God bless you!
Becky
I want to make these with wire lock lid jars I bought at Hobby Lobby, only I want to store flour, wheylow and coconut sugar in them. I have a can of Valspar Milk Glass paint I want to use. If I paint the outside only it should be food safe, shouldn’t it?
Your jars are beautiful, do you know what the French words say in English?
As long as you only add paint to the outside of the jar, it shouldn’t effect the food safe quality of it. As far as what they say, a boulangerie is a bakery patisserie is bakery that specializes in pastries and sweets (yum!). That is the extent of my french. The names of the bakeries I found online to mimic real bakeries/eateries in Paris.
Hi there! I’m wanting to paint my glass canisters that I have on my counter now. Can you tell me if the chalk paint holds up well? Is it easily scratched off? Seems like any paint on glass will easily scrape off at the touch of a fingernail? Thank you!
Mine have been holding up beautifully so far. I find the spray paint really affixes to things as long as they are clean before applying. Also lots of thin layers creates a better seal.
I have painted jars in the past. I clean well let dry.before painting I will wipe with rubbing alcohol. Without touching the outside again I spray with a primer first. Let dry then paint ( 2 to 3 layers) I spray with a sealer when paint is dry. Chalk paint I haven’t worked with but it should work and maybe use a Matt sealer ? Mat sealer should still leave the chalk paint look! Hope this helps
Thanks for the tips Terry! I just used the chalk paint without the primer and it’s holding up well.
Beautiful! You can’t even see a seam!
Thank you Chanele 🙂
Hi Katy,
These jars really look exquisite!!
Where do you buy such excellent looking vinyls?
Regards,
Hello Ing-Marie, these vinyls were cut with my Silhouette craft cutting machine. It can cut all kinds of vinyls and more. I designed the vinyl so you can cut it too if you want. Check out the tutorial for all the details.
Love these Kati!! Such a fabulous project and great for many uses! Featuring you at our party tomorrow night 🙂
Thank you so much Kendra!
Why not just use regular vinyl? Less of a hassle…
You could definitely use regular vinyl Christina. But I have a hard time weeding and dealing with small detail on the regular vinyl. I have also had it come off the backing and get stuck in the machine if the lines are too small. I have not had any of those issues with tiny lines using the HTV. I also like that the HTV is thinner. Either would work though!
Hi Kati, beautiful & very realistic looking jars. My question is this: I’m new to the “vinyl world” but I now have a Cricut Air & was wondering if I can use YOUR files with my Cricut? I sure hope you have the “Golden” answer & it’s a YES…LoL. I just signed up to your site…lovin’it already!
Blessings!
The Cricut air will work with the SVG cut files. I am not very familiar with the Cricut software, but you should be able to find a couple video tutorials on YouTube to help you open an SVG file and get it ready to cut. Have fun playing with your new crafting machine!
These are so lovely! Thank you for sharing your work. I have a cabinet FULL of jars, mostly the larger Adam’s peanut butter jars, no kidding! I’ve used them for the pantry storage (dry beans, noodles, etc) and de-clutter (one jar just for all those miscellaneous game pieces that get left behind after game night, etc.) This tutorial is a lovely way to step it up a notch and show off my collection craze. Thanks!
Ha ha! I am glad I am not the only one with a cupboard full of these jars. I love the idea of using them for pantry storage, I need to use some for that too. I hope you have fun making these kitchen canisters 🙂
These are beautiful! Does the HTV end up being smooth on the glass as opposed to using regular vinyl??
Hello Christa, the HTV isn’t totally smooth but it is much thinner than the regular vinyl. It really looks printed or painted on.
These are absolutely gorgeous – especially considering they used to be peanut butter jars! All that weeding looks monstrous, well done!
Thanks Megan. The weeding wasn’t too bad because I used the HTV. The regular vinyl would have probably given me a bit of headache since there are so many tiny pieces.
What a fun idea!! Love it!
Thanks you Katie!
Kati,
This project is simply stunning! I can’t believe how great these old jars look! You are seriously genius!
Thank you so much Cat! I really love these challenges you organize.
I try to limit what I keep on my kitchen counter to reduce clutter. But these are awesome!! I may have to rethink, and figure out a way to use these for good. Thanks for sharing
Ha ha! I totally get that you want less on the counters. It is a battle I fight daily. These would also be fun on a desk or as vases for flowers in case you can’t stand the clutter.
Love your canisters!
Thanks so much Roseann.
LOVE this gorgeous upcycle! Who would have ever guessed that they used to be peanut butter jars? These are just perfect in your kitchen. I didn’t know you could iron on vinyl to a glass jar like that! Oh the creative options!
Thank you so much Celeste! I had no idea I could iron the vinyl on the glass either, until I gave it a shot. I am so glad I did because these jars are one of my new favorites 🙂
These are so cute! I love how simple it is to do!
Thanks Emily! They really were simple to make, thanks to my Silhouette.
Very pretty jars. Crisp and pretty.
Thanks Audra! The HTV helps make them look so crisp and professional 😉
These turned out great! I love them. I will definitely be trying this project. Thanks for sharing!
Thank you Amy! I love how they turned out, they were really fun to make too.
This is a great idea, and I’m really going to have to try it!
Thanks so much Angela! I hope you get a chance to try.
Love this project! the Canister came out beautiful! I would love to learn this! Technique, shared with my FB page!
Maria
Thank you Maria! It was a fun project. I hope you give it a try.
These are beautiful! I can’t believe they started out as peanut butter jars. I am in love with them and they are so similar to the Magnolia Market canisters. Beautiful!
Thanks so much Michelle! I love that I was able to use up some of those peanut butter jars. They look so great on my kitchen counter.
Can you share your trick for getting the labels off? I have tried an assortment,met of ideas I’ve found on Pinterest, but none really seem to work.
Hello Suzer! For the particular jars, I have found that if I soak them in a bowl of water overnight, the labels just rub off so easily. Then if there is any left over sticky residue, I find it comes off with a paste of oil and baking soda. Good luck!
These turned out amazing!! I had no idea you could use HTV on glass jars… I need to give this method a try sometime!
I had no idea either Emily, but I’m so glad I gave it a shot! Now I need to try it on other stuff 🙂
These turned out so cute. Love the vintage french look.
Thanks so much BonBon!
What a great idea! I love how these turned out. They look amazing!
Thanks Rachel. They turned out better than I imagined 🙂
I love the jars! I don’t know how you painted them and the label is perfect. Anyhow when I get time I will look at this again to try and find the how to. I need some of these on my desk, one for highlighters, one for pens, one for pencils ………..!!!!!!!!!
Thank you so much Linda! The jars are not painted, but the wording is heat transfer vinyl. Take a look at the tutorial and it will explain it. They would be so perfect for a desk!