It’s Silhouette Creators Challenge time again! This month we are all about the backyard.
With summer in full force around here, we are definitely spending a lot of time in our backyard. I have been busy making all kinds of things already too, like an outdoor sofa, kids patio chairs, a treasure chest toy box, and now we are working on a DIY playhouse!
Whoo, lots to do for the backyard. But this week I decided to make things pretty with this Coastal Solar Lantern Decor, and it definitely makes things prettier.
This post may contain affiliate links. As an Amazon Associate I earn from qualifying purchases. Click here to read my full disclosure policy.
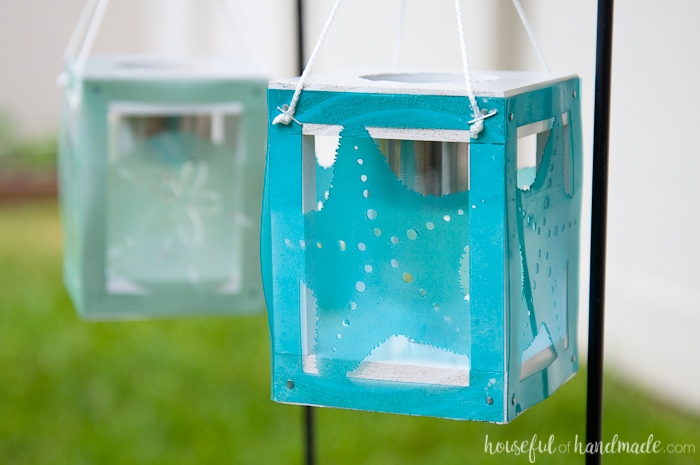
As soon as the weather starts to warm up, we love spending so much time outside. The kids have been cooling off in our super fancy blow-up pool (I am pretty sure jumping into ice cold water from the tap is what toughens kids up).
We have been gardening, and trying to keep our new found gopher from eating all our hard work. And we have even been relaxing and roasting mallows in the evening. We are taking full advantage of all things backyard.
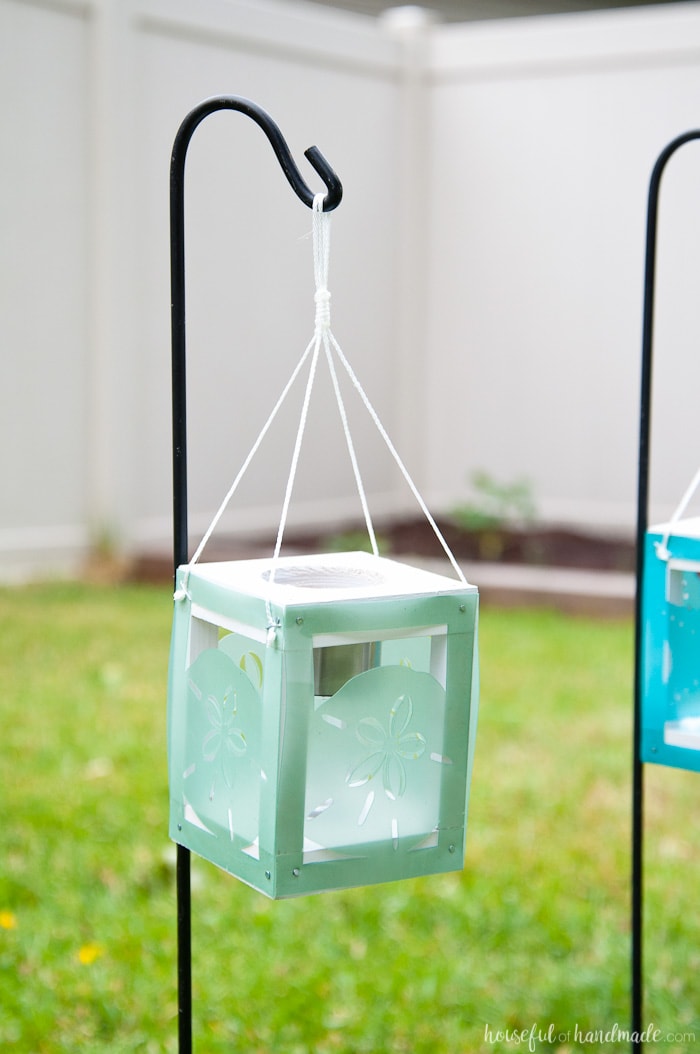
So for my next outdoor project, I knew I wanted to make something beautiful. I have a lot of function right now, but not much outdoor decor.
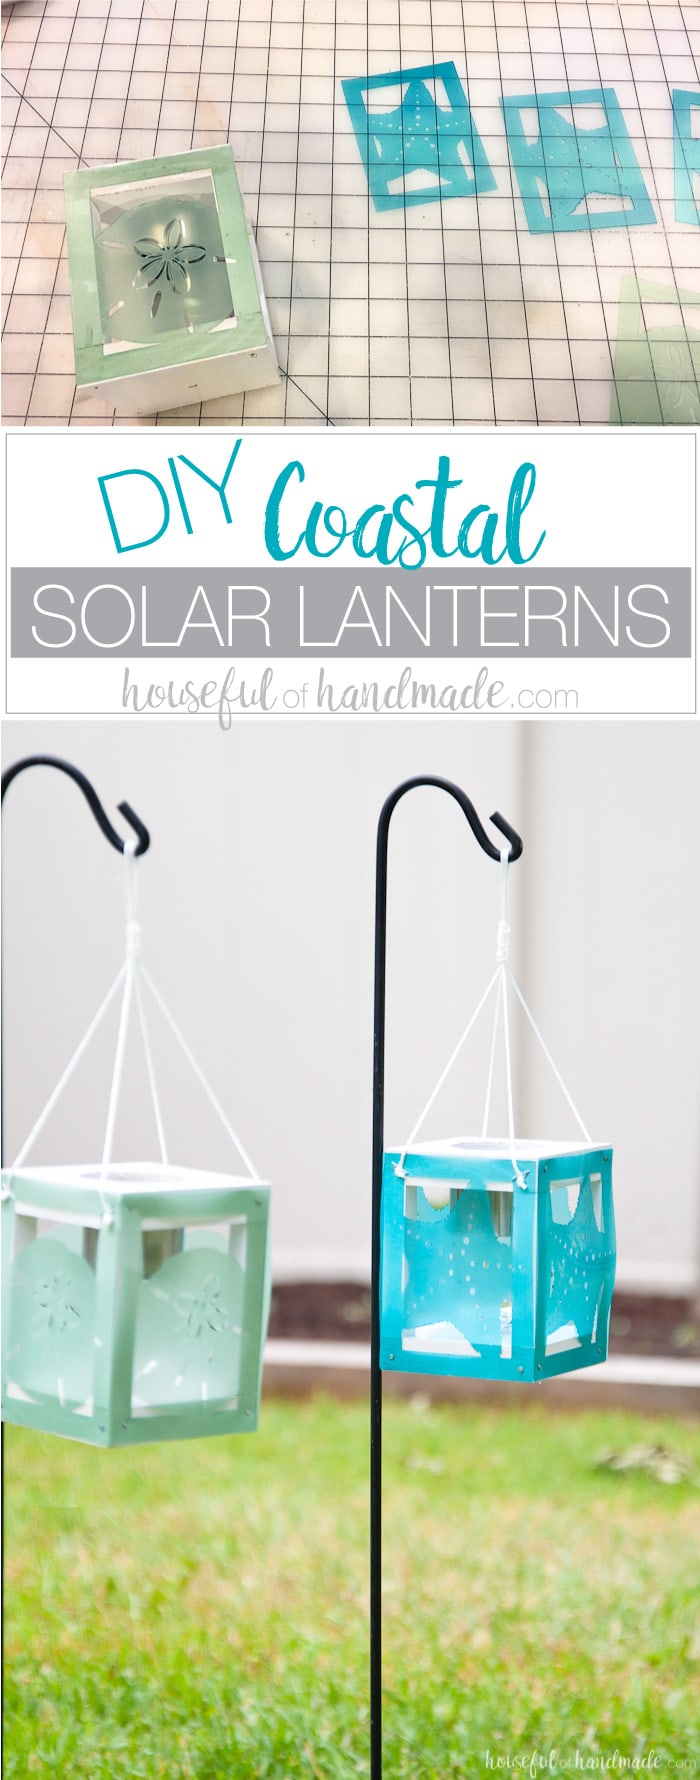
And since I am going for a coastal theme (okay, I bought some oar pillows last year and that is where I want the decor to go), I decided to make some coastal solar lantern decor with my Silhouette!
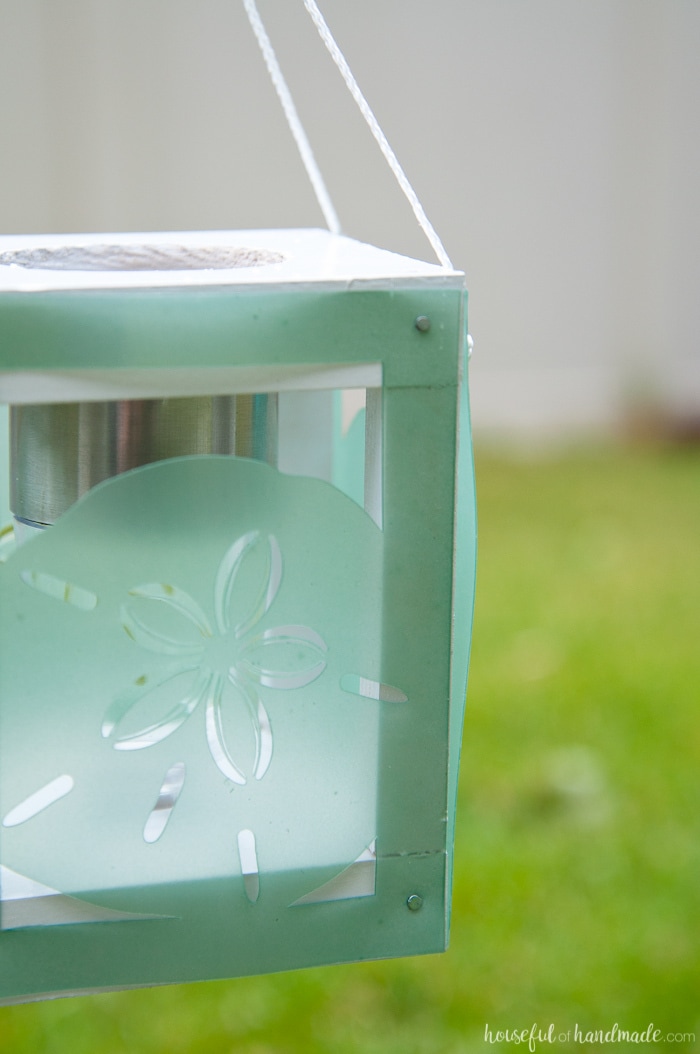
First thing I needed to do was figure out how to make my DIY decorative lanterns light up. As pretty as they are in the day time when the sun is shining, I wanted them to be even more beautiful as the hubby and I are sitting outside enjoying a glass of wine after the kids are in bed.
A little ambiance lighting maybe?? So I went to Target and found these $2 solar lanterns. I didn’t need the stake that mounts them in the garden. But the lighted easily popped off the stake part. Perfection!
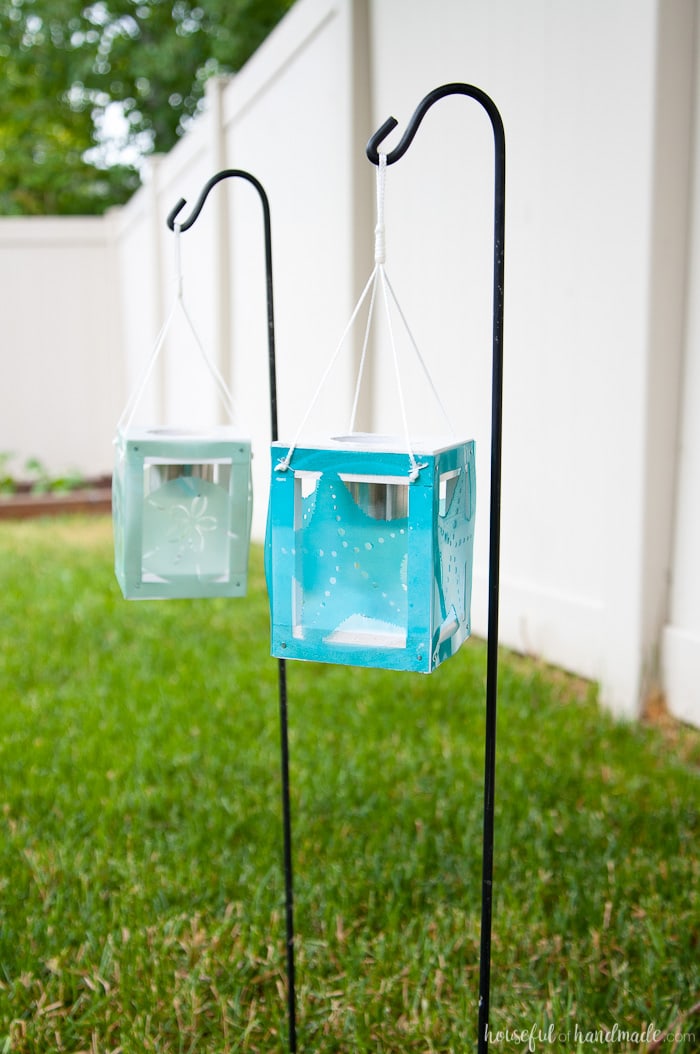
Then all I had to do was build a simple box and add some decorative sides! I decided to use some thin plastic sheets so they would hold up to the weather. I bought these clear plastic sheets to make wall stencils (see them here & here), but I have a bunch more left over.
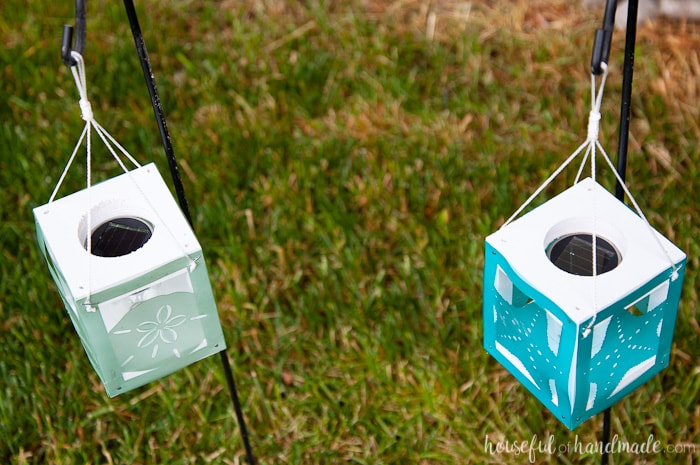
I designed the sides to have a beachy theme. And what’s more beachy than sand dollars and starfish?! These are some of my favorite sea creatures. So beautiful! And then I added a little more coastal love with left-over sea glass spray paint. You can hang the lantern on hooks or set them on the table. I don’t have an outdoor table yet, but I have these hanging hooks from some Halloween decorations I bought years ago.
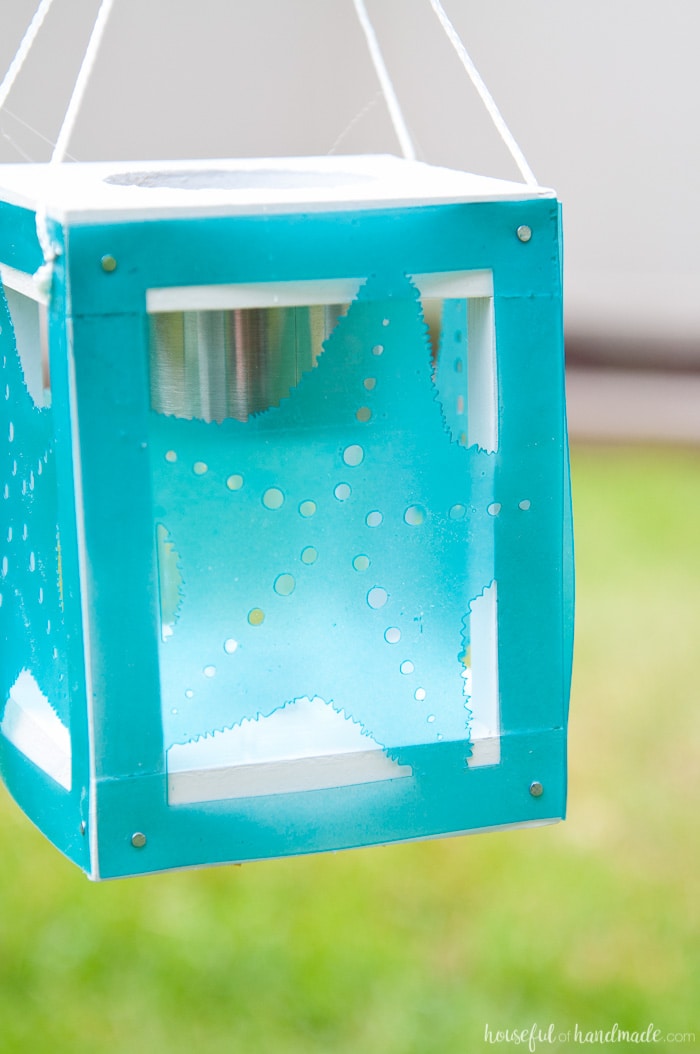
How to Make Coastal Solar Lantern Decor
Supplies:
- Silhouette Cameo
- Coastal lanterns cut file
- I am sharing the cut file I designed for my lanterns in my subscriber library. Click here to subscribe to my weekly newsletter and gain access to all the freebies. If you already have your password, click here to download them.
- Solar path lights with removable stakes
- I bought mine for $2 each at Target.
- Clear plastic sheets
- 1×4 wood scraps
- For each lantern you will need 2 pieces of 3 1/2 inch x 3 1/2 inch pieces.
- 1/2″ square dowel
- For each lantern you will need 4 3 inch pieces.
- Wood glue
- Miter saw
- Drill
- Nail gun and 1 1/2″ finishing nails
- Or you can use a hammer and finishing nails, but a nail gun is definitely faster.
- White spray paint
- Sea glass spray paint
- 5/8″ wire nails
- Hammer
- Nylon string
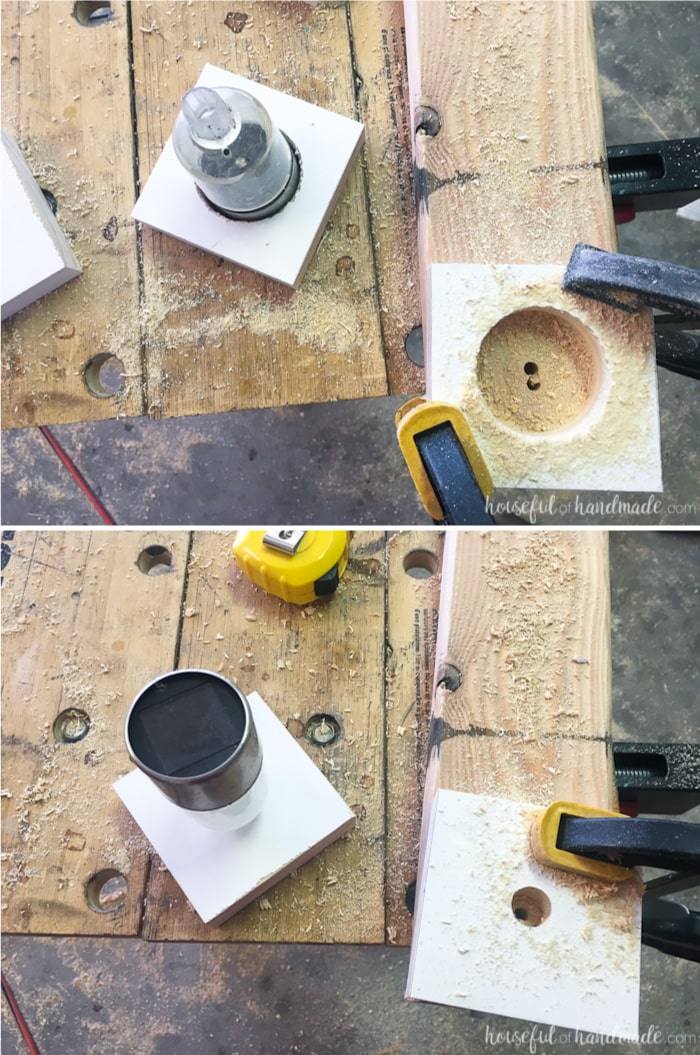
Cut your scrap of 1×4 board into 2 pieces of 3 1/2″ x 3 1/2″. In one piece drill a hole big enough to fit the top of your solar light. In the other piece drill a hole half way through that will snuggly hold the bottom of the solar light.
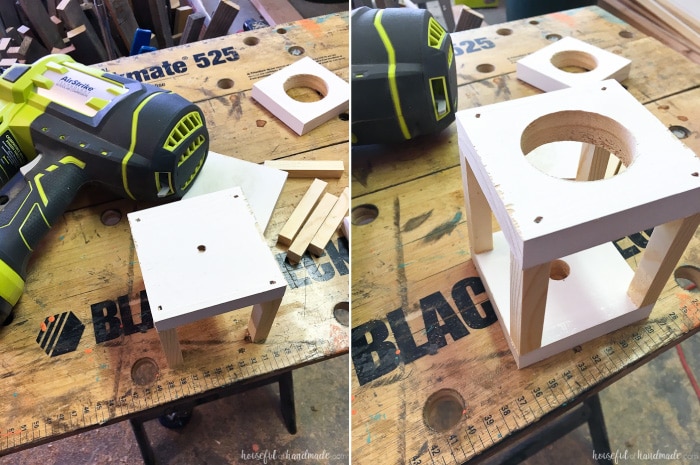
Cut the dowel into 4 pieces 3″ long. Add a little wood glue on the end of the pieces and attach them to the corners of the 1×4 pieces with the finishing nails.
Add the other piece on the bottom of the 3″ dowels. Let the wood glue dry, then spray paint the wood frame with the white paint.
While the paint dries, it’s time to cut out the decorative sides of the lanterns. Cut 4 of each lantern design on the Silhouette using the following cut settings: Blade – 10, Speed – 1, Depth – 33, & Double Cut.
I have found that if I don’t have a new blade, the clear plastic doesn’t cut well. But if you do not unload the cutting mat you can press Start and the Silhouette will cut the entire design again in the exact same place as the original design. The second cut will make the design pieces perfect.
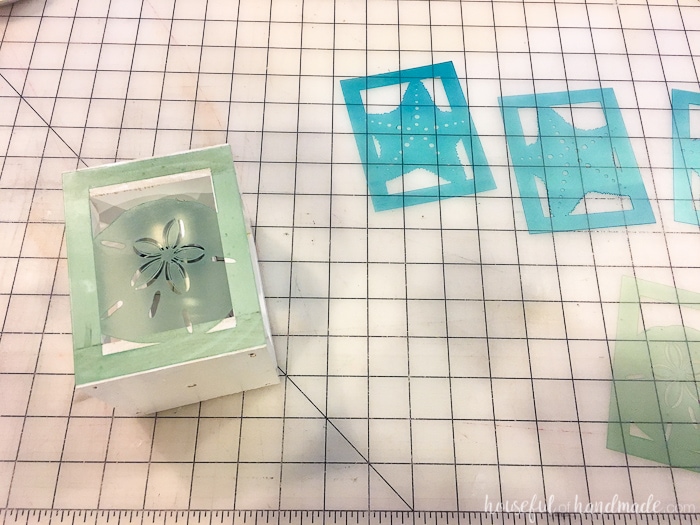
After you cut the lantern side pieces out, spray paint them with the sea glass spray paint. I love this stuff (slightly addicted). I’ve already used it on our summer mantel and I know many more summer projects will be the color of sea glass. Use a few thin coats to cover the lantern pieces so you get even coverage.
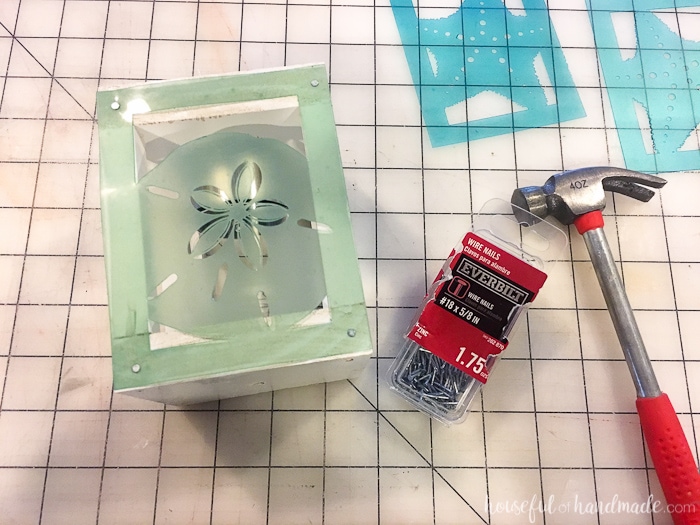
When the spray paint is dry, put your solar light into the wood box. Then carefully attach the sides to the lantern base with the 5/8″ finishing nails. Tap one in each corner.
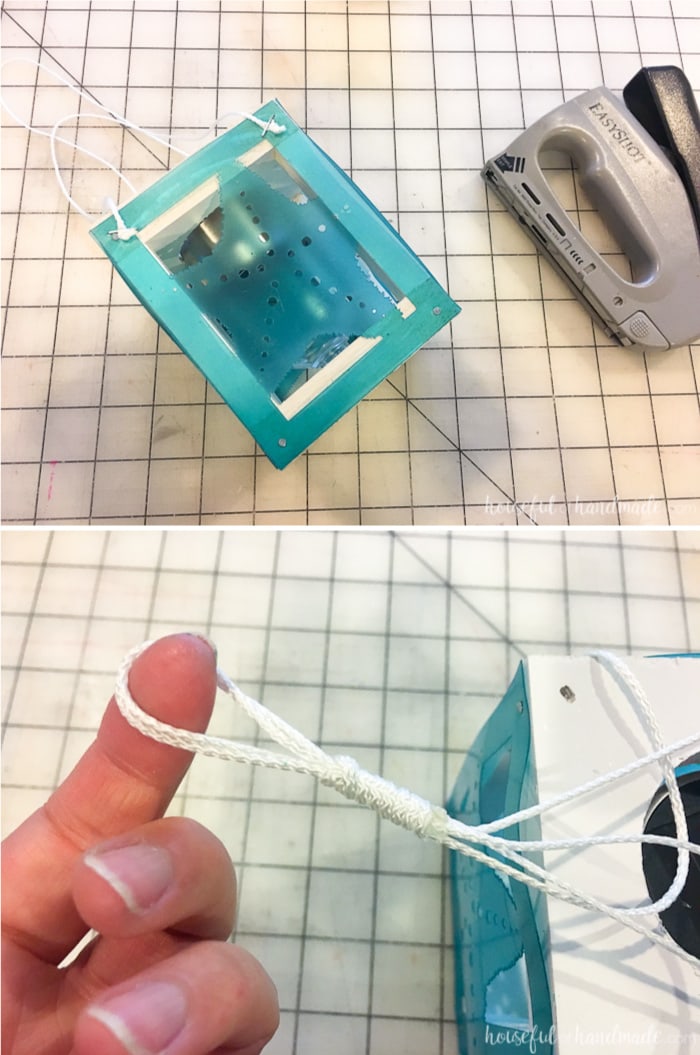
Then add a couple strings to the top for hanging. I used my small staple gun to easily attach the string to the sides. For more coastal flare, wrap another piece of string around the top creating a hook. Secure the string with glue.
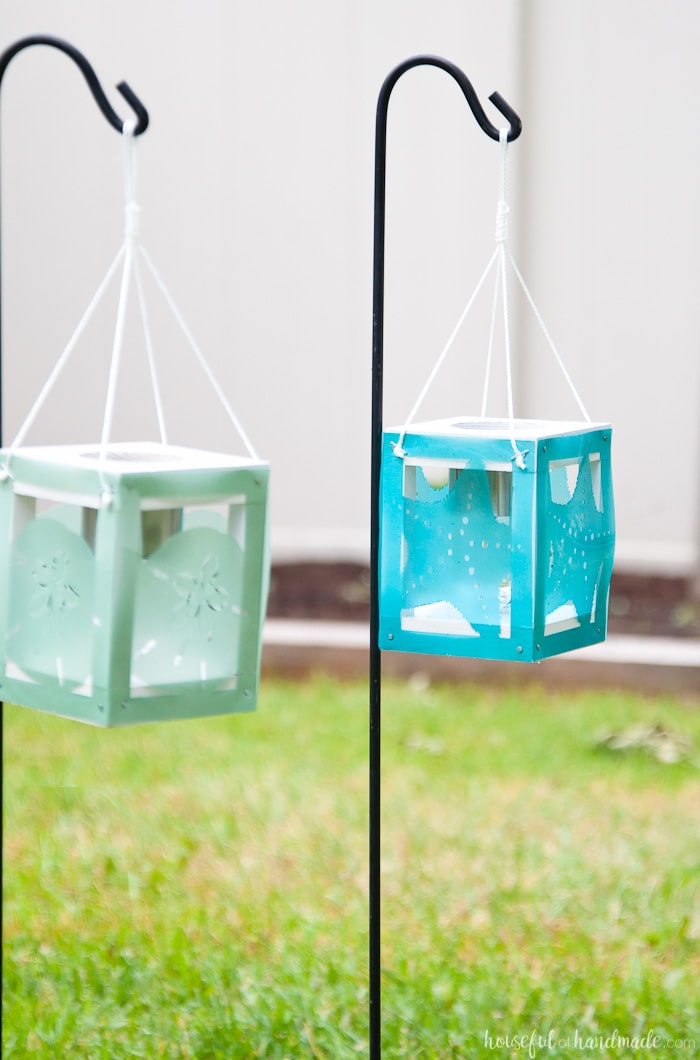
Now hang your lanterns outside and let the sun charger hem up. They will come on at dusk and supply a bit of lighting and decor for your evenings outside. So much fun!
Louise
Friday 13th of July 2018
I don't own a Sillouette, but do have a Cricut. Can you save the cuts on the plastic as svg or pdf file? Thank you.
Kati
Saturday 4th of August 2018
Thanks for letting me know I didnt include the SVG, I just started doing that. I have added it to the library for you now!
Louise
Friday 13th of July 2018
These are beautiful. What tool did you use to cut out the plastic? This part of the instructions confused me: "But if you do not unload the cutting mat you can press Start and the Silhouette will cut the entire design again in the exact same place as the original design. The second cut will make the design pieces perfect." Was it a programmable one like Cricut?
Kati
Saturday 4th of August 2018
I used my Silhouette Cameo (yes it is similar to the Cricut) to cut them out. What I meant there is to send the file from your computer to the machine a second time before unloading it. That way it cuts in the exact same spot. If you unload then reload the cutting mat, it may be off when you cut the material a second time.
michelle james
Friday 23rd of June 2017
Solar lights are so wonderful and yours are terrific. I love the colors too!
Kati
Monday 31st of July 2017
Thank you! Solar lights are super awesome!
Emily
Wednesday 21st of June 2017
These are awesome Kati!! I never would've thought to make my own lanterns. I love how yours turned out, and how they can be customized with so many different designs!
Kati
Monday 31st of July 2017
That is what I love the most, you can customize them however you want!