Decorate for Easter with this bunny trail Easter sign you can quickly DIY.
I love making seasonal signs and decor. And with Easter rapidly approaching, I needed a new Easter sign to start decorating with.
Last year I made an easy double-sided wood sign for fall and Christmas. The wood sign is quick to make out of 1x2s and 1x3s.
And you can decorate both sides differently so you only have 1 sign to store for 2 seasons.
This post may contain affiliate links. As an Amazon Associate I earn from qualifying purchases. Click here to read my full disclosure policy.
Since I only had a double-sided sign for fall and Christmas, I decided I needed an option for Easter too! So I designed and SVG for an Easter sign to fit the simple sign blank.
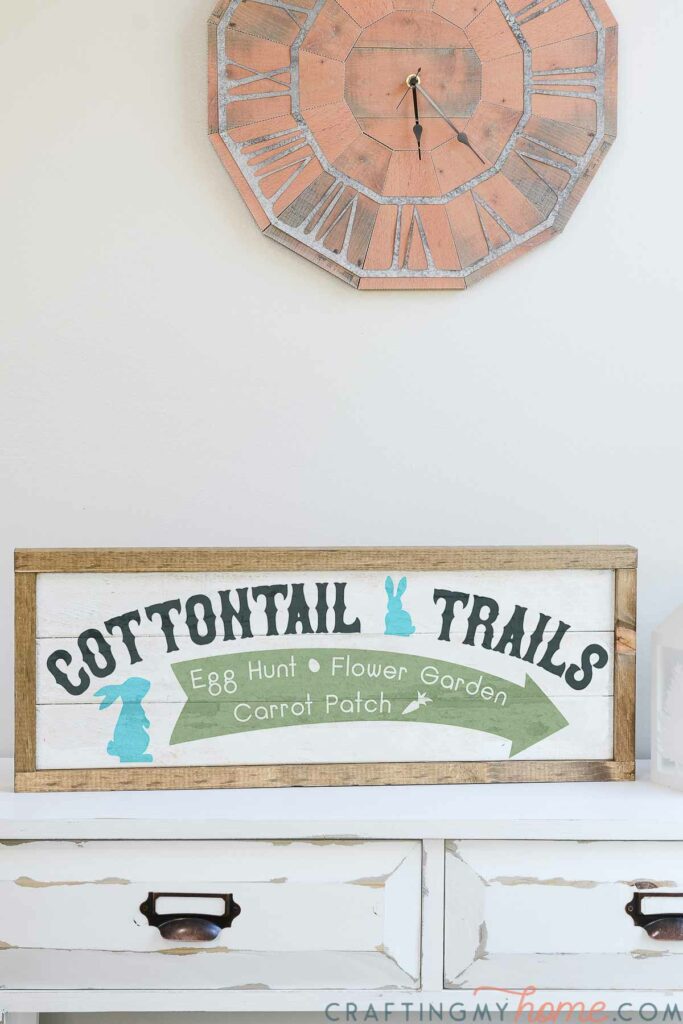

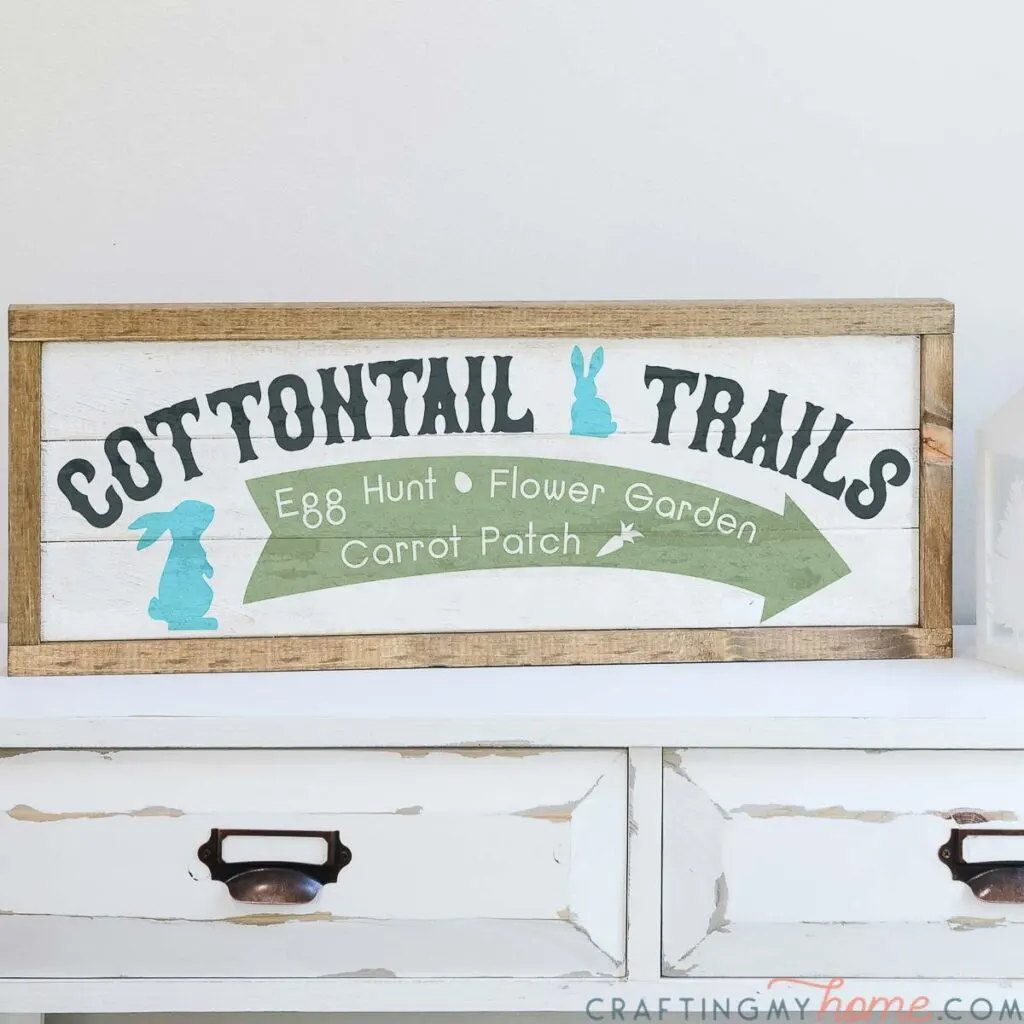
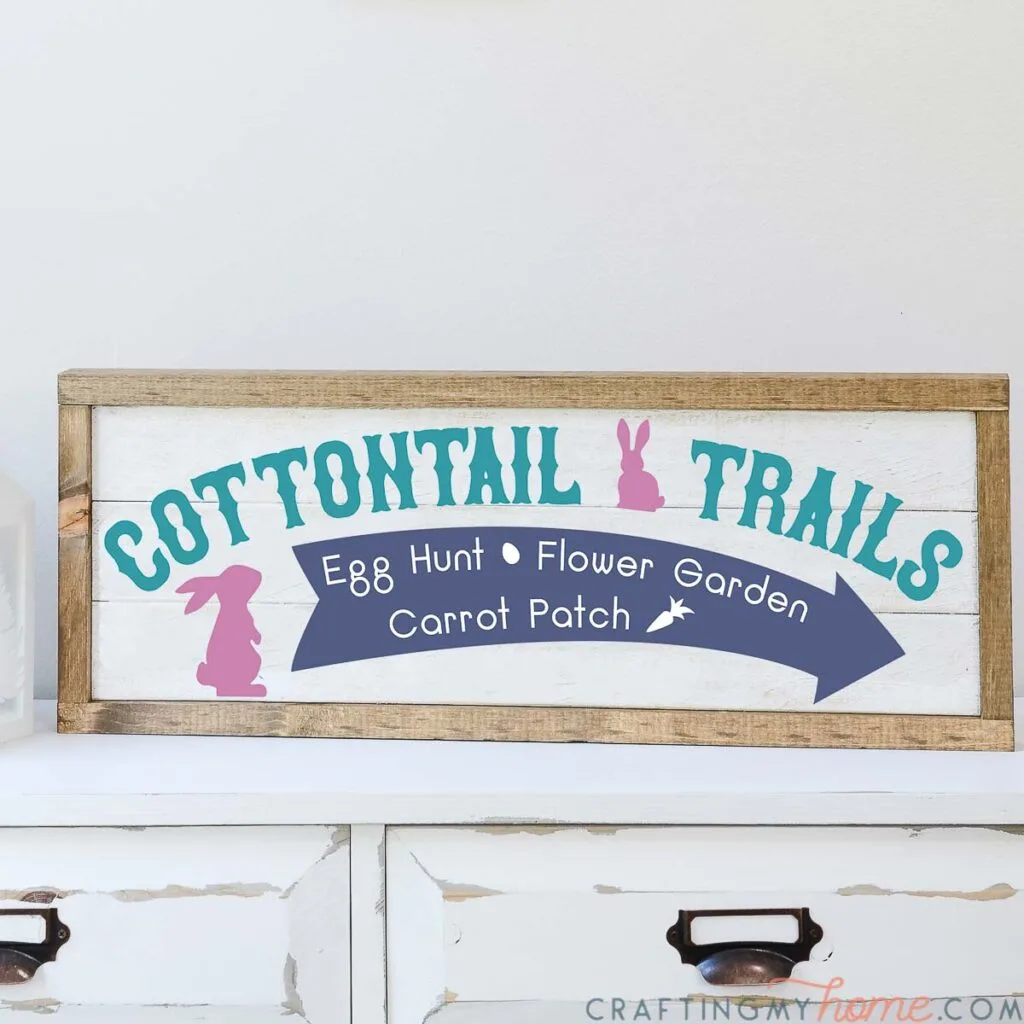
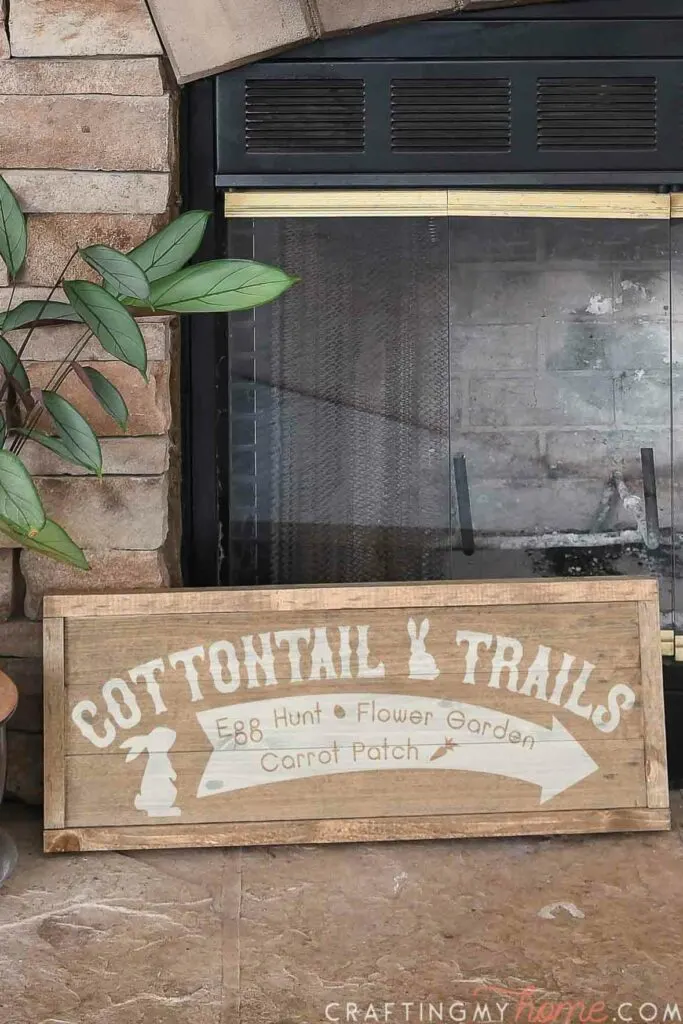
Cottontail Trails Sign
We just spent a day at a local arboretum which gave me inspiration for this fun Easter sign. Walking through trails of flowers and blooming trees is the perfect start to spring.
So for this DIY Easter sign, I thought about a spring garden that would be decked out for Easter.
Of course there would be a place for an Easter egg hunt. But why not also have a flower garden path to wonder through. Then finish it off at the carrot patch.
It’s like the Easter version of visiting the pumpkin patch in the fall!


Ways to Use the Easter Sign SVG
Supplies:
- Easter sign SVG
- 22″ x 7 1/2″ wood sign blank
- Electronic cutting machine like a Silhouette Cameo or Cricut Maker
- Vinyl
- Transfer paper
- Optional: Craft paint & foam pouncers
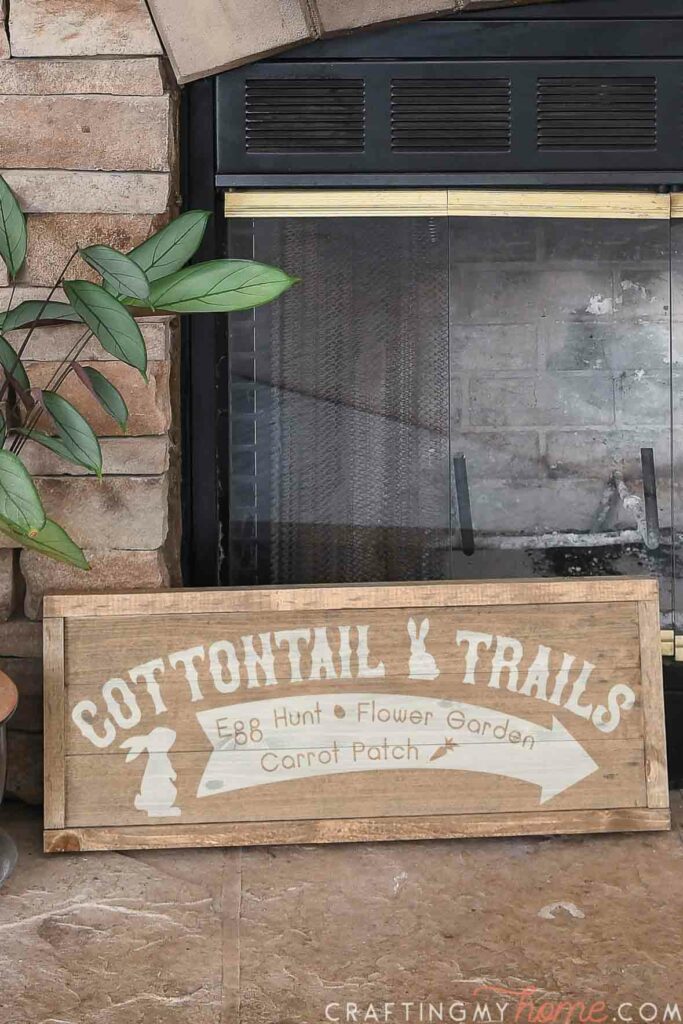
You can make a DIY Easter sign with the Easter SVG by either using the vinyl to decorate your sign or using the vinyl as a stencil to paint the design on the wood.
If you want a distressed look on your sign, you will want to use a vinyl stencil to paint it.

Simple Vinyl Easter Sign
- Set up the cut area in your cutting machine software to equal 22″ x 7 1/2″ if you are using the double-sided sign blank.
- Open up the SVG.
- To open an SVG in Silhouette Design Studio, you will need to upgrade to the Designer Edition. It is a one time upgrade charge and well worth it to get SVGs all over the web!
- Decide what colors each element of the Easter sign will be.
- Load the vinyl into the cutting machine and cut it out with the vinyl settings.
- Repeat for all the colors.
- Wee out the extra vinyl around the design.
- Lay the first pieces on the sticky side of the transfer tape, then remove the backing.
- Layer the rest of the colored pieces onto the transfer tape, until all pieces of the design are on the same piece in the shape of the final sign.
- Place the transfer tape on top of the finished sign blank. Use a vinyl scraper to ensure it is adhered.
- Remove the transfer tape.
- Enjoy your new sign!

Painted Easter Sign with Vinyl Stencil
I share a detailed photo tutorial on using the vinyl stencil in this DIY sign post.
- Set up the cut area in your cutting machine software to equal 22″ x 7 1/2″ if you are using the double-sided sign blank.
- Open up the SVG.
- To open an SVG in Silhouette Design Studio, you will need to upgrade to the Designer Edition. It is a one time upgrade charge and well worth it to get SVGs all over the web!Cut the stencils out of vinyl. Weed out the areas that will be painted.
- Cut the entire sign out at the same time. Use any color vinyl you have laying around as you will remove it after you finish painting.
- Weed out the areas from the stencil that will be painted, leave all the area around the design.
- Add a piece of transfer tape over the top and then pull the back of the vinyl off.
- Carefully place the vinyl on top of the wood sign. Make sure to center it on top.
- Smooth it down with a vinyl scraper. Then remove the transfer tape.
- Use a pouncer to dab the paint over the vinyl stencil. Use an up and down motion (not side to side) to prevent the paint from getting under the sides of the stencil.
- Repeat for all the colors of the Easter sign.
- Let the paint dry just until no longer tacky. If you wait too long, it can peel off the paint with the stencil.
- Carefully peel away all the pieces of the vinyl stencil revealing your painted design.
- If you want to give your sign an aged look, lightly sand the dried sign with a piece of sandpaper to rough it up as much as you would like.
- Enjoy your new sign!
Now you will have another great option for a double-sided wood sign, and I am thinking about making a second spring sign option to put on the back so stay tuned!