Create a layered doormat for Halloween with this easy tutorial.
If you love the layered doormat trend as much as I do, you are going to love this Halloween layered doormat DIY!
With the Day of the Dead theme that we are using to decorate our yard this year, I turned a few inexpensive supplies into a layered doormat that might have to stay up even longer than just October.
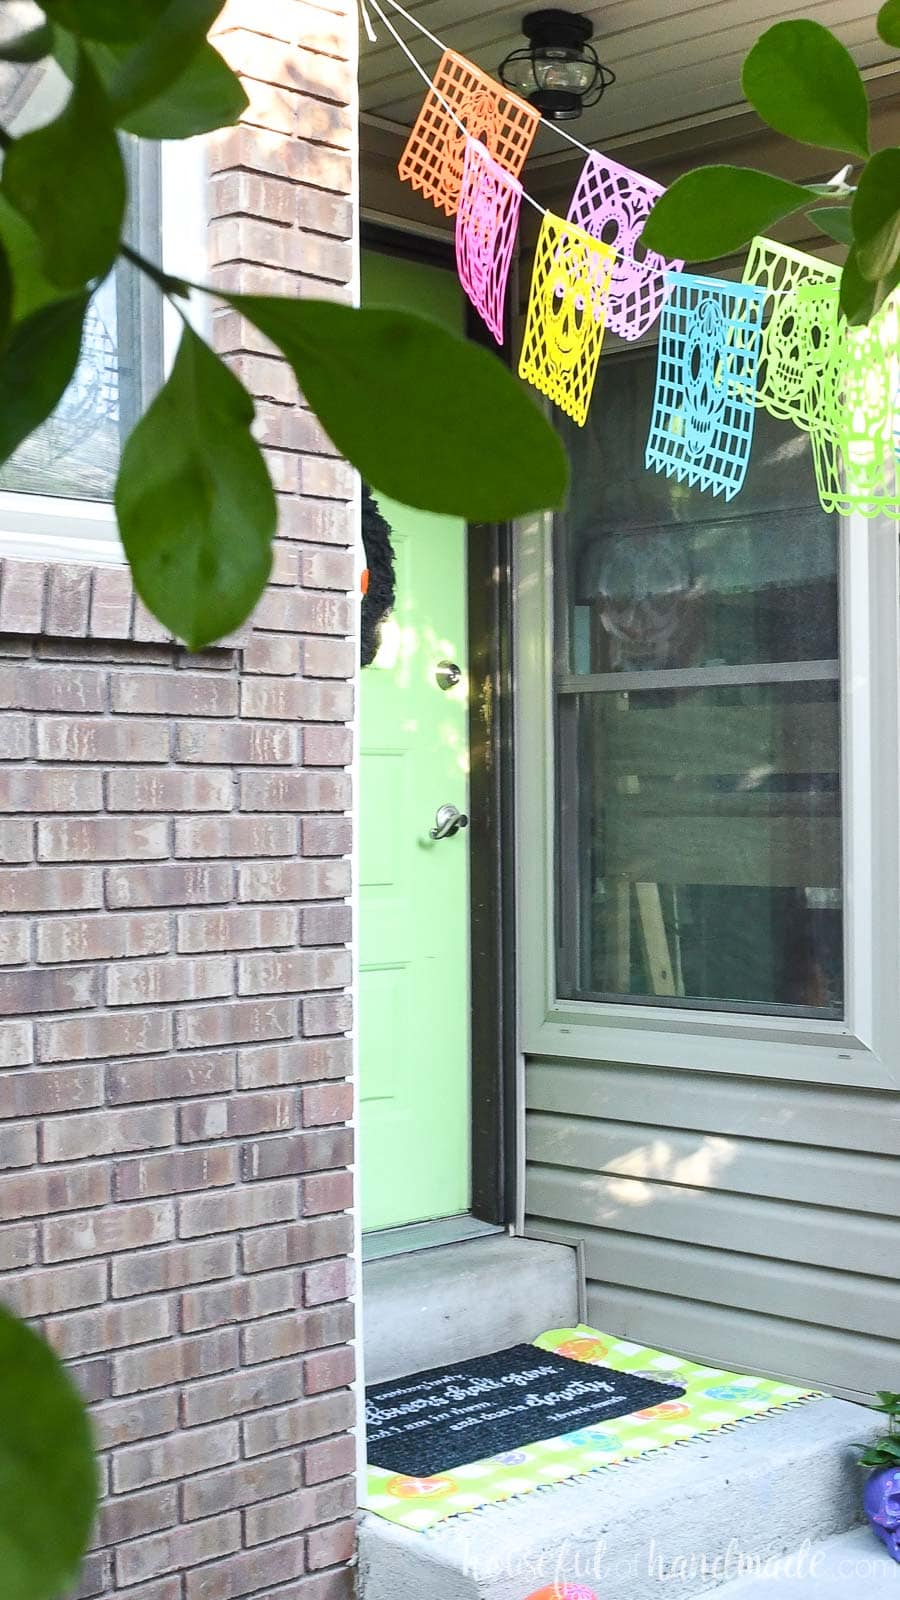
Layered doormats are a big trend right now. They offer your porch more design and texture than just 1 doormat. Since we have a small porch, the layered doormat covers most of the space. And it makes the space look complete, instead of slightly empty.
This post may contain affiliate links. As an Amazon Associate I earn from qualifying purchases. Click here to read my full disclosure policy.
But doormats can be expensive. Why do we have to pay so much for something we just walk all over?
This fun Halloween layered doormat instead was made from a scrap of drop cloth (and if you have to buy a drop cloth… don’t worry, here are more drop cloth projects to use it up).
And then the top layer was created with an inexpensive ribbed mat. The end result, looks way more expensive than it was.
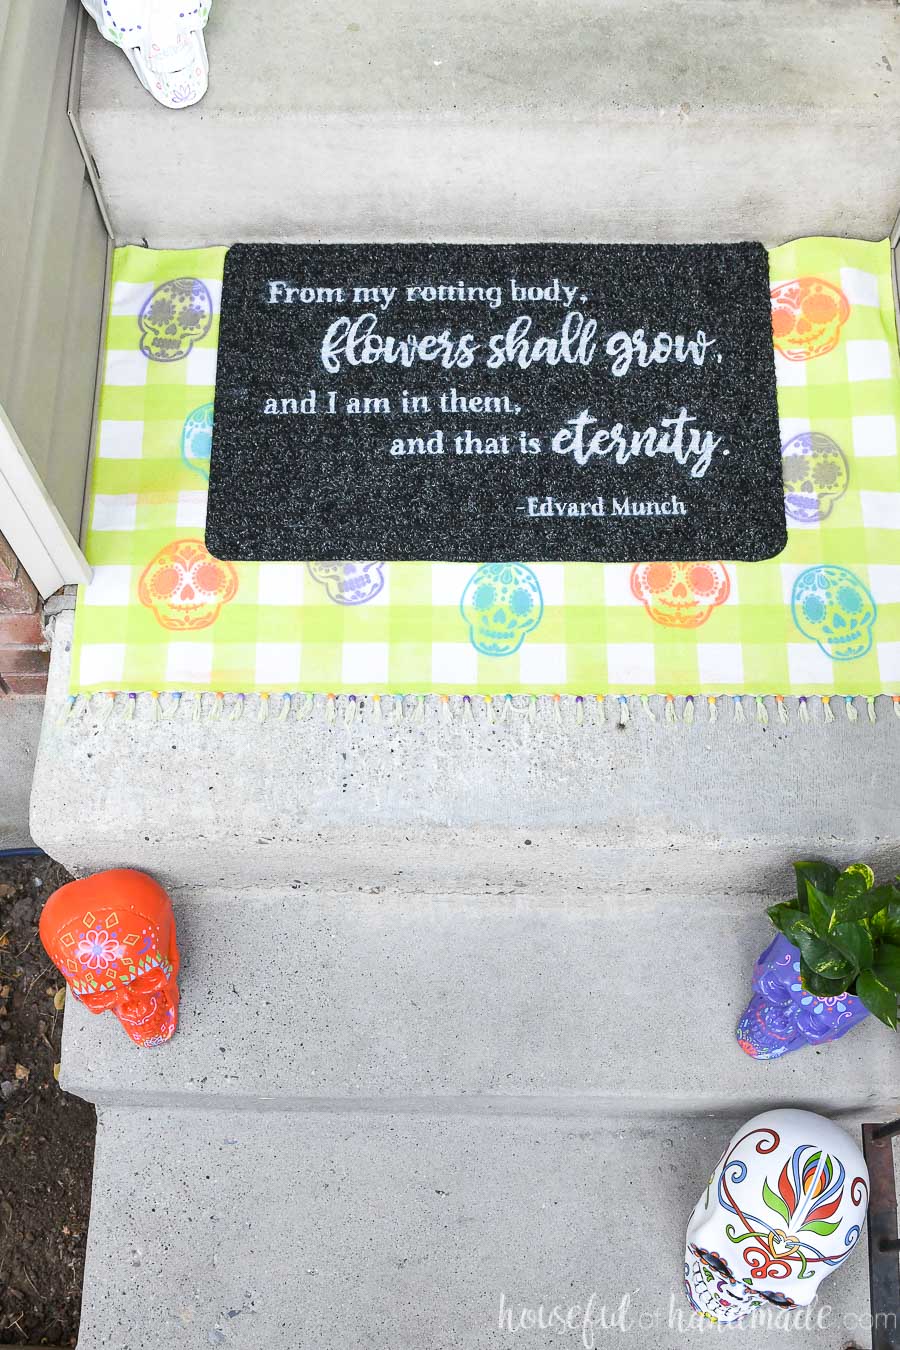
And since you are DIYing your own layered doormat, you can have fun with the designs and colors. This one was made for Halloween with a sugar skulls and a Day of the Dead quote. But you can do whatever works for your style and decor.
So let’s get busy making a DIY doormat…
How to Make a DIY Layered Doormat
Supplies:
- Drop cloth
- Plain black doormat
- I used this inexpensive ribbed one.
- Painters tape
- Spray Paint
- Beads
- Hot glue gun and glue sticks
- Vinyl and transfer tape
- Optional: thin plastic sheets and electronic cutting machine to cut stencil
Prepare the Drop Cloth
Cut the drop cloth to the size you need for your large doormat. Since our porch is small, I cut it to fill the entire space.
When cutting, use the factory hem on the top edge. Also, add 1 inch to each side you want to hem and 2″ any sides you want to add fringe.
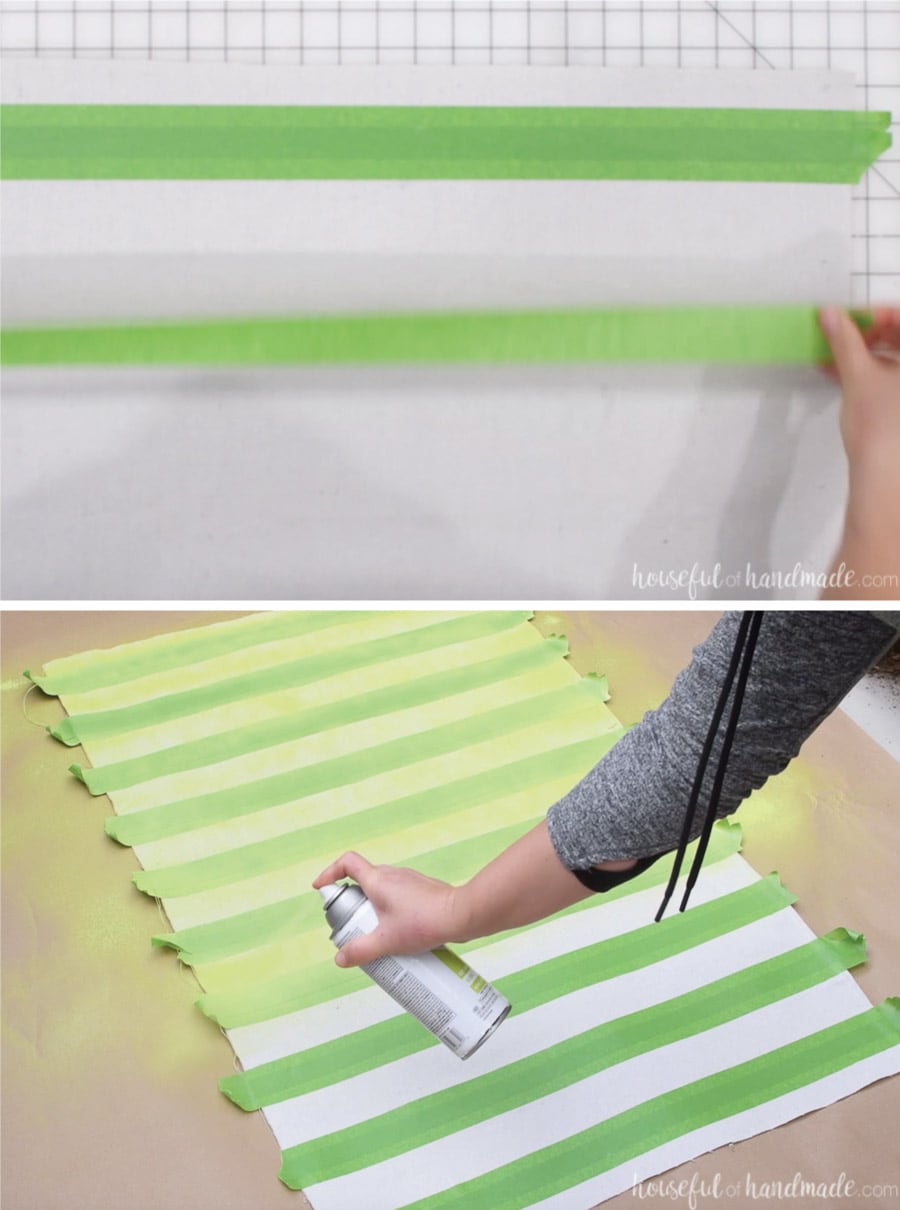
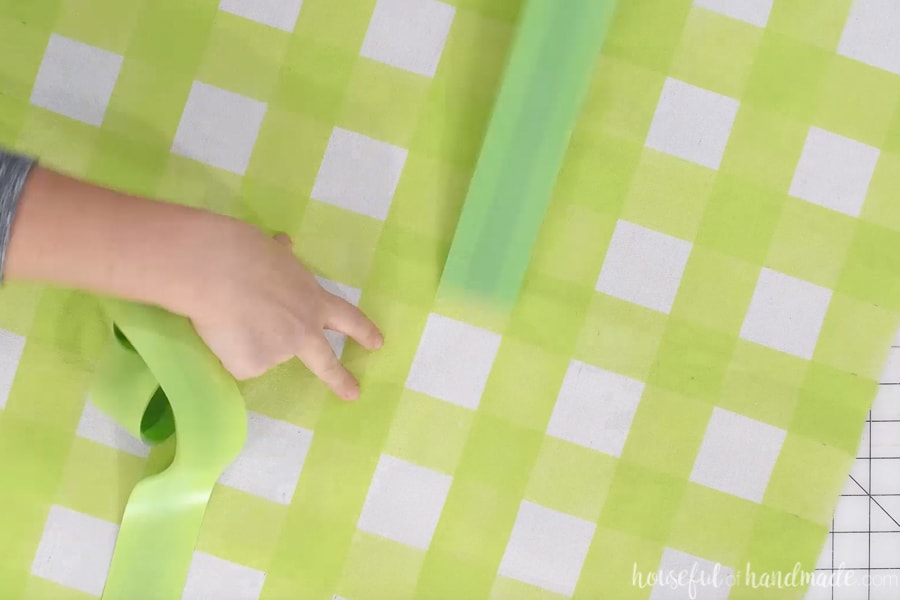
Make marks every 2″ on both sides of the drop cloth. Use a piece of painters tape and cover the cloth between every other set of marks.
Spray a light coating of spray paint on the open areas. You want to keep it light so the second coat will create a deeper colored square giving it a buffalo check look.
After the paint dries (luckily spray paint dries fast), remove the tape.
Make marks on the other two sides ever 2″. Add painters tape to create stripes perpendicular to the first stripes.
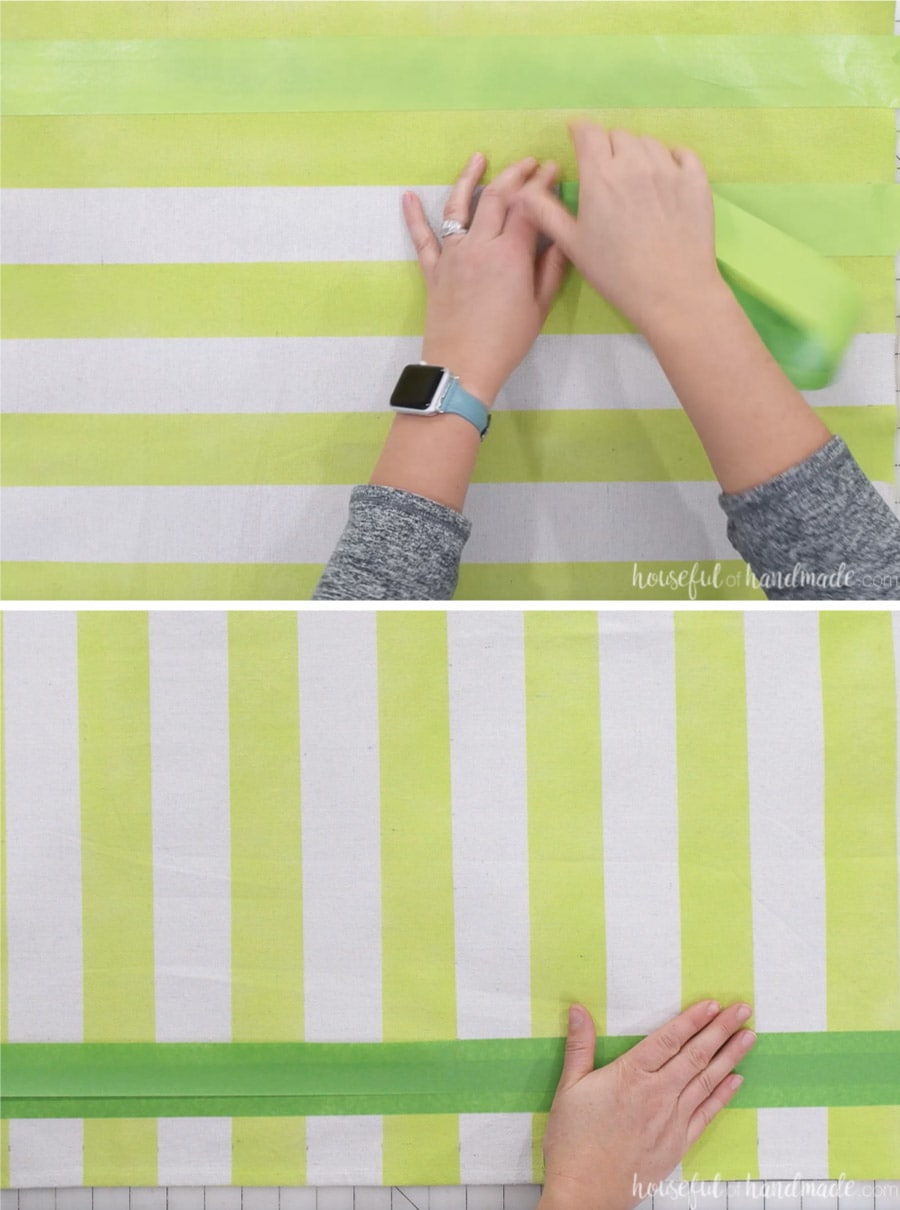
Then spray again with a light coat of paint to finish the design. Let it dry and remove the tape.
Add Details to the Drop Cloth Doormat
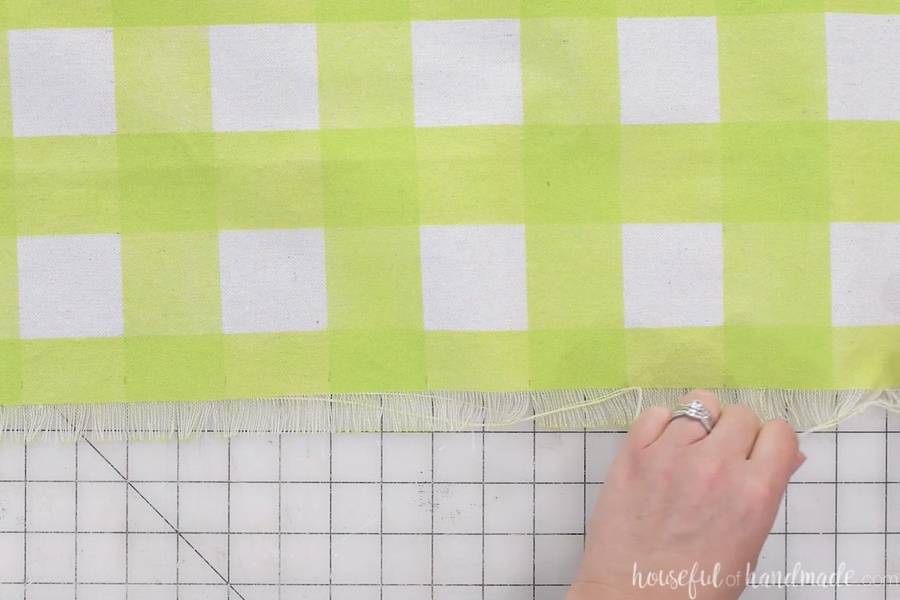
If you have a large porch, you can add fringe to all 3 sides. Or you can hem the sides and just add fringe to the bottom. But do not hem it until you have frayed the edge.
Remove the strings of the drop cloth until you have at least an inch of fringe. I did 1 1/2″ for my mat. The spray paint may cause some spots to be sticky, use something with a small sharp point to help separate the threads. I used a pair of snips. You could also use a vinyl weeder hook or pin.
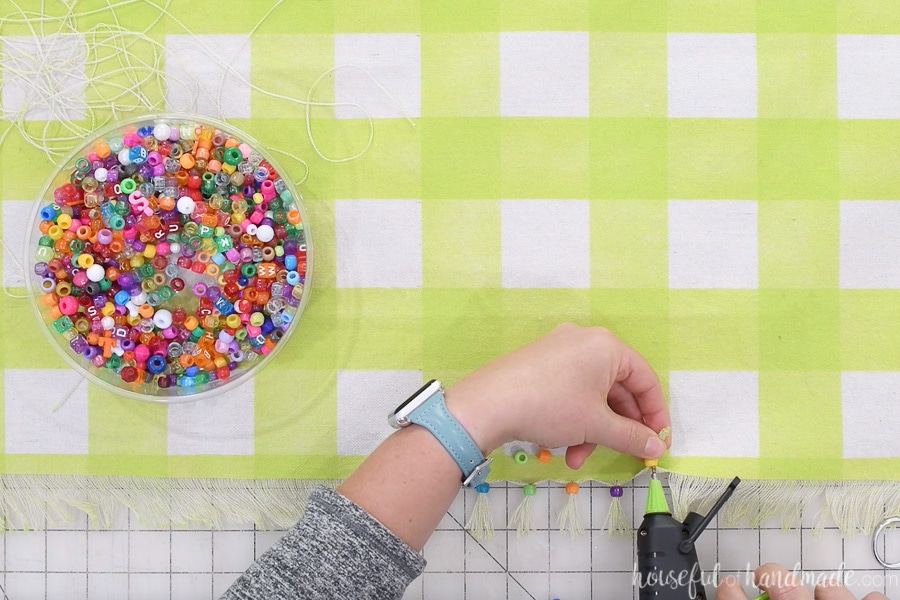
Gather up 1/2″ sections of fringe and twist to make it easier to put a bead onto it. Slide the bead on and then secure with a bit of hot glue in the center of the bead and slide it up to work the glue into the fringe.
I loved using my new detail mini glue gun for adding small dots of glue inside the beads.
Repeat across the entire edge. When you get to the sides, if you want to hem the sides, add a 1/2″ hem before sliding the bead on the last section of fringe.
To hem my doormat, I used my hot glue gun. Super easy, and great for a doormat that only needs to last a month. But you can use a fancier option like sewing if you want.
Paint Sugar Skulls on the Drop Cloth
To give the bottom layer of the doormat a bit more fun for our Day of the Dead theme, I wanted to add a few sugar skulls on top of the buffalo check.
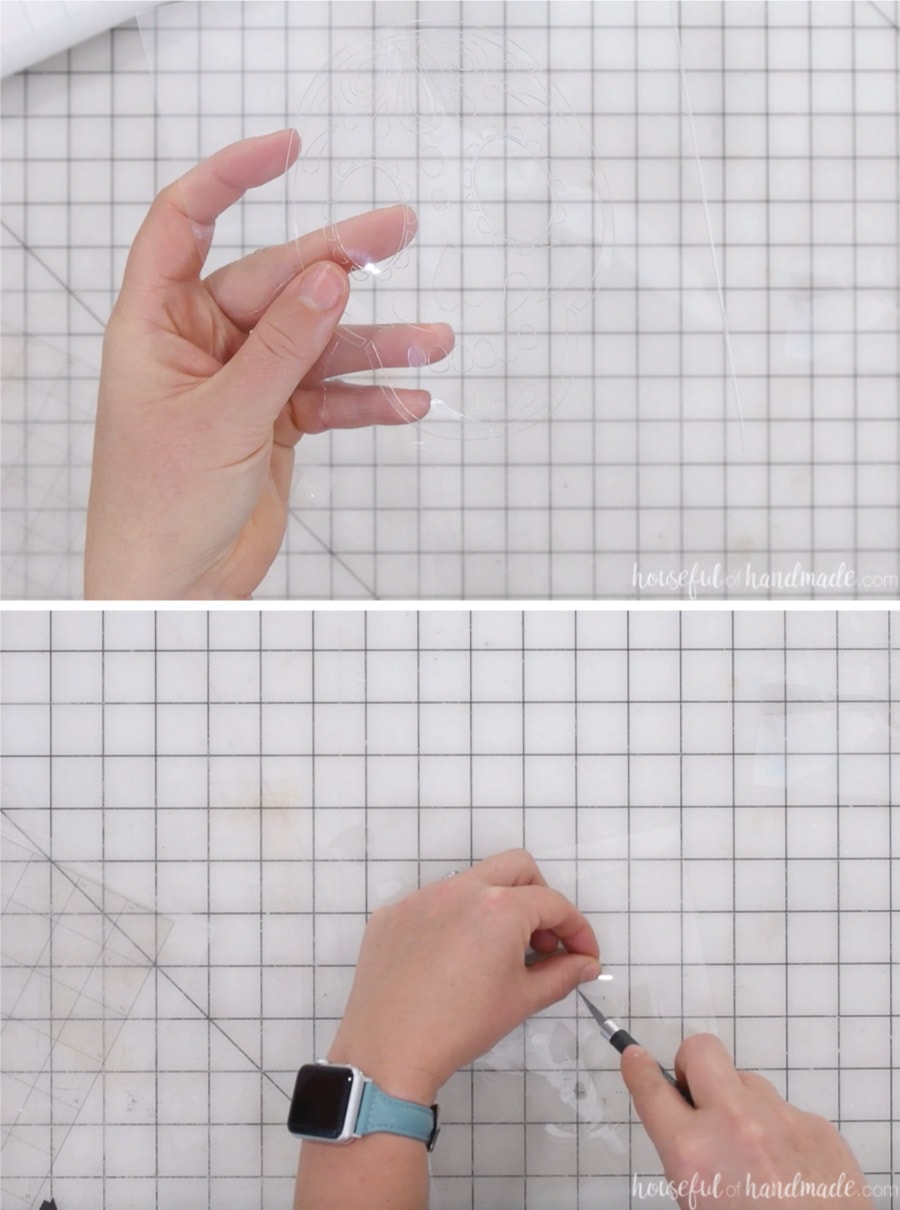
Cut the sugar skull stencils. I used a piece of thin plastic that I had left over from a making stencils for painting walls and stenciling floors. But you could cut them out of vinyl or even cardstock.
I used my Silhouette Cameo to cut the plastic, but my blade was a little dull so I needed to cut a few spots with an x-acto knife. You could also cut the entire stencil with an x-acto knife if you don’t have an electronic cutting machine.
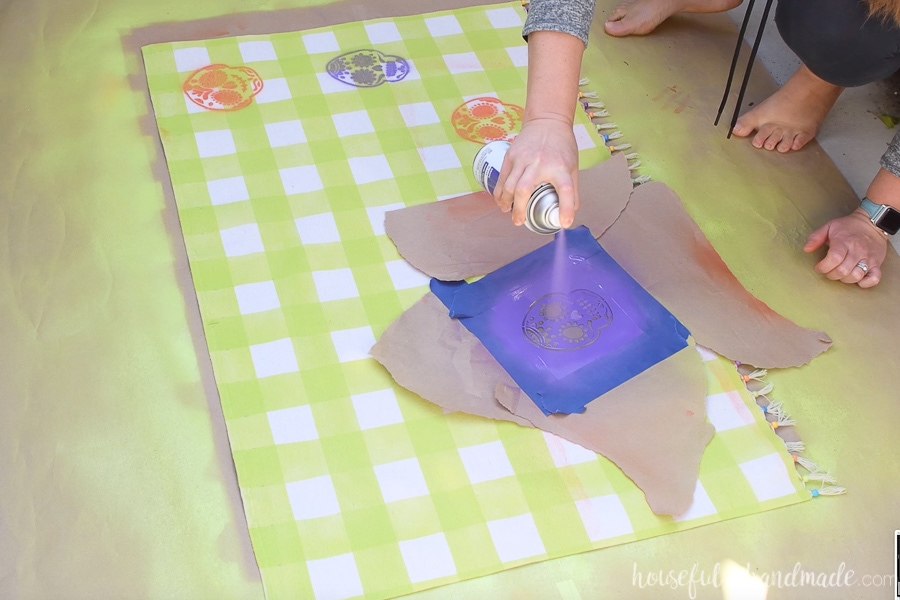
Lay the stencils on the doormat and spray to transfer the design.
Make sure to take into account the overspray. Use tape and some paper to protect your pretty buffalo check design (ask me how I know).
Paint the Top Doormat
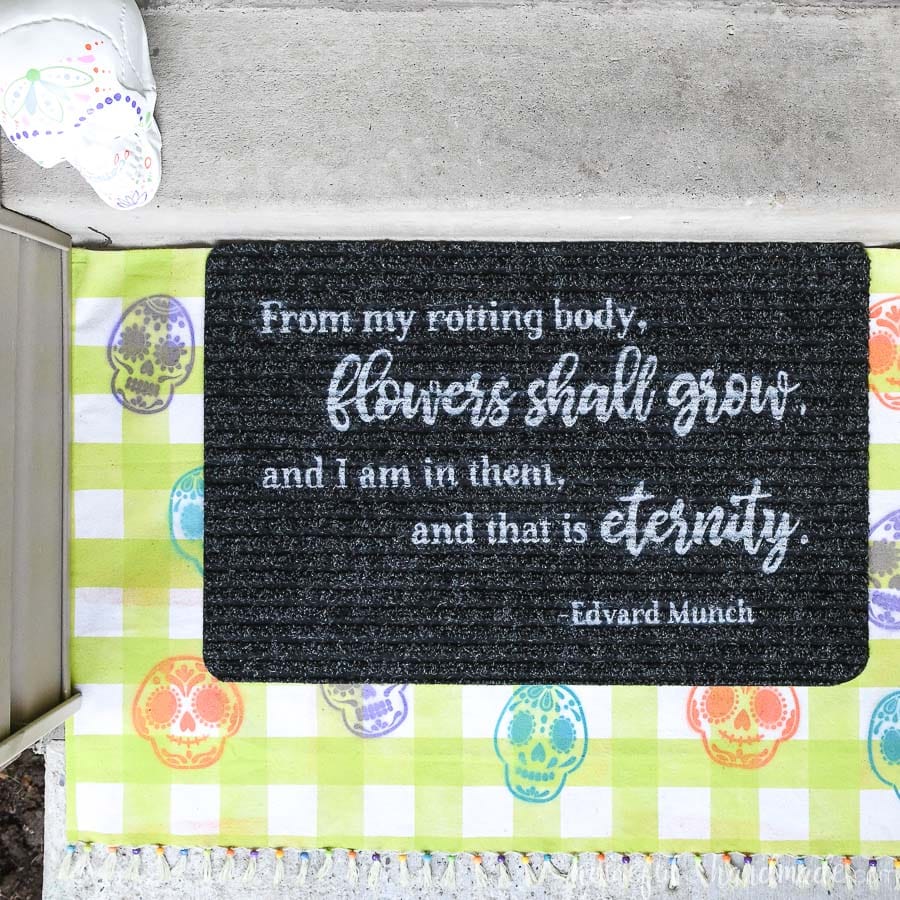
To make the complete layered doormat look, the top doormat needs to have a coordinating design. I chose a saying that was perfect for the Day of the Dead theme.
I used this inexpensive ribbed doormat. Adding the vinyl stencil to it was a little tricker and I needed to touch up the design at the end, but it still turned out amazing.
Cut the design out of vinyl and weed out the words (where the paint will go). Then use some transfer tape to remove the vinyl from the backing.
Place the vinyl on the doormat. Use your fingers to press it into the ribbing and onto the mat as tight as you can. Remover the transfer tape.
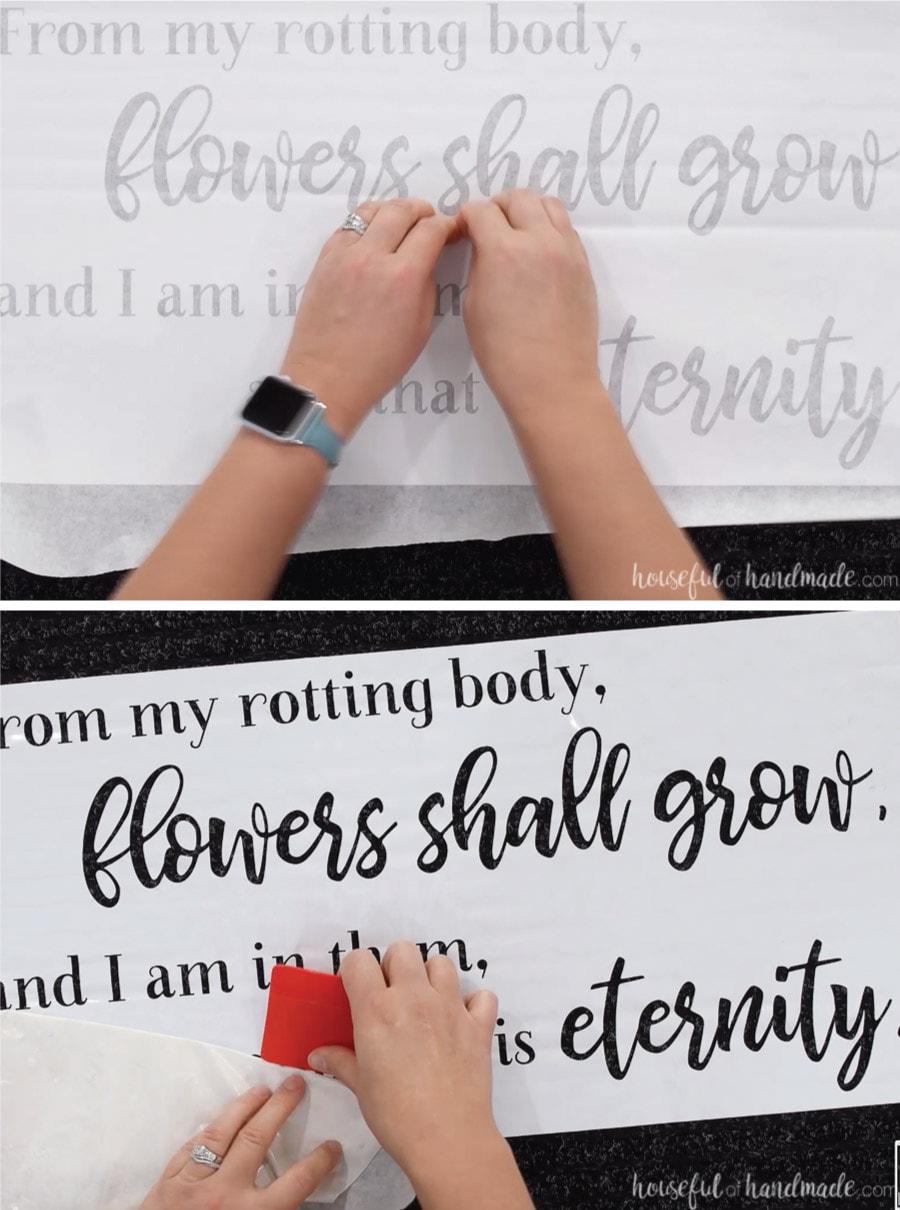
Add 2 coats of spray paint to give it good coverage, it might not even look like there is much on there until after you remove the vinyl because it sinks into the loops of the doormat. But it is there.
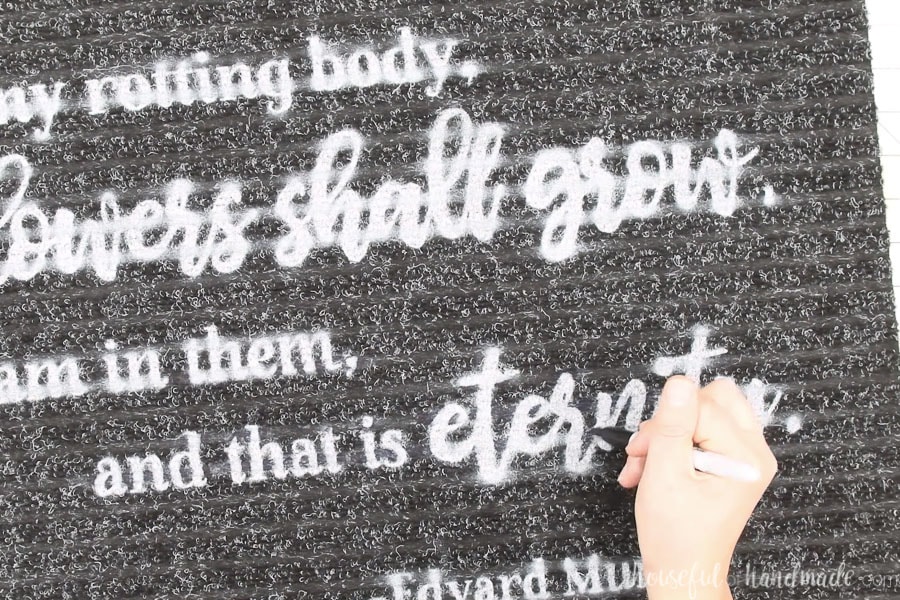
Because the vinyl didn’t stick inside the ribbing well, there was a slight halo of the paint around the letters in the dips. To remove it, I used a black sharpie and drew over the top of the halo creating a crisp line around the words. You can’t even tell where the paint was!
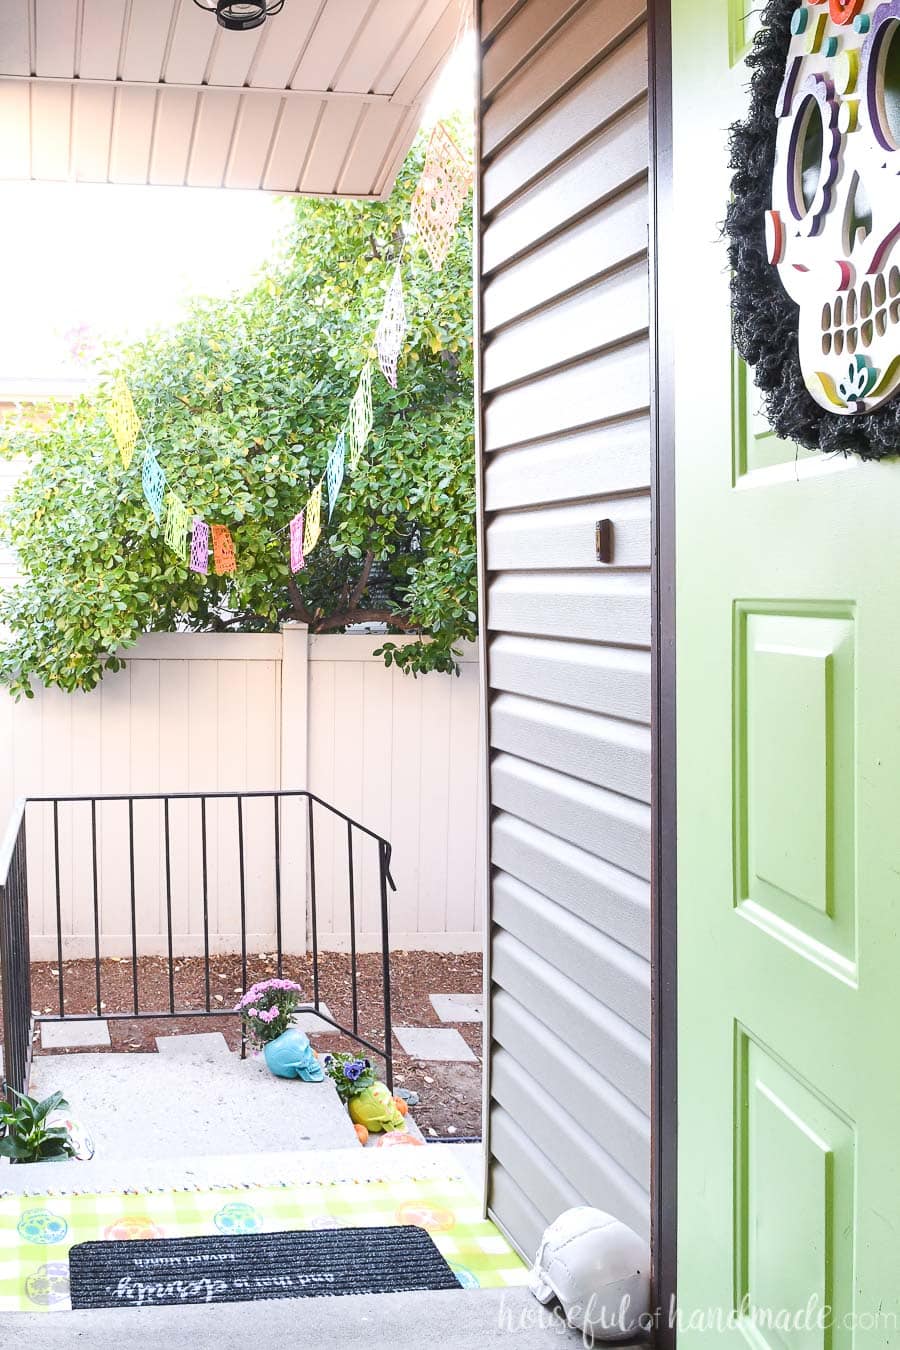
Now your new Halloween layered doormats are ready to be put outside. They are the perfect start to our Day of the Dead themed decor this year.
Come back soon to see the rest of the Day of the Dead projects and the final reveal of our Halloween porch.
Sharon LaCoss
Friday 4th of October 2019
Oooohhh Kati, I can just see this idea as a Christmas Mat maybe with a wooden sign. Going to Home Depot today anyway so will pick up supplies. Thanks for the inspiration.
Kati
Thursday 10th of October 2019
Love the idea for Christmas too. I need one for every month ;)