Add tons of farmhouse charm to your decor with this inexpensive decorative windmill.
Have you been eyeing the beautiful rustic windmill decor you’ve seen around? But with price tags in the $100s and up, it’s really hard to fit that into a small budget. Guess what? I figured out how to make one for around $10!
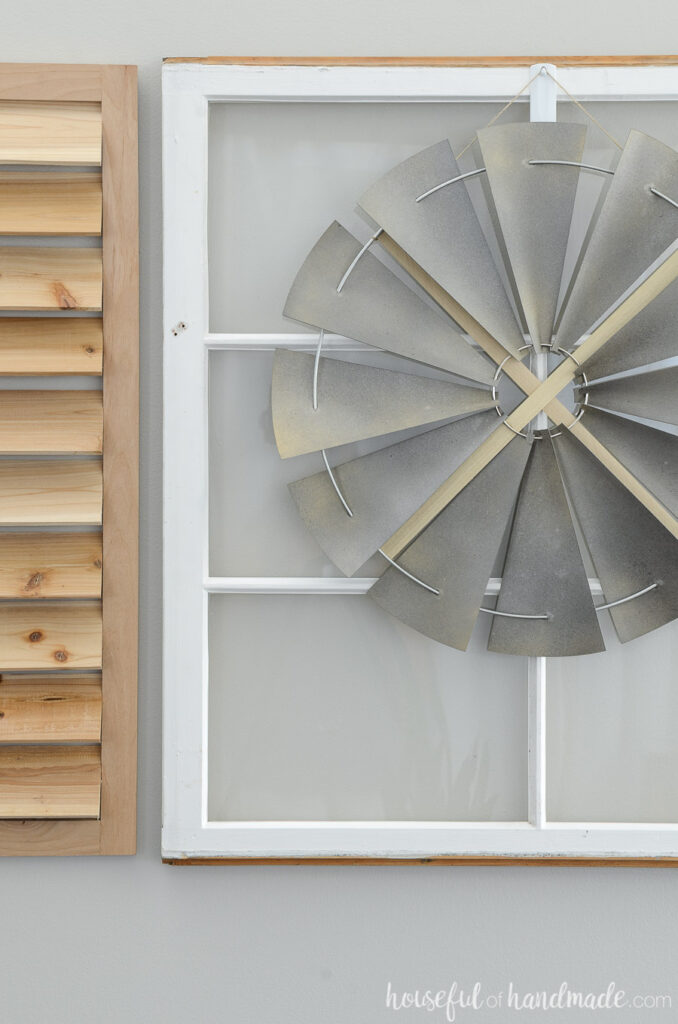
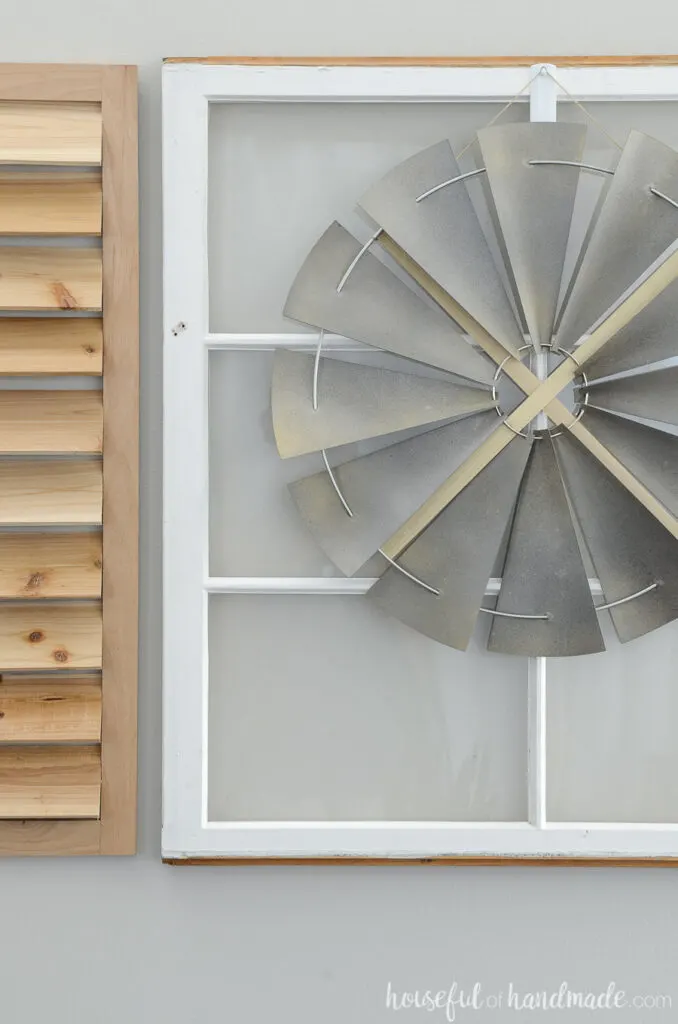
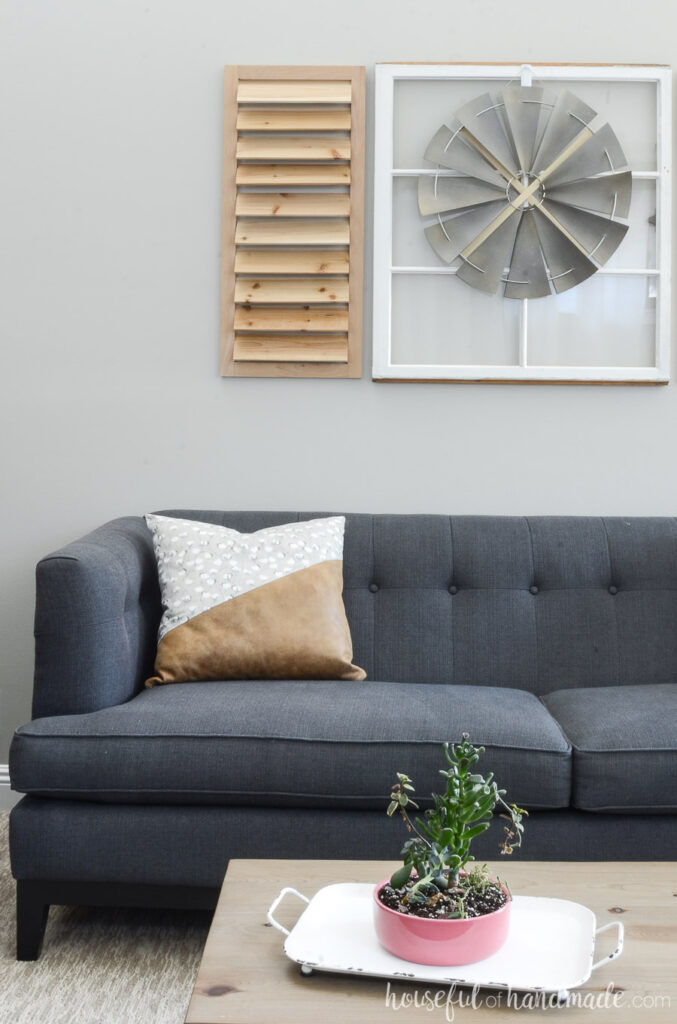
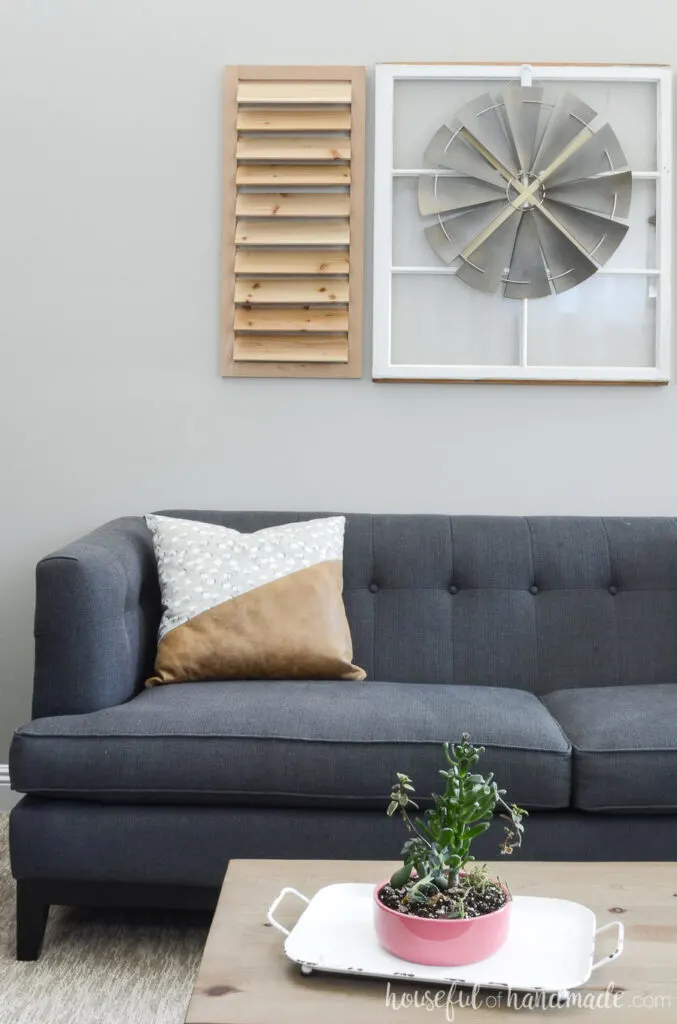
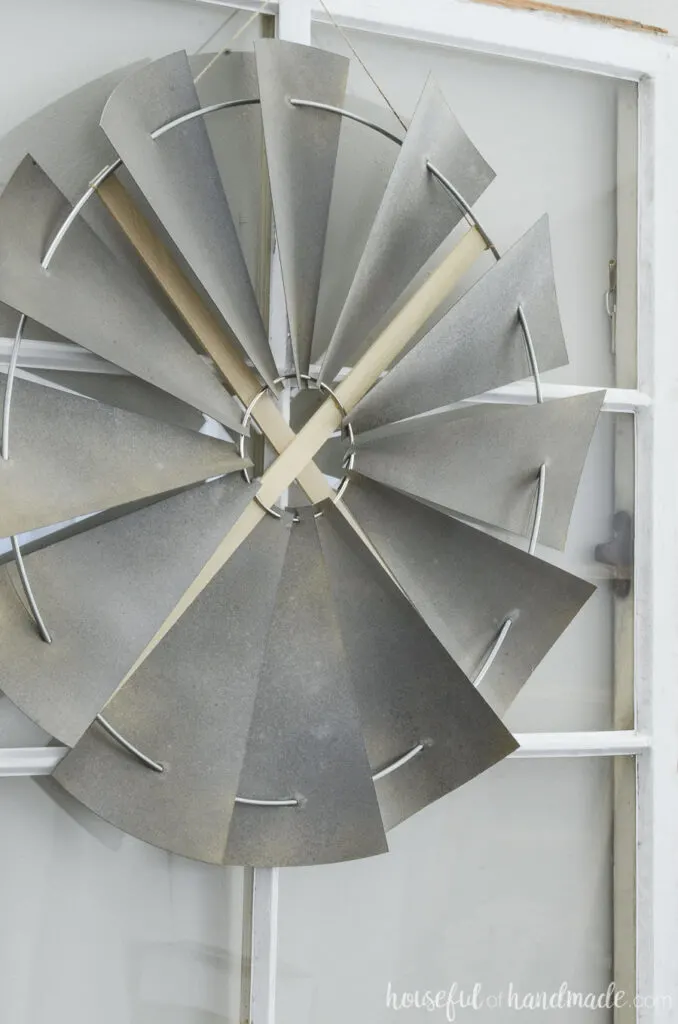
Yep, this beautiful decorative windmill was made at a fraction of the cost and I’m so excited to show you how.
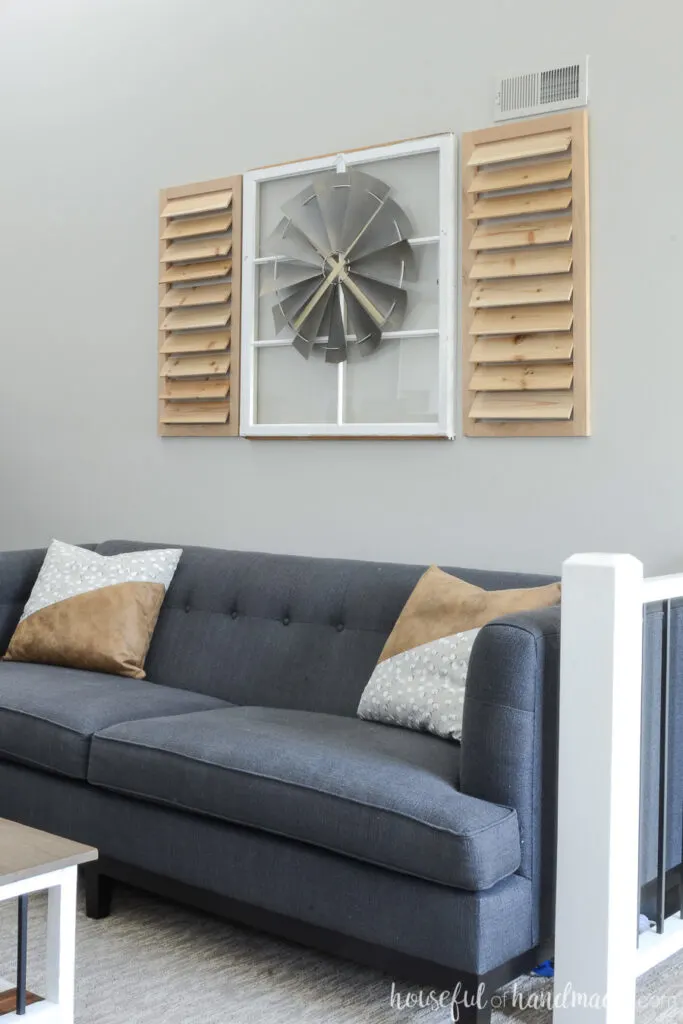
Going into fall, I want to update our living room to be a bit more cozy. For the summer we decorated it to look like a tropical retreat, but now I am ready for more farmhouse elements.
This post may contain affiliate links. As an Amazon Associate I earn from qualifying purchases. Click here to read my full disclosure policy.
Saying goodbye to the pineapples and palm leaves can only be okay when it is replaced with windmills and pumpkins!

After spending way too much time looking at windmills online, I seriously considered buying one. But even if I have the money, my heart hurts thinking about spending so much money on one piece of decor.
I like to have options. Lots of options! So when I want to switch things up on a whim, I can. Then I decided to figure out how to make my own decorative windmill instead!
I went looking for ideas for metal rings, praying they would be in my budget, and was so excited to find a 19″ metal floral ring! Perfect for a large rustic windmill! After bringing it home, the vision unfolded.
Even better than this extremely awesome price tag for my DIY windmill decor, was how fun and easy it was to make in just an afternoon.
How to Make a Decorative Windmill
Supplies:
- Windmill blades template
- I am sharing the template for the blades for free in my Subscriber Library. Click here to subscribe to my newsletter and gain access to all the freebies. If you already have your password, click here to go to the library download them.
- 19″ metal floral ring
- 4″ metal ring
- Coverstock
- Variety of metal look spray paints
- I used a combination of hammered metal in Weathered Steel, Dark Bronze and Metallic Gold.
- 19″ x 3/4″ x 1/4″ piece of wood
- If you do not have scraps of wood to use, you can buy a small dowel for a dollar or two.
- Hot glue gun and glue sticks
- Tape
- Optional: Electronic cutting machine like a Silhouette Cameo or Cricut Maker
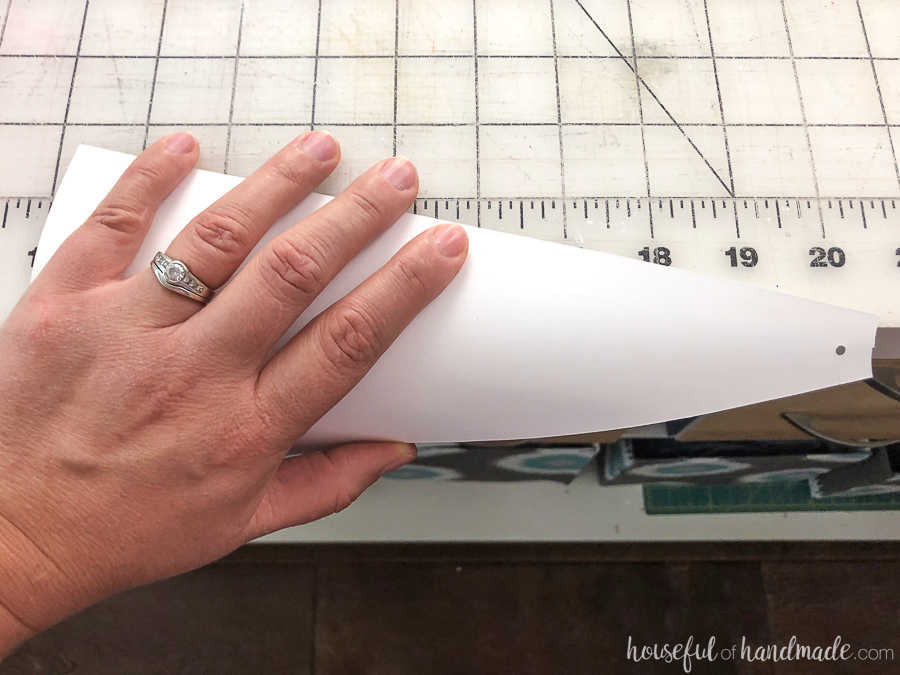
Cut out 12 windmill blades out of coverstock paper. You could use cardstock, but it won’t be as strong.
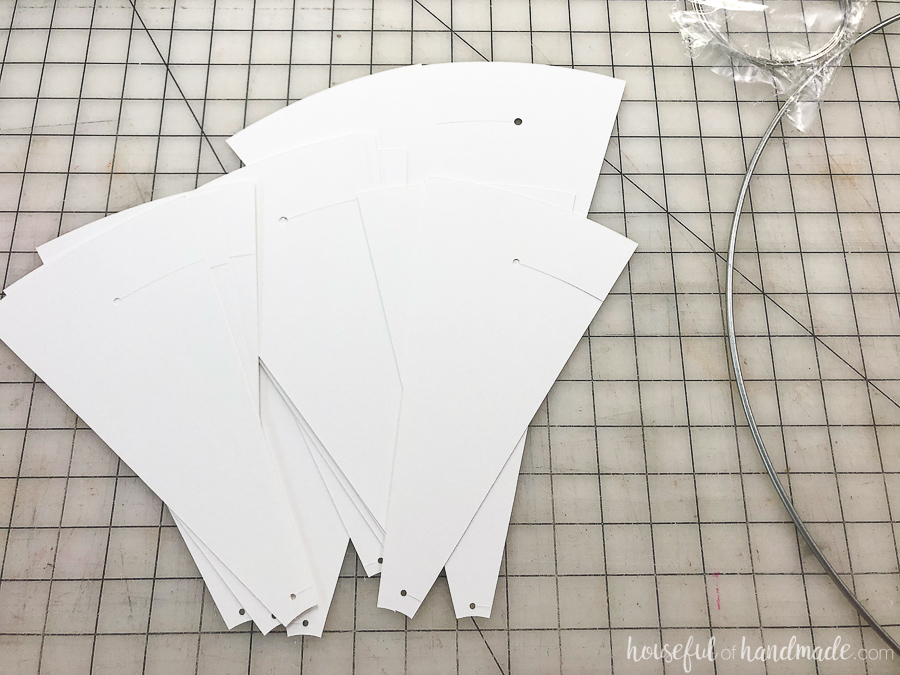

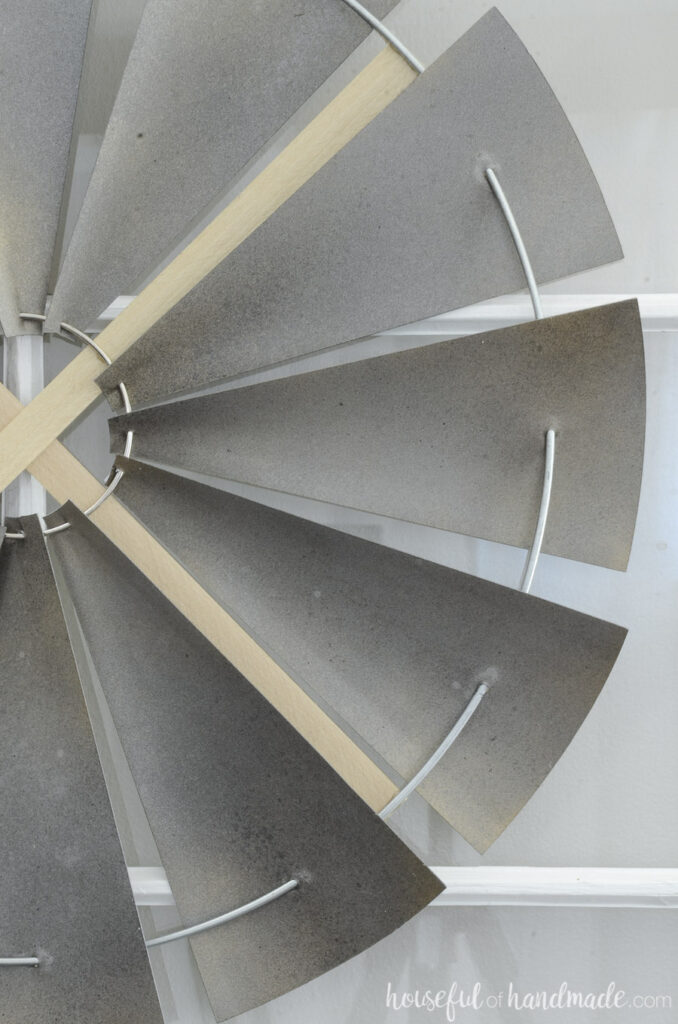
Roll the blades along the edge of a table to give them a little curve. Make sure you are curving them all so the slits are all on the same side.

Spray paint the fan blades. I started with a base layer of Weathered Steel on both sides.
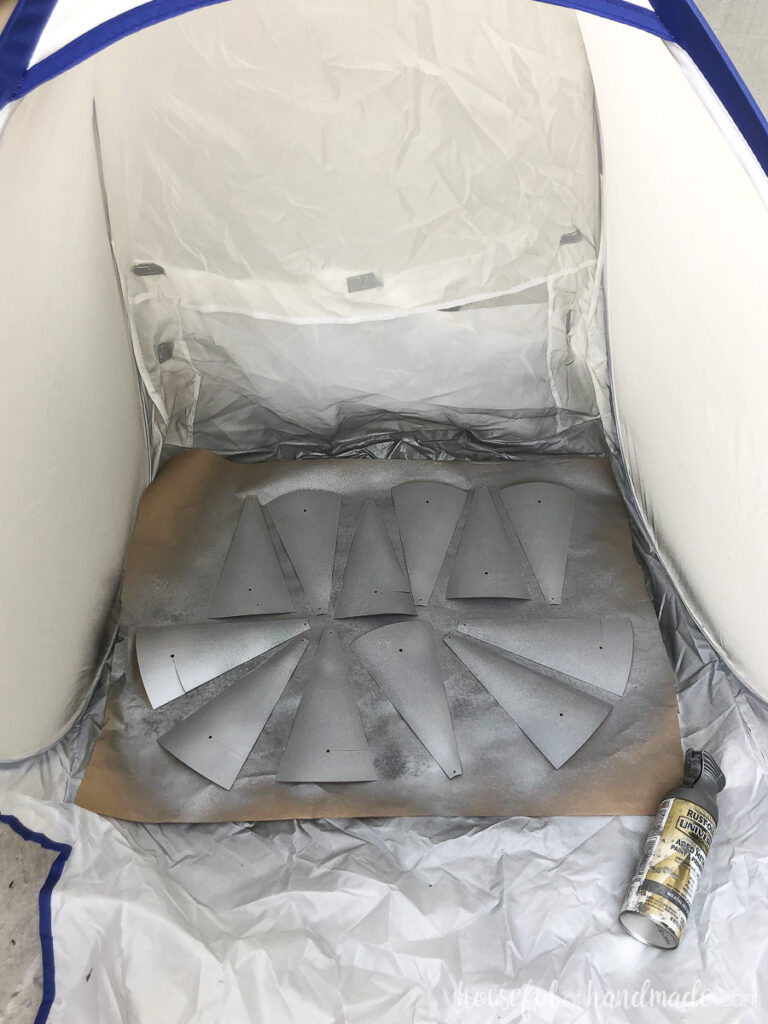
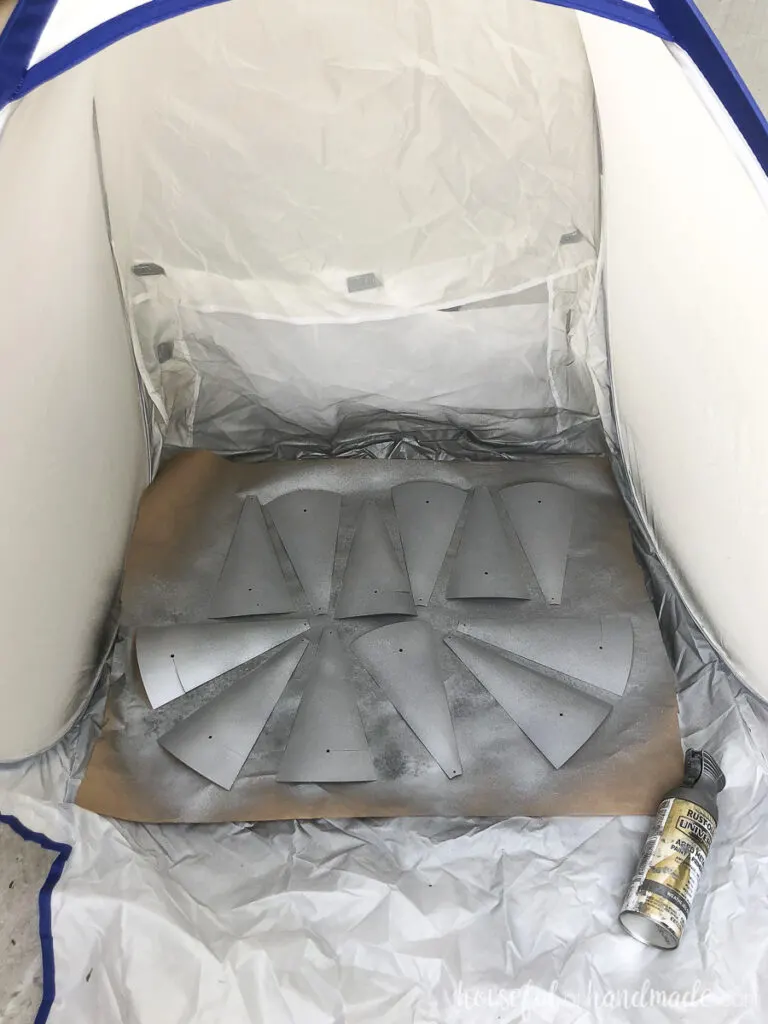
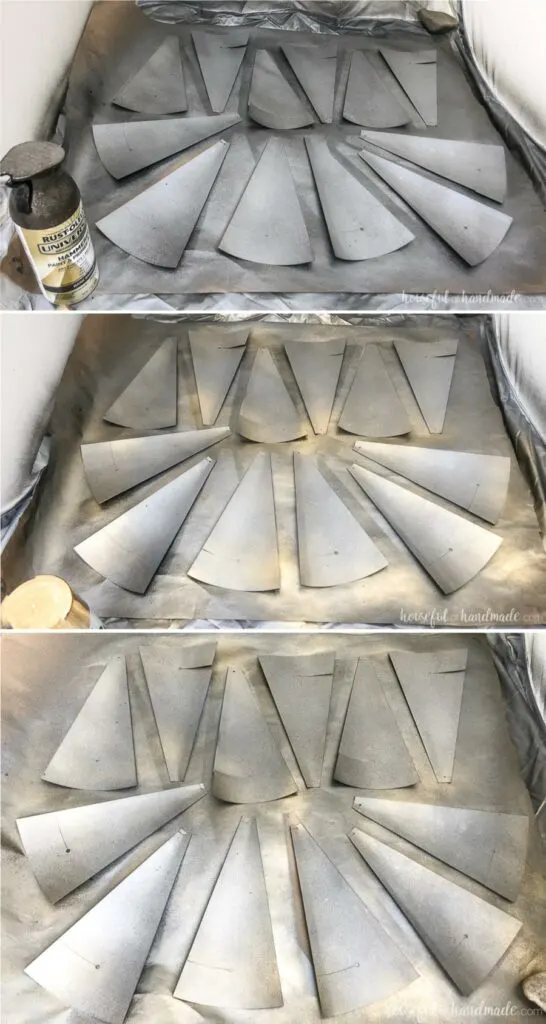
Then I added a spotty layer of Dark Bronze to the fronts. Next I added a few swipes of Metallic Gold. The gold seemed very stark, so I added a bit more Dark Bronze on top again to make it look more rusty.
And it only took about 20 minutes to paint the windmill fan blades.

While the blades are drying, fire up the hot glue gun. Use the pieces of wood to secure the rings together so the center ring is centered nicely. I didn’t do this, I tried to adjust and add the wood at the end.
But I would highly recommend doing it first.
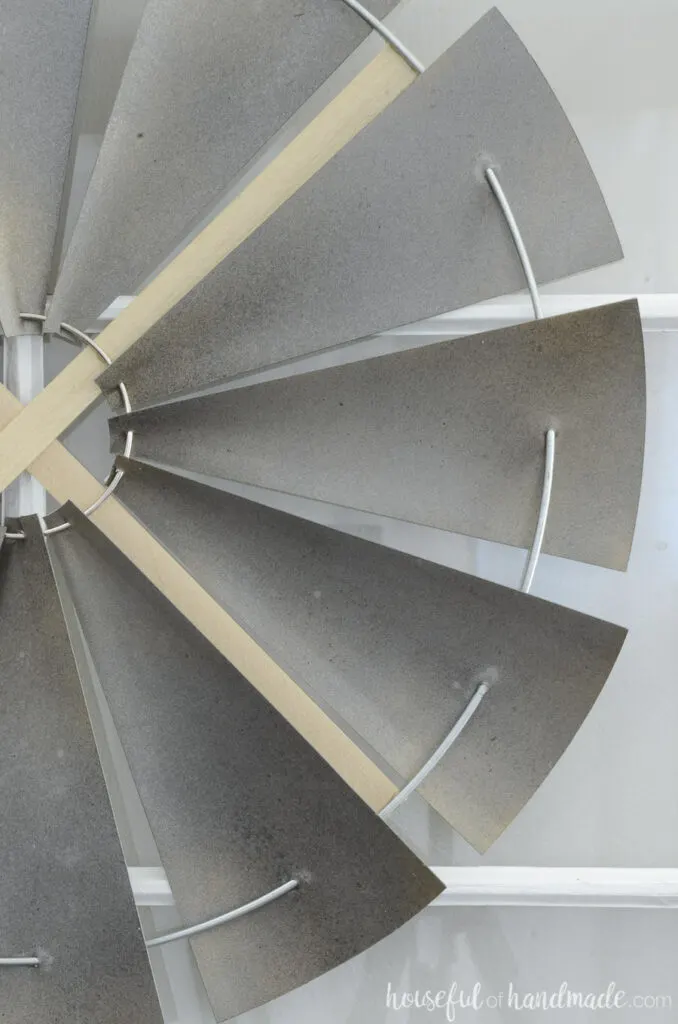
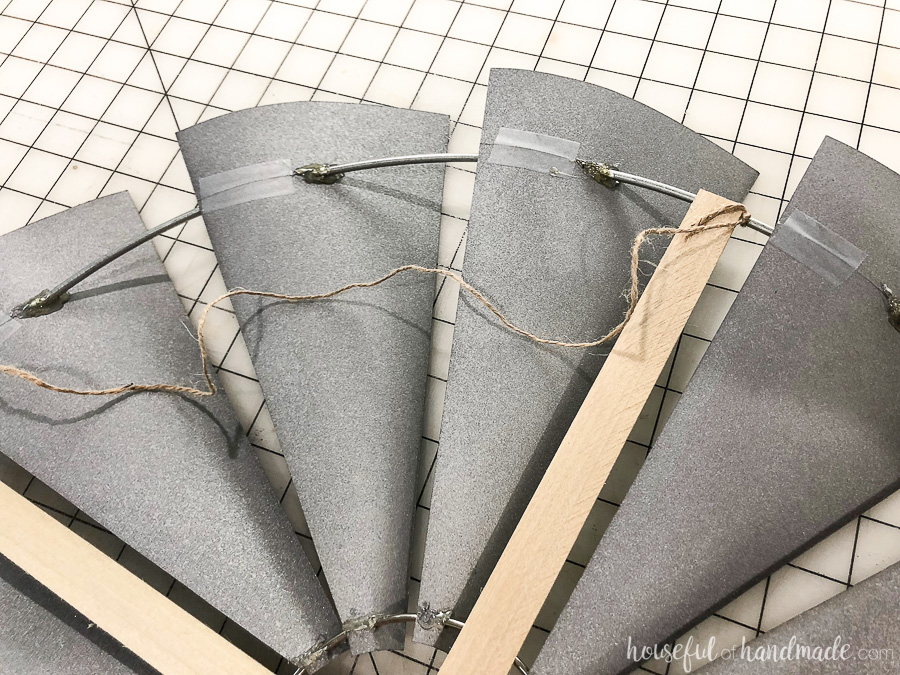
After they are dry, start threading the blades onto your rings. Open the slits and place the rings so they are in the cut out holes. Use a small piece of tape on the back to close the slit back up when you are done.
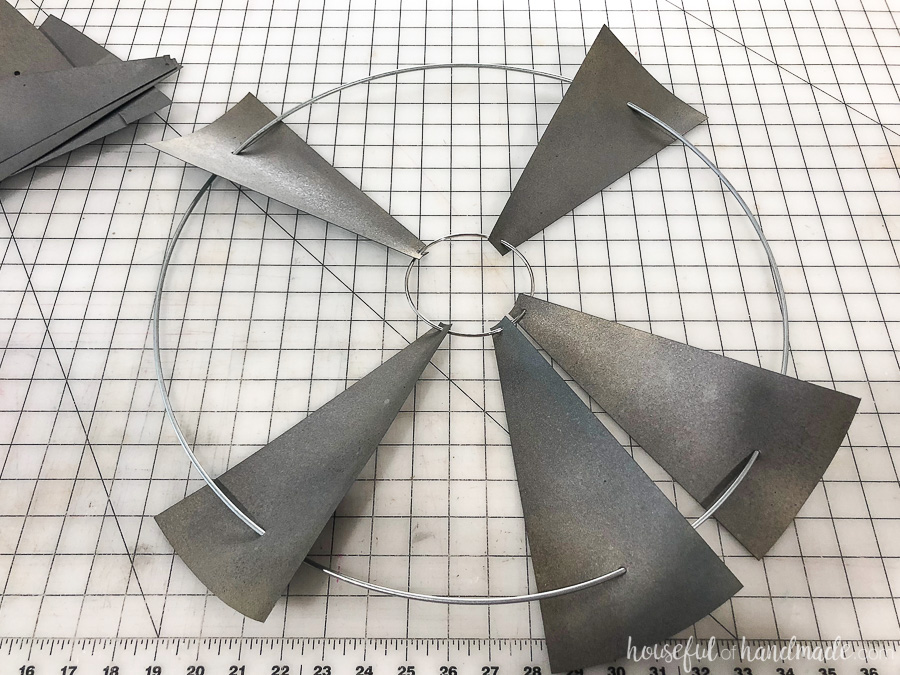
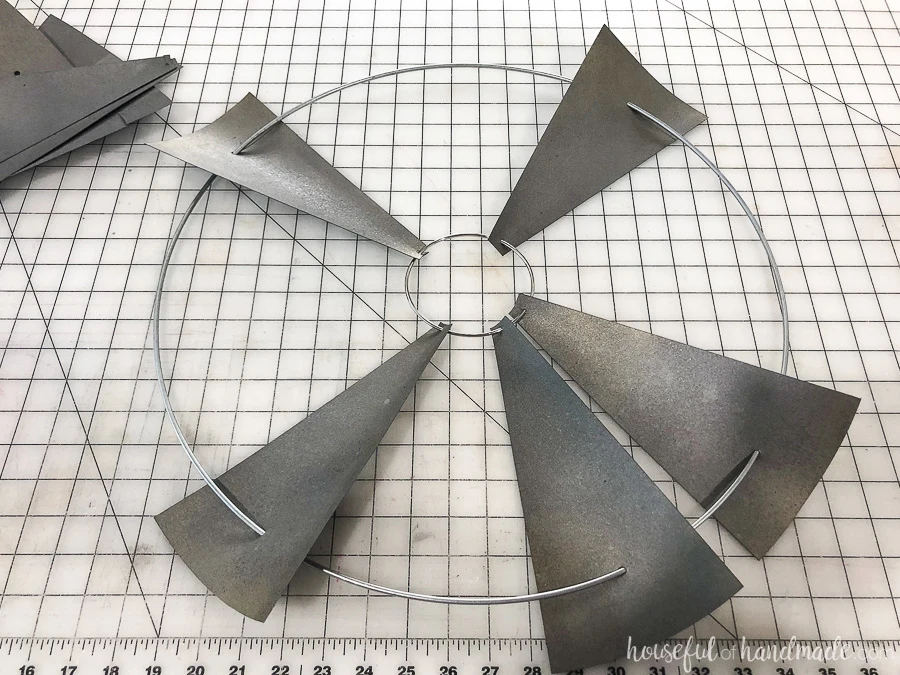
Position the blades where you want them, then secure with a dollop of hot glue on the back of the blade around the ring. Make sure to secure the top and the bottom.
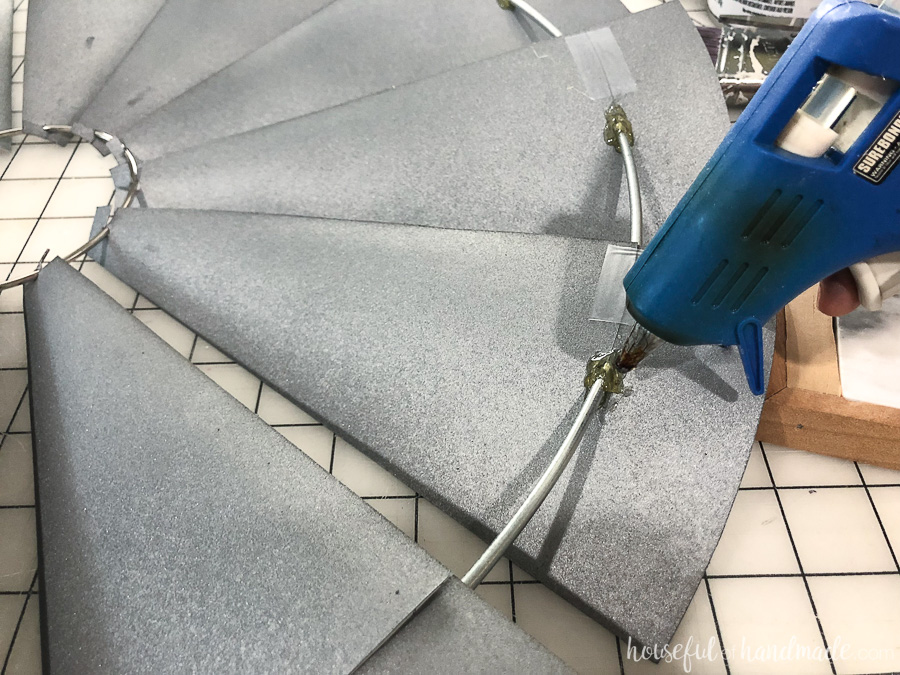
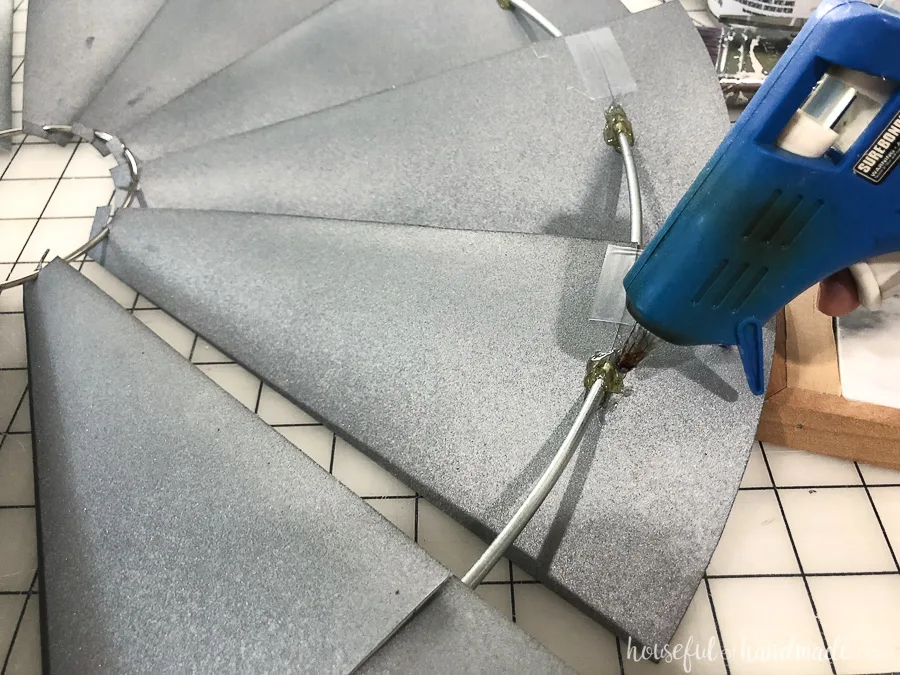
To hang your beautiful new windmill decor, tie a piece of string to the back of the ring on the outside of the wood piece. This will prevent it from sliding.
I also used a little hot glue to secure the end of the string to the back of the wood so it doesn’t accidentally stick out while hanging so nicely on the wall or mantel.

Then all that is left is to decide where to hang your new decorative windmill.

Now to finish the rest of the fall decor!


How to Make a Decorative Windmill
Add tons of farmhouse charm to your decor with this inexpensive decorative windmill tutorial.
Materials
- Windmill blades template
- 19″ metal floral ring
- Coverstock
- Variety of metal look spray paints
- 19″ x 3/4″ x 1/4″ piece of wood
Tools
- Hot glue gun and glue sticks
- Tape
Instructions
- Cut out 12 windmill blades out of coverstock paper. You could use cardstock, but it won’t be as strong.
- Roll the blades along the edge of a table to give them a little curve. Make sure you are curving them all so the slits are all on the same side.
- Spray paint the fan blades. I started with a base layer of Weathered Steel on both sides.
- Then I added a spotty layer of Dark Bronze to the fronts. Next I added a few swipes of Metallic Gold. The gold seemed very stark, so I added a bit more Dark Bronze on top again to make it look more rusty.
- While the blades are drying, fire up the hot glue gun. Use the pieces of wood to secure the rings together so the center ring is centered nicely.
- After they are dry, start threading the blades onto your rings. Open the slits and place the rings so they are in the cut out holes. Use a small piece of tape on the back to close the slit back up when you are done.
- Position the blades where you want them, then secure with a dollop of hot glue on the back of the blade around the ring. Make sure to secure the top and the bottom.
- To hang your beautiful new windmill decor, tie a piece of string to the back of the ring on the outside of the wood piece.
Amy
Thursday 9th of June 2022
I signed up for your newsletter but have not received my "password" yet. I have checked my spam folder.
Thanks
Kati
Saturday 11th of June 2022
Hi Amy, and welcome to Crafting My Home! The password is in the bottom of every email that is sent. One was just sent one out this morning, it will be in there as well.