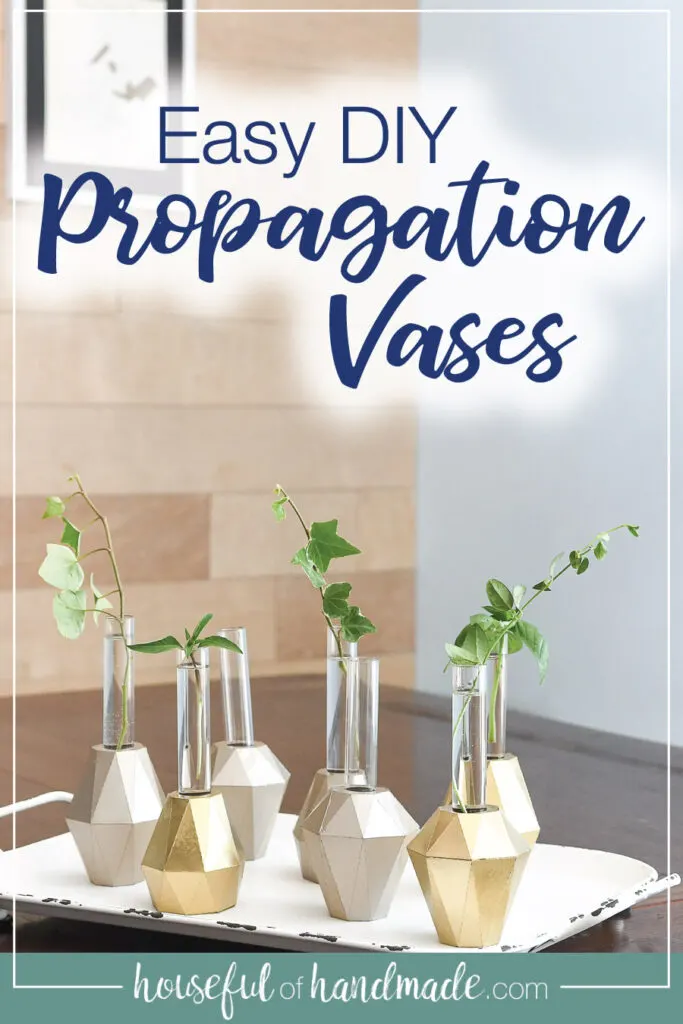
Grow new plants from clippings in these beautiful propagation vases.
I have been wanting to try my hand at plant propagation. Problem was… I needed some where to do it. And these gorgeous plant propagation vases are the perfect place!
Test tube vases are perfect for propagating plant cuttings. They are nice and tall so they support the cuttings wonderfully. But you cannot just put a test tube on the table, it needs something to support it.
So I set out to create the perfect test tube holders that I could use to propagate some new plants or use as test tube bud vases. And I turned to my love of paper crafting to accomplish it.
This post may contain affiliate links. As an Amazon Associate I earn from qualifying purchases. Click here to read my full disclosure policy.
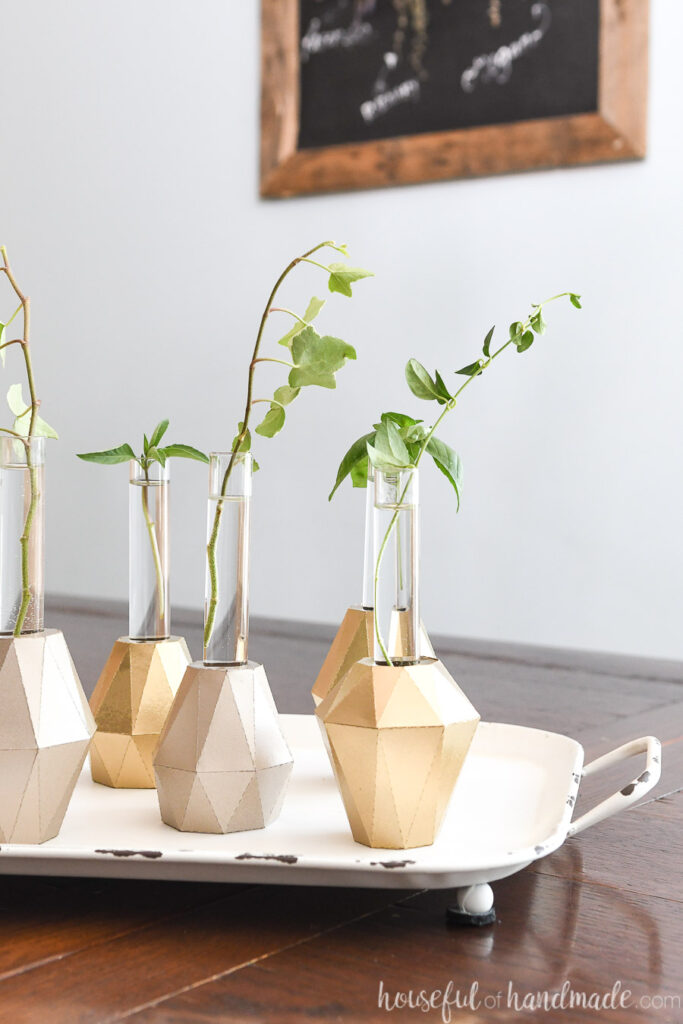
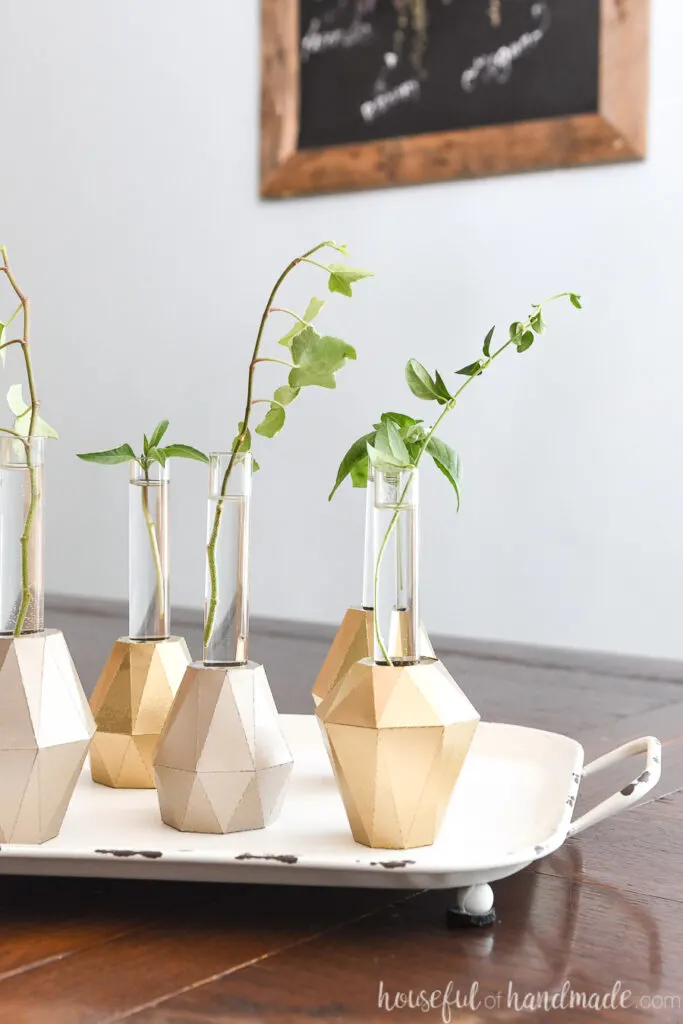
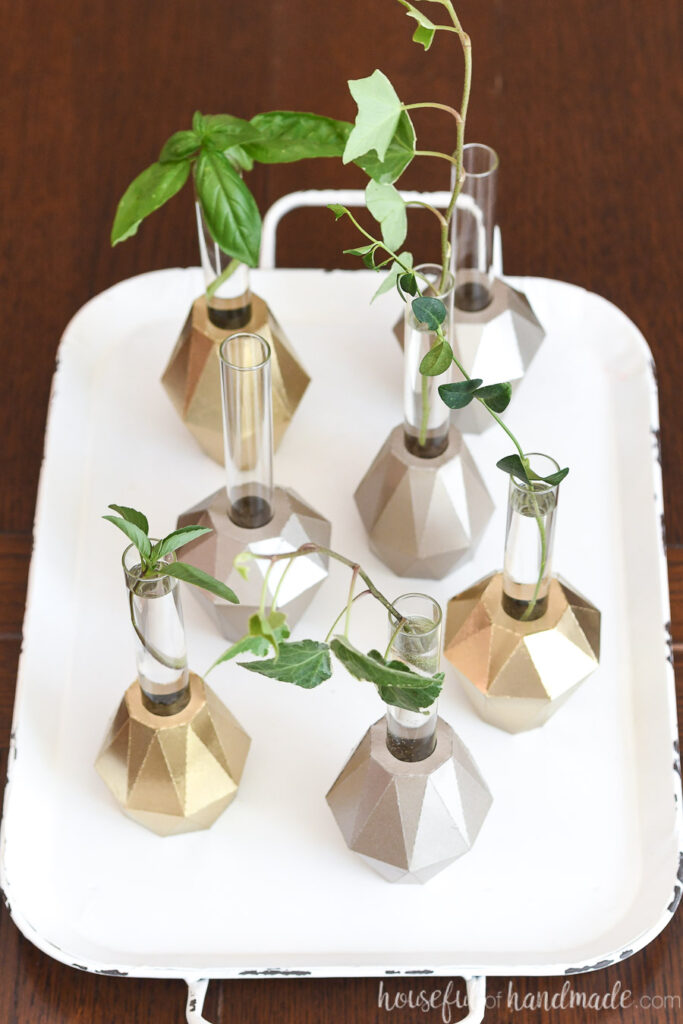
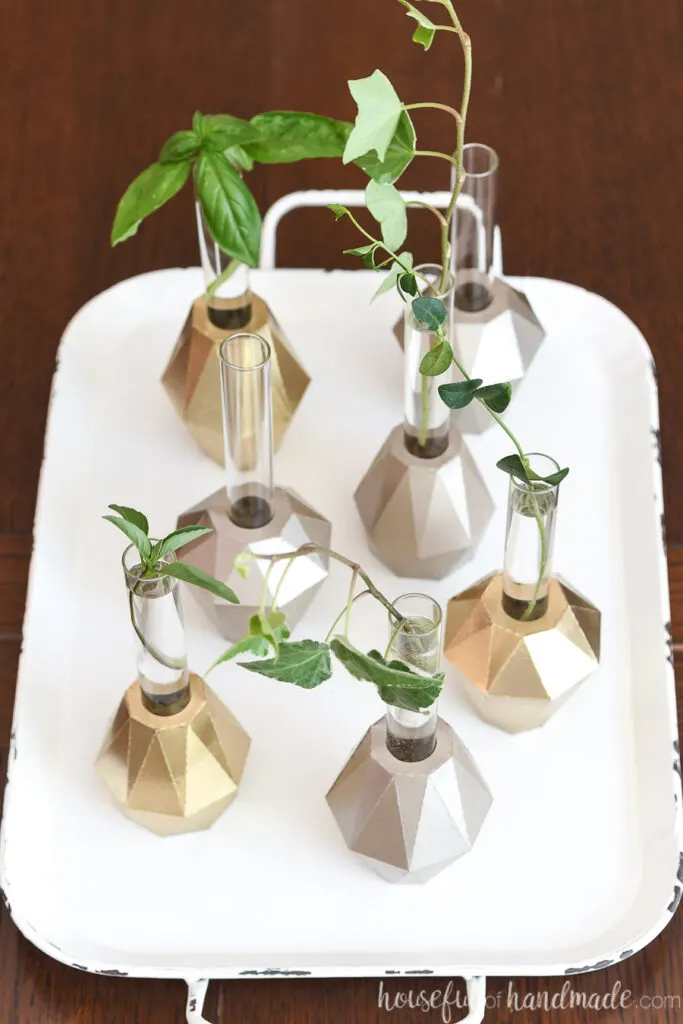
DIY Propagation Vase
What I came up with is the perfect mix of glam and budget. Each of these plant propagation vases is made from 1 sheet of cardstock and 1 test tube.
I bought this pack of test tubes and each tube cost less than $1. But they look so fancy!
And whenever I need to add another tube to my glamorous propagation station, it takes just a couple minutes to fold one up and I’m ready to grow more free plants.
These DIY jeweled test tube stands are super easy to make. You cut the paper template out, fold it up and glue it together.
I love using hot glue for quick and secure glowing of all my paper crafts. Plus it’s cheap and I always have it on hand!
But the best thing about these glam vases is you can paint them anyway you want! I prefer spray painting them because it’s quick and easy.
But you could use any paint you have on hand. I chose gold to really make the faceted style of the test tube holders look like jewels. But you can use whatever colors work for your space!
And for more amazing paper crafts, make sure to check out this gorgeous Anthropologie mirror knock off and these faux metal wall vases.
How to Make Test Tube Vases
Supplies:
- Test tube holder template
- Cardstock
- 20 mm x 150 mm test tubes
- Hot glue gun and glue sticks
- Paint
- I used Champagne Mist and Metallic Gold spray paint
- Rice, sand or pebbles
- Optional: Electronic cutting machine like a Silhouette Cameo or Cricut Maker
**Click here to Pin for later!**
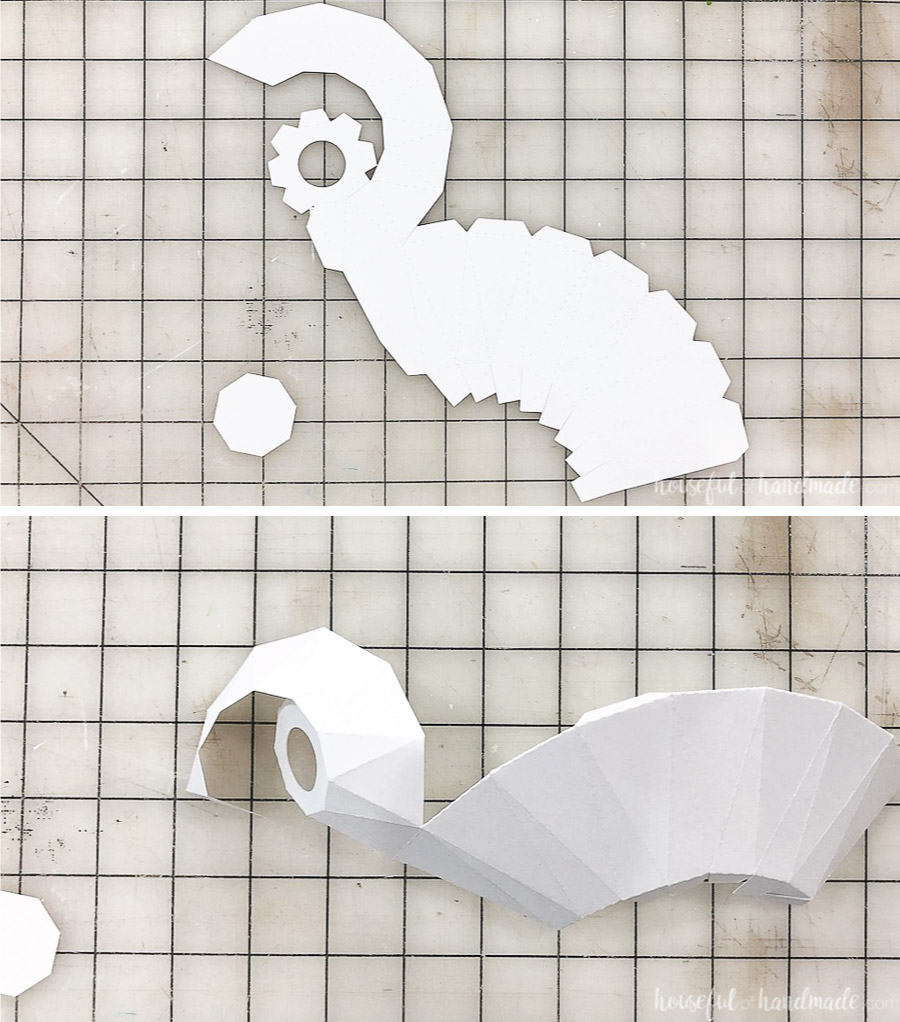
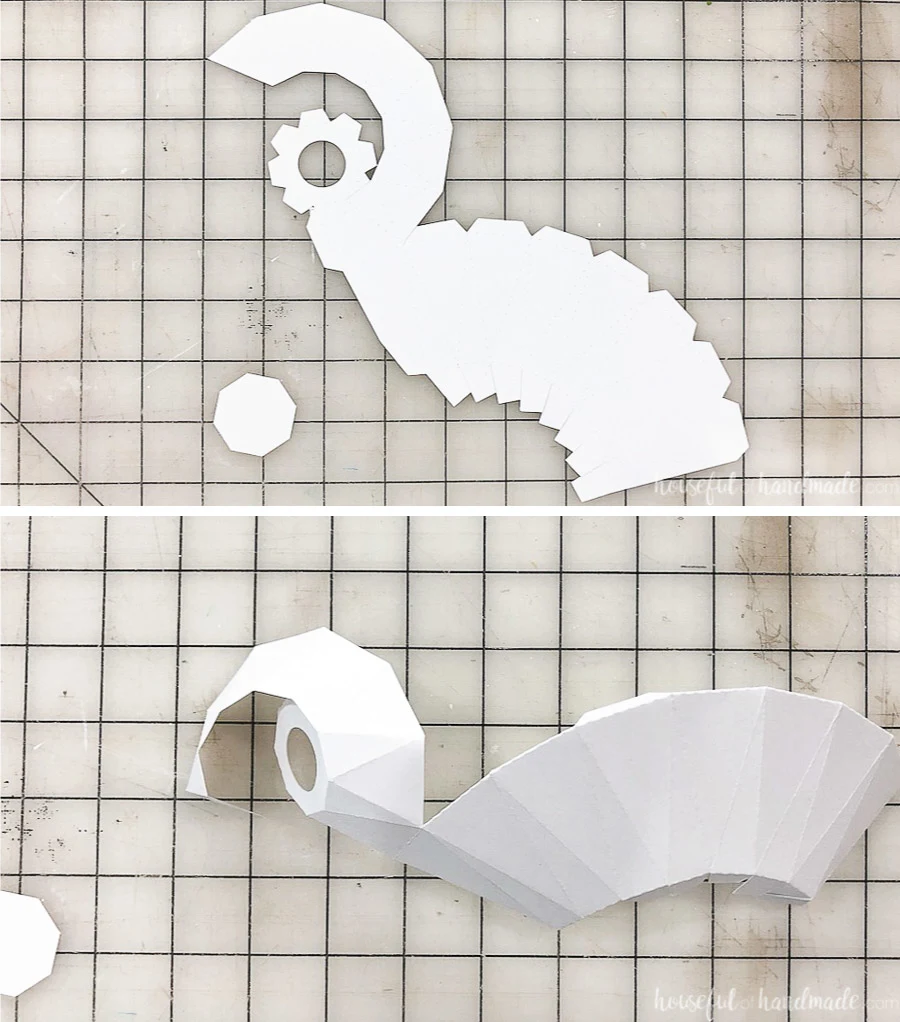
Cutting out the Template
Cut the template out of a sheet of cardstock. There are 3 different jeweled shapes available.
I love using my Silhouette Cameo to quickly cut out paper templates, but you can also print the PDF and cut it out by hand.
If cutting by hand, use a scoring board like this one to make clean fold lines for professional looking paper crafts.
Crease along all the fold lines (dotted lines) except the ones on the bottom of the vase. These dotted lines are just used for reference later.
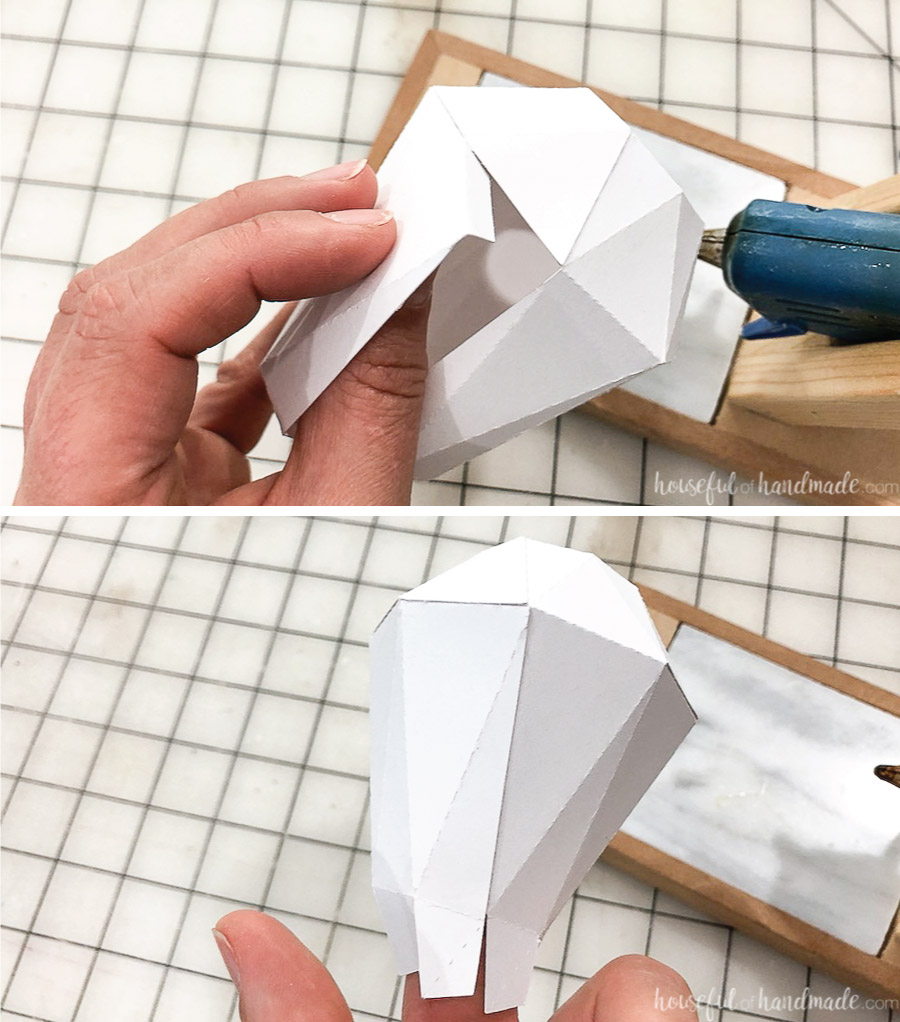
Assembling the Base
Start glueing together the base at the top (the octagon with the hole in it). Place a small dot go glue on the tab on the side of the octagon and then glue it to the attached piece.
Go around the entire perimeter of the octagon securing the top. Make sure to slightly pull the sides to make sure the corners meet at the points.
Once you have secured the tabs on the top all the way around, glue the tab on the side completing the top of the jewel.

Next, add a small line of glue to the tabs on top of the lower base piece and secure it under the top piece.
Make sure to slightly pull the paper to make sure the corners line up properly.


Continue all the way around the lower section until it is secured to the upper section.
Once you have secured the tabs all the way around, glue the tab on the side completing the bottom of the jewel.
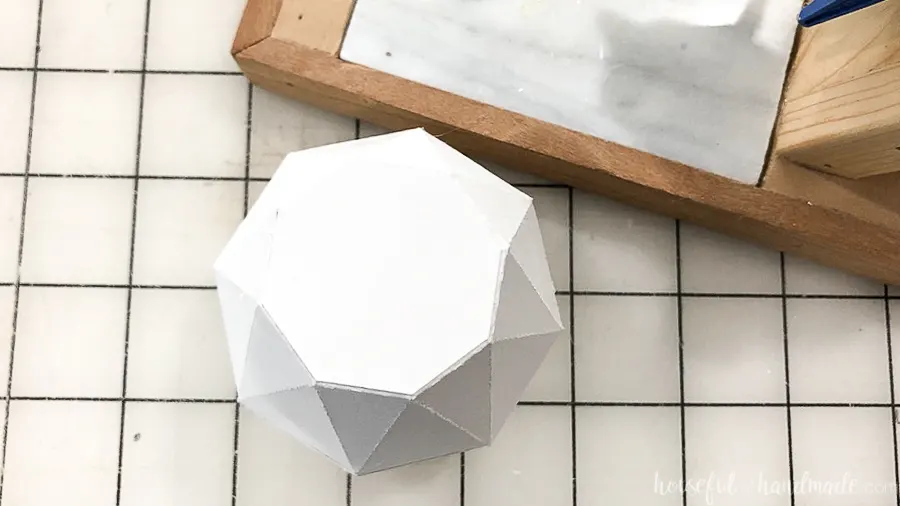
To secure the bottom, start by placing a dot of glue on the tab on the side of one of the bottom pieces. Carefully place the piece next to it on top making sure to line the side of it up with the dotted line.
Repeat for the tab next to it, taking care to line up the side of the bottom piece with the dotted line. This will keep the base perfectly aligned so it doesn’t go askew. It is important to keep the bottom lined up so that it stands properly.
Continue all the way around until all the pieces are secured. Do not try to place the last piece under the first one, just glue it to the base. The next step will cover it up.


Add glue to the octagon piece and place it on the bottom of the base. This will cover up all the tabs and make the bottom super secure.

Finishing the Vase
Repeat assembling as many propagation vases as you want. They are so quick once you get the hang of it.
Then paint them as you want (I used spray paint). I love using empty shipping boxes to hold all my small painted pieces while spray painting.


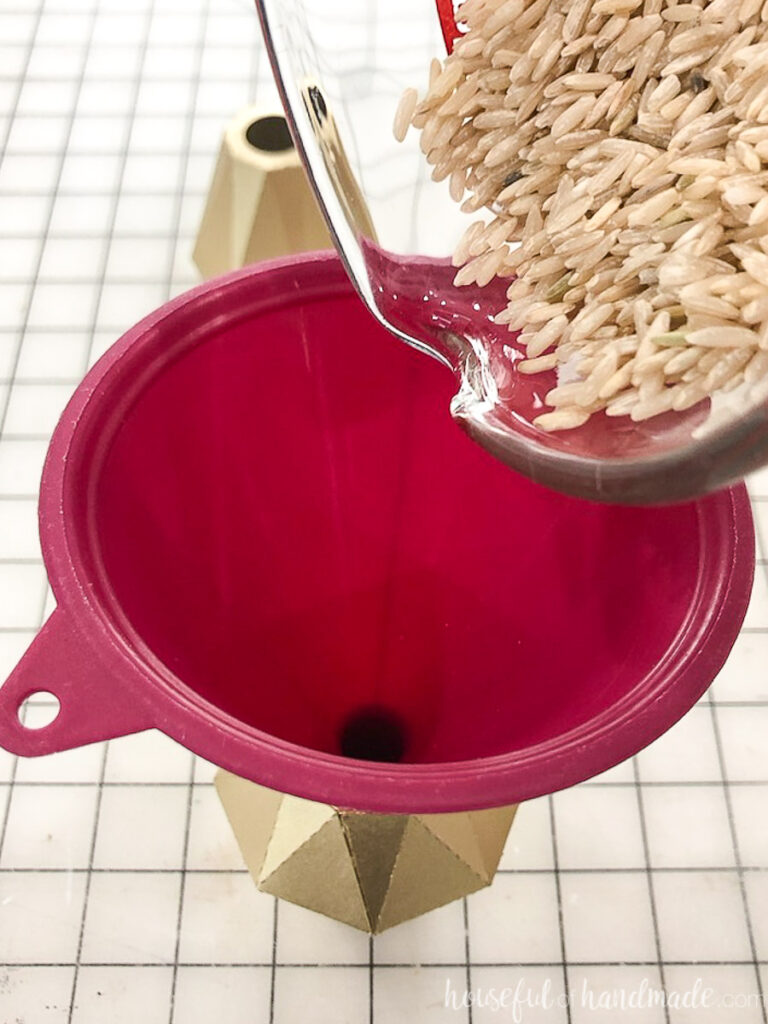
After the paint is dry, fill the base with dry rice. You could use dry beans, sand or even tiny pebbles, but I had rice on hand so it won.
Do not fill the base completely up, just about 3/4 of the way. Then, carefully slide the test tube into the hole on top and secure it into the rice.
The filling with help hold the test tube up and give the entire thing some weight so it will not tip over. Especially helpful when propagating larger plant clippings.

Now it is ready for plant cuttings. Or you can use these as the perfect test tube bud vases, perfect for a single flower stem!
What would you use your jeweled test tube vases for?

Remember to subscribe to gain access to the library and grab this freebie before it moves to the shop!
Then stay tuned for more flash freebies to help you decorate your home on a budget!