Giving gift cards doesn’t have to be boring with these beautiful bow gift card holders.
As much as I love giving DIY gifts, I also appreciate a good gift card. Sometimes those too-hard-to-shop-for people just need the ability to buy something for themselves!
But what I don’t like is a boring gift card holder. You can’t just toss the gift card under the tree in the envelope they gave you at the store.
In the past I have shared some fun gift card boxes, but today is a new one. Instead of a box for your gift card, why not wrap it inside a giant bow?!
This post may contain affiliate links. As an Amazon Associate I earn from qualifying purchases. Click here to read my full disclosure policy.
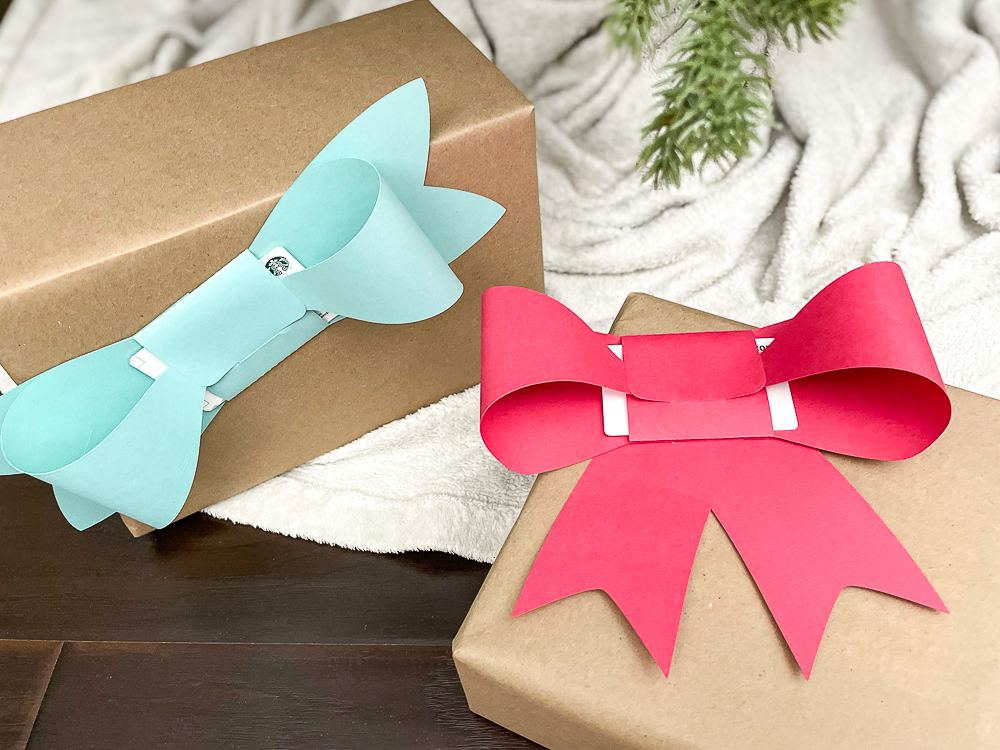
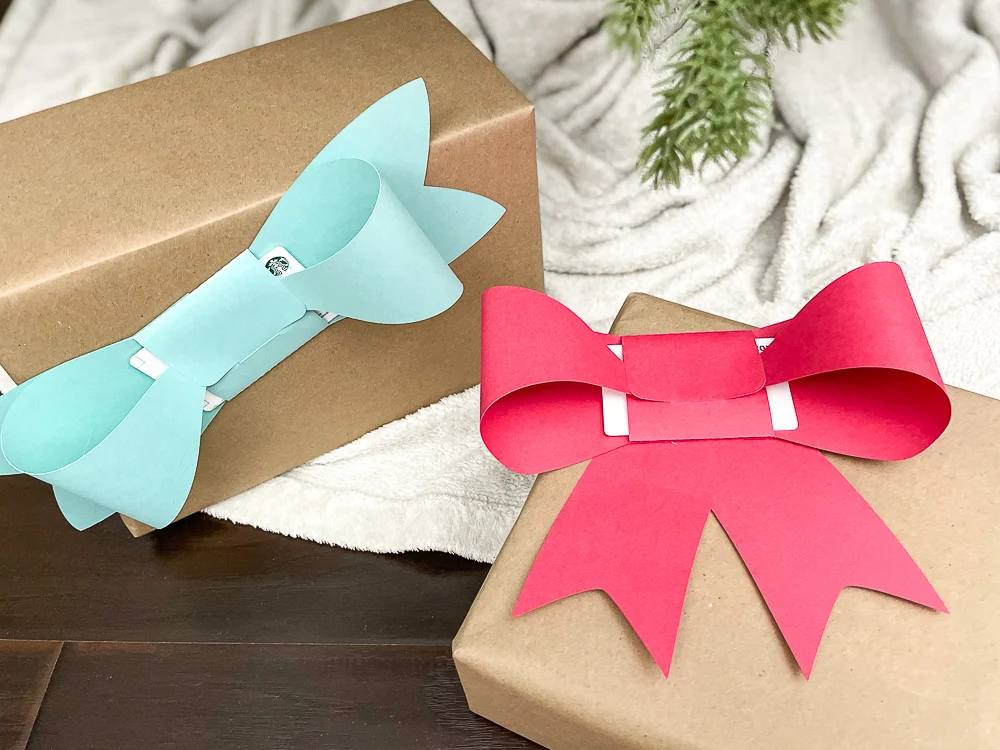
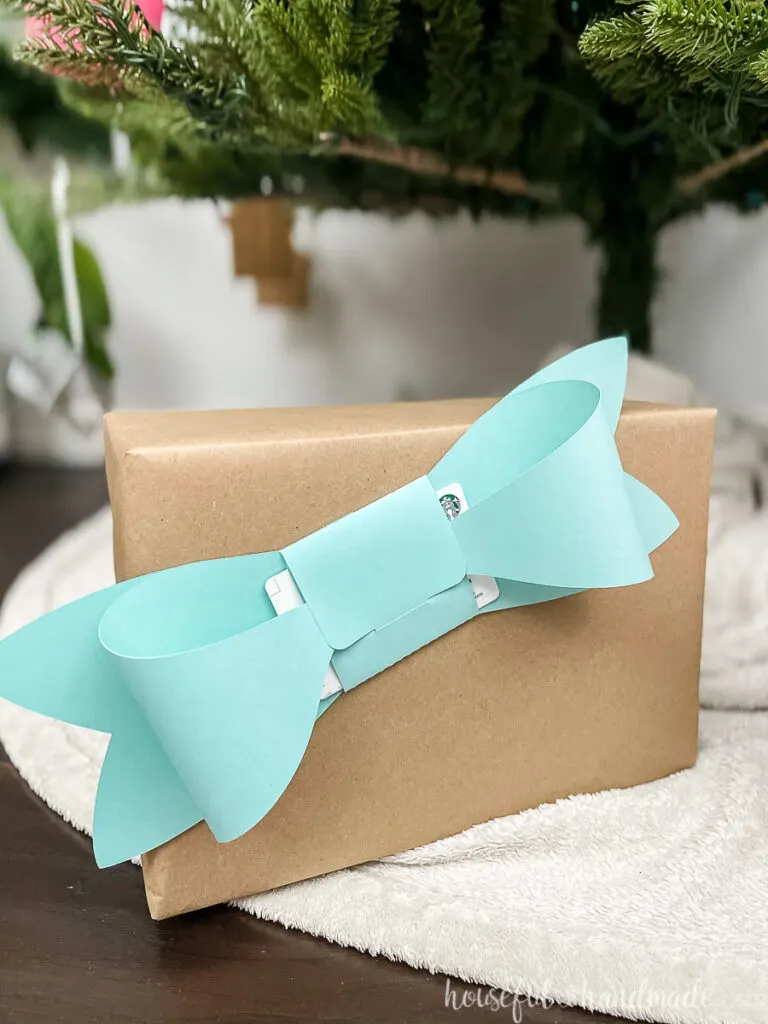
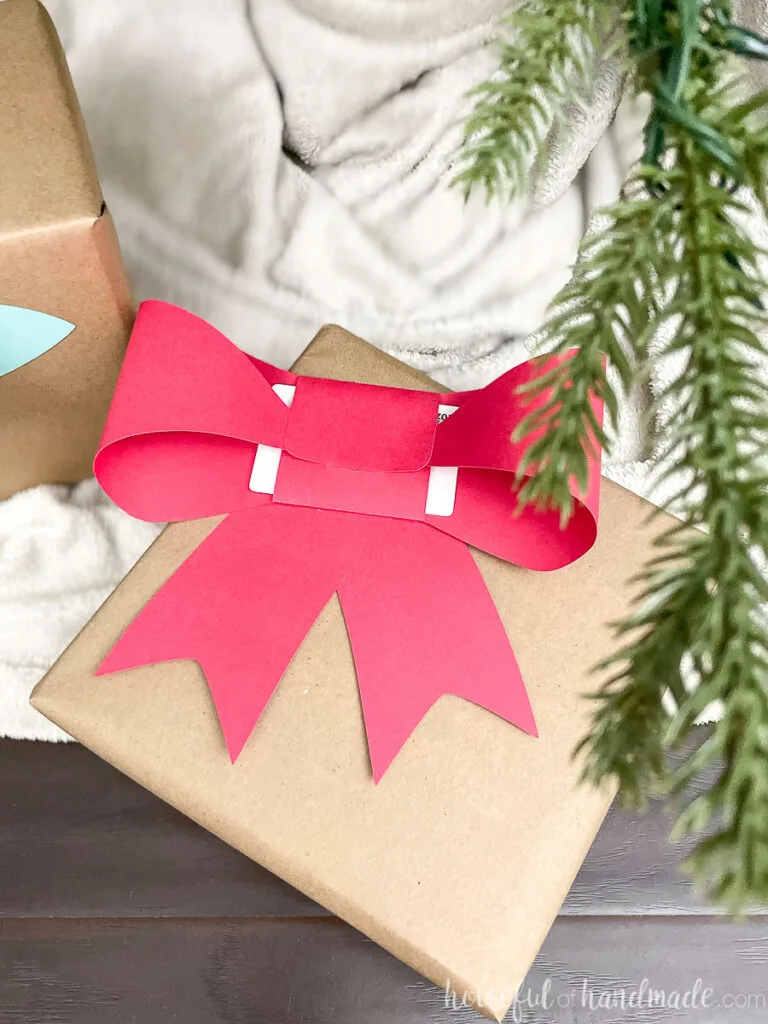
These bows can be placed on top of a present to add a gift card to something else.
Or you can just tuck the giant bows into the branches of the trees to be unwrapped all by themselves on Christmas morning!
Easy Paper Bows
These large paper bows are so simple and fast to make, but they look so amazing. I love this unique way to give a gift card.
Each bow is made from 2 pieces of paper. The final size for the bow with dangling tails is 8″ x 7″ and the bow with straight tails is 4″ x 11″.
The loops on the bows are approximately 2″ tall with their loops.


Each bow folds around a standard gift card/credit card size with a little room to spare. So you could actually fold a few gift cards into one bow if you want.
The paper bows do require some assembly. They are made from 4 pieces so they fit on a standard letter sheet of paper. But the pieces are super quick to glue together.

I prefer to use hot glue to glue them together. It creates a strong permanent hold that drys quickly. Standard school glue might not have the strength to hold up to the pressure of the bow loops.
I love that these bows can be placed on a present or just tucked in the branches of your Christmas tree. Just imagine how cute it would look to have a tree full of bows come Christmas morning!

How to Make Bow Gift Card Holders
Supplies:
- Paper bows template
- Cardstock
- Hot glue gun and glue sticks
- Optional: Electronic cutting machine like a Silhouette Cameo or Cricut Maker
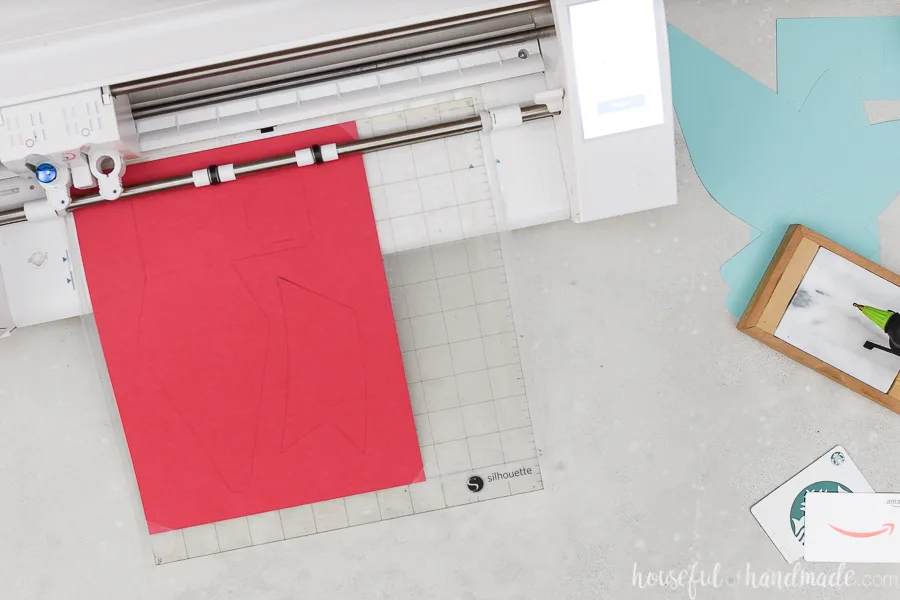
- I love using my Silhouette to quickly cut out paper decor projects, but you can also print the template and cut it out with scissors and an x-acto knife.
Cut out the Pieces
For each bow you will need to cut out the 2 template pages. Each page fits on an 8 1/2″ x 11″ letter sized piece of cardstock.
You could also use regular colored paper in place of cardstock, but your bows will be floppy and may deflate easily.
I used my Silhouette Cameo to cut out the bows on the cardstock setting. But feel free to cut them out with scissors. Then use an x-acto knife to cut the slits.

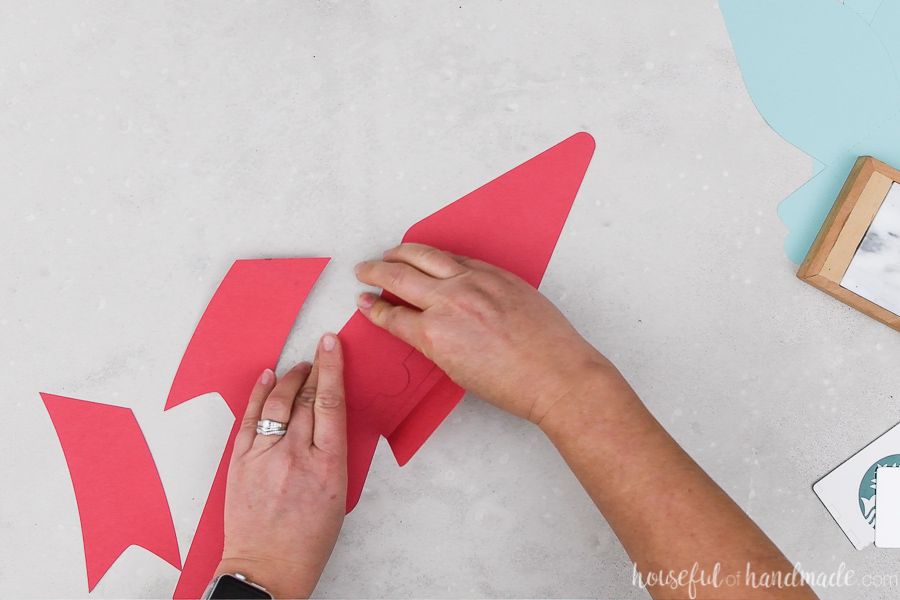
Assemble the Bows
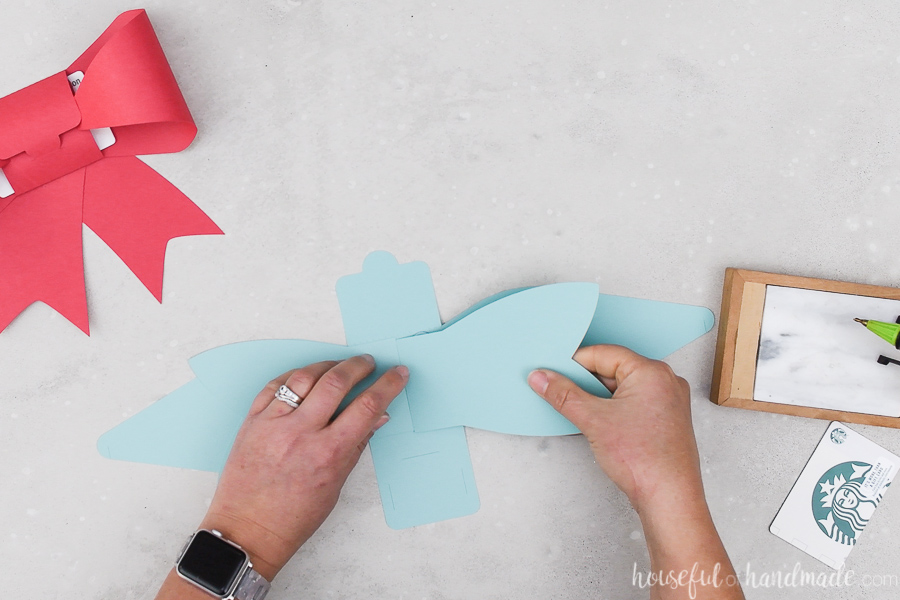
Start by laying the two bow pieces (the L shaped pieces) on top of each other so the two flaps are opposite each other.
Fold along the dotted lines for the flaps so they fold over the front.

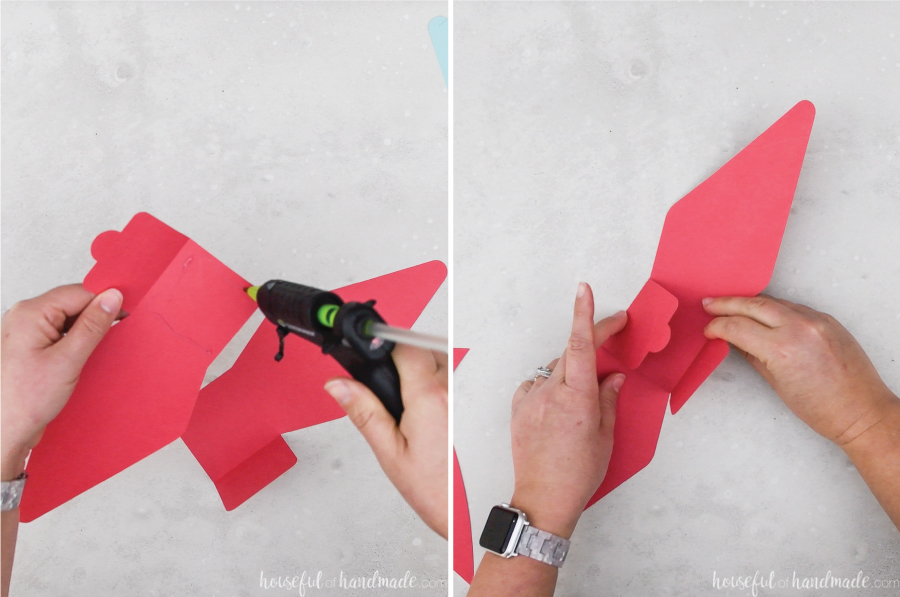
Next glue the two L shaped pieces together. The top should be the piece with the tab on the flap. The bottom should be the piece with the slots on the flap.
Add glue to the center square of one of the pieces and secure it on top of the other. Make sure the flaps still fold over properly.

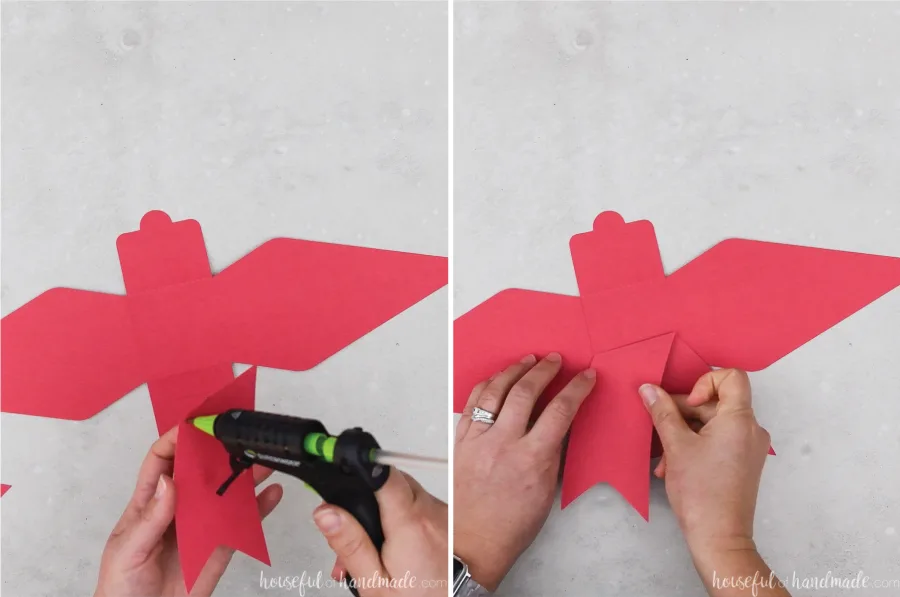
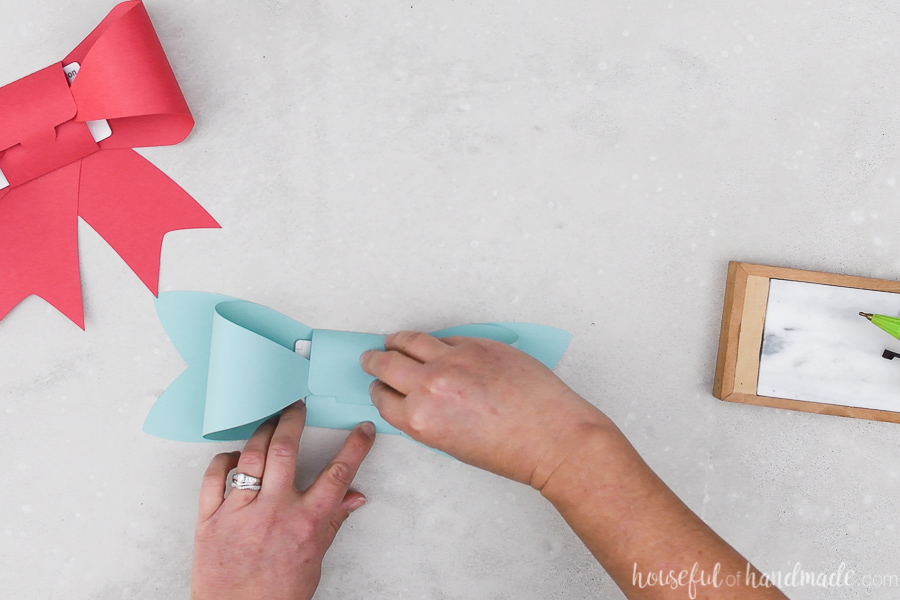
Then flip the gift card holder over and attach the tails. For the bow with the dangling tails, add glue to the top of the tails and secure to the back of the bow where you want them.
Repeat for the second tail on top of the first.

For the bow with the sideways tails, the two tails pieces will meet in the middle of the center square. Line them up, then glue them in place.

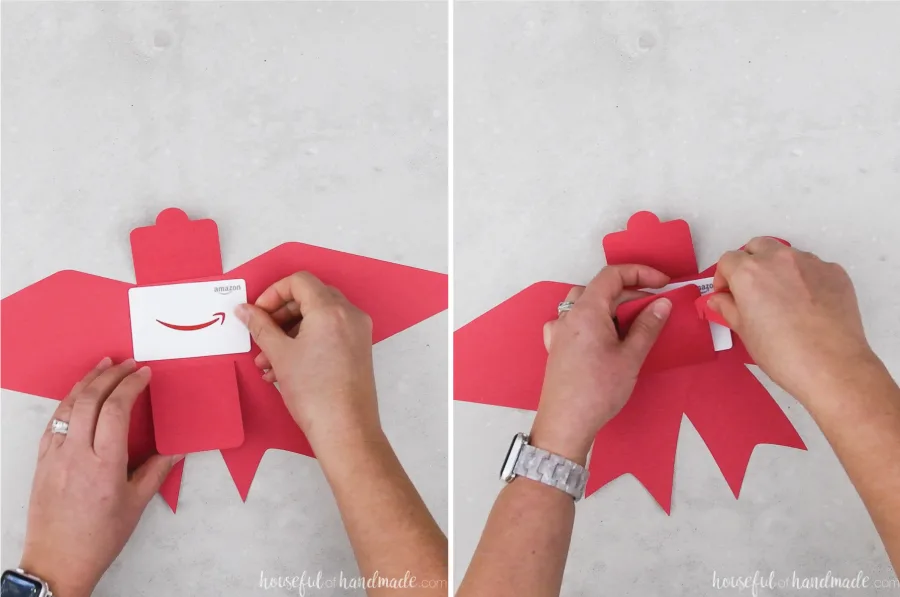
Fold Bows around the Gift Card
Now you can flip the bow over and place the gift card in the center. If you want, you can use a piece of double-sided tape or tiny dot of glue to secure it.
Then fold the sides of the bow toward the center. Insert the sides into the slots and slide them to connect with the slit on the sides.
Repeat for both sides.

An all that is left is to fold the top flap down over the front and insert the tab in the slot.

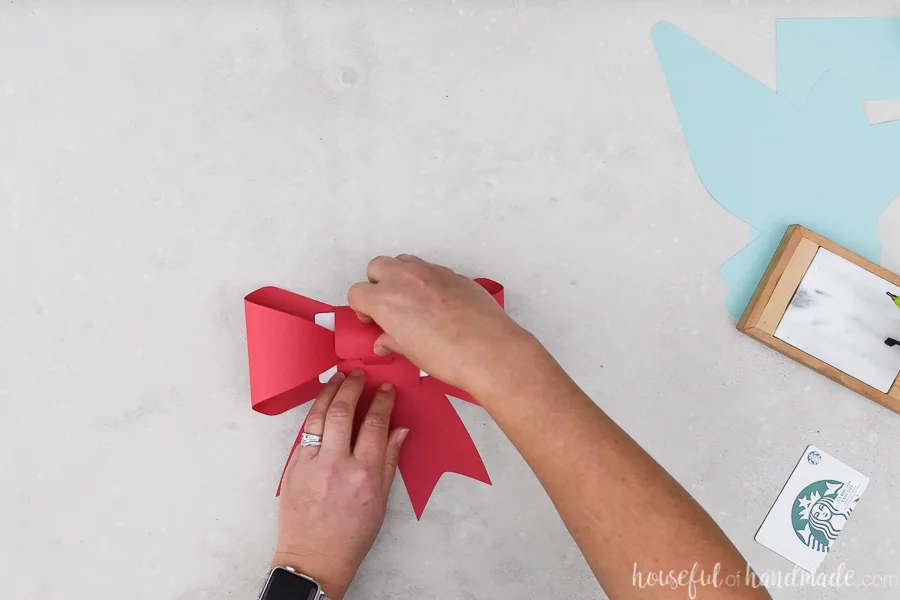
For some of my bows they held just fine with the tab in the slot, but for one of them the tab kept sliding loose. You can glue the tab to secure or add a cute sticker over the top!

These large paper bows are so cute. Now I want to add a gift card to every present I give… I might have just created more work for myself with another cute DIY!
However you decide to use the bow shaped gift card holders, they are definitely a fun and unique way to give a gift card this season.
Happy gifting!