Thanksgiving is right around the corner! Even though I like to use disposable napkins for Thanksgiving (we have a big family), I still wanted them to be festive.
So to add a little flair to our Thanksgiving table, I made these Homemade Decorative Napkins. They are fun and quick to make from a DIY stamp. Or you can easily use a purchased stamp too.
Now we are ready for the turkey and family to come together!
This post may contain affiliate links. As an Amazon Associate I earn from qualifying purchases. Click here to read my full disclosure policy.
As much as I love cloth napkins, I really love the convenience of paper napkins. Kids can be so messy!
I would be doing laundry forever if we used cloth napkins. And when we have lots of guests over (like for Thanksgiving dinner) I just don’t have that many cloth napkins in my arsenal.
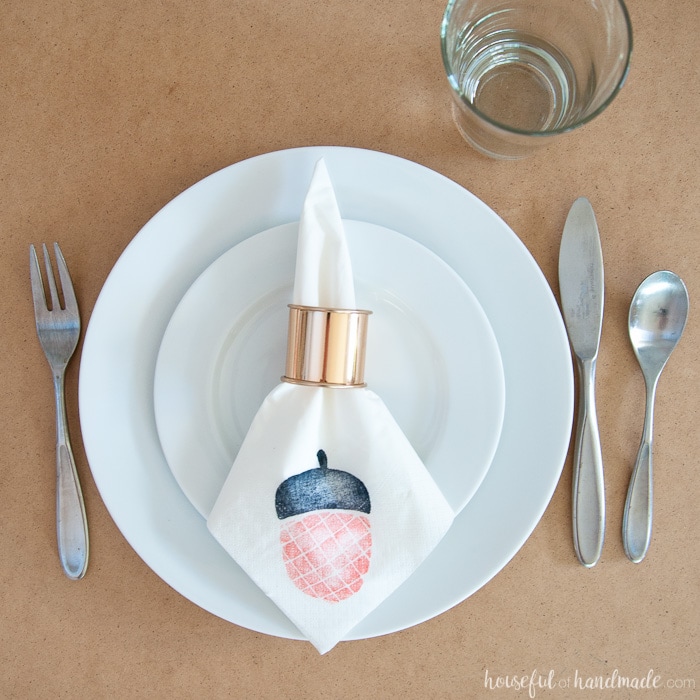
I thought it would be fun to decorate paper napkins so that they can be festive for the holiday. The next question was how to decorate napkins? That is where my Silhouette came in.
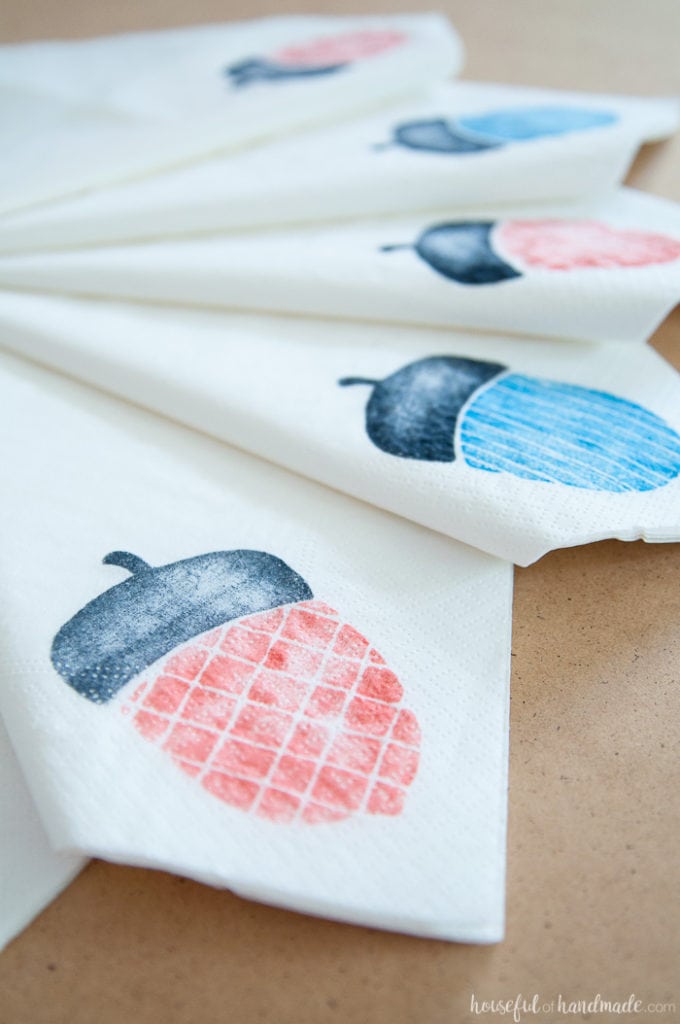
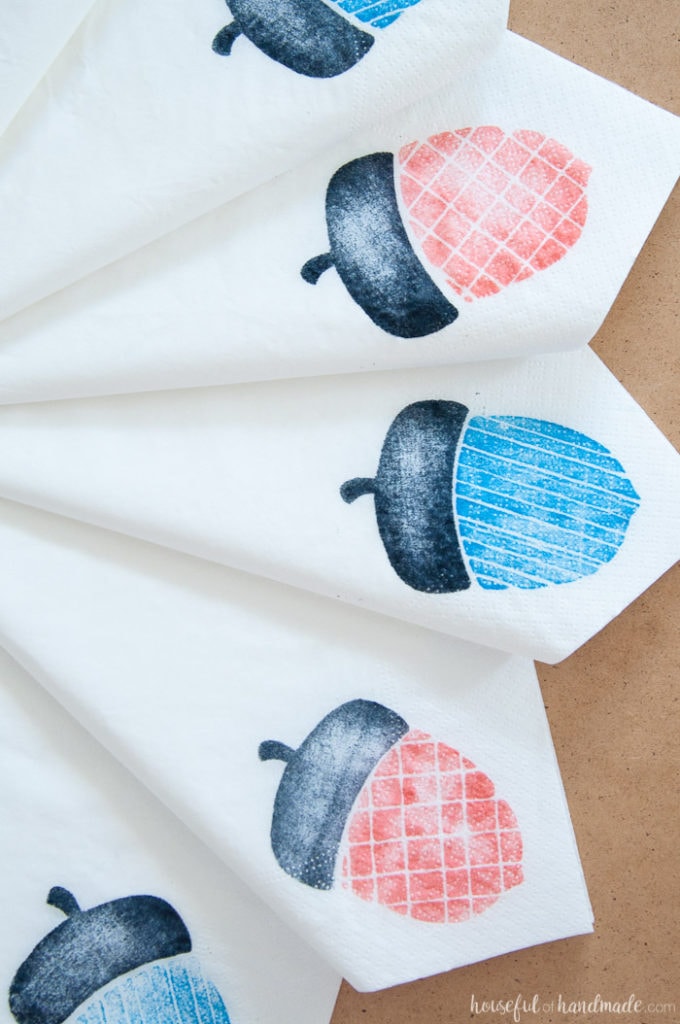
By making a few simple stamps (out of the acorns I designed for this month’s free digital backgrounds) I was able to make the perfect homemade decorative napkins for Thanksgiving. And they were so easy to make!
DIY Foam Stamp
This project is actually 2 tutorials in one. First I will show you how to easily make foam stamps on your Silhouette cutting machine.
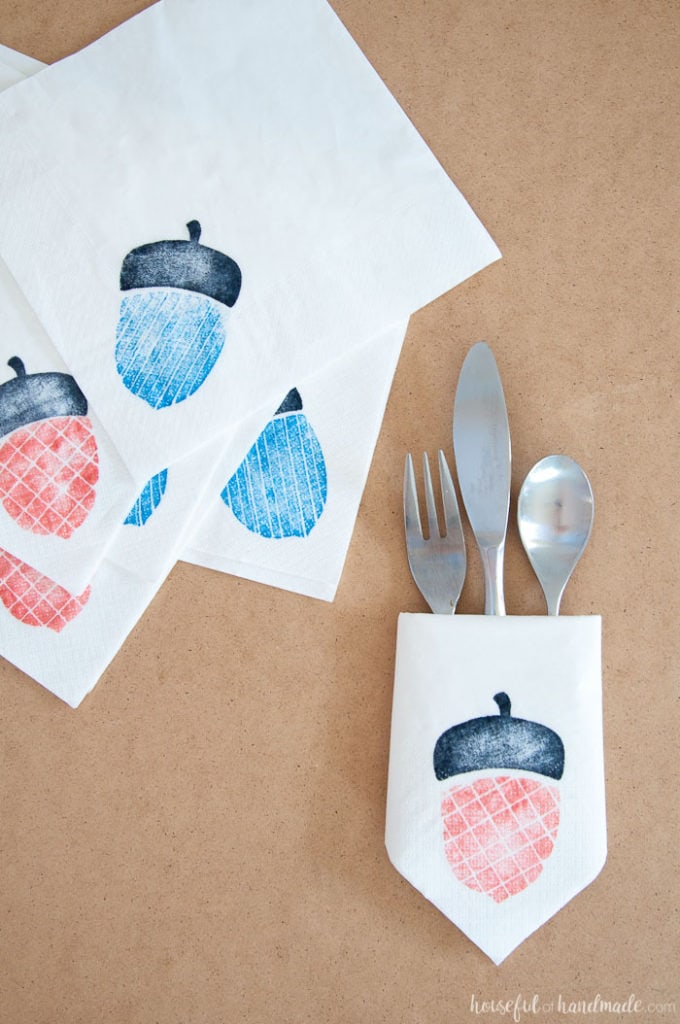
Then I will show you how easy it was to decorate paper napkins for our Thanksgiving table (I even decided to do a video for you, yeah). But it doesn’t stop there, I’m going to be using this method to decorate napkins for every holiday.
Or even custom birthday, baby shower, or wedding napkins. The possibilities are endless!
And bonus, these custom decorative paper napkins are so easy to make, you can have your kids work on them while you cook the turkey.
My kids were having so much fun making them. I have a feeling we are going to have so many custom acorn napkins that we will be using them until summer. Oh well, at least they are having fun!
How to Make a Foam Stamp
Supplies:
- Electronic cutting machine like a Silhouette Cameo or Cricut Maker
- Artwork for stamp
- The cut file for the acorns I used are available in my library of free downloads and printables. Click here to subscribe and get access to this download and so much more.
- Extra thin craft foam
- The large foam sheets can be too thick to cut with your Silhouette, but you can find extra thin little sheets in a pack for just a few dollars.
- Packing tape
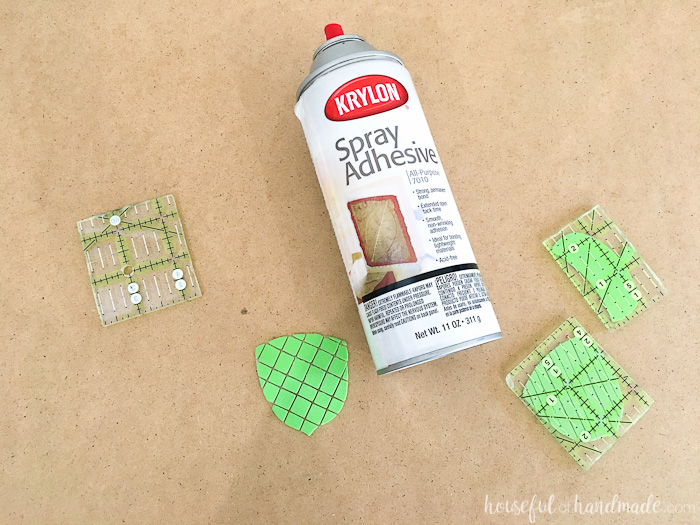
- Spray adhesive
- Hard piece of plastic or wood
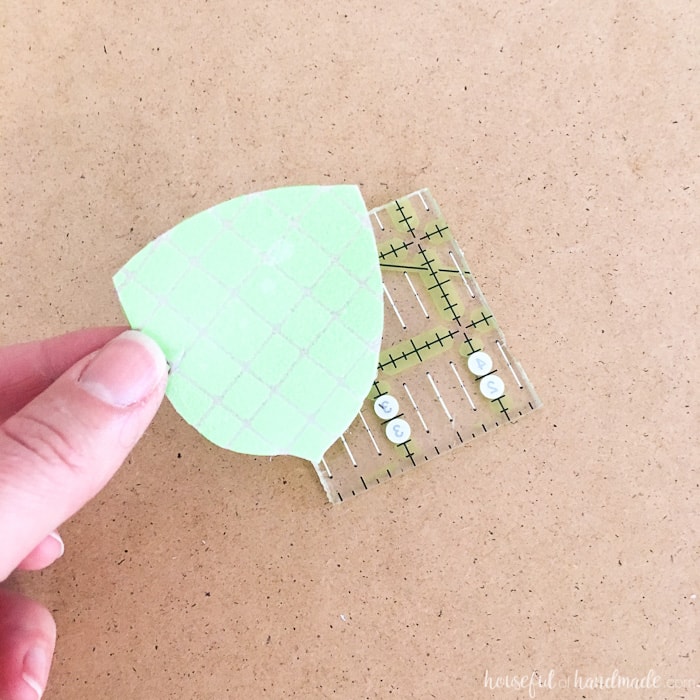
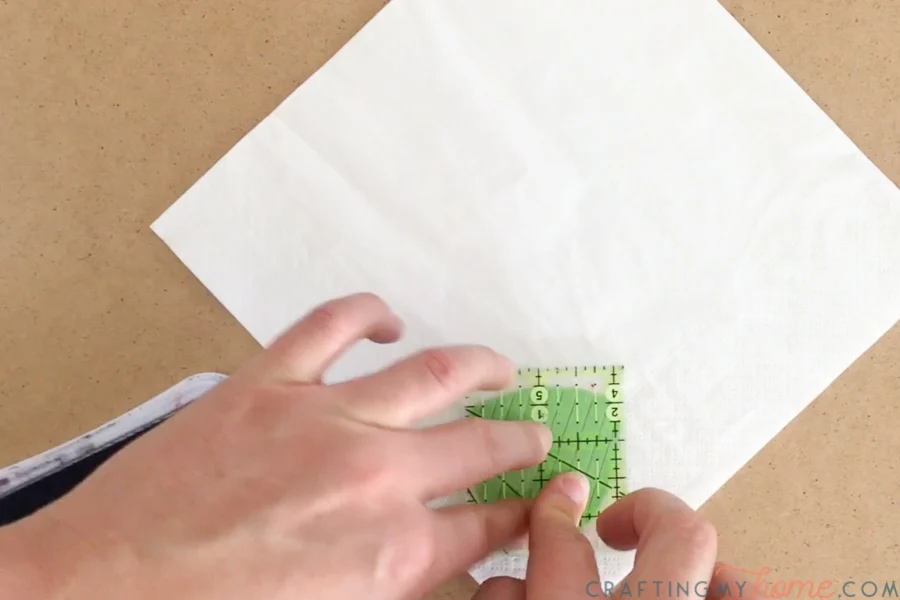
- I used a piece of broken quilters ruler as my backing so I could see through it to line up the second part of the design. You can also use pieces of thick plexi glass or wood as a backing, just cut it to the size you need.
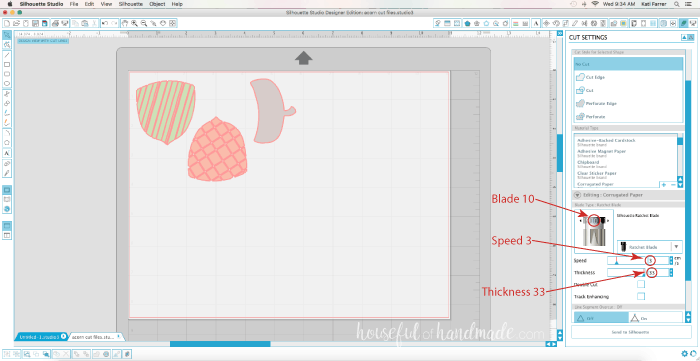
Open your design in the cutting software. Make it the size you want your finished stamp.
Place the foam on your cutting mat. Cut the design out on the extra thin craft foam using the following settings:
- Blade depth: 10
- Cutting thickness: 33
- Speed: 3
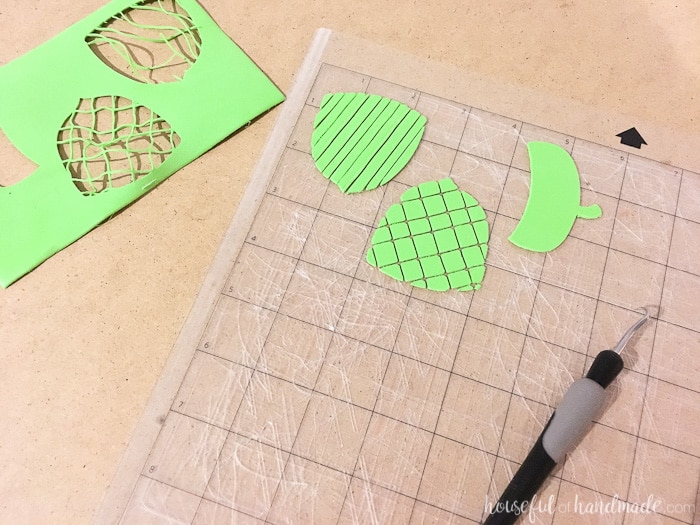
Leave the foam on the cutting mat and weed out the extra around the design.
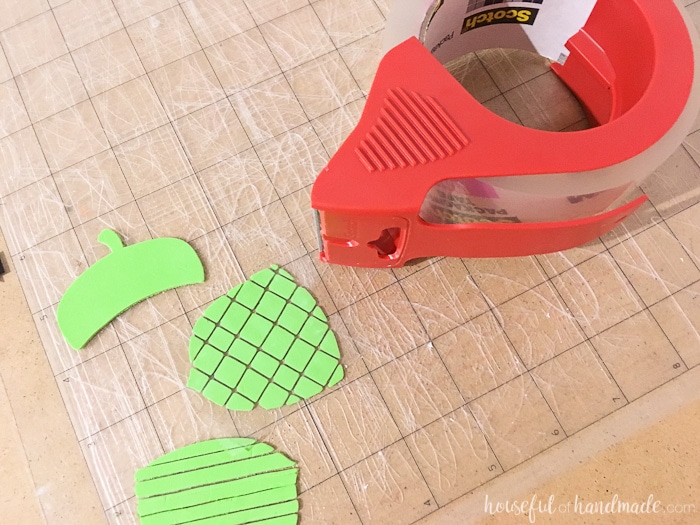
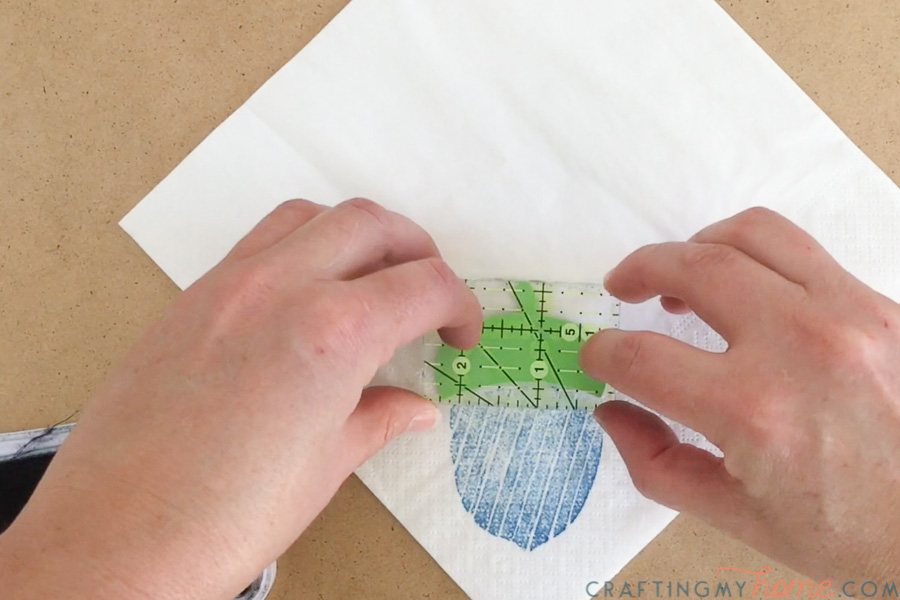
Take a piece of packing tape (or more if your design is large) and lay it on top of the foam. Make sure there is packing tape over all the pieces of the design.
Carefully pull the packing tape and foam off the cutting mat. Trim away any excess tape from around the outside of the design.
Spray glue on the smooth back of the packing tape and stick it to the piece of hard plastic or wood that you are using as the back of your stamp.
The spray adhesive will take a few minutes to dry. Leave the stamp with the foam side down to apply pressure while it drys. The stamp may wiggle around on the backing if not fully dry because of the smooth side of the packing tape.
Once dried, your new stamp is ready to use to make these homemade decorative napkins!
How to Make the Decorative Napkins
Supplies
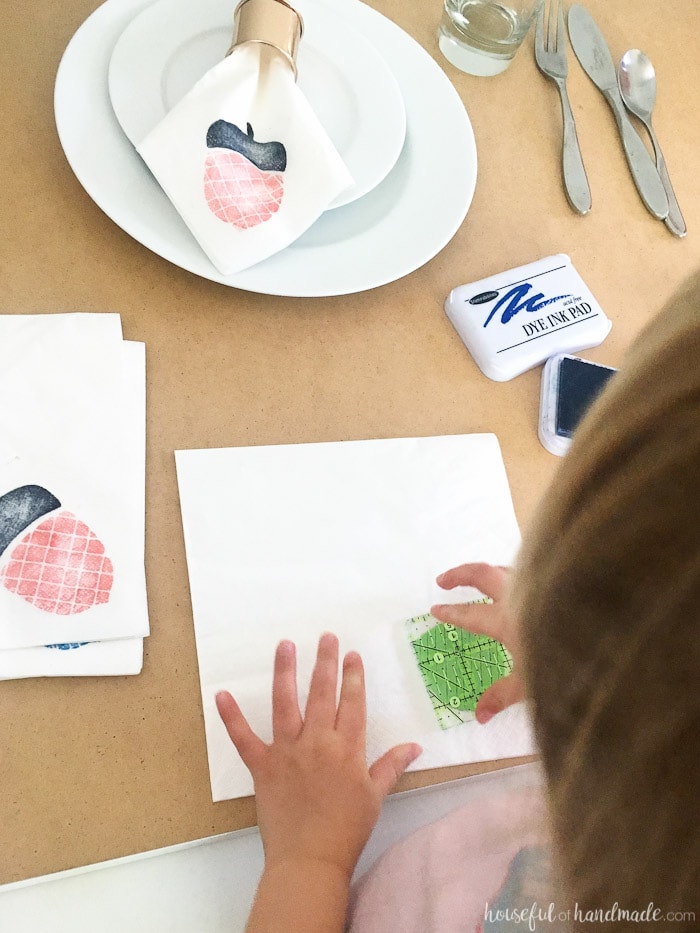
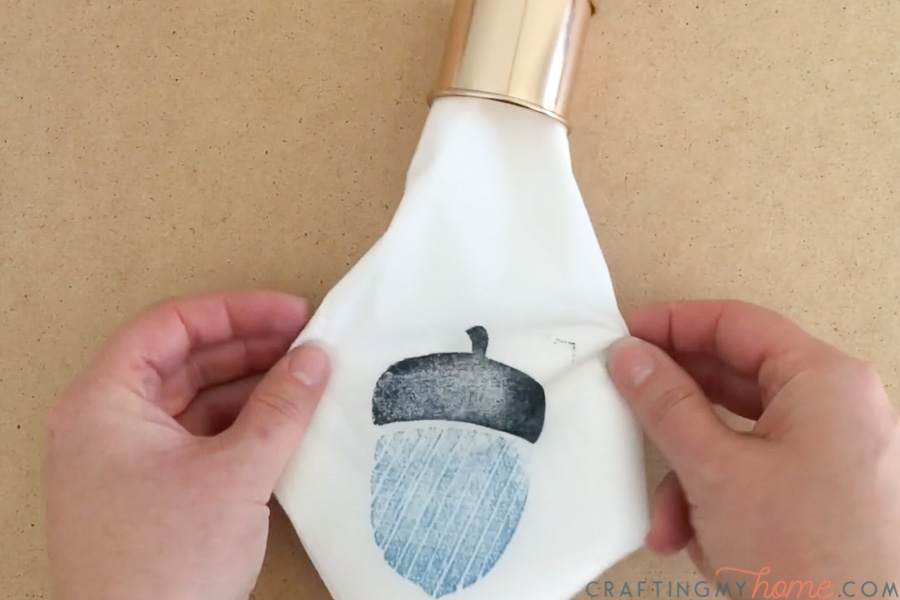
Use your new custom stamps to add a festive decoration to your paper napkins.
Place the stamp on your stamp pad.
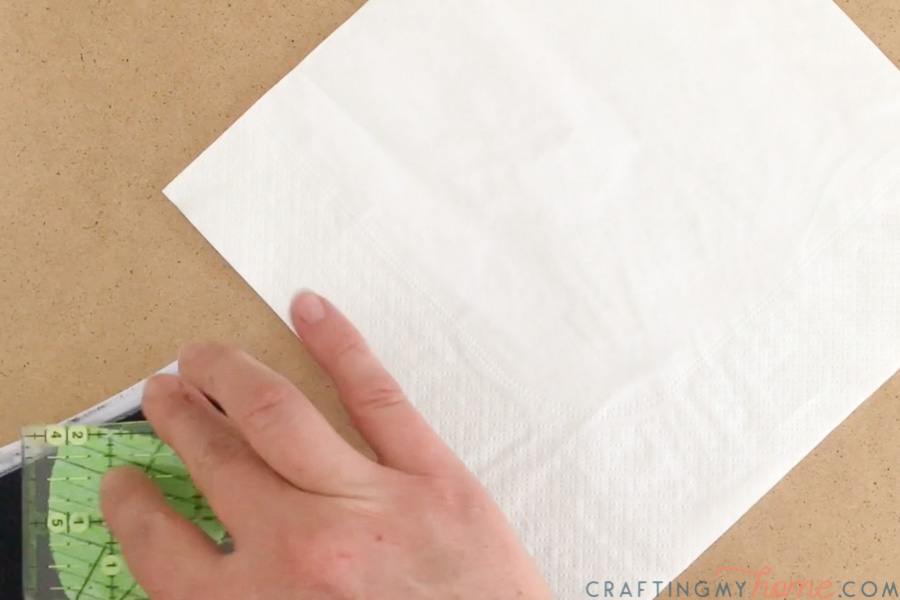

Carefully place the stamp on the napkin. Press firmly.

Repeat for the other pieces of the stamp.

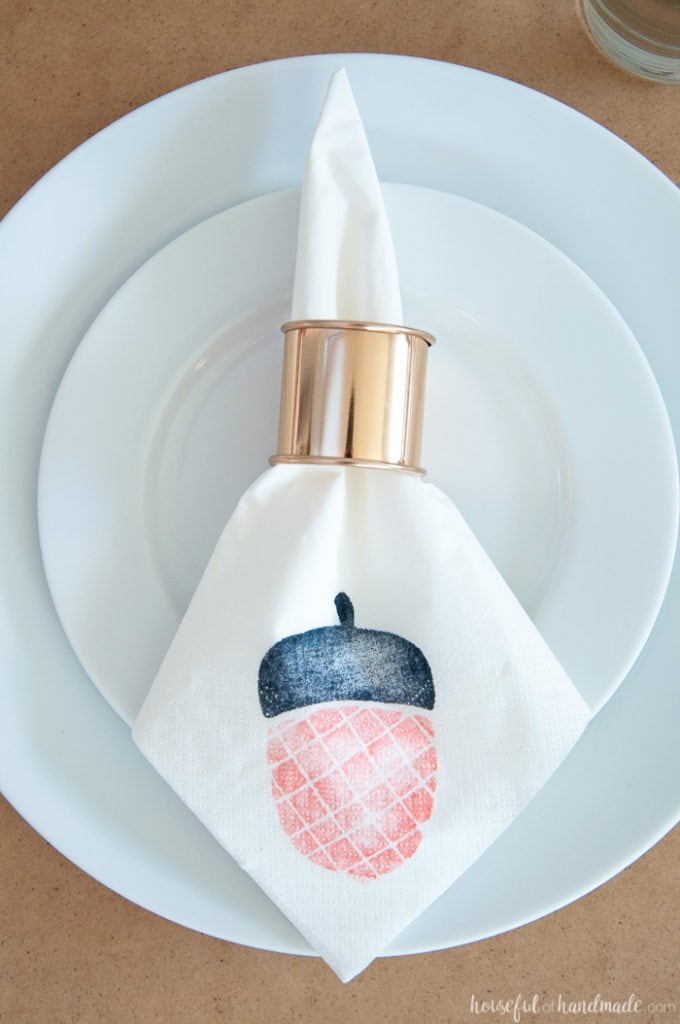
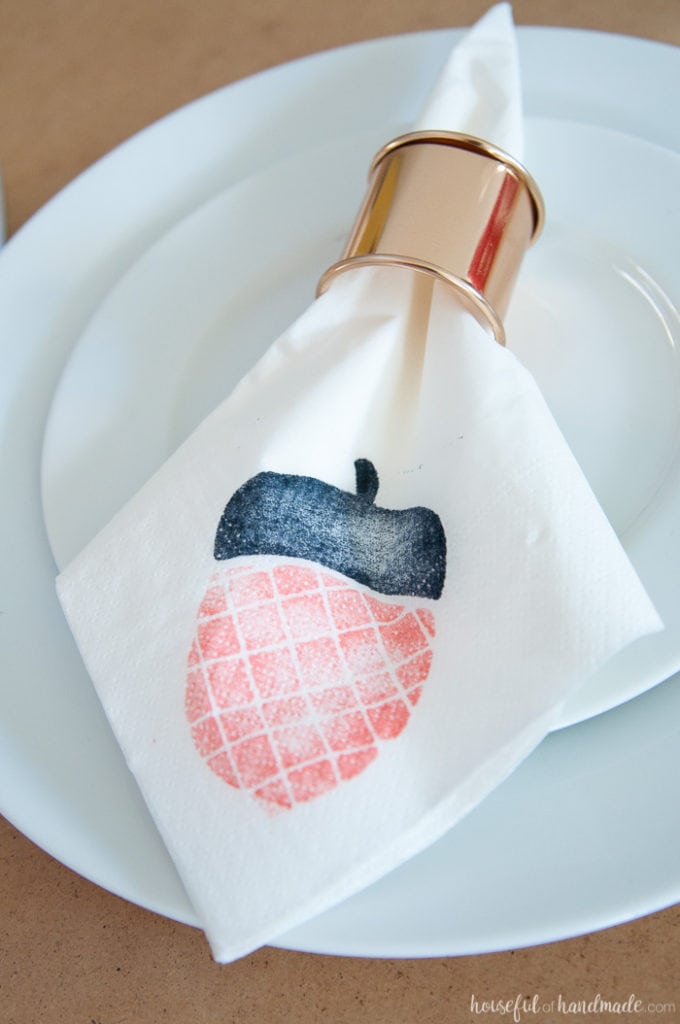
Let the ink dry, then fold or insert your napkin into a napkin ring to set the table!
Now the only thing I have left to do before the the big dinner is decide what recipes I want to make 🙂
Happy Holidays!
Marie
Monday 14th of November 2016
These are sooo pretty! I totally didn't realize that they were paper napkins at first. That's brilliant! Thanks for sharing with us at Merry Monday this week!
Kati
Sunday 20th of November 2016
Thank you Marie! I love that the paper napkins can be pretty.
Erica @ Dwell Beautiful
Friday 11th of November 2016
Oh these are too cute! Love the idea of dressing up plain paper napkins - all the style without all the laundry! :)
Kati
Saturday 12th of November 2016
Thank you Erica! I am a huge fan of dressing up things without creating extra laundry ;)
Cat @ Pocketful of Posies
Thursday 10th of November 2016
These are so cute Kati! I would have never thought to decorate paper napkins, and for the life of me, I don't know why! It is a brilliant idea! I love the idea of cloth, but I know my guests and mostly my hubs would never treat them with care. He would be more likely to mop up a gravy spill with them! Then they're ruined. I love this idea! All the elegance of cloth none of the fuss!
Kati
Saturday 12th of November 2016
Thanks Cat! My kids would be the first to use the cloth napkins to clean up an awful mess too!
Kim Young
Thursday 10th of November 2016
LOVE this idea! I'm with you on the napkins - we have a large family and washing all of them is quite the chore. I love all of the things you could do with this idea. So fun!
Kati
Saturday 12th of November 2016
Thanks Kim! I'm glad I'm not the only one who doesn't want to spend all that time doing laundry :)
Amy @ My Life From Home
Thursday 10th of November 2016
Wow! I never would have thought to do that! Amazing and I love it can be used over and over again! Great job!
Kati
Saturday 12th of November 2016
Thanks Amy! I am excited to use this little trick all the time now :)