Decorate your kitchen for fall with these gorgeous DIY pumpkin tea towels.
When decorating for the season, don’t forget to add touches of fall to your kitchen. And what is easier than adding some amazing pumpkin tea towels.
Tea towels are so fun to make. I have made custom fabric for DIY tea towels and created a stencil for decorating bakery tea towels.
So it just made sense to have fun making more tea towels for Day 3 of the 5 Days of Pumpkin Crafts series. This time, the pumpkin is stealing the show!
This post may contain affiliate links. As an Amazon Associate I earn from qualifying purchases. Click here to read my full disclosure policy.
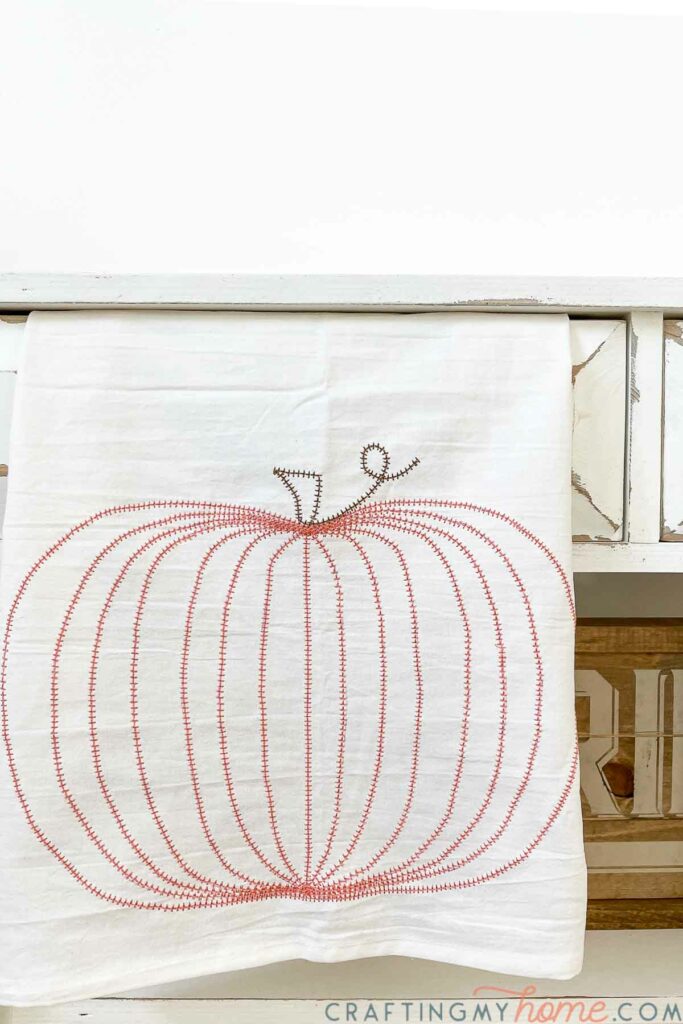
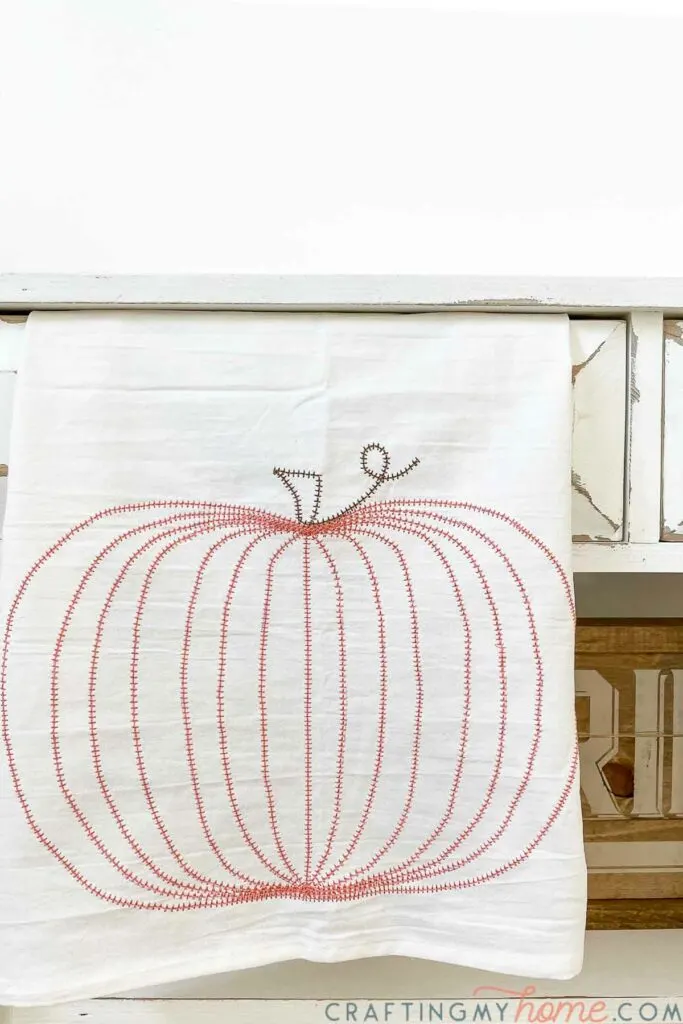
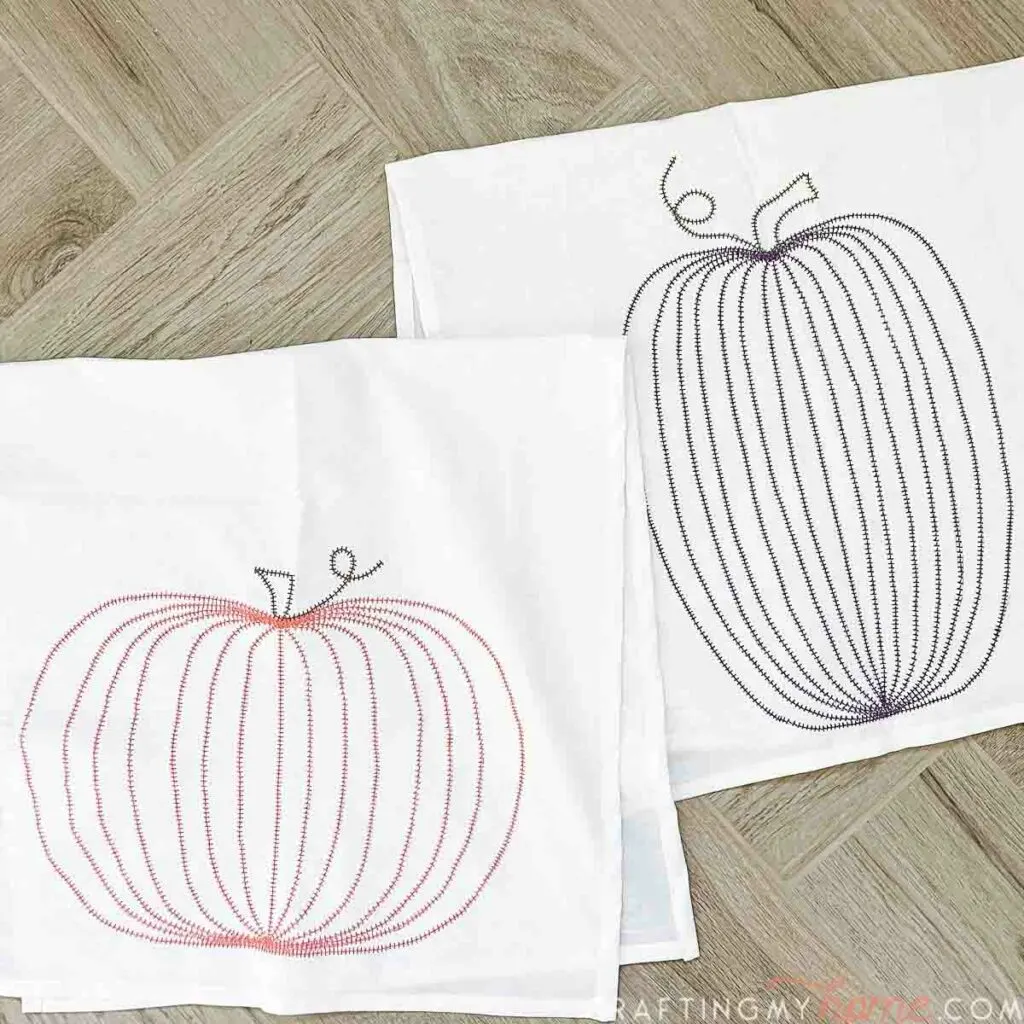
DIY Embroidered Pumpkin Design
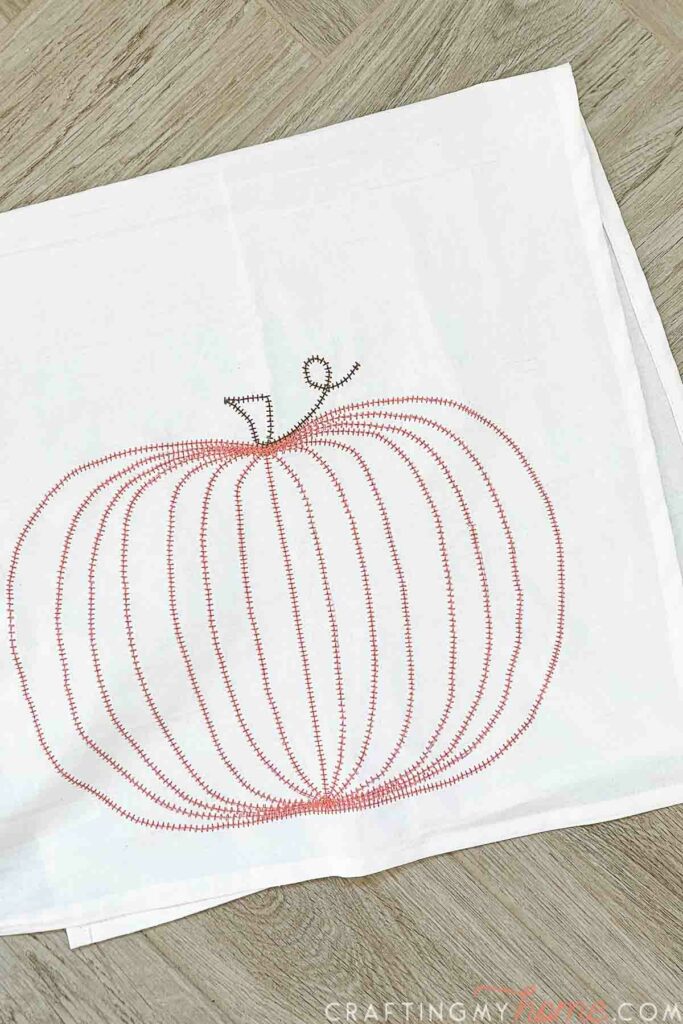
I wanted these tea towels to look like embroidered teat towels, without having to have an embroidery machine. I guess that makes this DIY embroidery!
At first I thought about couching a cord onto the towels like I did for this DIY spiderweb throw pillow. But the cording added more weight than I wanted for a kitchen towel.


If you like hand embroidery, you could definitely do that for this design also, but I never got the hand for it. So I turned to my sewing machine.
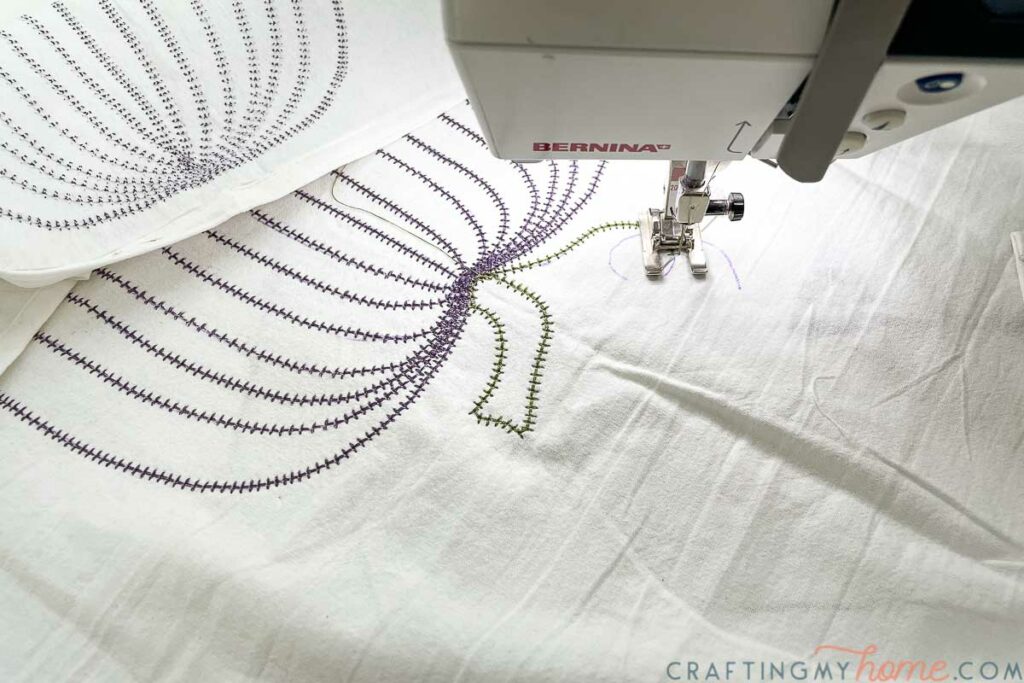
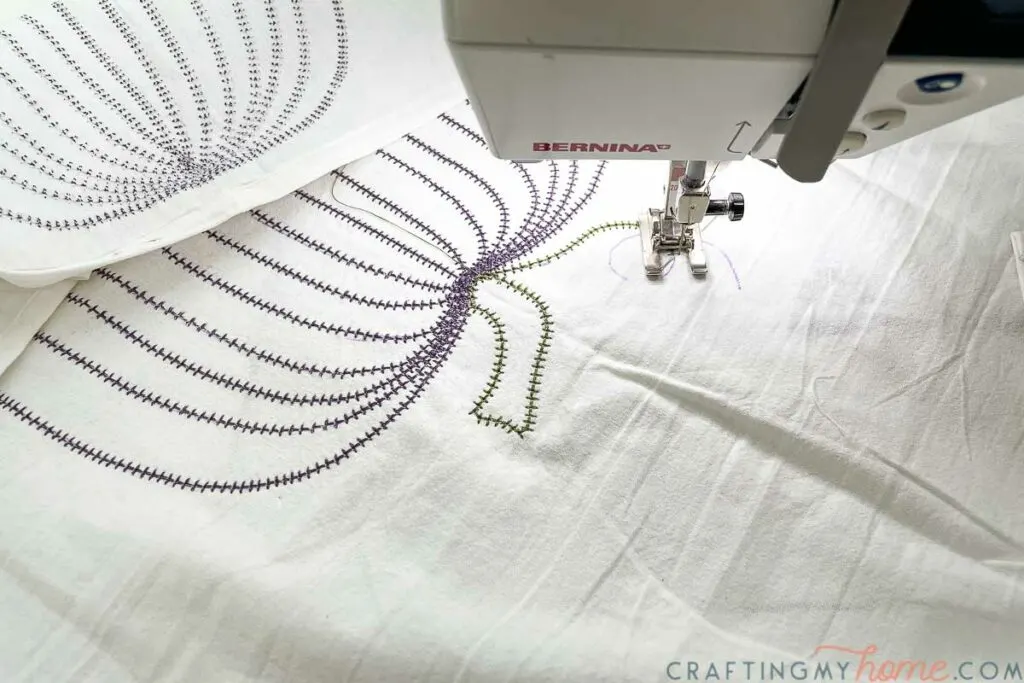
Most sewing machines have a selection of decorative stitches. These stitches can be sewn in a pattern to create an embroidered look. And it worked perfectly for this pumpkin line design.
Since I was initially planning on using couching for the pumpkin tea towels, I created the design so it was a continuous line. You start at one point and sew in a circle until you finish at the center at a stopping point.
Embroidery with decorative stitches
You can use any decorative stitch your machine has, the one I chose is similar to a blanket stitch but with lines going out both sides instead of just one (but a blanket stitch would also look awesome for this design).
If your machine does not have any decorative stitching, you can compete the design with a zig-zag stitch. Use a scrap of fabric to play around with the zig-zag width and stitch length until you find something you like.
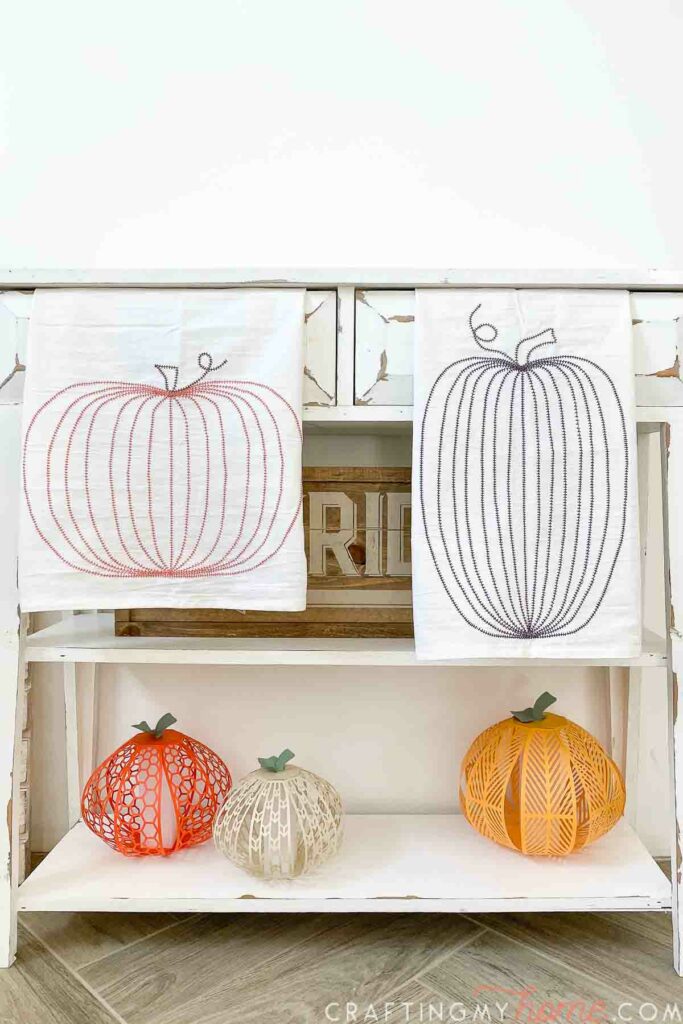
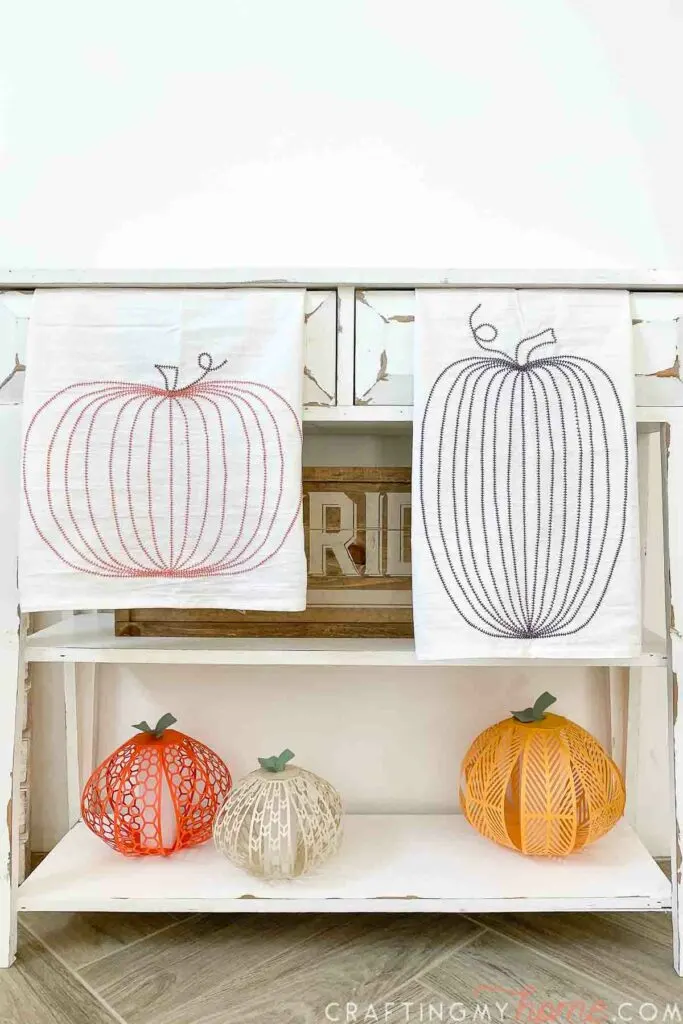
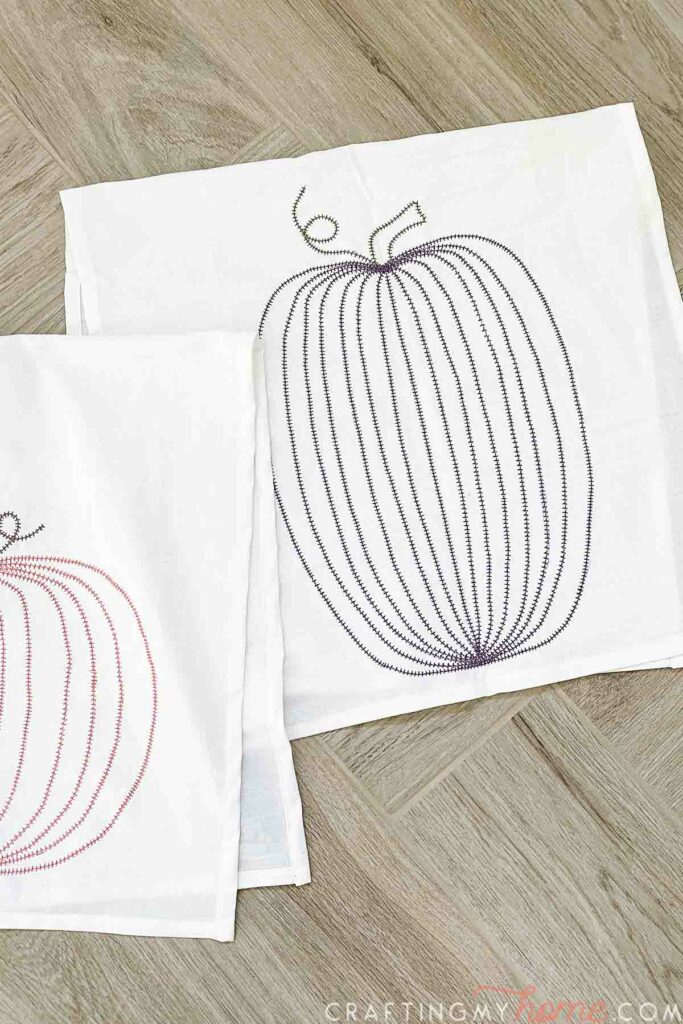
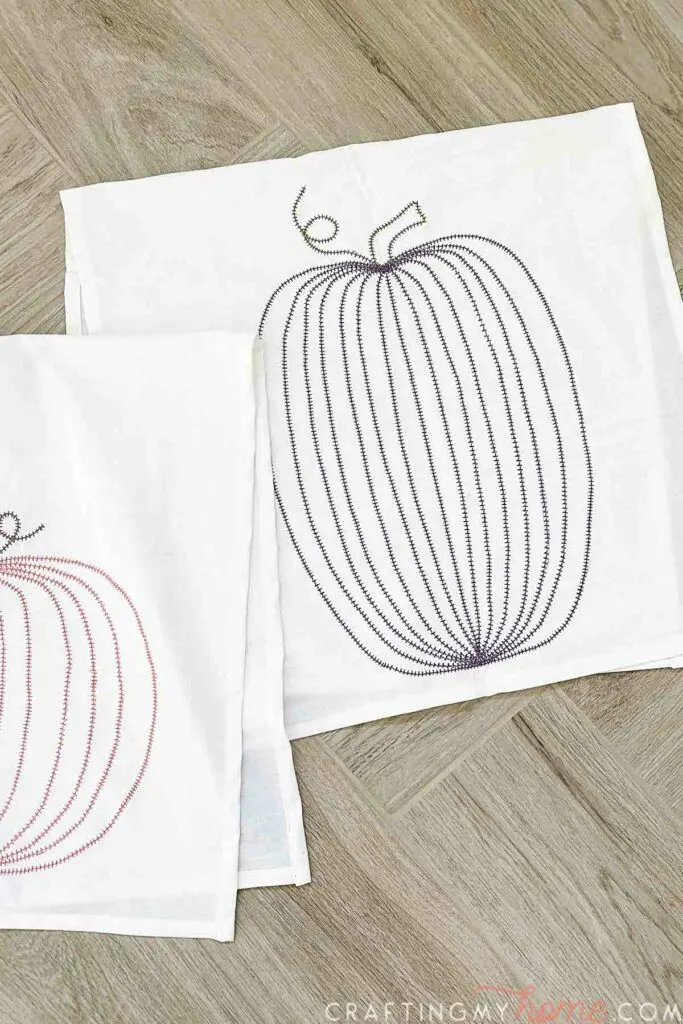
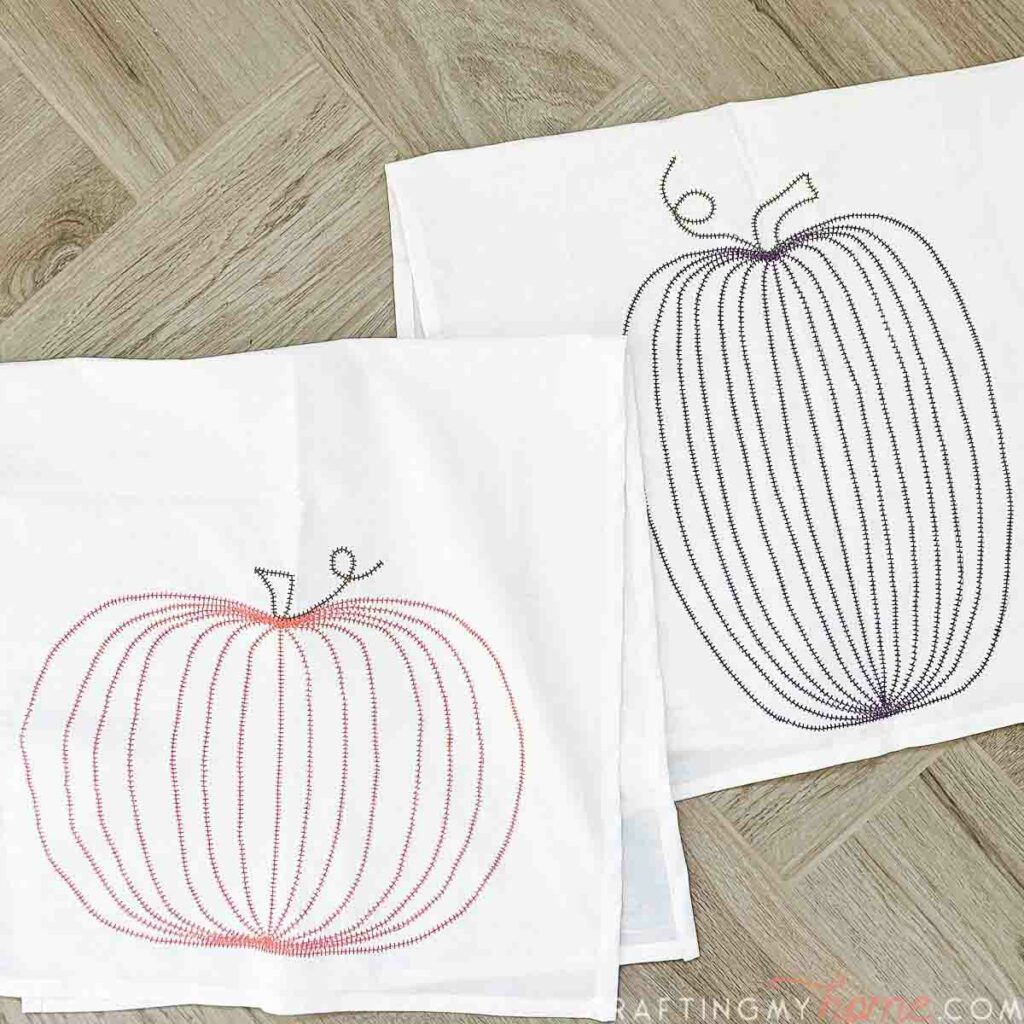
And have fun with the colors too. I didn’t want to purchase thread, so instead of two different orange pumpkins, I have a coral colored one and a purple one.
I think the purple gives a nod to Halloween without being spooky. And the colors work well with my homes decor.

5 Days of Pumpkin Crafts
To get your home fully decorated for fall, I am sharing a new pumpkin craft tutorial every day this week! Yay for all things pumpkin!
Here are the other amazing pumpkin projects in case you missed any:
- Day 1: Modern Pumpkin SVG
- Day 2: Beautiful Paper Pumpkin Lanterns Craft
- Day 3: DIY Pumpkin Tea Towels
- Day 4: Neutral Pumpkin Patch Printable Art
- Day 5: Simple Halloween Signs from Paper
How to Sew Pumpkin Tea Towels
Supplies:
- Pumpkin sewing pattern
- I am sharing the PDF for these pumpkin tea towels in my subscriber library until 10/23/2021, then they will move to the shop. Click here to subscribe to my newsletter and gain access to all the freebies. If you already have your password, click here to go to the library download them.
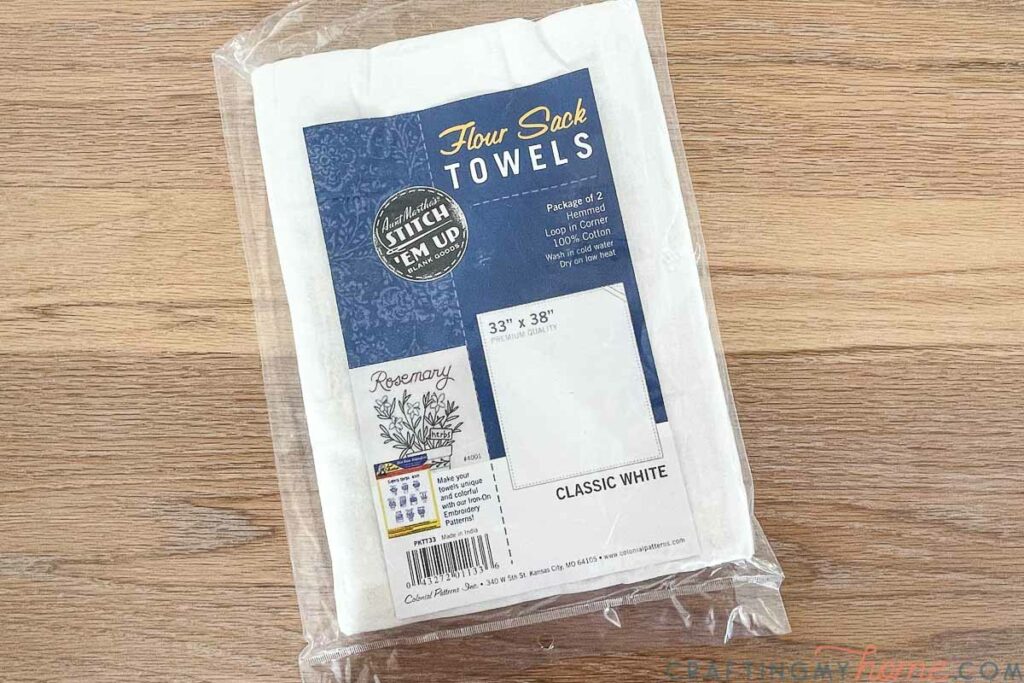
- White cotton tea towels
- Printer
- Tape
- Disappearing ink fabric marking pen
- Colored sewing thread
- Tear away fabric stabilizer
- Sewing machine
- If you do not have a sewing machine, you can always hand-embroidery the pumpkin design on your tea towels.
For my towels, my local store was out of the smaller size so I bought these larger 33″x38″ flour sack towels. Then I cut them in half to make smaller ones.

Prepare the pattern
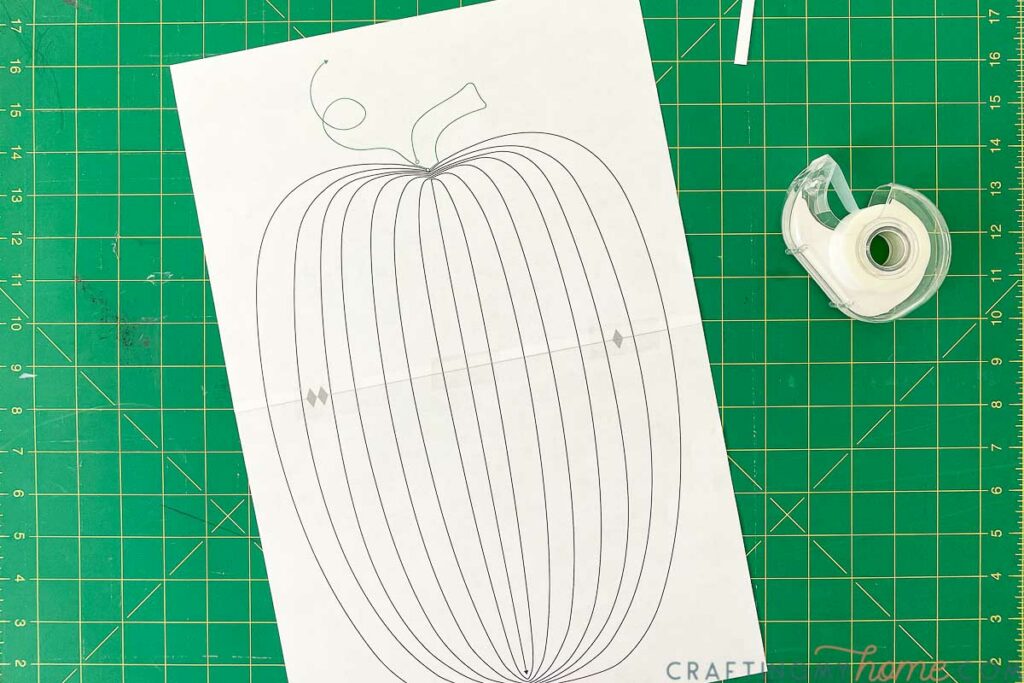
The large pumpkin sewing design is printed on two 8 1/2″x11″ papers.

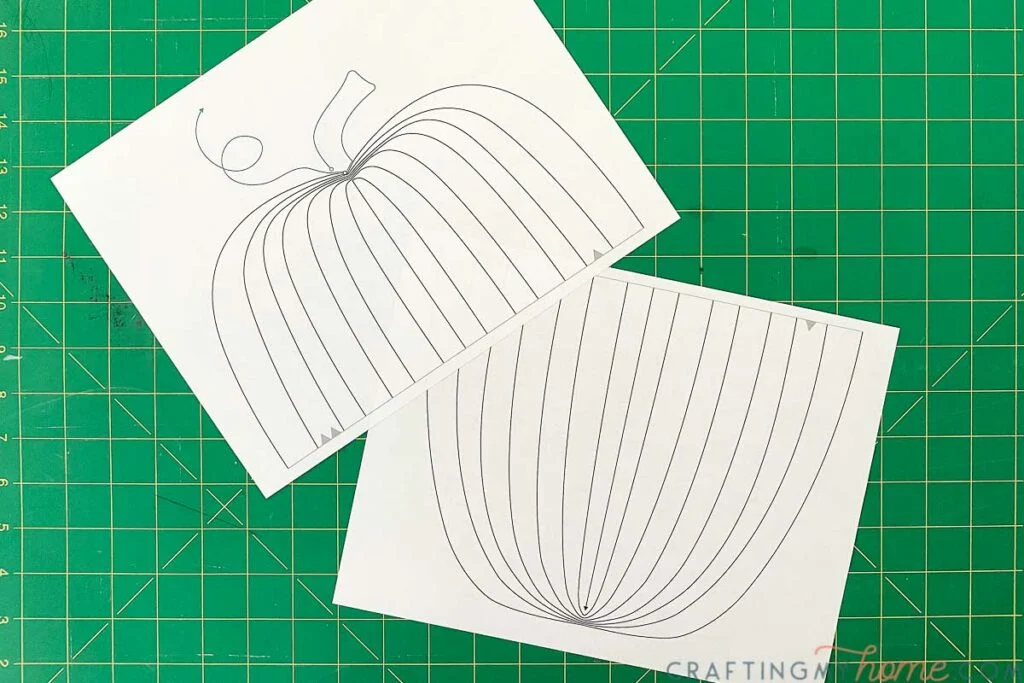
Cut along one of the papers on the gray line. Then line the two pieces together matching the triangles.
Secure with a few pieces of tape.
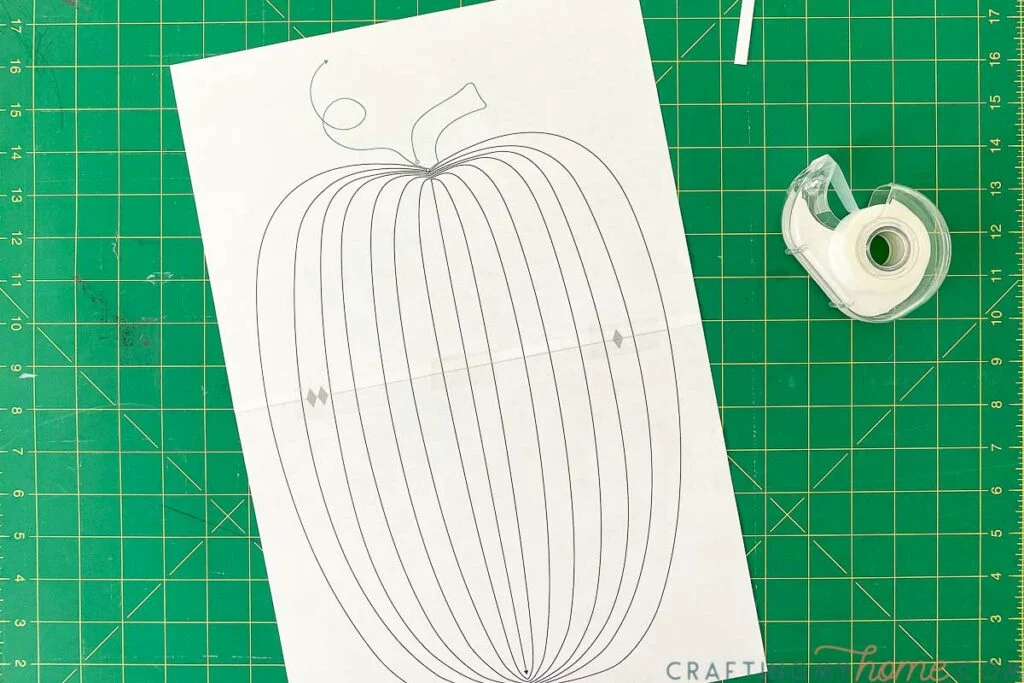
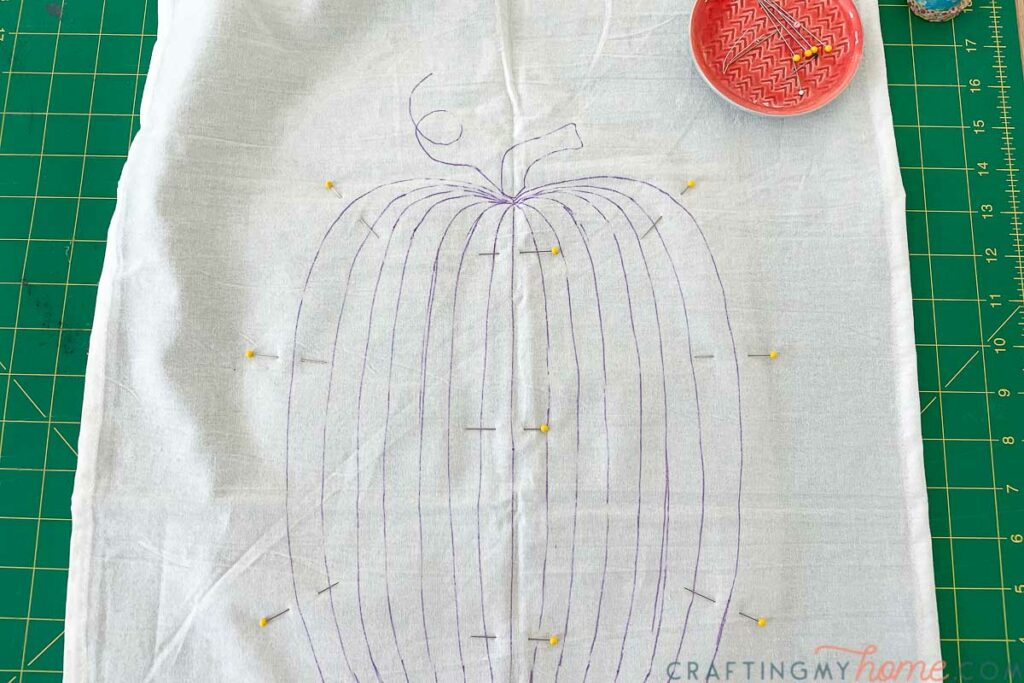
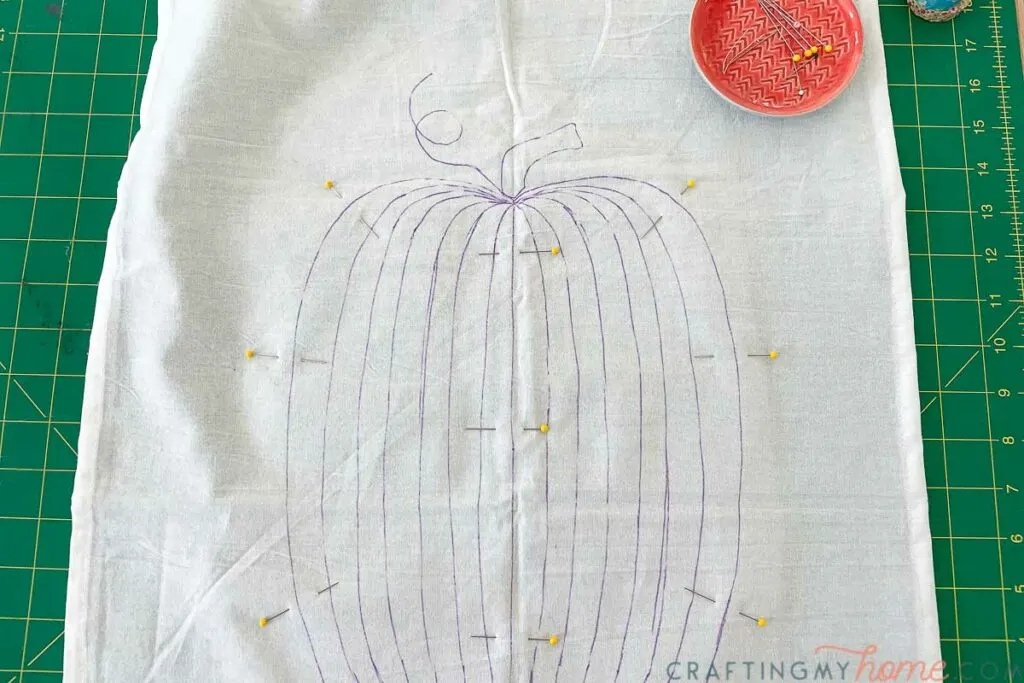
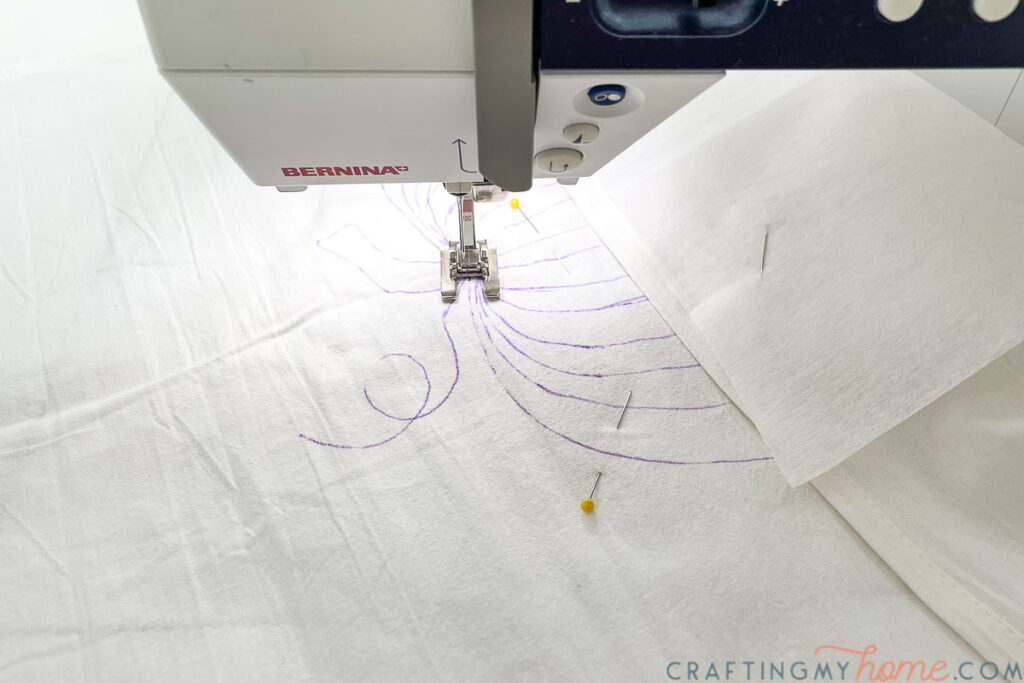
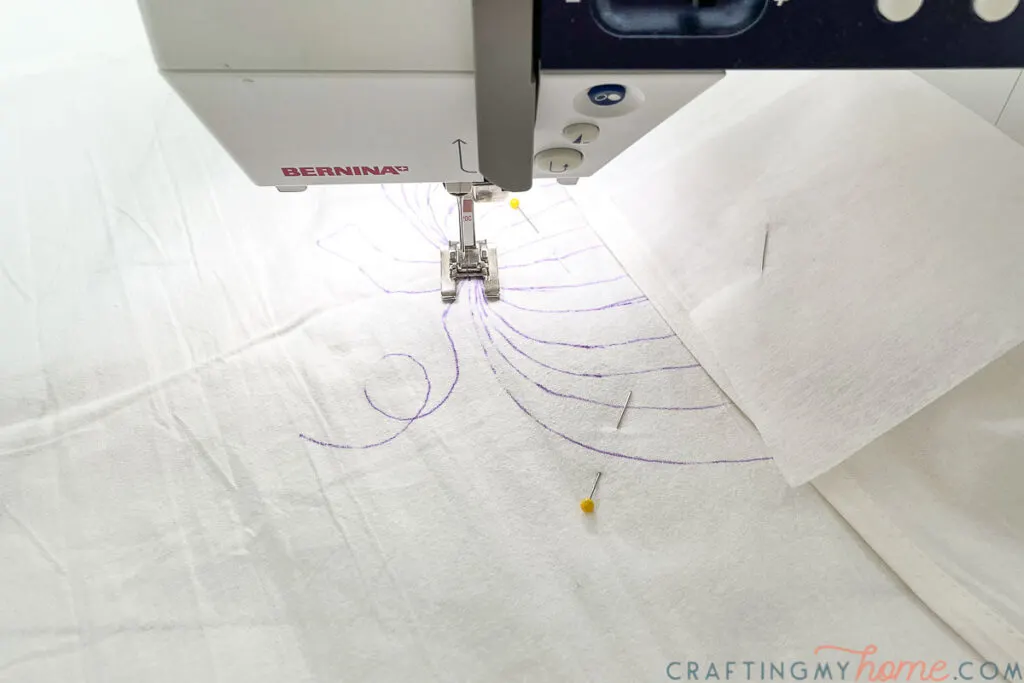
Lay the design under your tea towel and center.
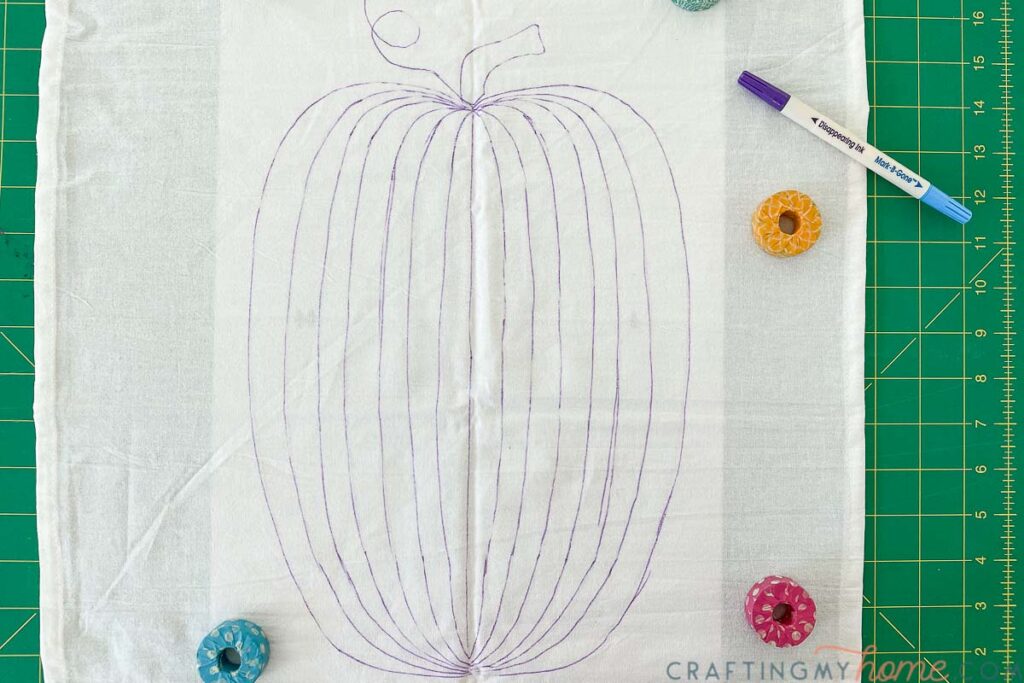
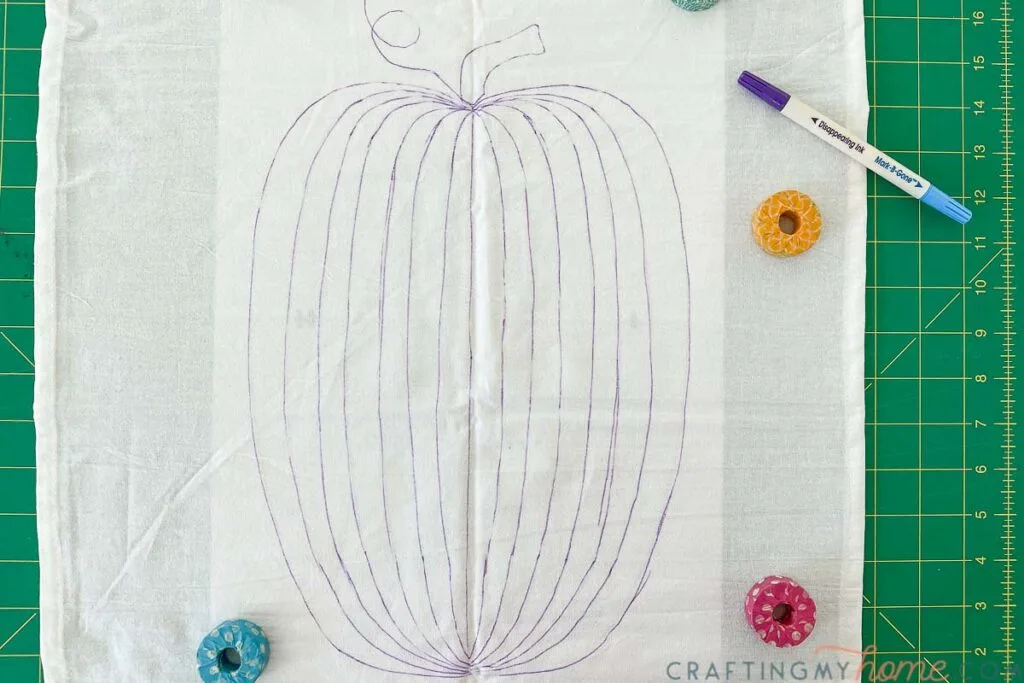
Using the fabric marking pen, start tracing the design onto the tea towel. If you are having a hard time seeing the design, use a light table or place the design on a window to trace.
If you are planning on sewing right away, use a disappearing fabric marking pen. If not, you can use a fabric pen that disappears with water so it does not disappear before you are done sewing.
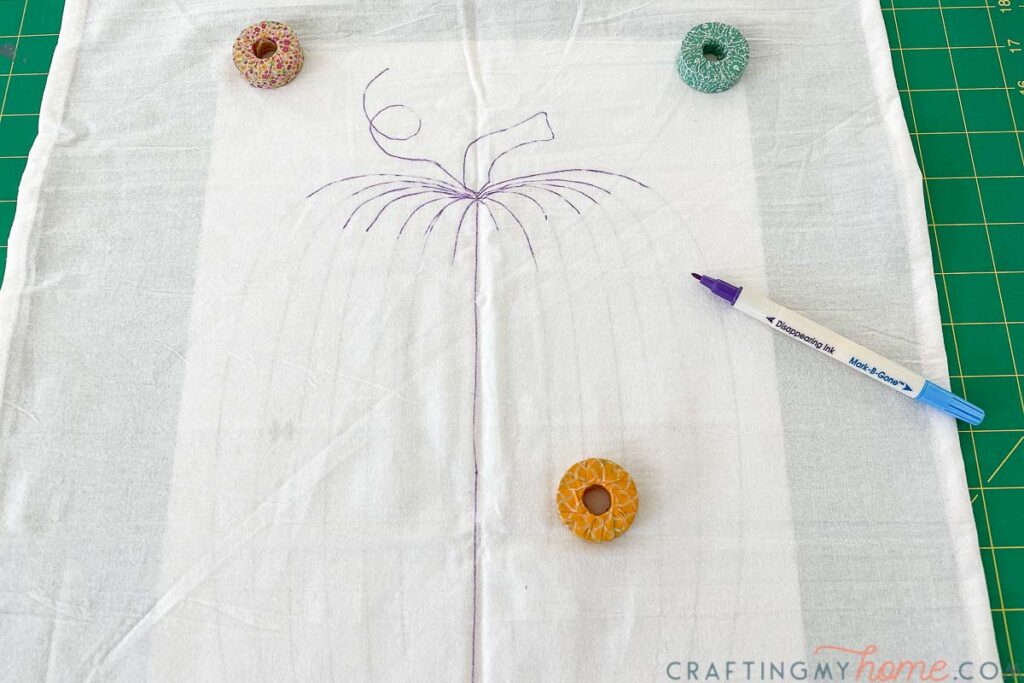

I like to trace all the top and bottom loops of the pumpkin then connecting the two lines together in the middle.
Continue until you have traced the entire design.
Attach fabric stabilizer
You will need to use stabilizer while sewing the design to keep the fabric flat. Tear away stabilizer is easy to remove after you are done sewing.
Cut a piece larger then the pumpkin design (at least an inch larger on all sides).
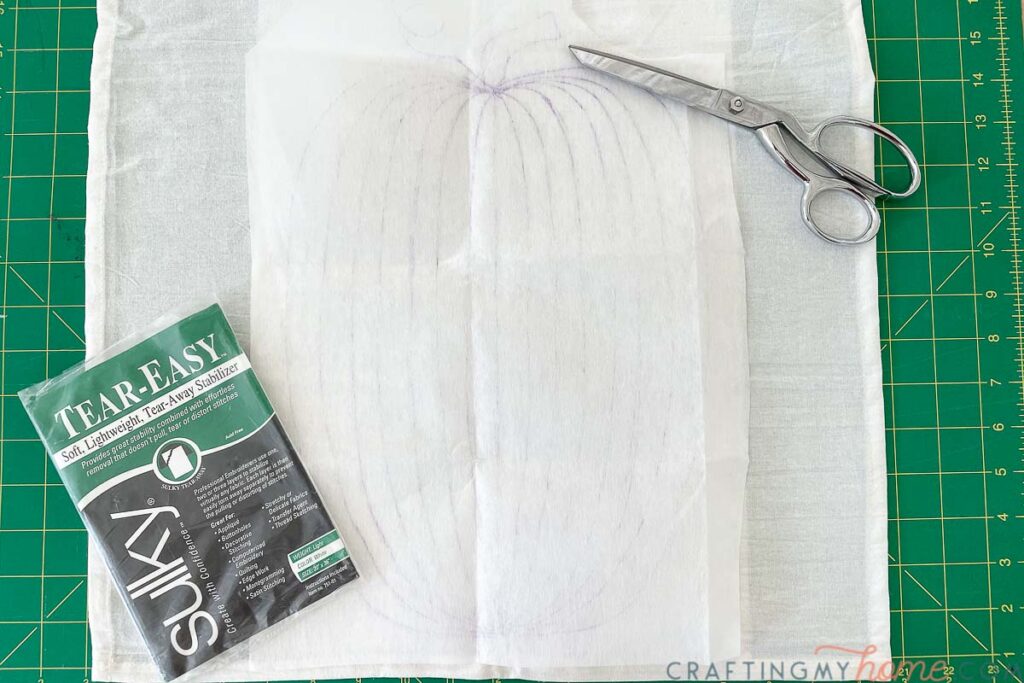
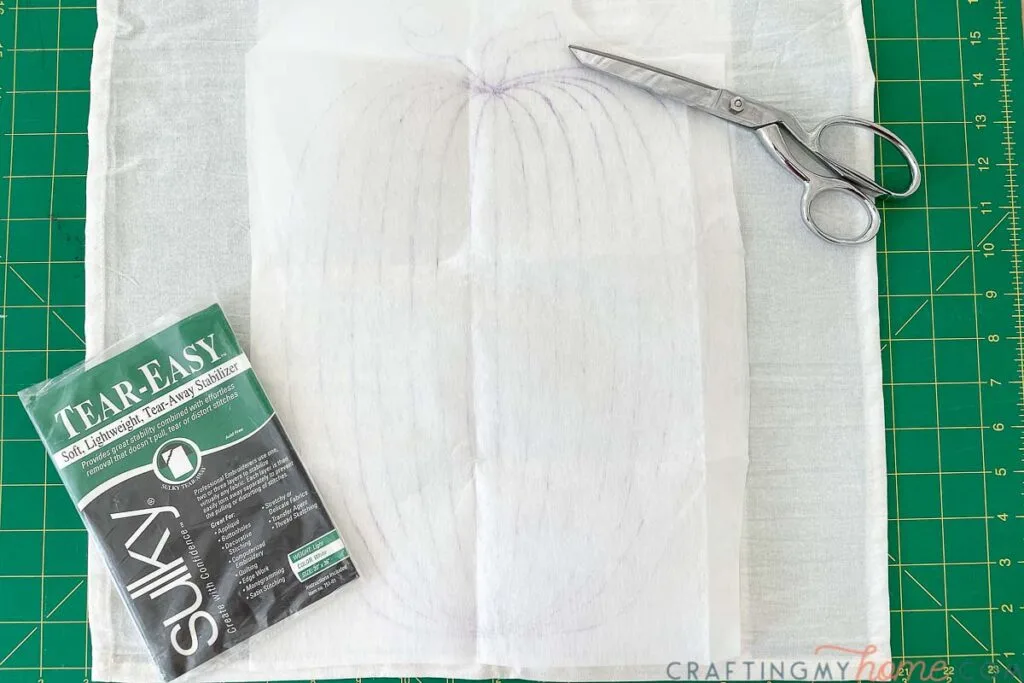
Place the stabilizer under the tea towel where the design is drawn on. Pin it in place.
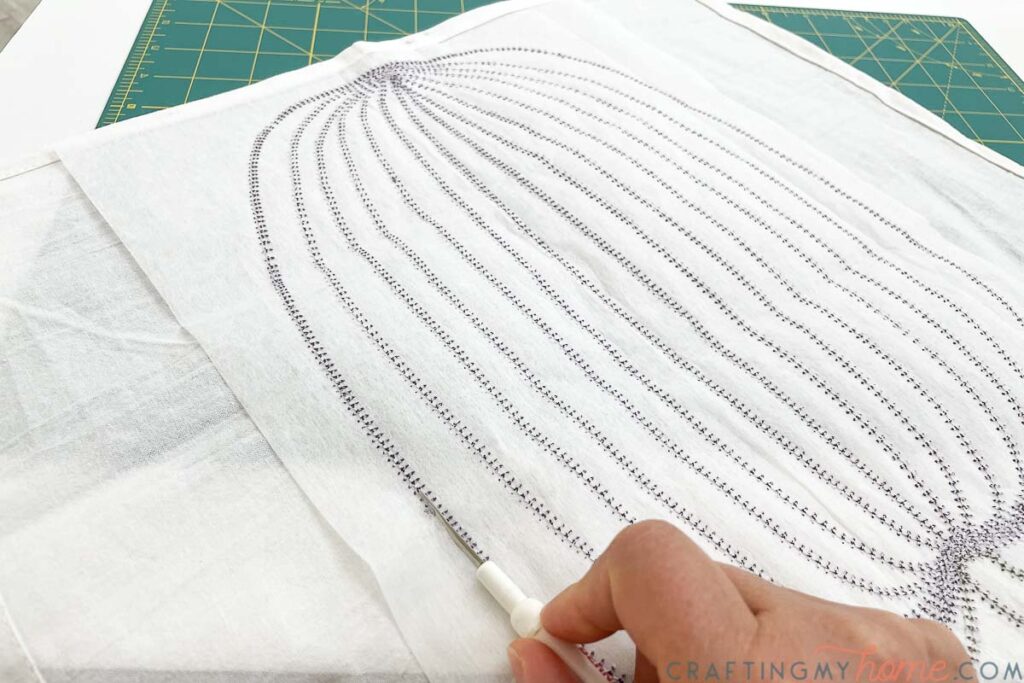
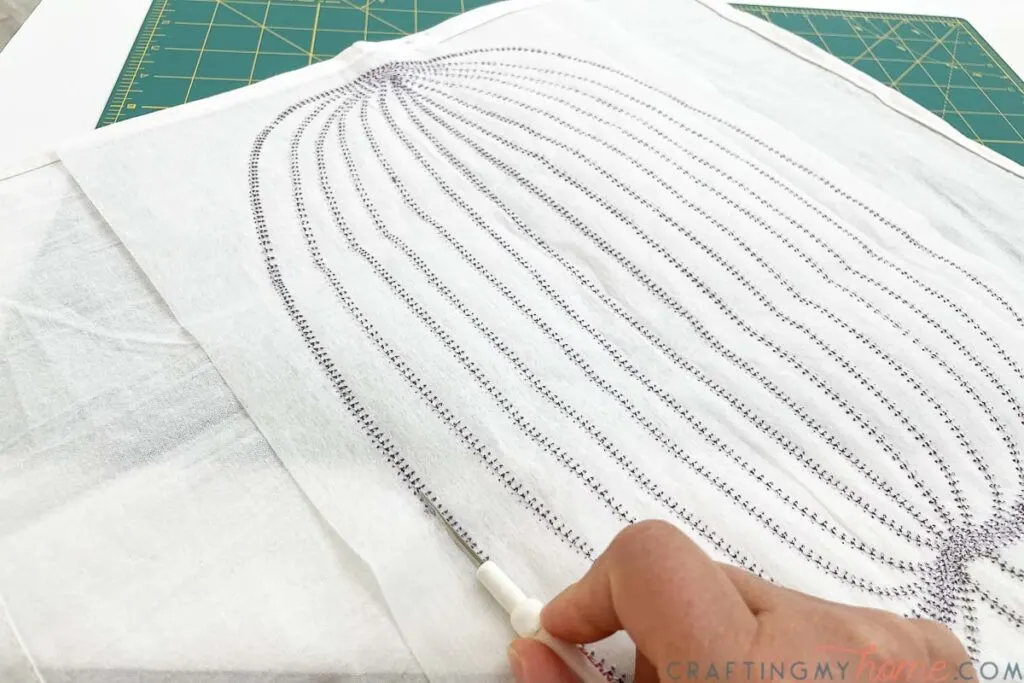
Sew the pumpkin design
Choose a decorative stitch that will work the pumpkin design. I used a design that looks like a blanket stitch but on both sides.
Start sewing at the circle on the pattern.
Do your best to follow along the lines you drew.
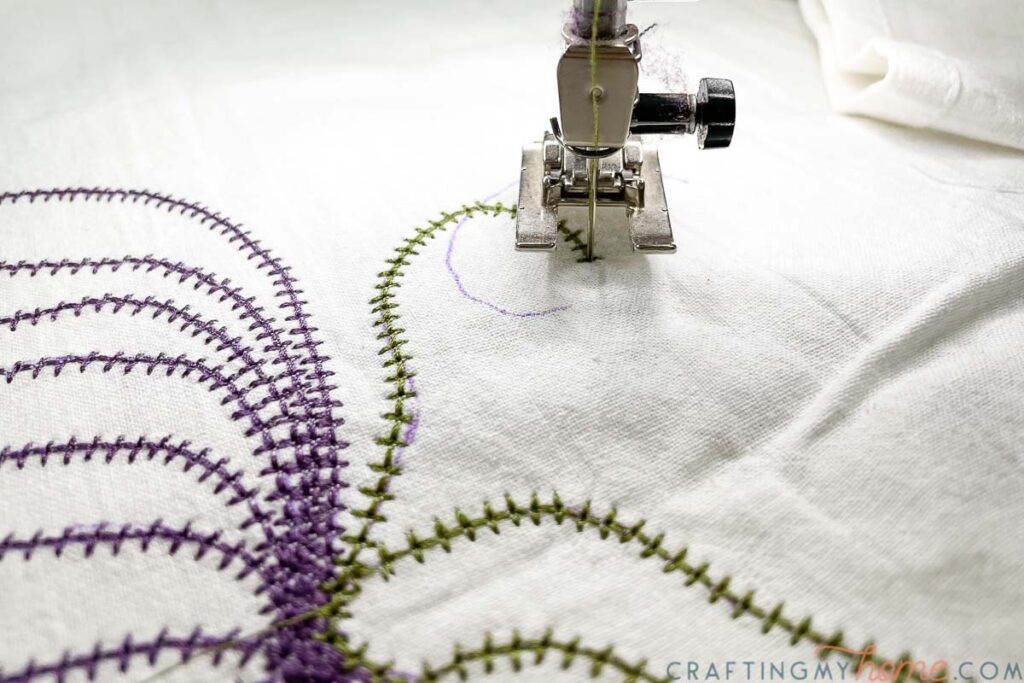
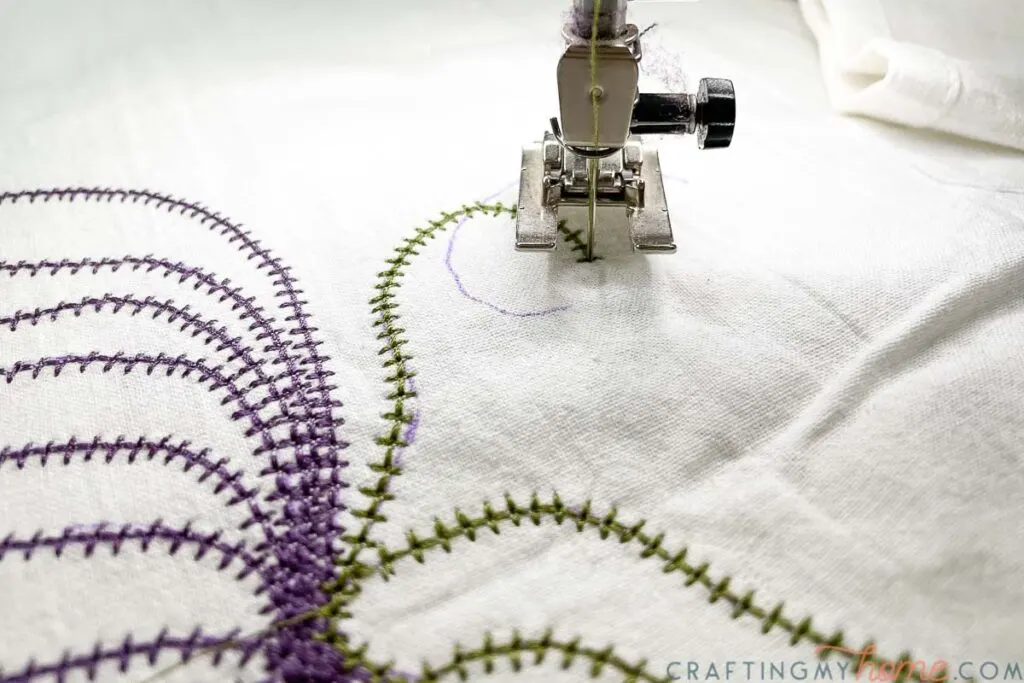
Make sure you allow the fabric to move front and back with the decorative stitch, while carefully guiding it in the arcs of the pumpkin.
The design will be one continuous sewn line for the pumpkin and a second for the stem. Continue around the design until you reach the arrow on the pattern. Then back-stitch a couple times to secure.
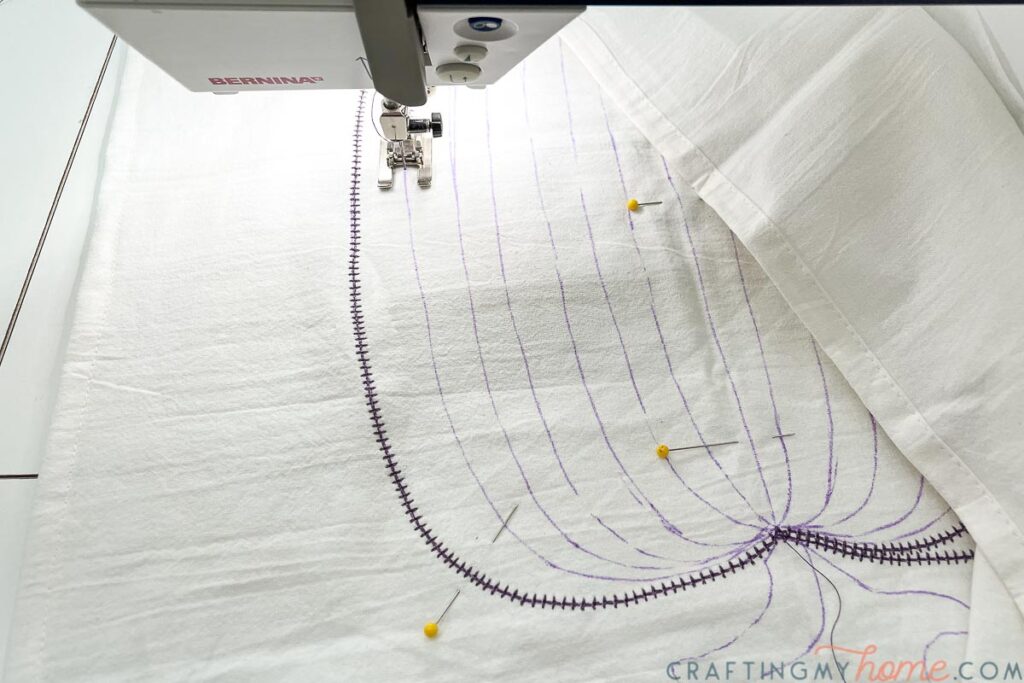
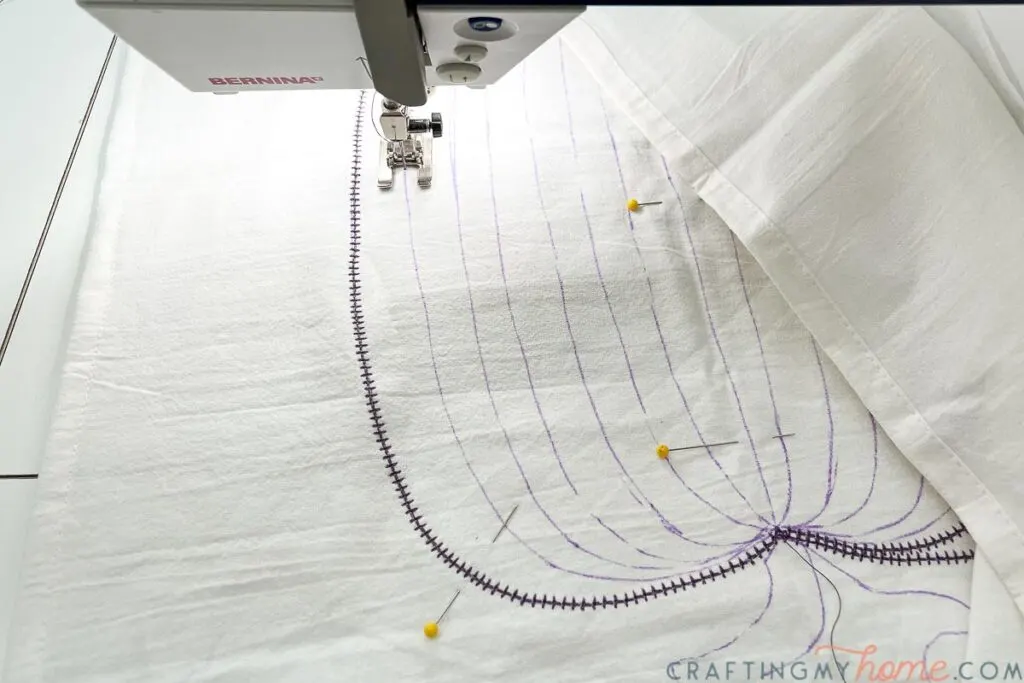
Change thread colors and start the stem on the second dot in the pattern. Follow the line to the arrow.
Making curves with decorative stitching can be hard.
Make sure to stop at the end of a completed decoration with the needle down. Then lift the sewing machine foot and pivot the fabric to line up with your drawing lines.
Stitch another full decorative stitch or two, then repeat as needed to get around the curves.
Remove the stabilizer
Remove the tea towel from the sewing machine and clip the threads. Now you can tear away the stabilizer around the stitches.

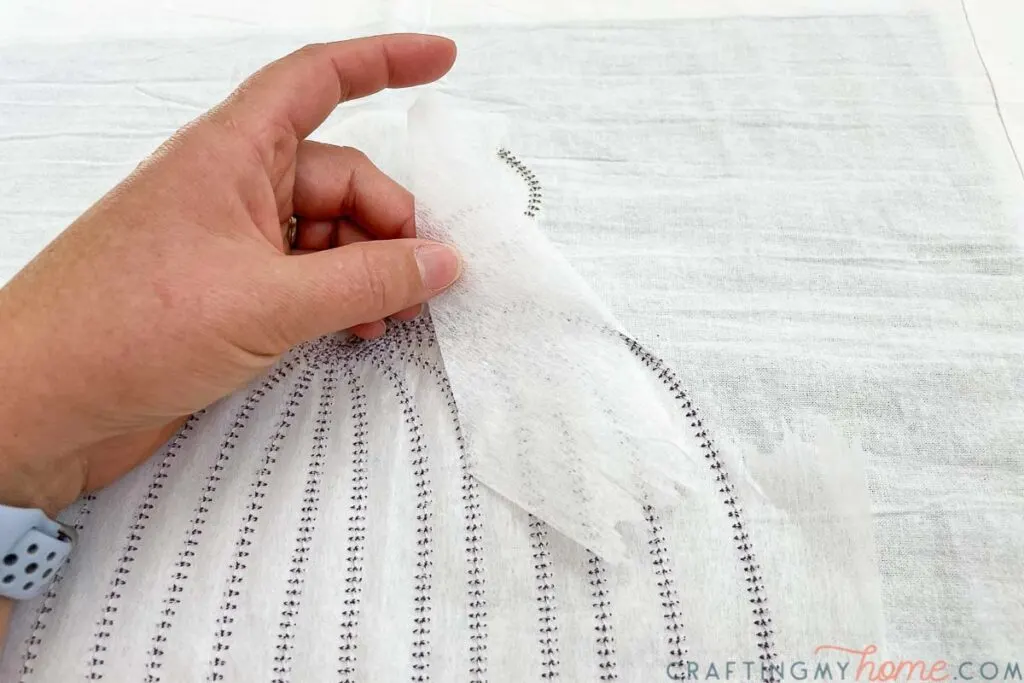
I found it was easy to grab my seam ripper and with a very light touch, it cut away the excess stabilizer. Make sure not to cut your stitching.
Expert Tip:
Place the side of the seam ripper with the bead on it in between the fabric and the stabilizer and let it guide you along the stitching without cutting it.
Once all your stabilizer is removed, your pumpkin tea towels are ready to display and use!
I love the large pumpkin design sewn into the fabric. They are soft and beautiful and I did it myself! Which I think is always the best 😉
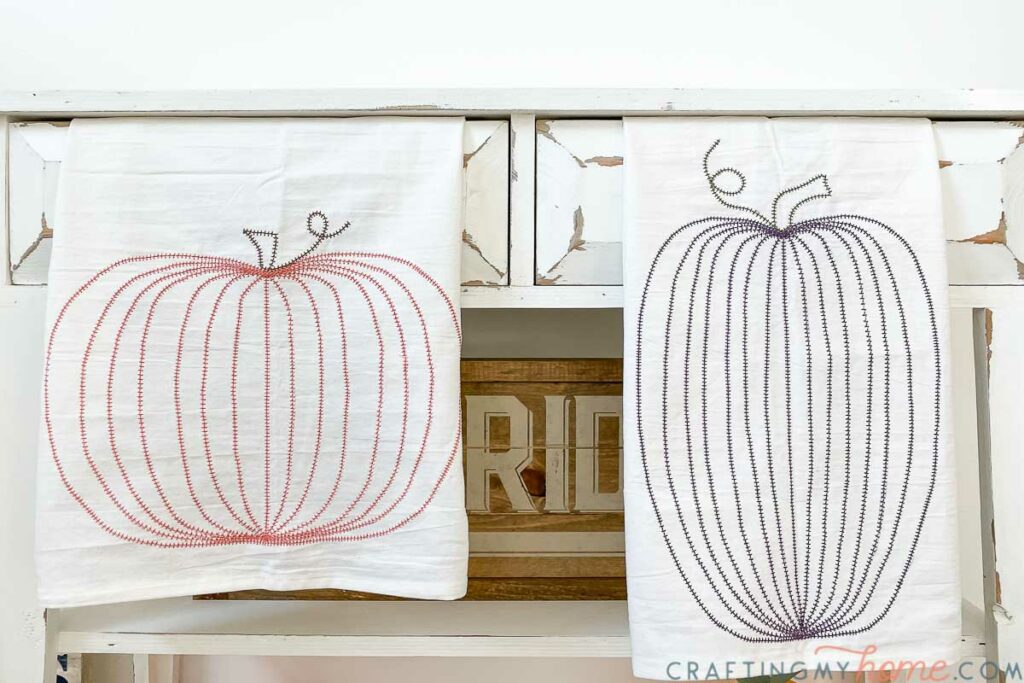

These DIY fall tea towels would make an excellent gift. Wrap them around a warm loaf of pumpkin bread and whoever is lucky enough to receive that will love you forever.
Or at least I would! Now I guess I need pumpkin bread.
Happy sewing!
Cheri
Wednesday 20th of October 2021
You could use wash-away stabilizer so you wouldn't have to cut it away.
Kati
Sunday 24th of October 2021
That would definitely work, do you have a wash-away stabilizer you like? I haven't found one I am super happy with yet.