


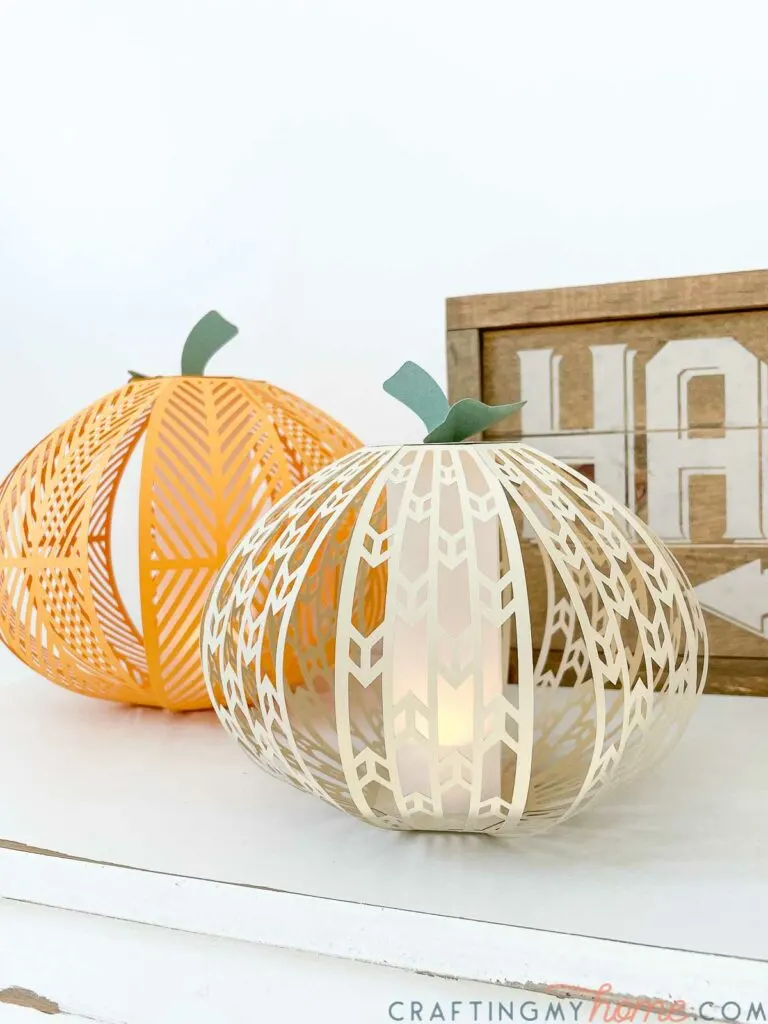
These amazing paper pumpkin lanterns will instantly make your home feel like fall.
It’s no secret I love making amazing paper lanterns for all kinds of decorations.
I have shared large paper lanterns that look like metal, unique 3D pumpkin lanterns, and chic paper jack-o-lanterns to name a few.
So for the 2nd day of the 5 Days of Pumpkin Crafts series, it just made sense to make another beautiful paper pumpkin lantern. And this one is amazing!
This post may contain affiliate links. As an Amazon Associate I earn from qualifying purchases. Click here to read my full disclosure policy.

Decorating with Paper Lanterns
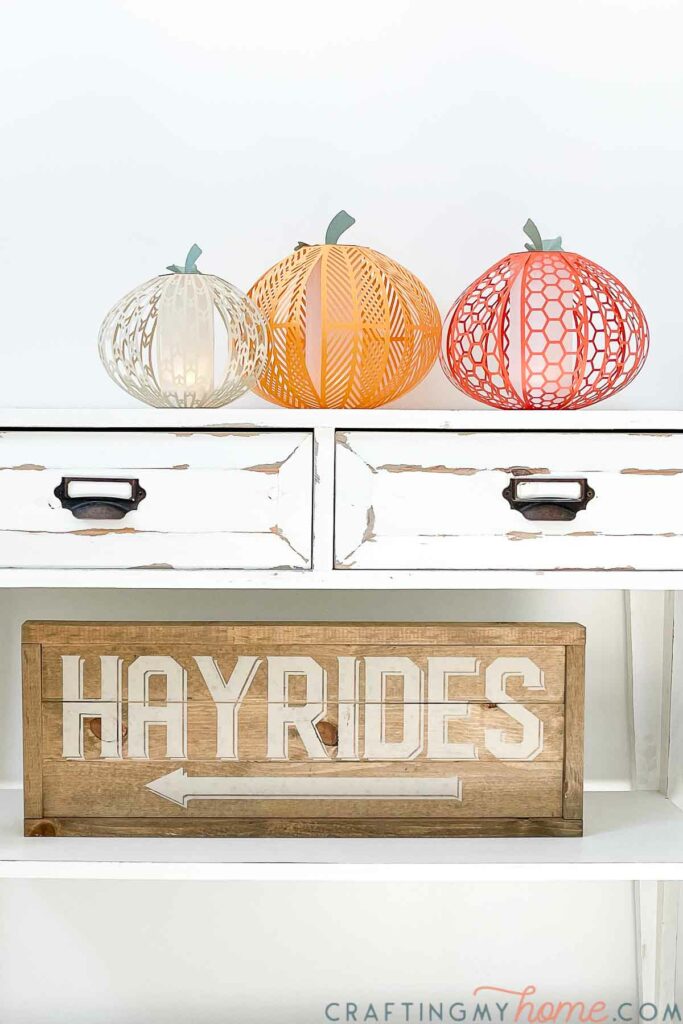
These are not your normal paper lanterns, instead these are amazing lanterns, shaped like pumpkins, to add touches of fall to your home.

You can use these paper lanterns to decorate you home in many different ways. Here are just a few to get you started.
- Cover your fireplace hearth with pumpkin lanterns.
- Add lanterns on top of books in your bookcase.
- Make a vignette with the pumpkin lanterns on a console table.
- Place a few smaller paper lanterns on your fireplace mantel.
- Create an amazing fall tablescape with the paper pumpkin lanterns.
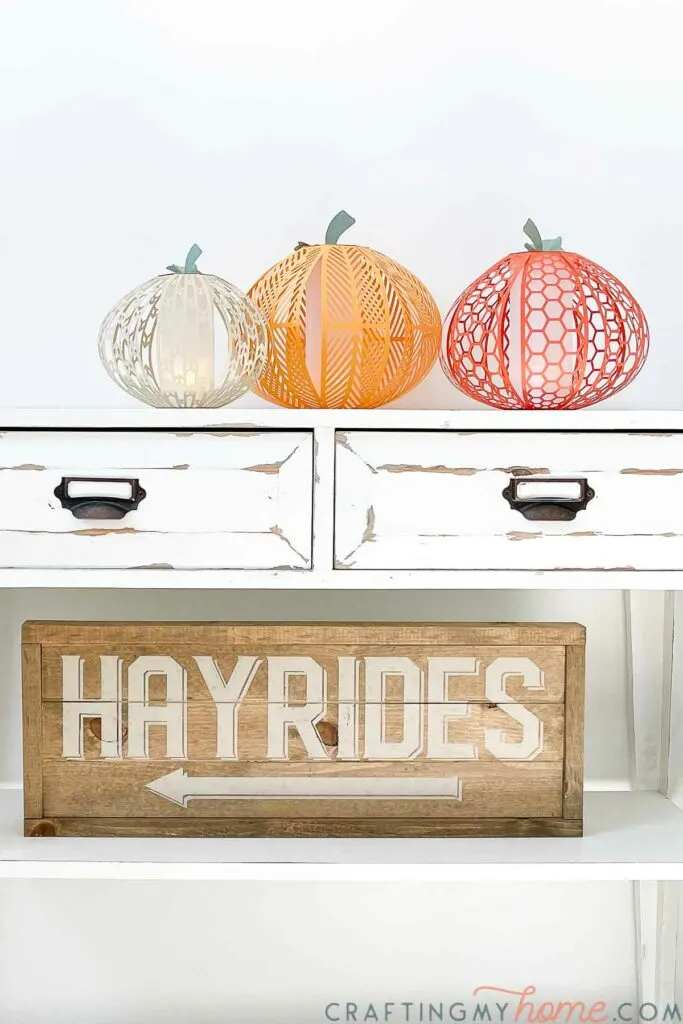
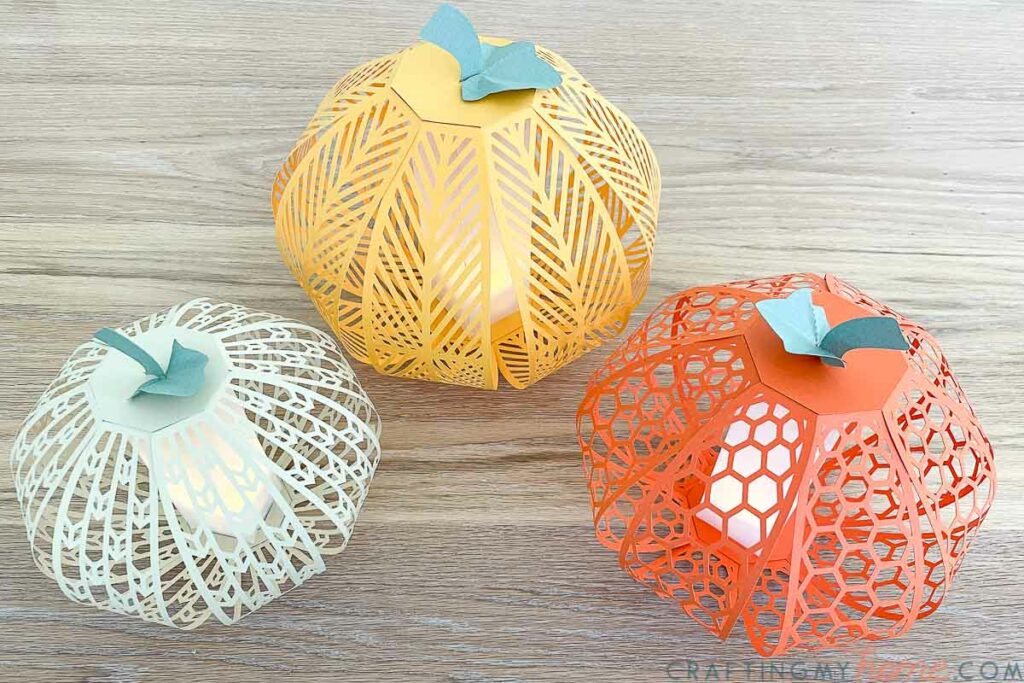
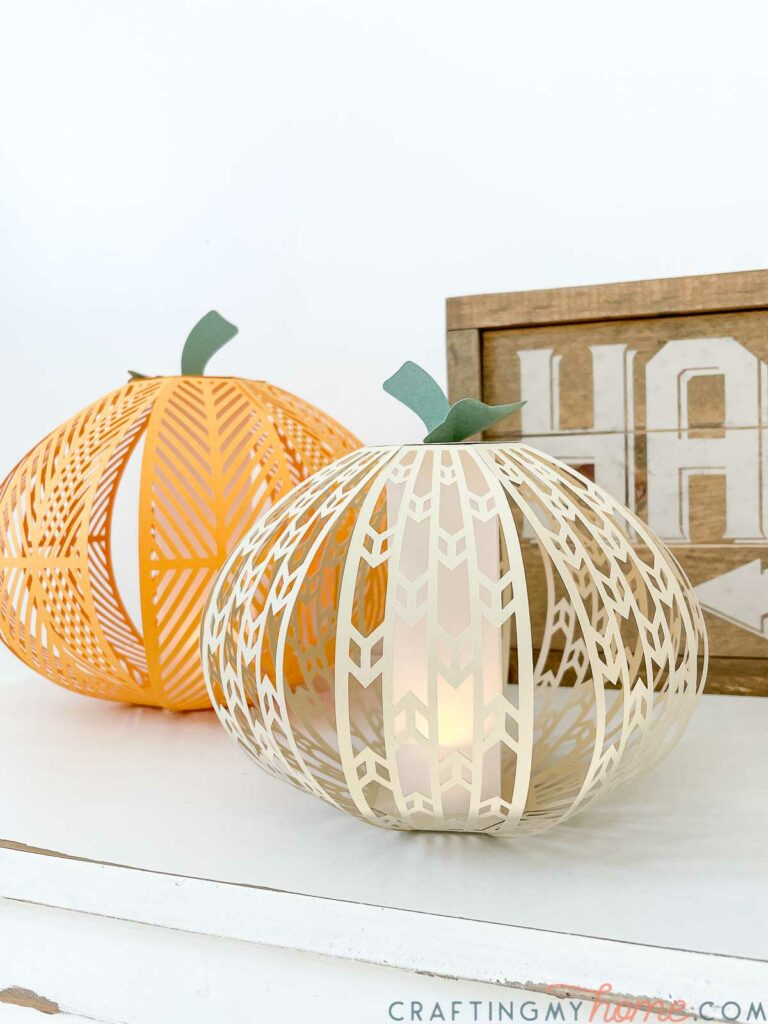
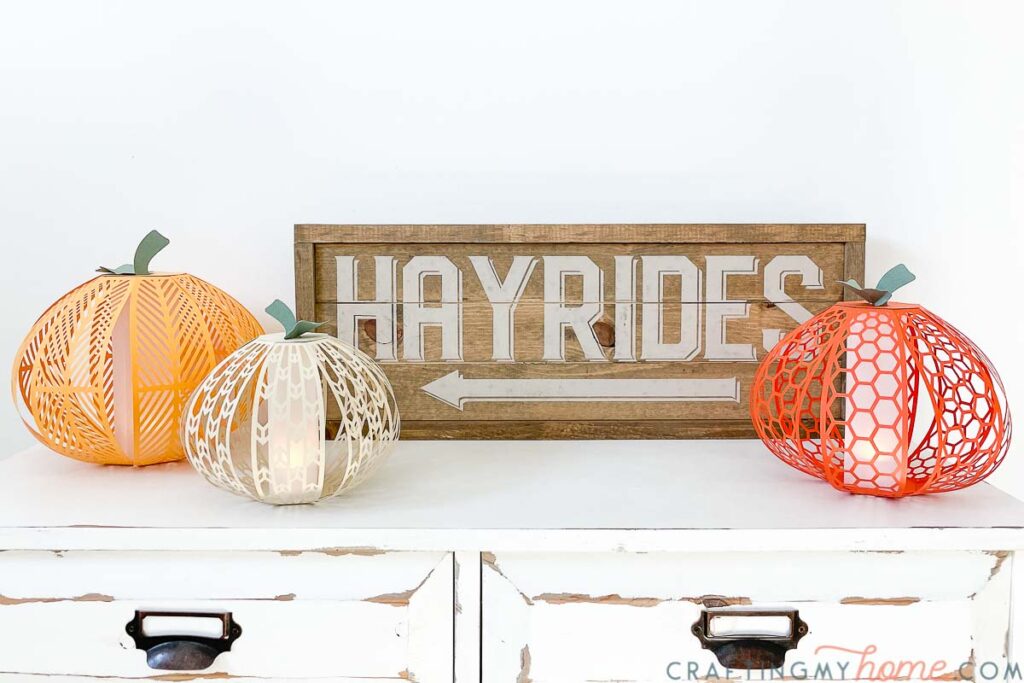
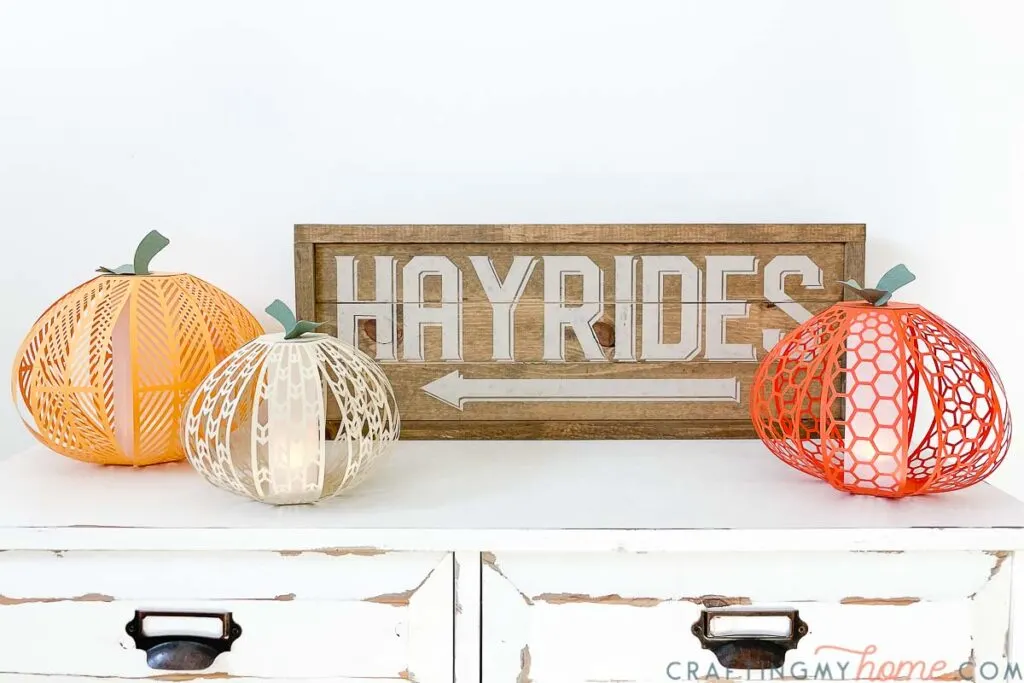
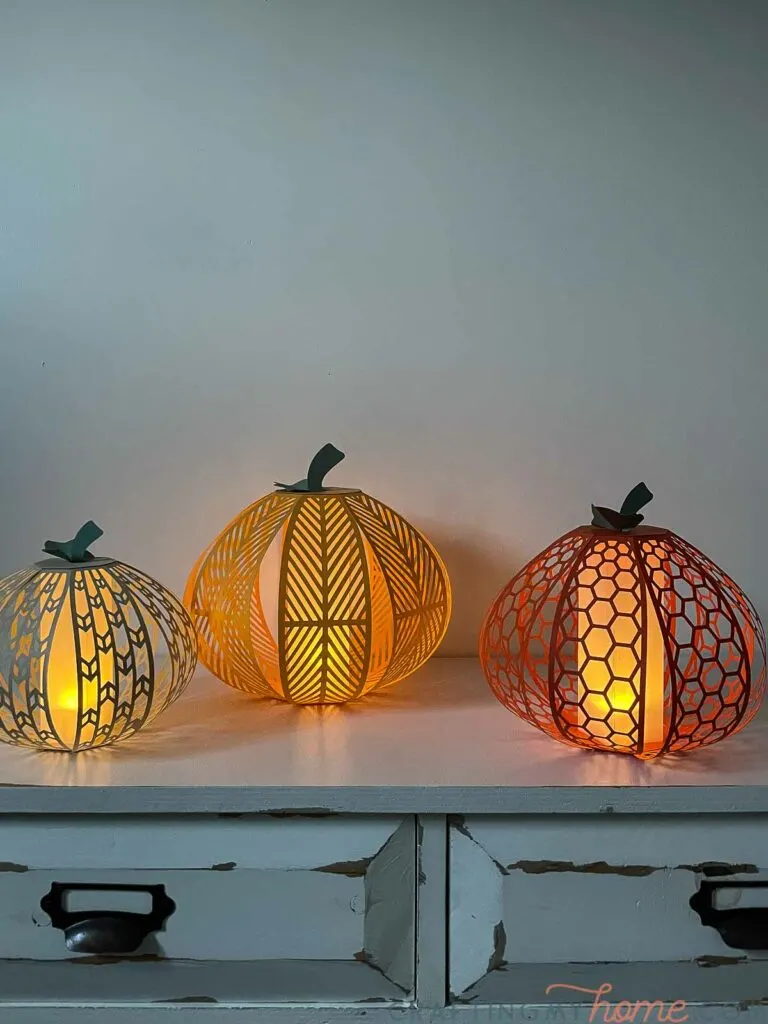
Three Different Pumpkin Designs
I couldn’t decide on just 1 design for these pumpkin luminaries, so I decided to make 3! Yay for my indecision!
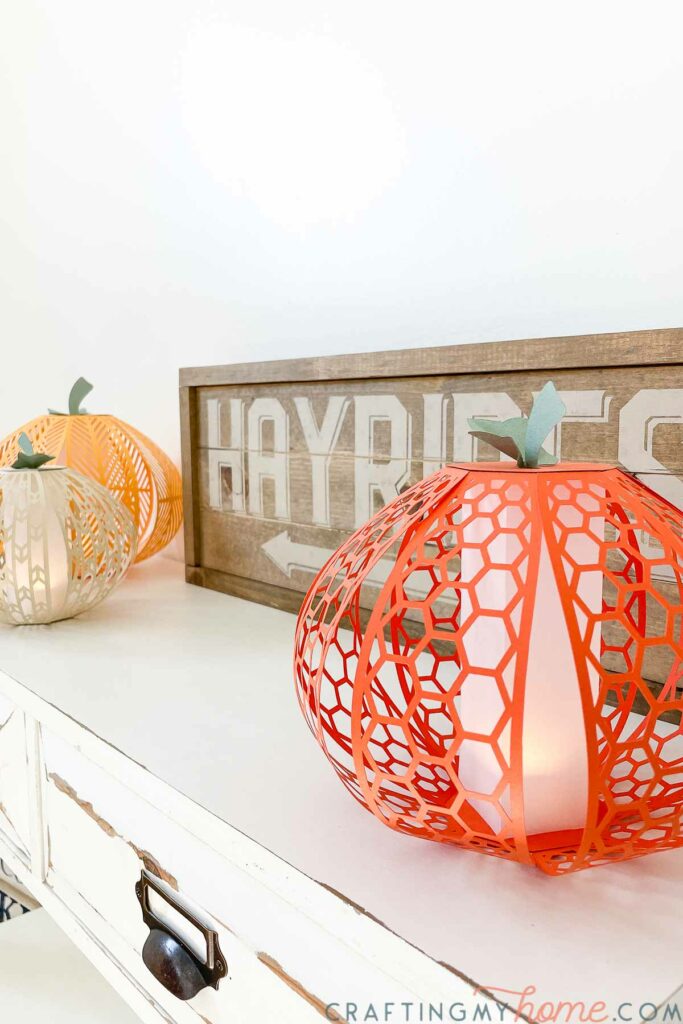

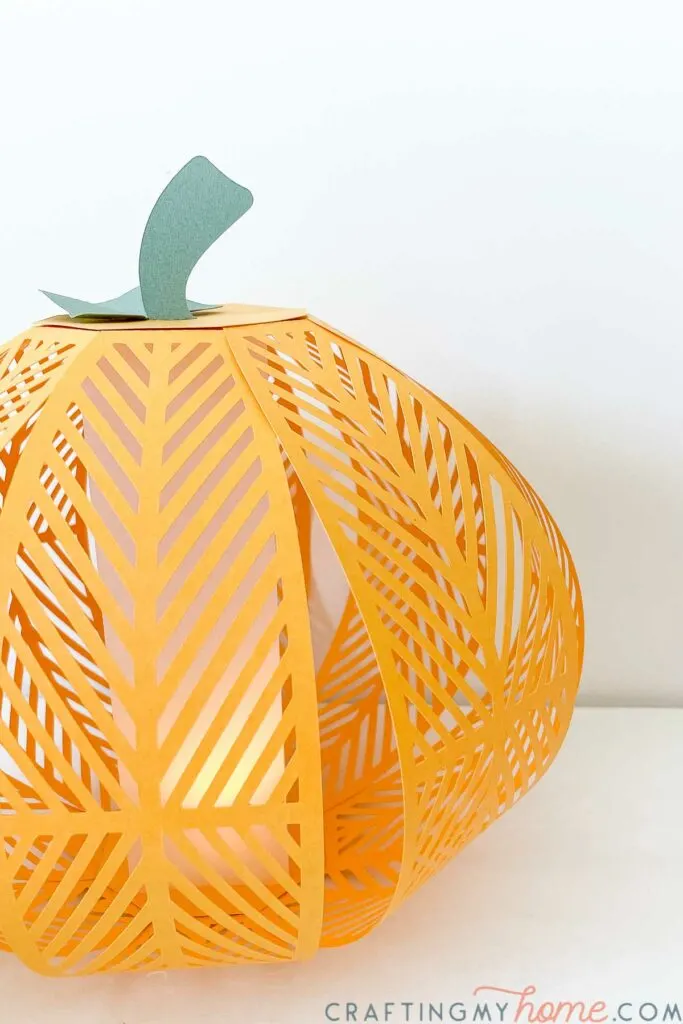
Each different sized pumpkin lantern has a different cut out pattern on the outside pieces. The paper lanterns are a nice size to create a statement in your fall decor.
- Largest pumpkin (chevron pattern) measures
- Medium pumpkin (honeycomb pattern) measures
- Smallest pumpkin (modern arrows) measures

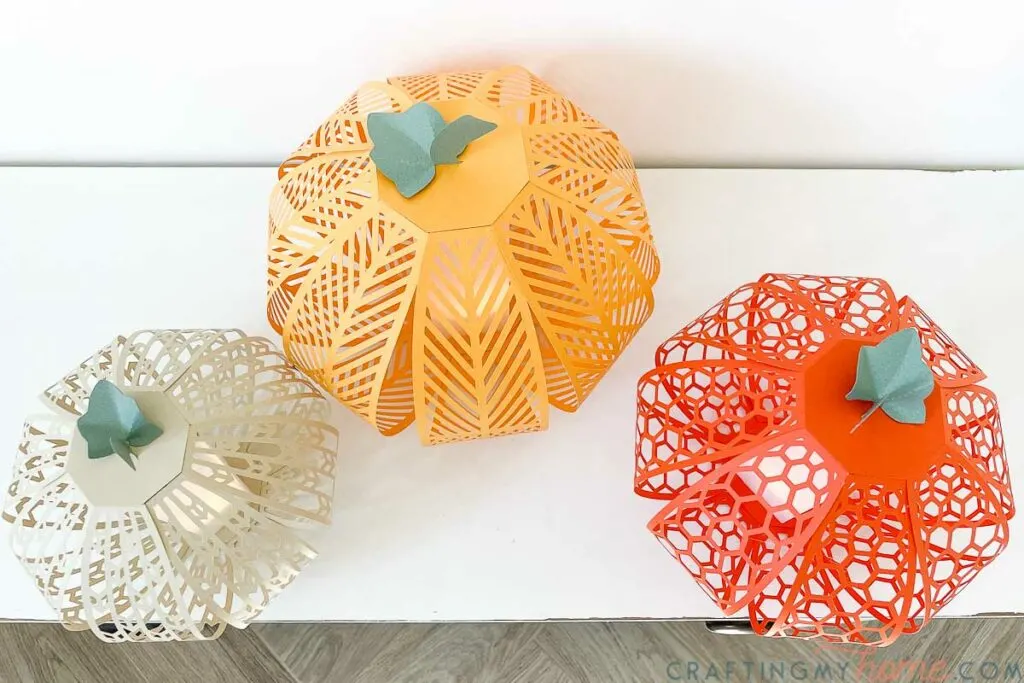
You can mix and match the different designs. Plus use different colored paper to make a fun vignette.
And don’t stop at just 3 pumpkins, have fun making a whole pumpkin patch!
5 Days of Pumpkin Crafts
Today is only day 2 of the 5 day series! By Friday you will have 5 fun new pumpkin crafts to decorate your home for fall and Halloween.
Make sure to check back daily for new projects, here are any you may have already missed:
- Day 1: Modern Pumpkin SVG
- Day 2: Beautiful Paper Pumpkin Lanterns Craft
- Day 3: DIY Pumpkin Tea Towels
- Day 4: Neutral Pumpkin Patch Printable Art
- Day 5: Simple Halloween Signs from Paper
How to Make Paper Pumpkin Lanterns
Supplies:
- Pumpkin lanterns cut files
- Colored cardstock
- Vellum paper
- Hot glue gun and glue sticks
- Tape
- Flameless tea lights
- Optional: Electronic cutting machine like a Silhouette Cameo or Cricut Maker
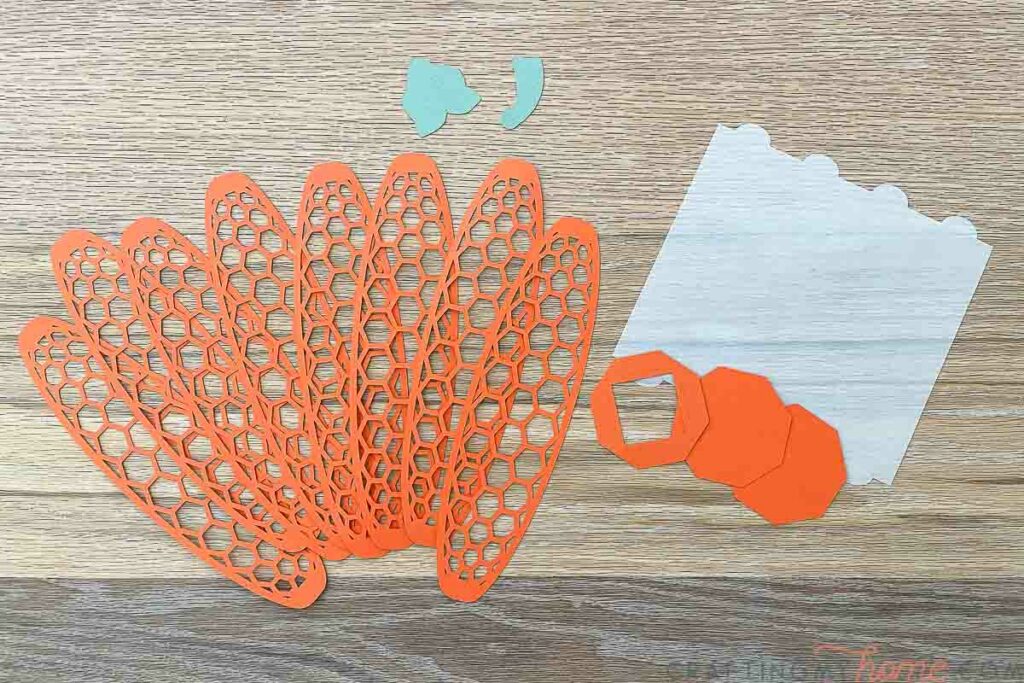
Cut out the pieces
Cut out the top/bottom and outer pieces from the cardstock. For the outer pieces, you will need 8 pieces per pumpkin. Cut out the stem and leaf from a contrasting cardstock.
Cut out the center column piece from the vellum.
I used my Silhouette Cameo to cut out all the pieces. If you do not have an electronic cutting machine you can also print out the PDF version and cut it out with scissors and an x-acto knife.

Assemble the center column
The center column will help hold the pumpkin shape as well as create an opaque column to light the lanterns.
Assemble it first by folding the vellum center piece along all the dotted lines. Tape the edge of the piece together to form a square column.
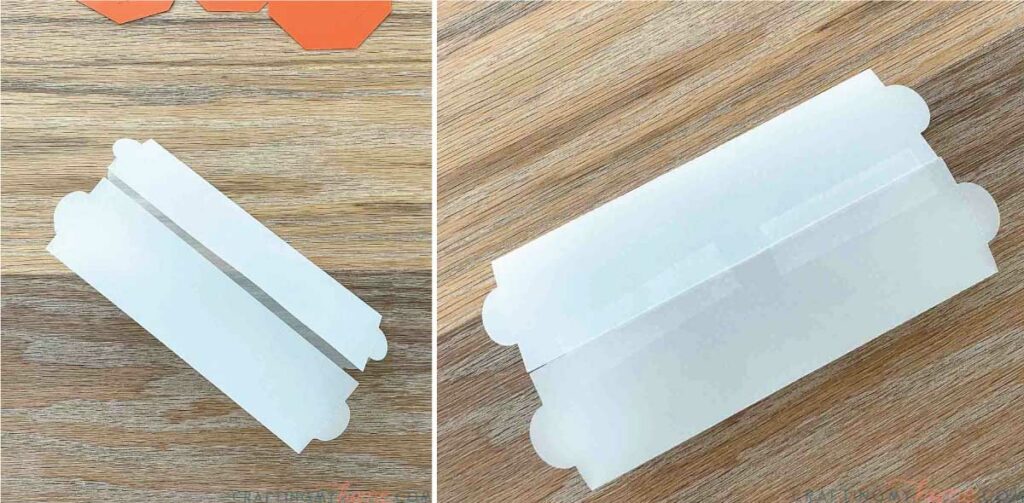

Feed the tabs on the top of the column through the slots on the top piece (without the square cut out of the center).
Fold the tabs over to the outside of the top piece and secure with the hot glue.

Repeat on the other side of the column with the bottom piece (the one with the square cut out).
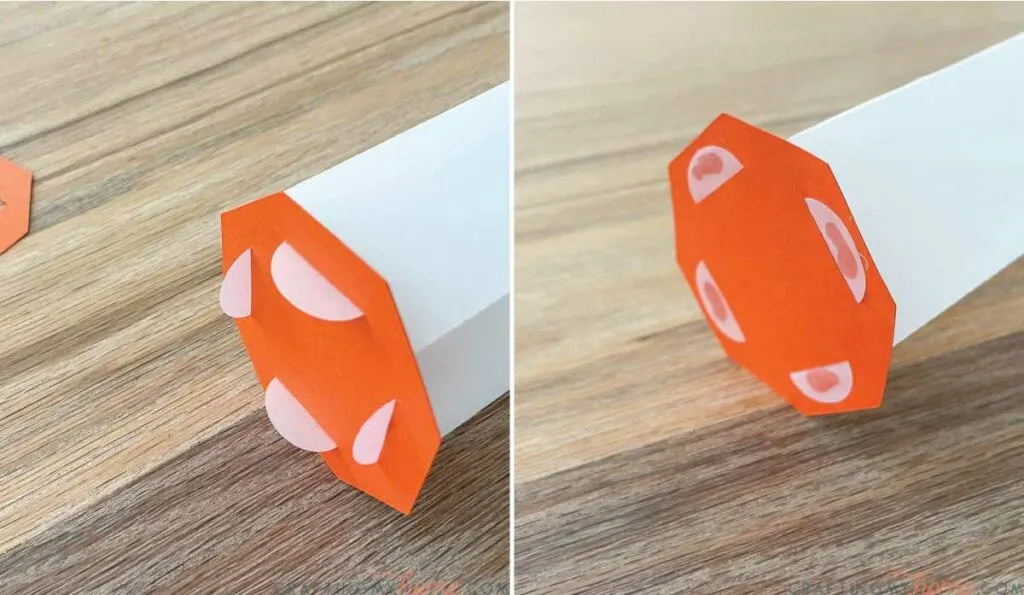
Attach the outer pieces
Fold along the dotted line on the top and bottom of all the outer pieces. This creates tabs to secure them.


Starting at the bottom, add hot glue to one of the outer piece tabs and secure it under the bottom piece.
Line it up so it sits flush with the outside of the bottom octagon.
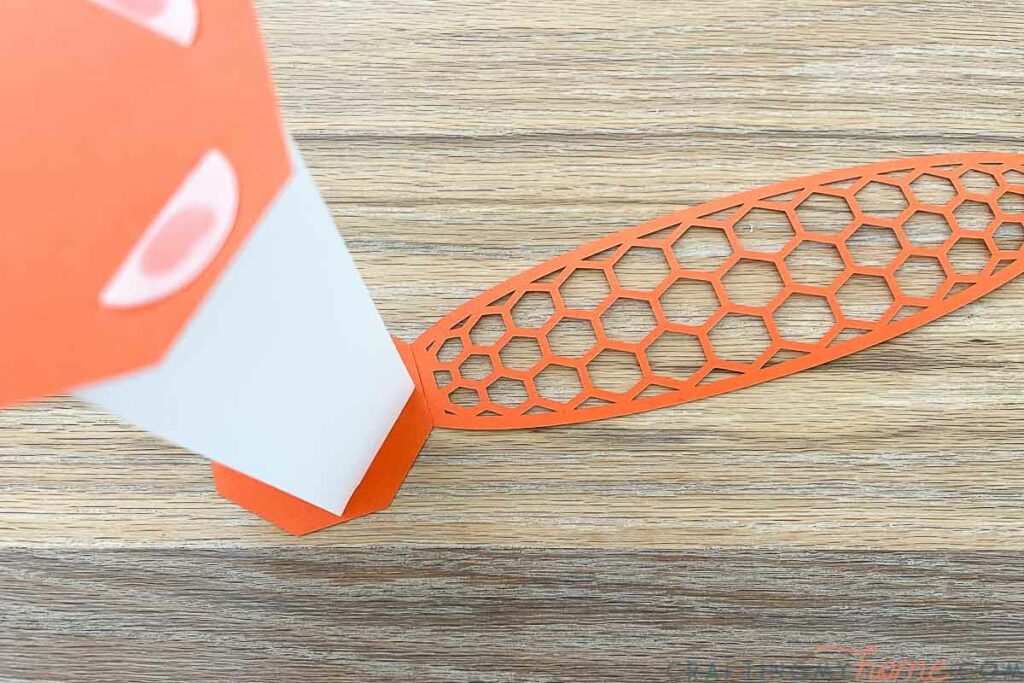
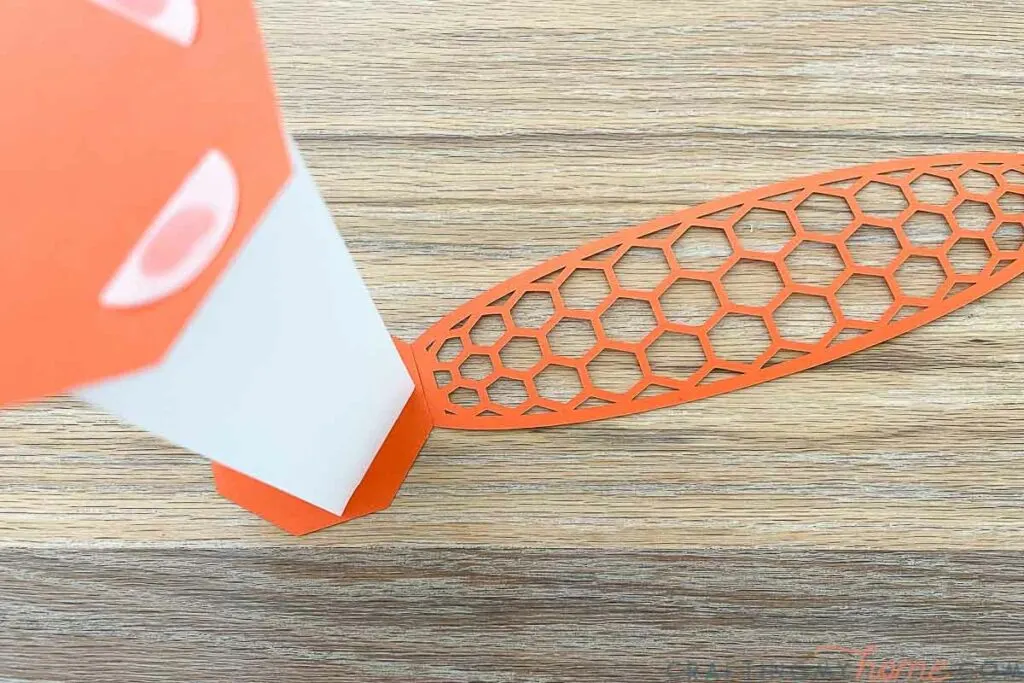
Repeat with the other 7 pieces so you have all 8 attached around the outside of the column.
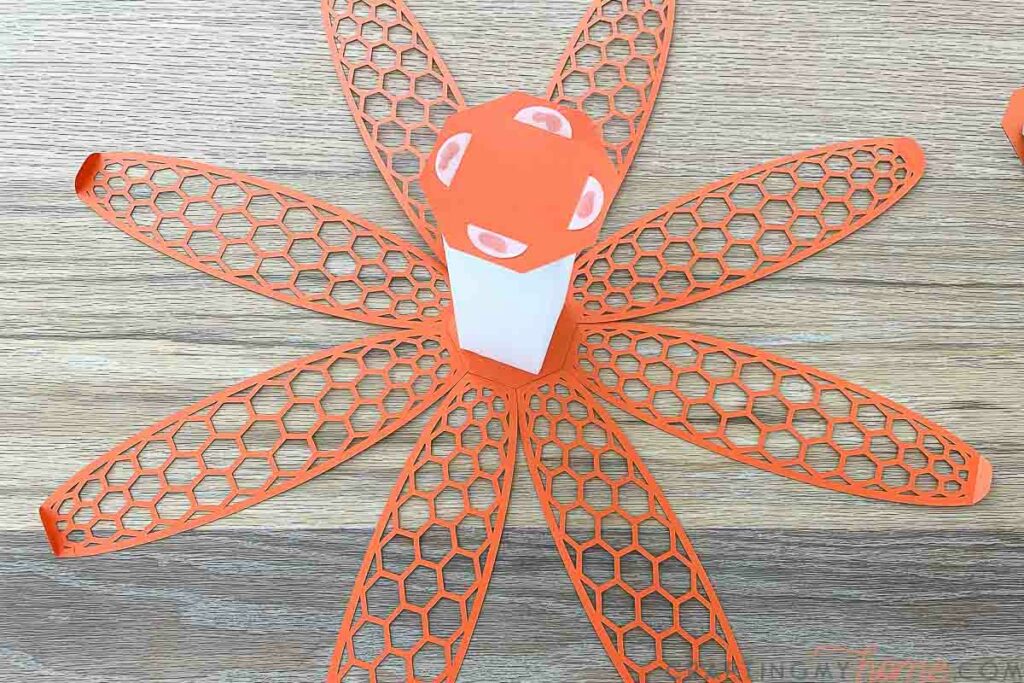
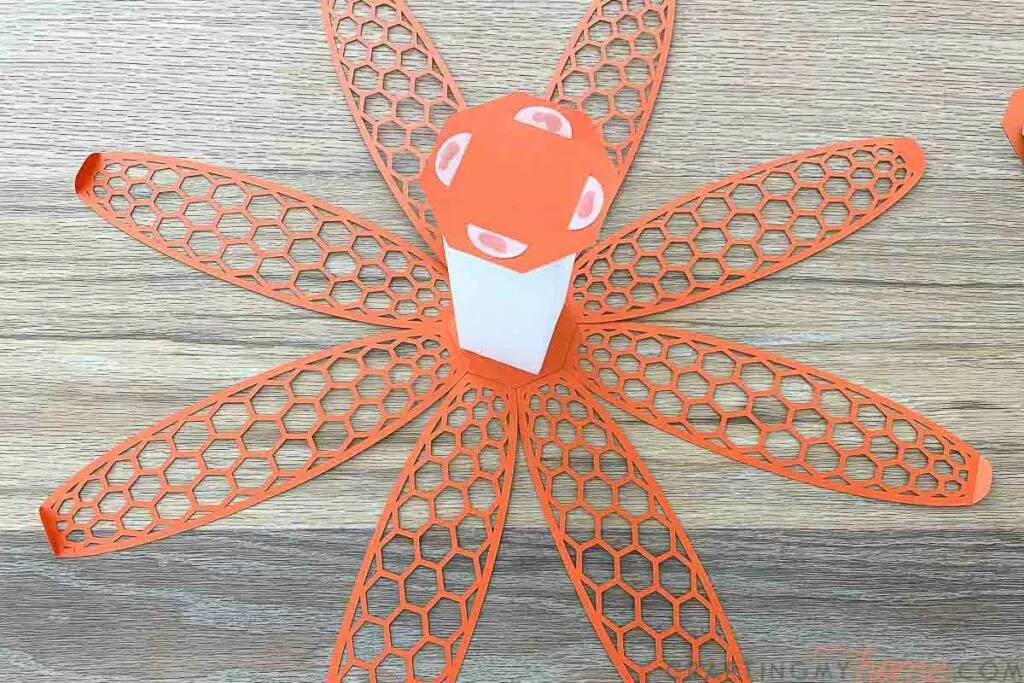
Next attach the top of all the outer pieces to the top of the column. Attach them just like you did with the bottom pieces.
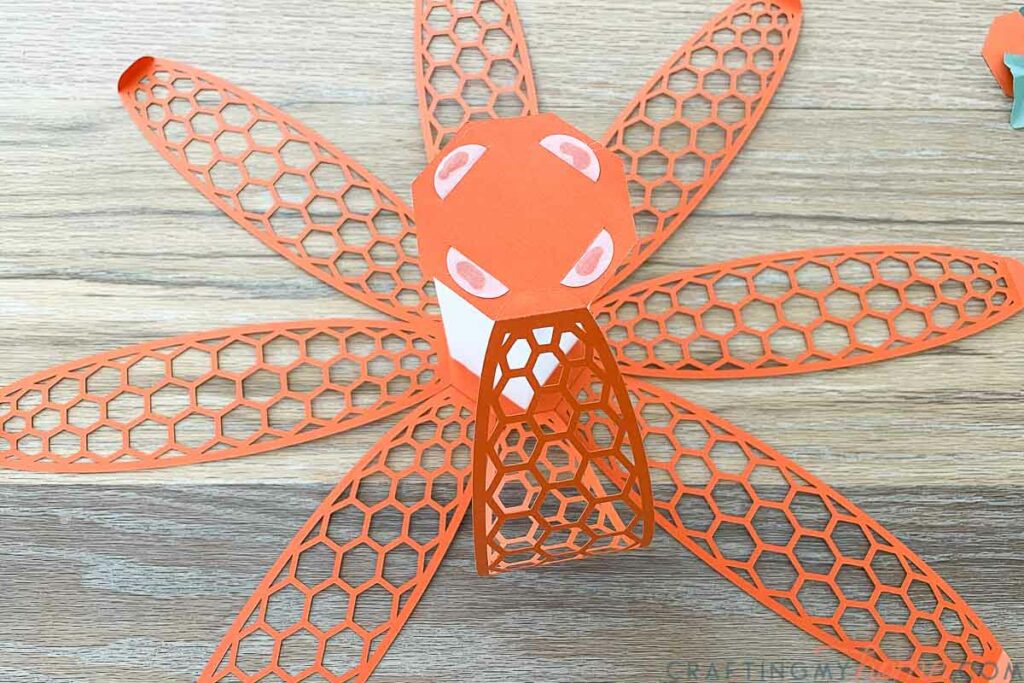

Repeat for all the rest of the outer pieces.

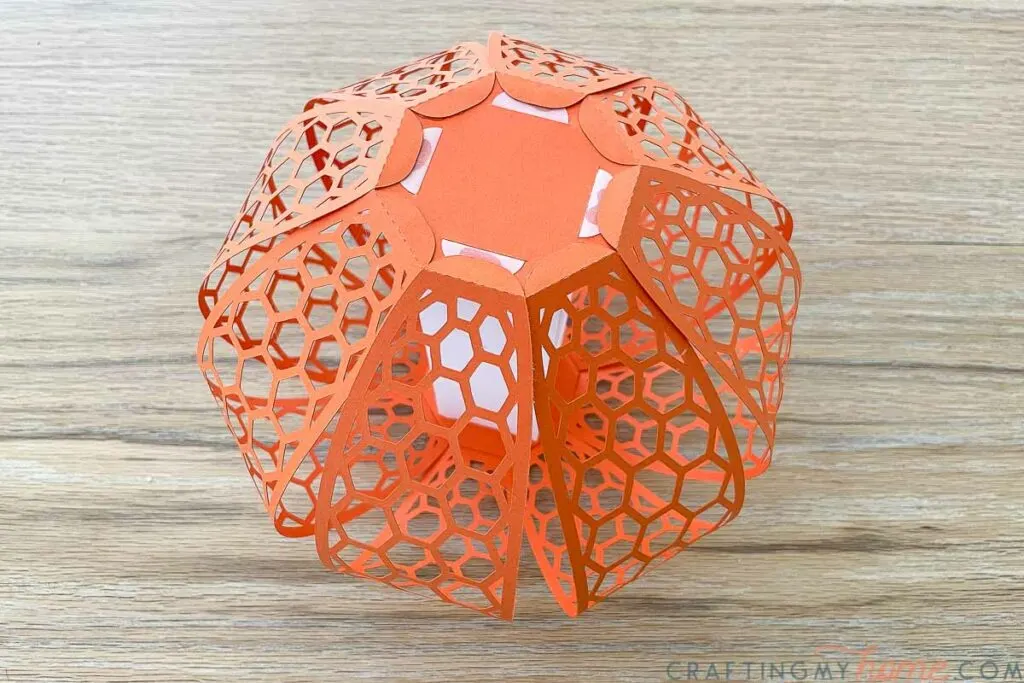
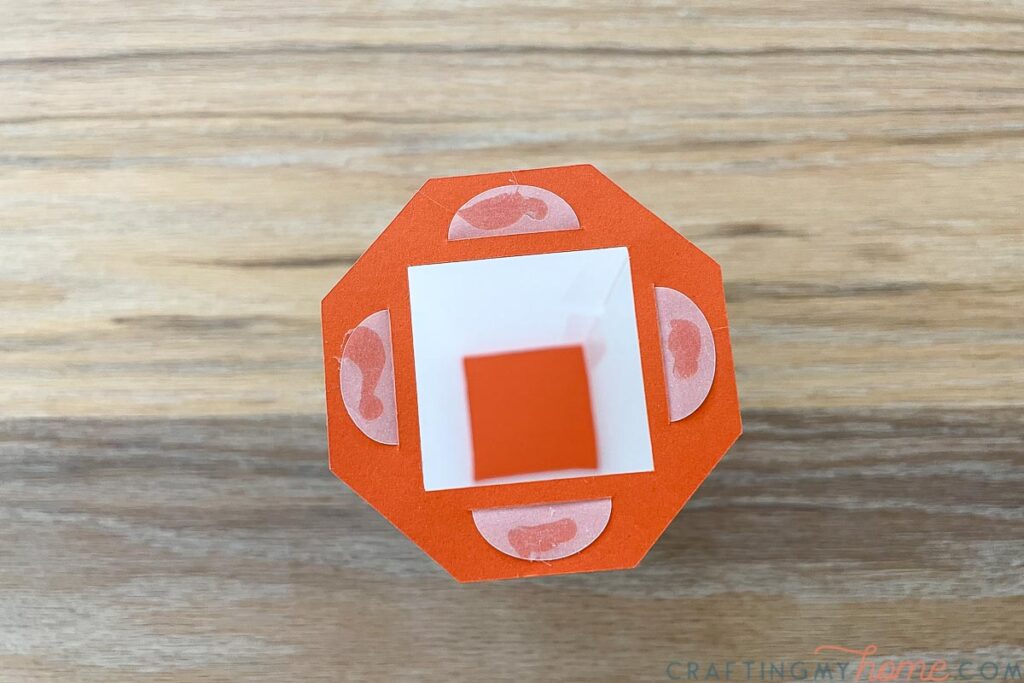
Finish the lanterns
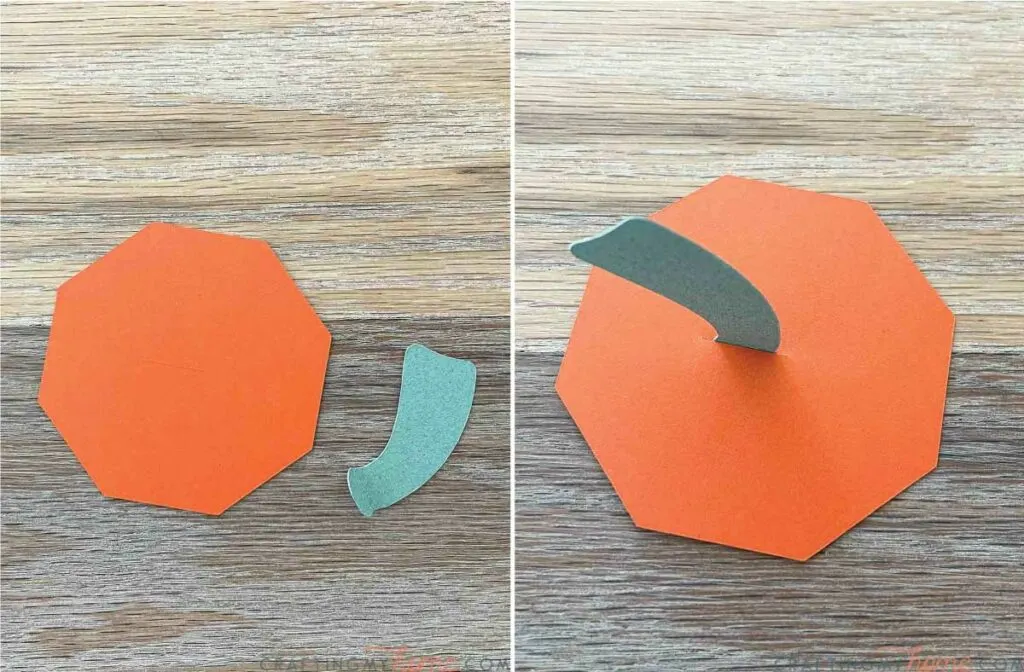
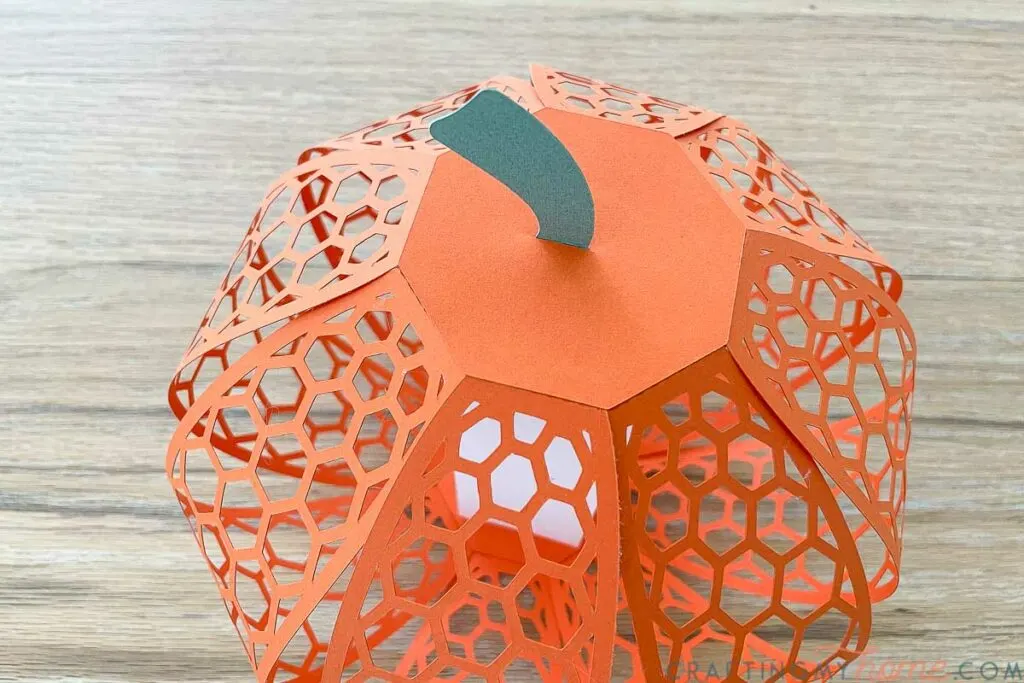
Create the top piece to cover the top of the column.
First start by folding the tab at the bottom of the stem piece. Then slip this piece into the slot on the top cap.
Fold it over and secure with hot glue.

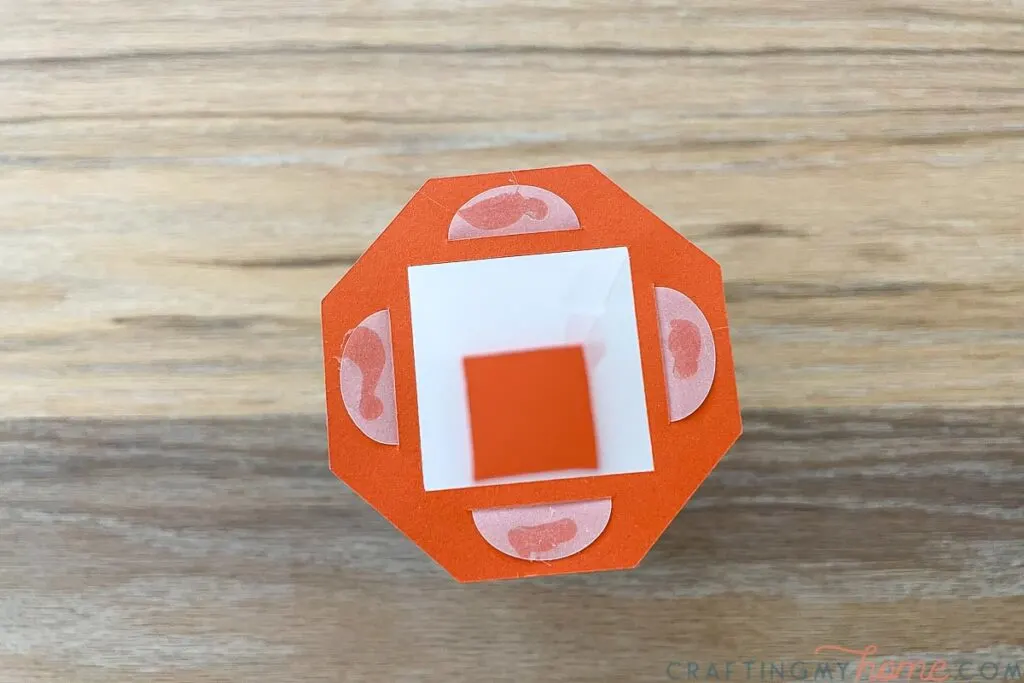
Glue the top cap on top of the pumpkin, covering all the tabs and the column top.
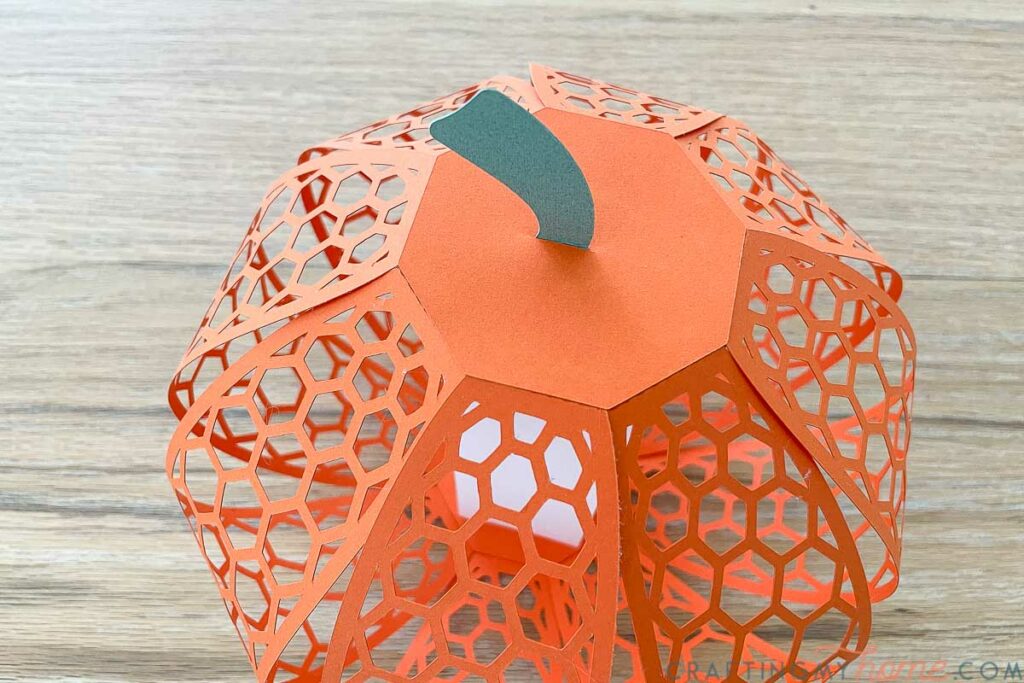
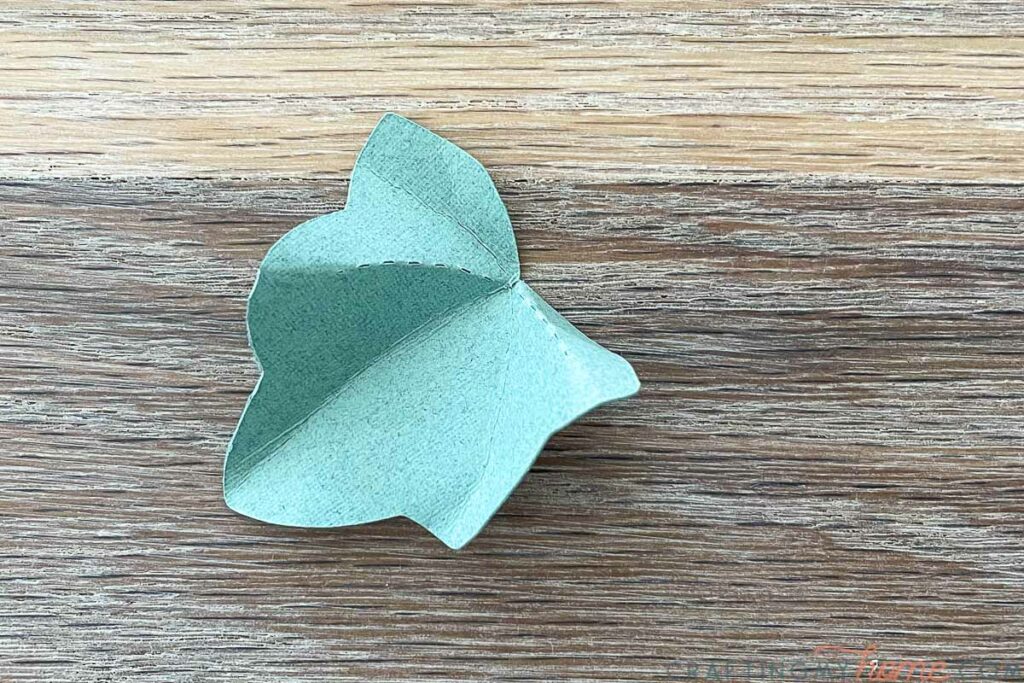
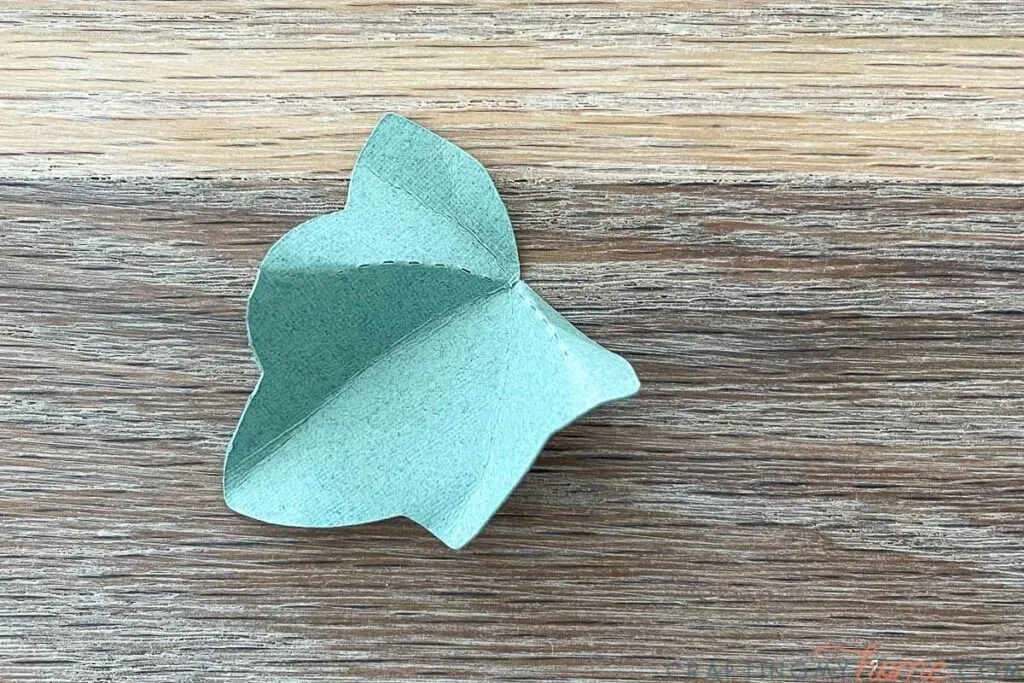
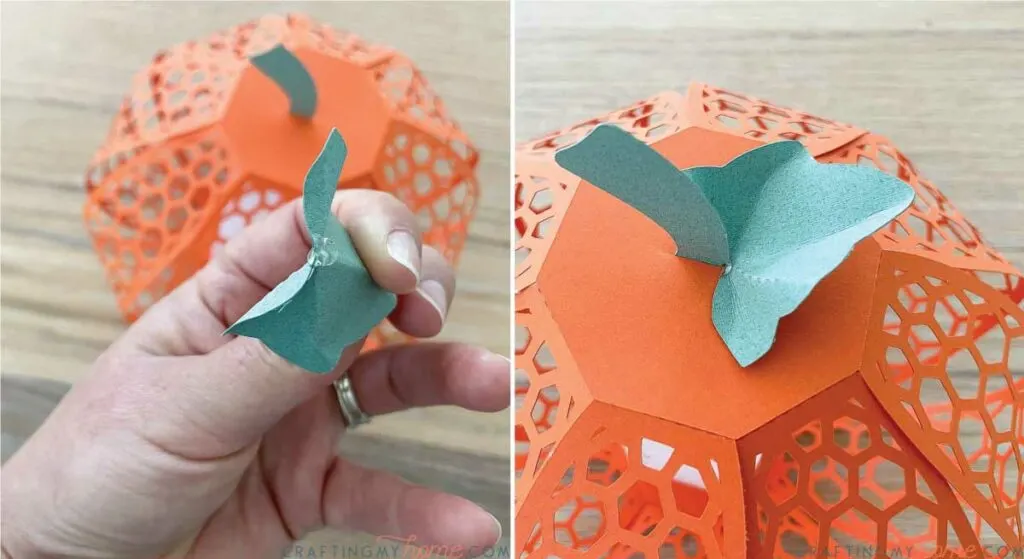
Pinch along the dotted lines on the leaf to create a 3D effect. Attach it to the top of the pumpkin.
To get the leaf to stand up on the pumpkin lantern, add a large dollop of glue to the bottom point of the leaf. Place it at the base of the stem.
Hold until the glue dries.

Now all that is left is to add a flameless tea light inside the vellum column and enjoy the glow!
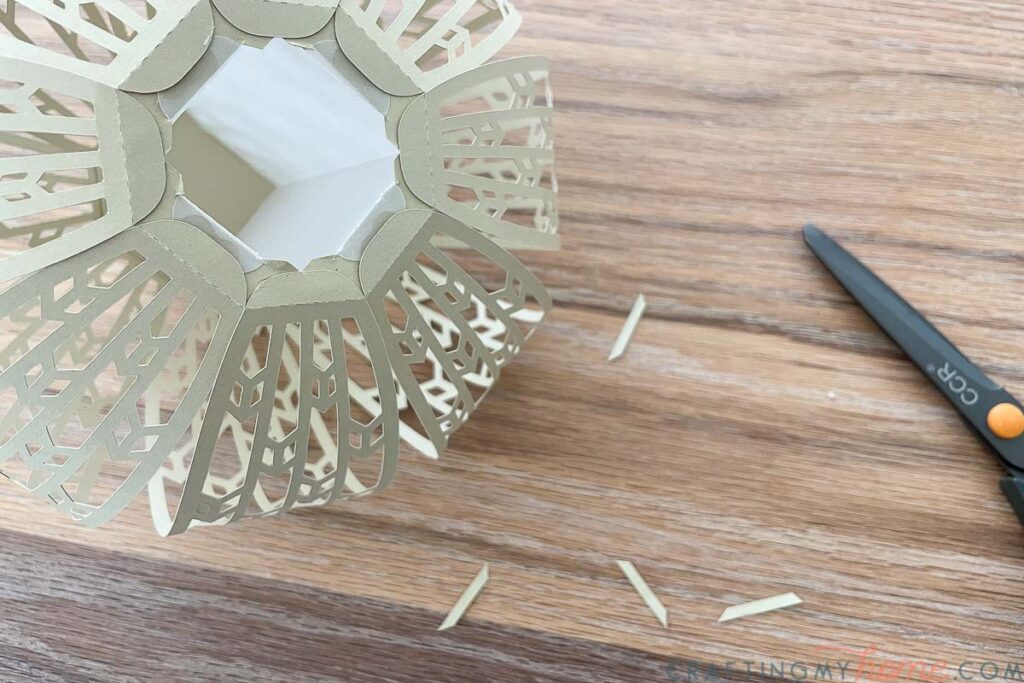
For the smallest lantern, the opening at the bottom of the column was slightly too small for these flameless tea lights I bought.
So I clipped the extra paper around the opening once it was fully assembled and the tea light fit in perfectly after that.

These beautiful paper pumpkin lanterns are such a fun decoration for fall. I am already having so much fun decorating with them and can’t wait to enjoy the glow when the sun goes down.
Don’t you just love that warm fall glow?

Happy fall crafting!
Diane
Tuesday 9th of November 2021
Hello Kati, I too have been trying to find these pumpkin lantern files in your library. When I click on the link to them in your tutorial, it takes me to your store. Is this right? Please let me know. I think these are a perfect craft for Thanksgiving. Thank you!
Diane
Kati
Sunday 21st of November 2021
The pumpkin lanterns were free for the week in the Library, now they are available to purchase in the shop.
Caryn
Tuesday 19th of October 2021
I think you have missed uploading them in the library. I cannot find them in there yet!!
Kati
Tuesday 19th of October 2021
You need to scroll down to the fall section in the library, if you still do not see them, try clearing your cookies and opening it up again (sometimes your browser can keep a copy and not pull from my website to make things faster).