Are you ready for Halloween costume #2? I am a little sad that my kids don’t want matching costumes, now that they are 7 and 5 I guess they want their own unique costumes and that is okay.
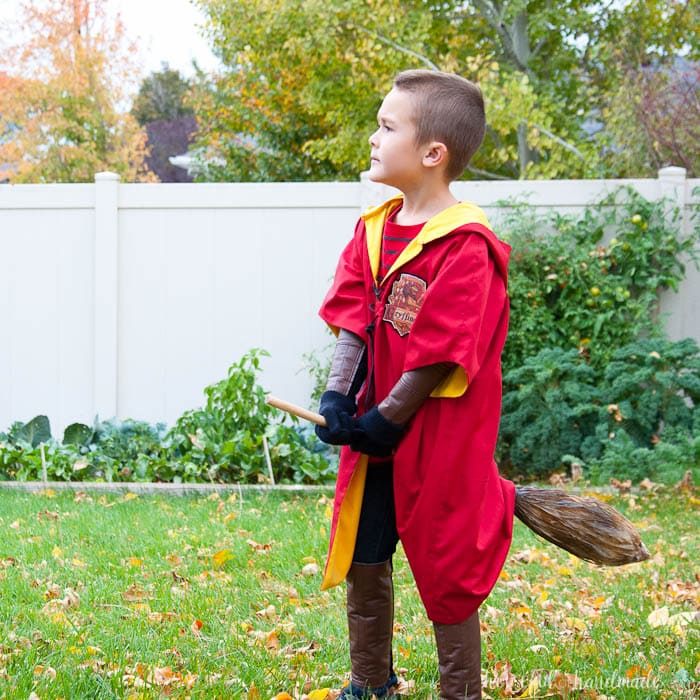
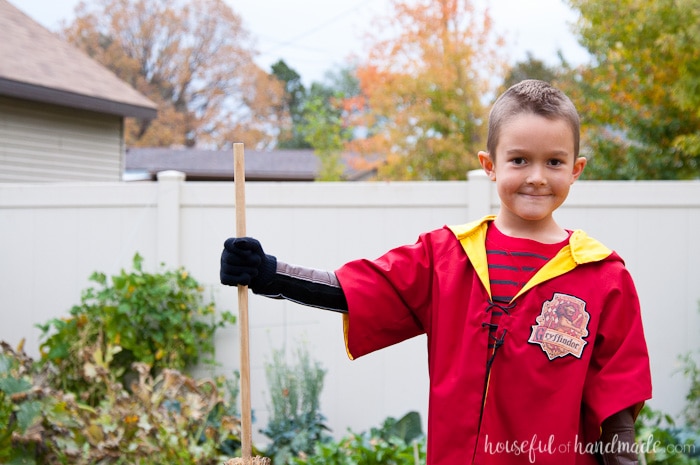
So after finishing up the Officer Hopps costume for my daughter I got to work on making a Harry Potter Quidditch Robes Halloween costume for my son. And it turned out more than awesome!
A couple months ago I decided it was time to introduce my kids to Harry Potter. I have read, and reread, all the books, watched all the movies, and can’t wait to visit Harry Potter world in Universal Studios.
This post may contain affiliate links. As an Amazon Associate I earn from qualifying purchases. Click here to read my full disclosure policy.
So when I was taking my kids to my parents house (which is a couple hours of driving each way), I decided that instead of letting them watch a movie, I would pop in the first Harry Potter book on CD and see what they thought.
My son was instantly addicted! It was definitely a proud mommy moment. When ever I paused the CD to talk to them, he got mad at me for stopping it. It was the quietest my kids have ever been in a car, I seriously kept checking to see if they were sleeping.
But no, they were just enthralled with the audiobook. Since our car ride only got us through part of the book, my son was eager to be in the car going anywhere else so we could listen to more.
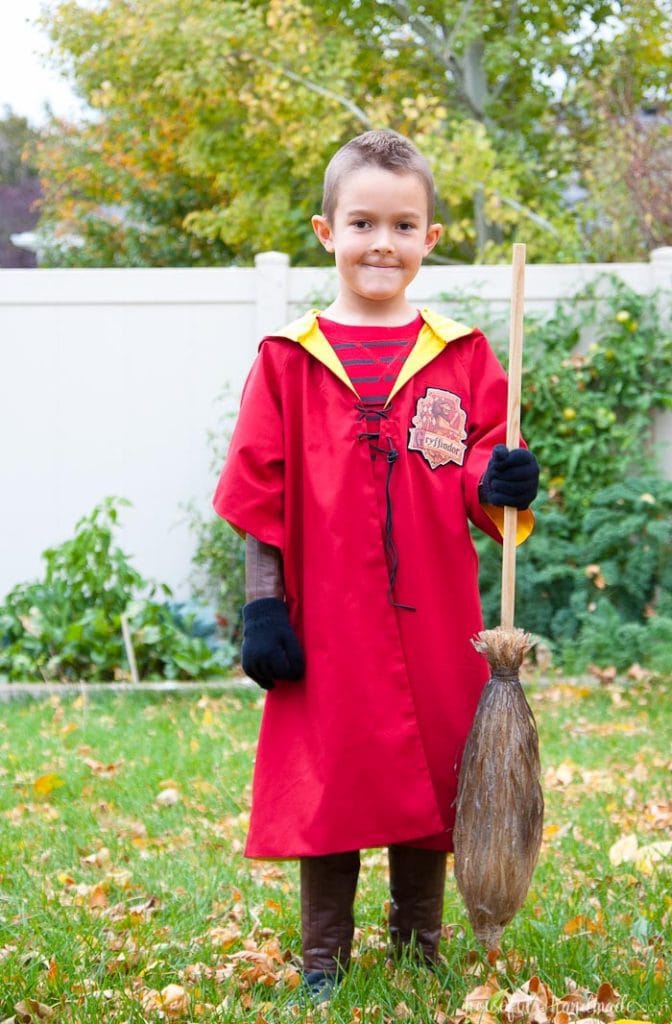
When it was time to decide on Halloween costumes this year, my son requested Harry Potter and never faltered once. As much as I knew he would look awesome in some plain black robes, I thought it would be more fun to make him his own set of Quidditch robes.
I’m not going to lie, it did take me a little bit of convincing to get him to agree, but when I told him he would get a broomstick with his robes he was all in!
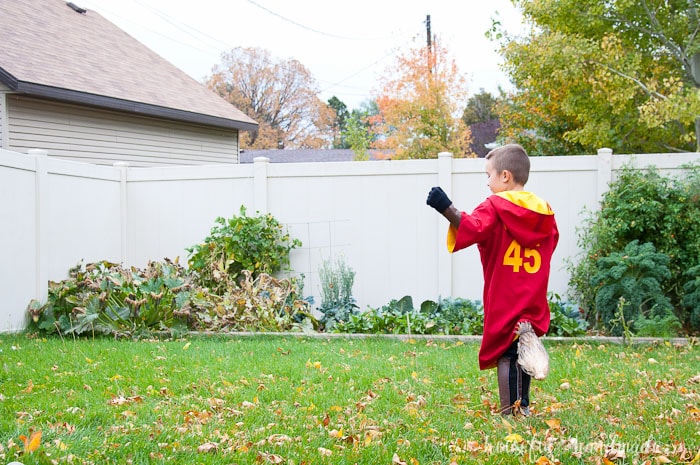
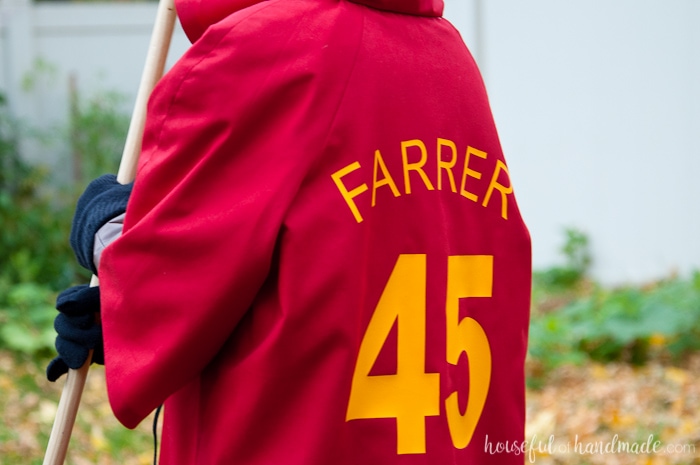
Once I got the robes finished, he decided he didn’t want the back of his robes to say Potter 7, he was adamant that they said Farrer 45. Not sure why 45, but that was the number he wanted so we went with it.
So technically instead of him being Harry Potter for Halloween, he is just a Gryffindor Quidditch player.
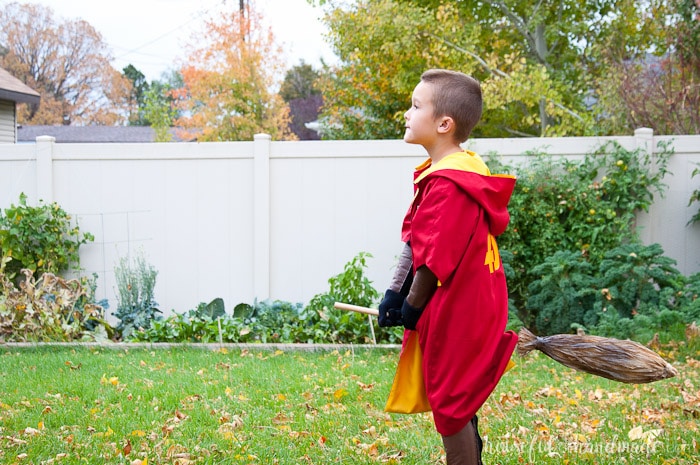
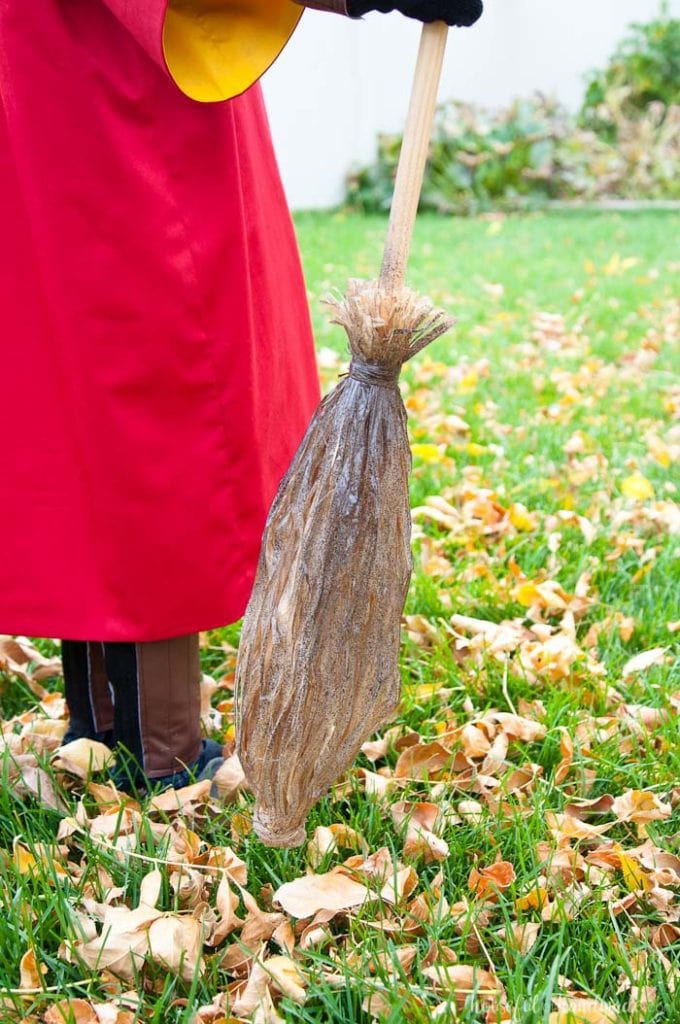
He said he is a beater just like the Weasley twins and now he is also requesting a bat but I think that might be a bad idea so we are are sticking with just a broom. But not just any broom, a Nimbus 2000!
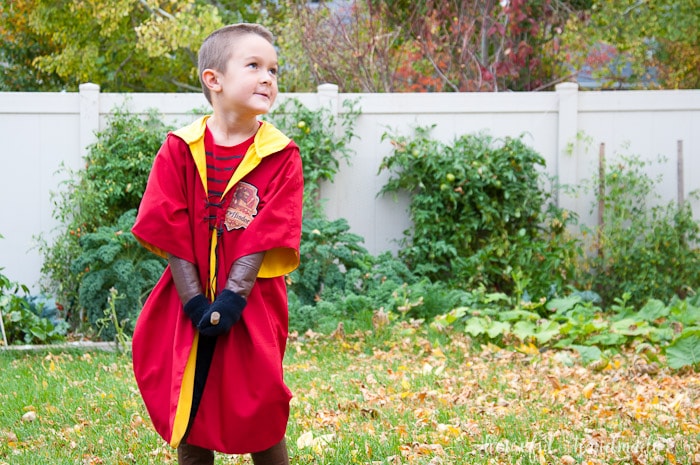
And now he is ready to fly up in the sky and play Quidditch in his new Harry Potter Quidditch Robes Halloween costume.
He keeps saying he wishes his broom was enchanted so he could fly, but I am a happy mommy with his feet firmly on the ground. Good thing he has a great imagination!
How to Make Harry Potter Quidditch Robes Halloween Costume
Supplies:
- Pattern for robe with hood
- FABRIC: Check the pattern for the amount of fabric needed for the size of your child
- Red broadcloth
- Yellow broadcloth
- Black felt
- Faux leather
- Velcro
- Scrap of canvas or drop cloth for Gryffindor patch
- Printable iron on transfer paper
- Yellow heat transfer vinyl
- Black leather string
- Fabric glue
- Large dowel
- 12″ foam cone
- Raffia
- Dark brown or black spray paint
- Hot glue gun and glue sticks
- Sewing machine
- Iron
- Printer
- Silhouette electronic cutting machine (or other way to cut the heat transfer vinyl for the back)
To make the robes:
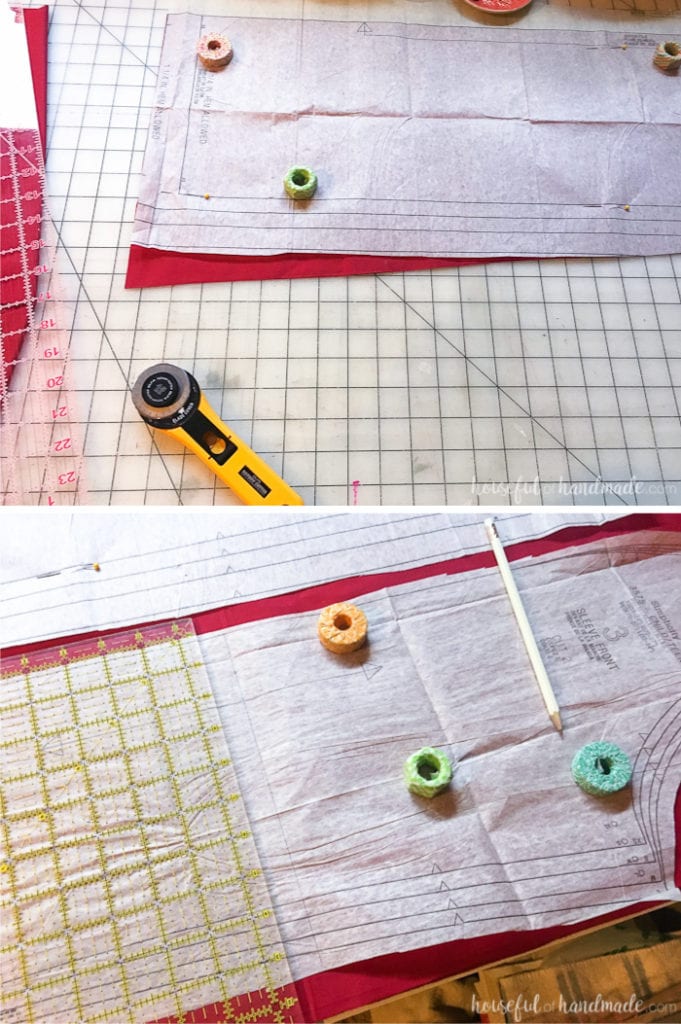
Use the pattern to cut out the robes. Cut one out of the red broadcloth and one out of the yellow broadcloth with the following adjustments. Only cut the front, back, sleeves and hood (my pattern also had pockets and a tie that I didn’t use).
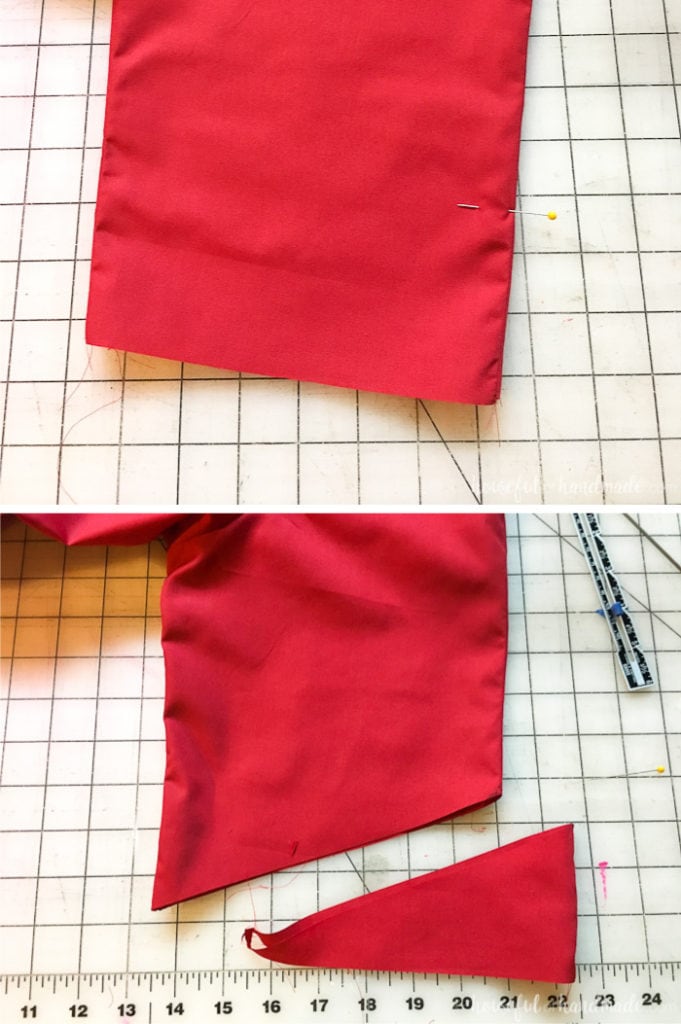
On the sleeve pattern pieces, shorten the arms to be just below your child’s elbow. Measure from the side of their neck to the length you want the sleeves then use that measurement to shorten the sleeves. Also, add about 3 inches to the bottom side seam and taper it to the side seam right under the arm. This will give the robe a little bit of flair at the bottom.
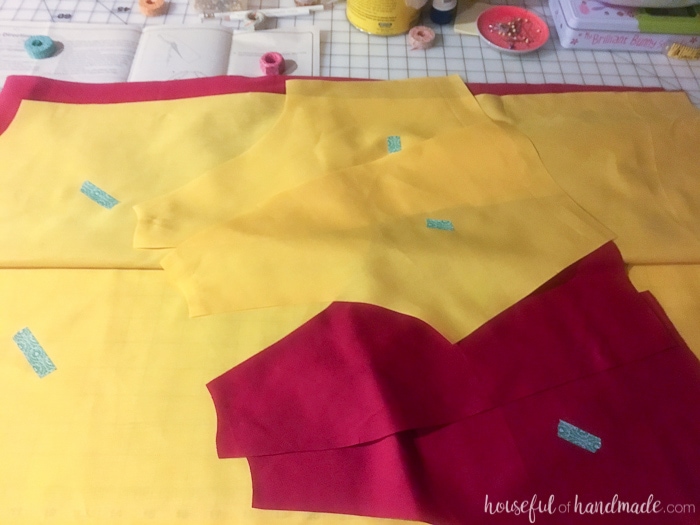
Because it can be hard to tell which side of the broadcloth is the right side, I like to put a piece of washi tape on it after I cut my pieces so I don’t get confused.
Sew the front, back and sleeves according to the instructions in your pattern for both the yellow and red robes. Then place the two robes together with the right sides touching.
Pin down the front of the robes and across the bottom and sew the two together. Turn the robes right sides out and iron the front and bottom seams flat (sorry I didn’t get a picture of this step).
Trim the sleeve so it is angled to be shorter on the top of the sleeve and longer on the bottom. Have your child put the robes on and mark the spot you want the top of the sleeve to be trimmed to. Then trim it equal on both sleeves.
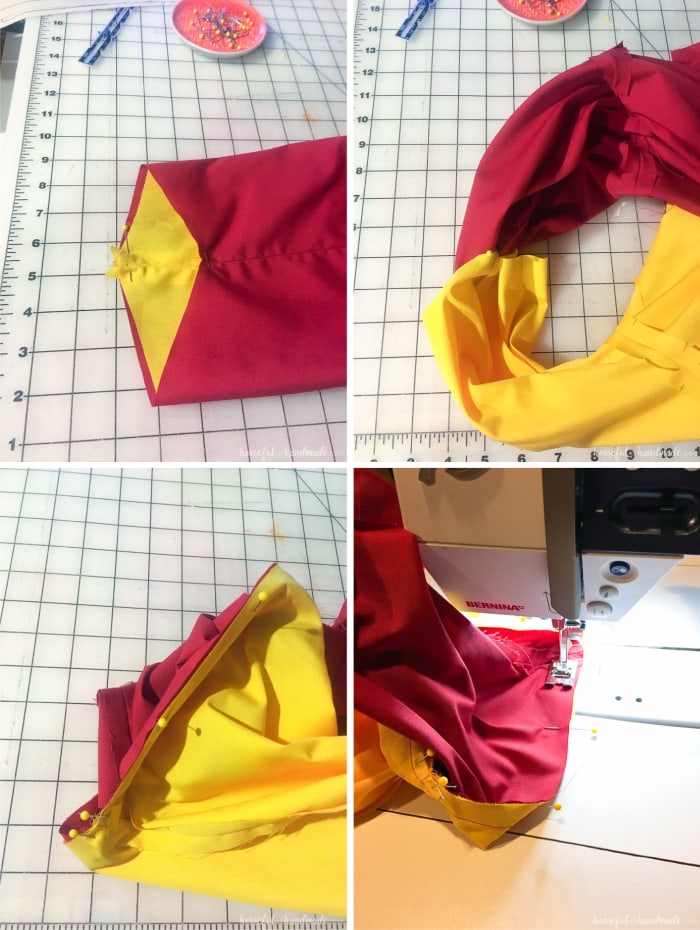
To sew the robes together at the end of the sleeves it is a little bit trickier. You cannot just put the sleeves together and sew then turn or you will end up with a ring of sleeve.
The easiest way I have found to sew the ends of the sleeves together is to put the yellow sleeve inside the red sleeve with the wrong sides together and pin it in a couple places. Then turn the sleeves inside out.
Here you will see the ring I was talking about. Carefully remove the pins, one at a time, and repin with the right sides together. Sew all around the ends of the sleeves.
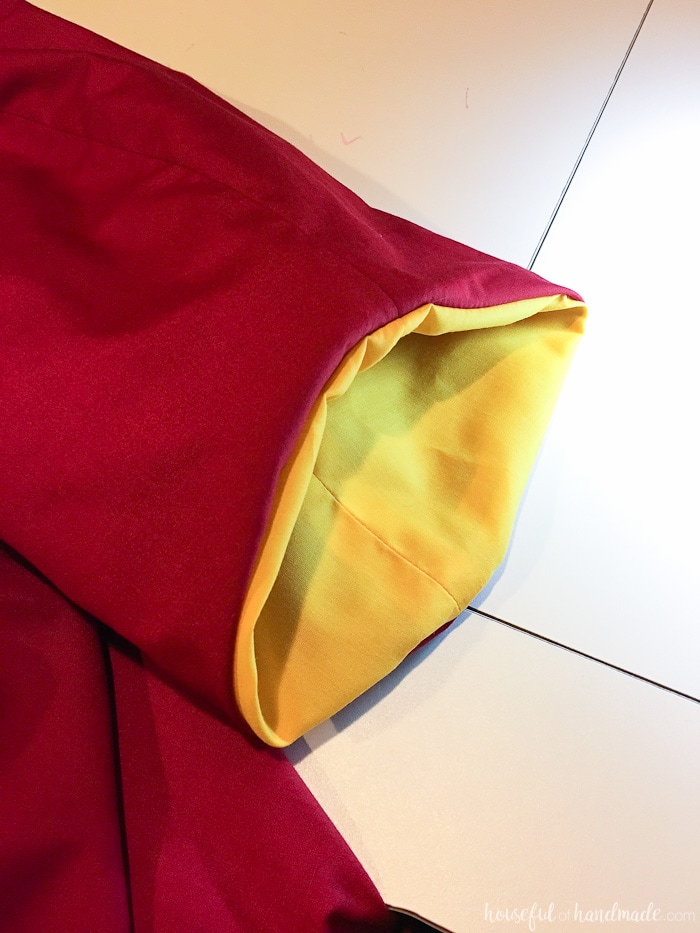
Turn the sleeves right side out again and you will have perfectly hemmed sleeves with the yellow on the inside and the red on the outside. Iron the seam flat.
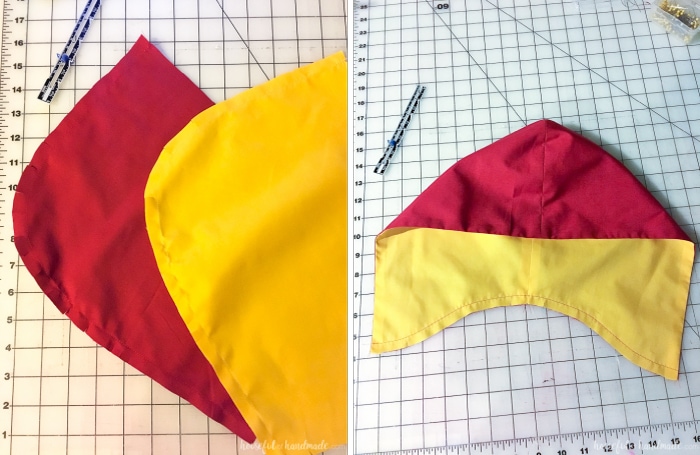
Sew the red and yellow hoods together according to your pattern. Then put the yellow hood inside the red hood, right sides together and sew around the front of the hood.
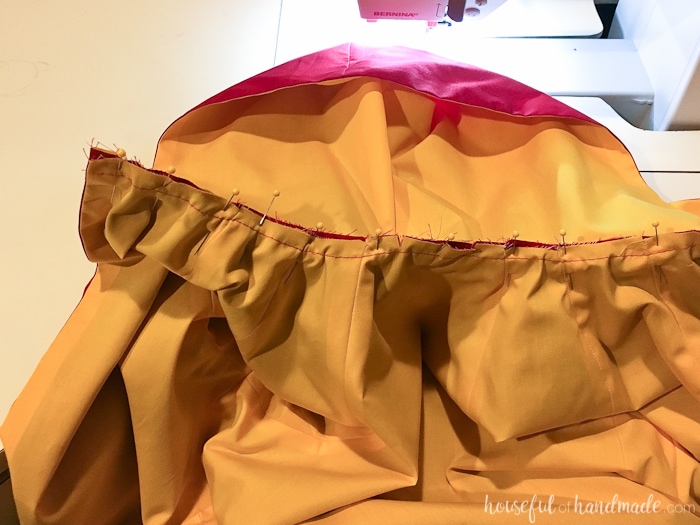
Turn it right sides out and iron the seam flat. Then baste along the bottom of the hood. Also, baste along the top of the robes where the hood will attach.
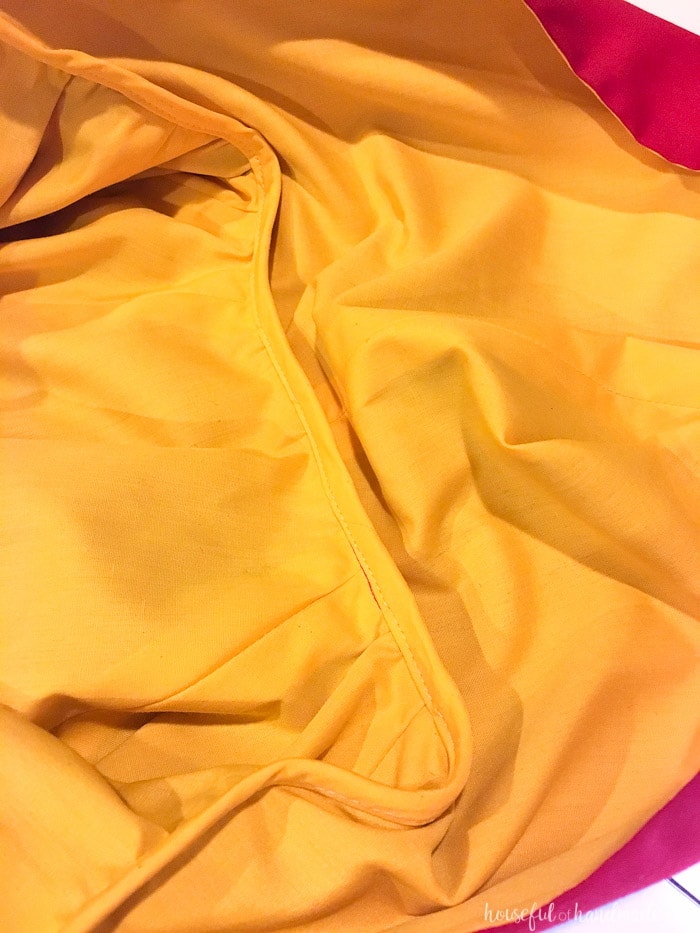
Pin the hood to the top of the robes with the red sides together. Sew the hood to the robes.
Make a couple feet of bias tape according to this tutorial. Cover the raw seam where the hood meets the robes with the bias tape.
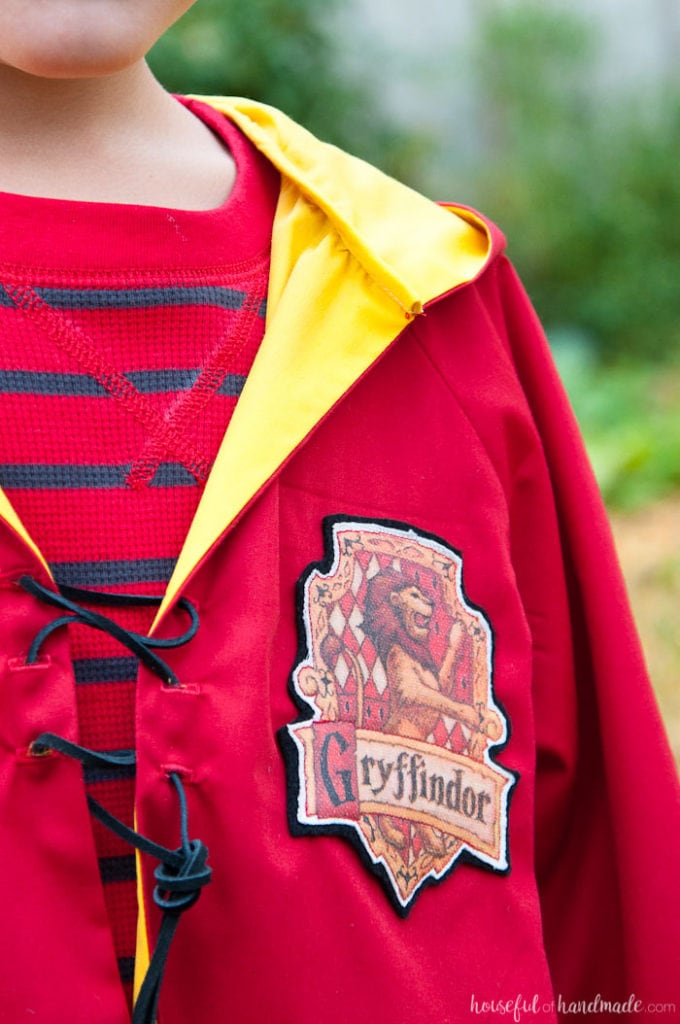
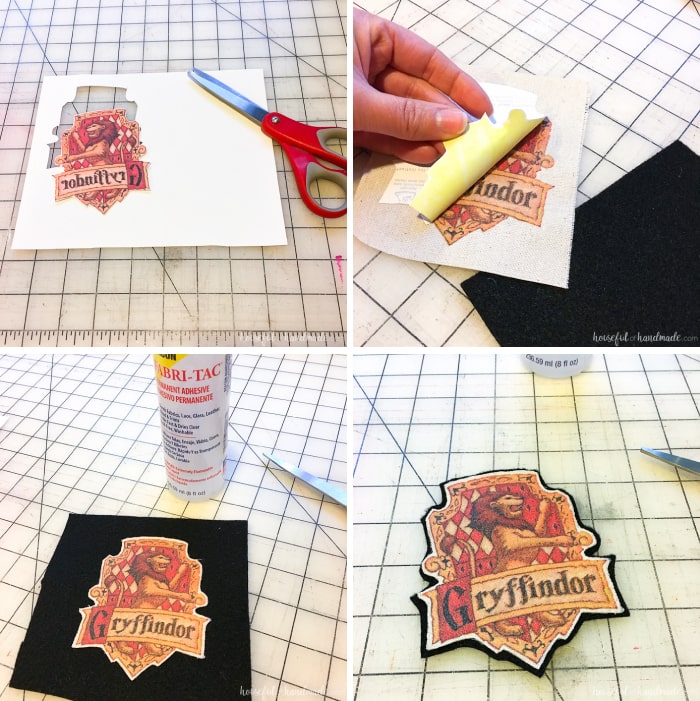
To make the Gryffindor patch, find an image you want to use online. Mirror it and print it on your printable transfer paper. Iron it on a scrap piece of canvas or drop cloth according to the directions of your transfer paper.
Cut the patch out. To keep the edges from fraying, glue around it with some fabric glue. Then put a little glue on the back of the patch and secure it to a piece of black felt and trim the felt so just a little bit shows around the patch.
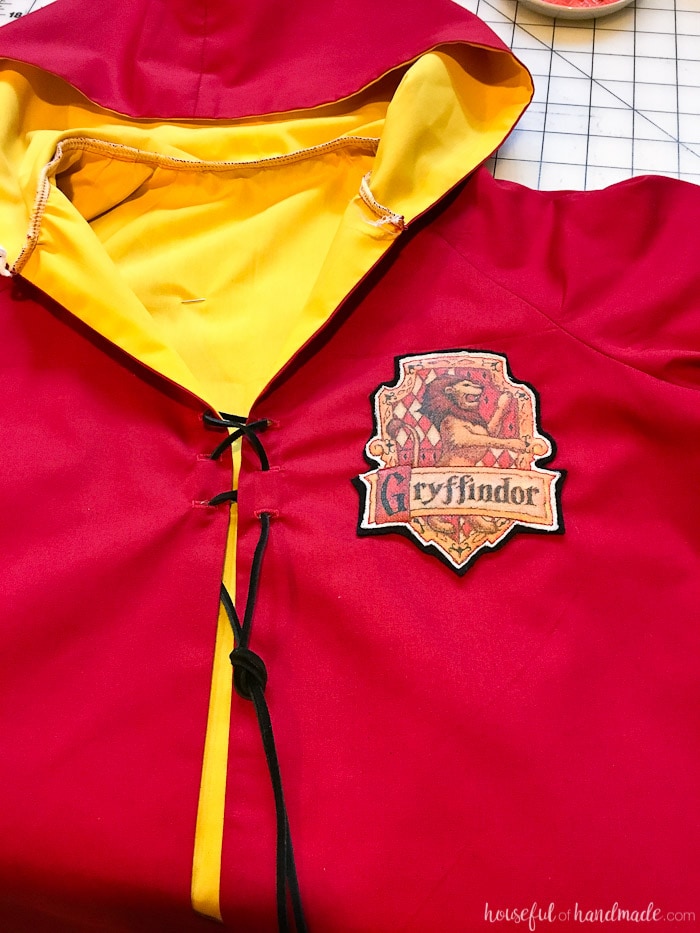
Sew around the permitter of the patch (not the felt, but the actual canvas piece) to secure it to the robes. This will also secure it to the felt more permanently.
Add 3 button holes to each side of the front of the robe and thread a piece of leather rope through it to hold the robes closed.
For the final detail, cut out the heat transfer vinyl with the name and number you want. Make sure it is mirrored when you cut it out so it will be correct when ironed onto the robes. Iron it onto the back of your robes and you are all done!
To make the arm and leg pads:
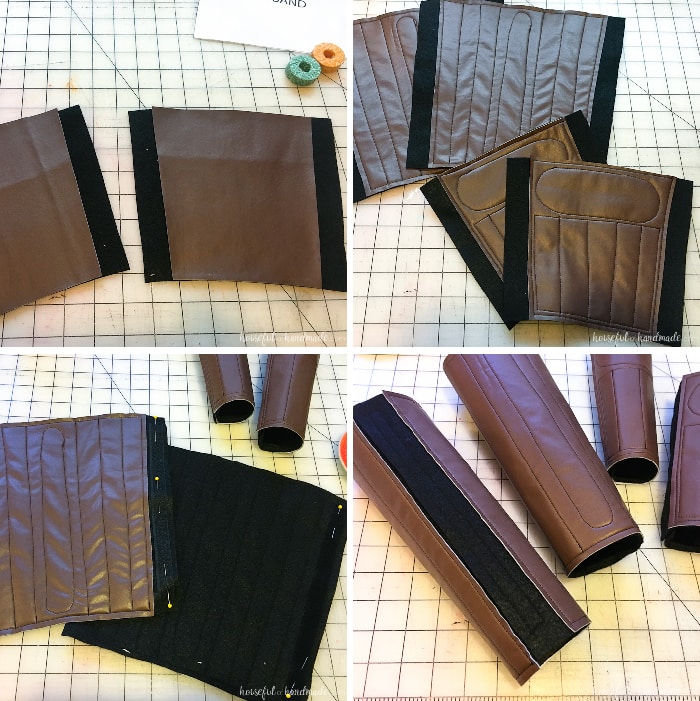
Measure your child’s forearm from below the elbow to the wrist. This will be the length of your arm pads. Measure around the thickest part of the forearm add 2 inches, use this for the measurement at the top of the arm pads.
Measure the wrist and add 2 inches, use this as the measurement for the bottom part of the arm pads. Cut out two of these out of black felt, then cur the 2 inches off your pattern (one inch off each side) and cut 2 of these out of faux fur.
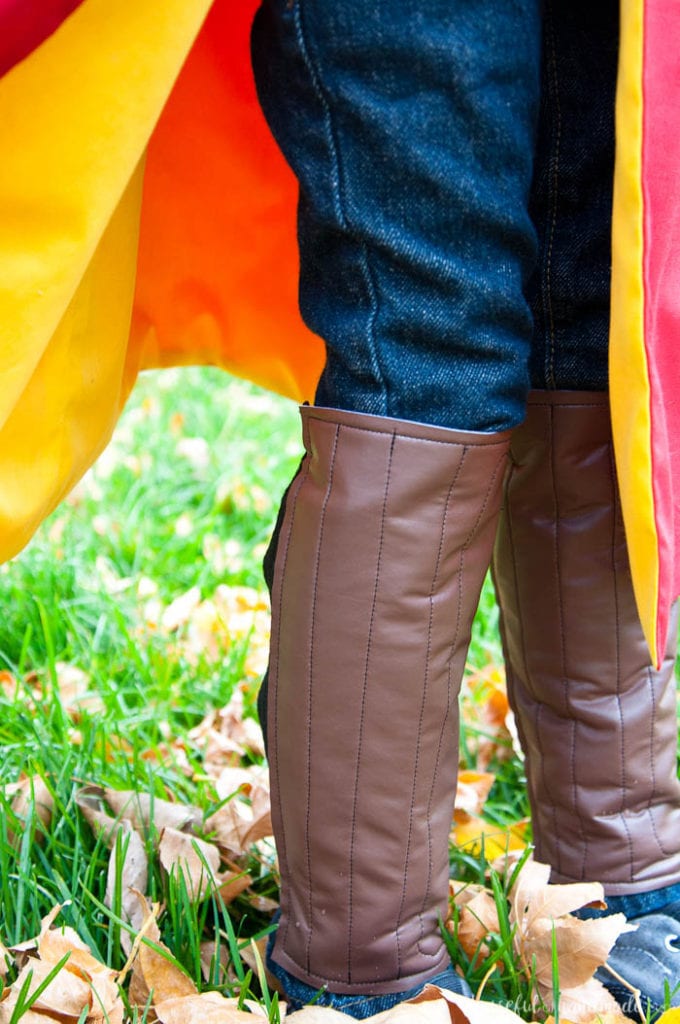
Stitch these together on your sewing machine with black thread in a design you want. I did mine freehanded because I wasn’t sure the best way to mark the faux fur. They are not exactly the same, but look close enough. Repeat for the leg pads.
Attach some black velcro on the sides of the arm and legs pads make sure the one side of the velcro is on the top of the pad and the other side is on the bottom so they close correctly.
Now your child is ready to suit up for the next Quidditch match!
To make the broom:
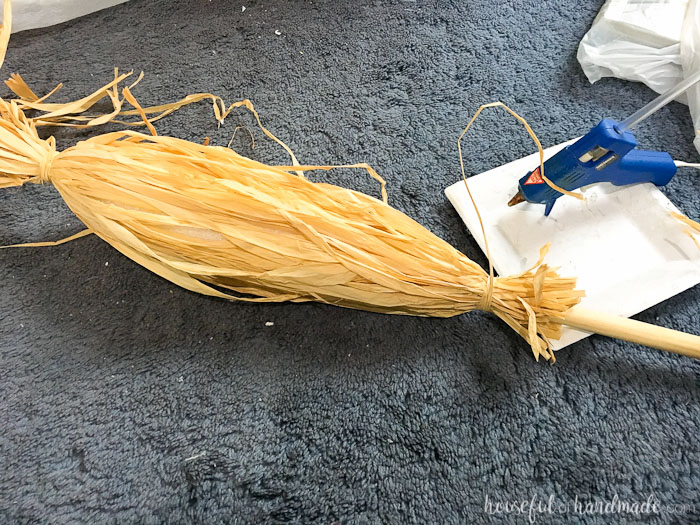
Trim the bottom of the foam cone to give it a rounded shape. Carve a hole in the top of the cone so the dowel will fit inside it. Fill the hole with glue (I used a thick all purpose gel glue) and add the dowel. Allow to dry according to the directions on your glue.
Using hot glue, start wrapping your foam with raffia. I found the easiest way to do this was to gather small groups of the raffia in my hand, add a little glue to the dowel right above the foam and press the group of raffia.
Then wrap a small piece of raffia to further secure the group and secure it with some more hot glue. Then twist the broom and add another section, securing the top the same way.
Continue until you have raffia all around the top, then tie it closed at the bottom with a piece of raffia. Trim the bottom of the broom. Now add some more raffia to the top around the entire broom.
To secure this second section of raffia at the bottom, fold it over the bottom of the broom and secure it with some glue. Continue working your way around until you are happy with the broom.
To give it a little more dimension, I spray painted the top part of the broom with some black spray paint and feathered it out so the bottom was mostly light. It looked a bit more like the Nimbus 2000 this way and that is what my son was requesting.
Now he is all ready for Halloween! He couldn’t be happier with his new Harry Potter Quidditch robes Halloween costume, hopefully we can keep it clean until Halloween because he doesn’t want to ever take it off.
Today he was running around with just the arm and leg pads on because I hung the robe up so it wouldn’t get lost. At least I know he will be using his costume way past Halloween.
I have to admit, I am pretty proud of myself for getting their costumes done 2 weeks before Halloween.
They are ready just in time for our first costume party this coming Tuesday, but usually I make them reuse old costumes or dress ups for the first costume party of the month because I am an amazing procrastinator.
But I guess this year I might even have time to do costumes for me and the hubby… or we can just reuse too.
More Costume Ideas for Boys
Check out these other great boy costume ideas for Halloween:
- Digital Dudz DIY Halloween Costume
- Tattoo Shirt Sleeve Costume
- Captain America & Thor Costumes
- Upside Down Man Costume
- Great Pumpkin Charlie Brown Costume
- Easy Luke Skywalker Costume
- Spaceship Costume
- DIY Demogorgon Stranger Things Mask
- Disney Maui Halloween Costume
- Pikachu Costume
Have a wonderfully spooky Halloween,


Marisol
Friday 5th of October 2018
Hello, I have a questions, I want to make the guards for my son’s costume and I was wondering about how many yards of felt and faux leather you used to make the guards? Thanks in advance!! Love your post!!
Kati
Tuesday 9th of October 2018
The amount really depends on how big your son it. Measure around their arms and legs and the length you want them. Then you can see how big each one it. Fabric usually comes in 44" width and a yard is 36" so 1 yard is probably more than enough for a boy. Maybe a little more if they are fully grown.
Lydia
Tuesday 31st of October 2017
This is so cute! I made it for myself, but ravenclaw. It turned out awesome! The trick with the sleeves is really clever. It took me a few tries to get the hang of it, but once i had, it was easy. Also, i topstitched the whole thing so it wouldn’t move. Thanks for the tutorial!
Kati
Thursday 2nd of November 2017
Thanks so much for your comment Lydia! I am so glad the tutorial was helpful.
Amy @ my life from home
Monday 24th of October 2016
Love it! So cute.
Kati
Friday 28th of October 2016
Thank you Amy!
April R - UncookieCutter
Monday 24th of October 2016
Just adorable! I need one for my son, who wants to be Harry Potter for book day. And my daugther is Judy Hopps, which is so funny because we'll have twins-eys . Except your costumes are WAY better! Pinning!
Kati
Friday 28th of October 2016
That is awesome, little twins! I'm sure your costumes are awesome too. It's so much fun for them to be able to dress up.
sarah
Friday 21st of October 2016
love the costume! he looks so cute in it!
Kati
Friday 21st of October 2016
Thanks Sarah. He loves it too ?