Create an adorable paper hot air balloon spring wreath that will look great on your front door!
The sun is shining, the air is warmer (slightly) and I am ready for spring. Yay! I can’t wait for the ground to thaw and the flowers to grow. But until then, I will have to settle for just filing my home with bright and cheery spring decor.
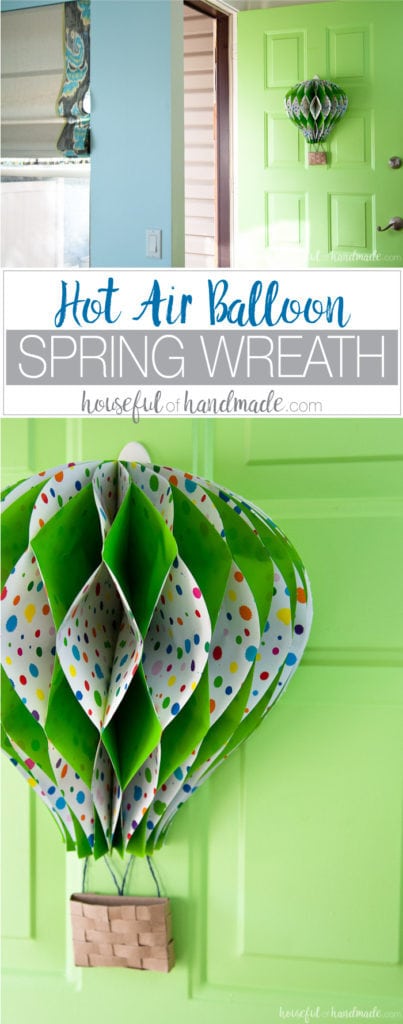
And my seasonal decorating always starts at the front door. This time I didn’t go for a traditional wreath, instead I made this beautiful Hot Air Balloon Spring Wreath to brighten my door.
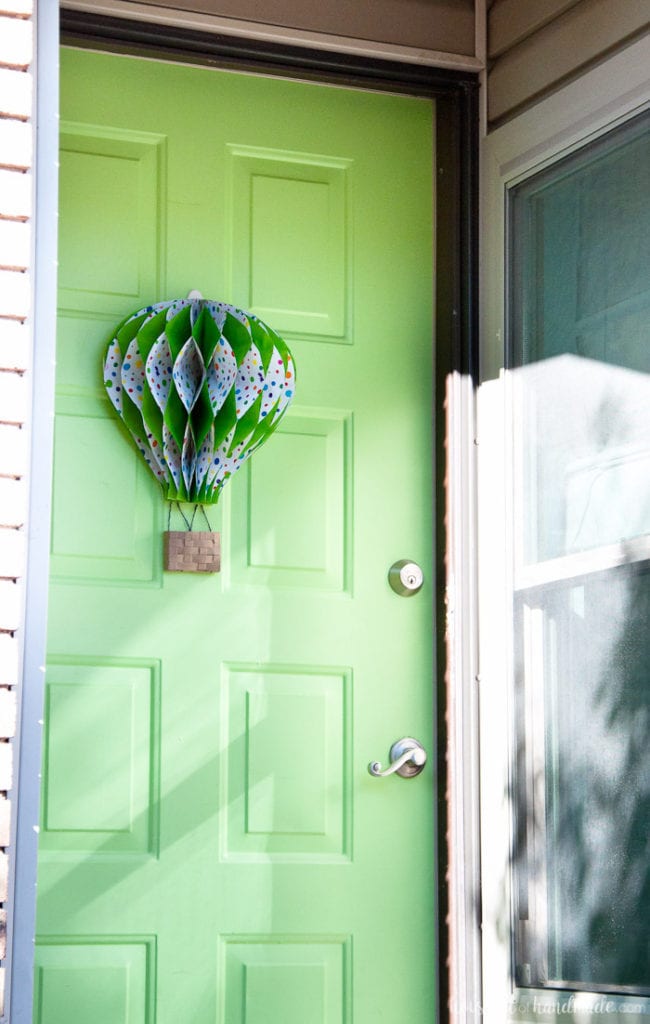
After making the giant paper ornaments for my front door a couple years ago, I have been thinking about doing the same thing with a hot air balloon. After waiting way too long to make it happen, I decided it would be the perfect DIY spring wreath for this year.
This post may contain affiliate links. As an Amazon Associate I earn from qualifying purchases. Click here to read my full disclosure policy.
Doesn’t it just make you think of warm days and having fun on the grass?
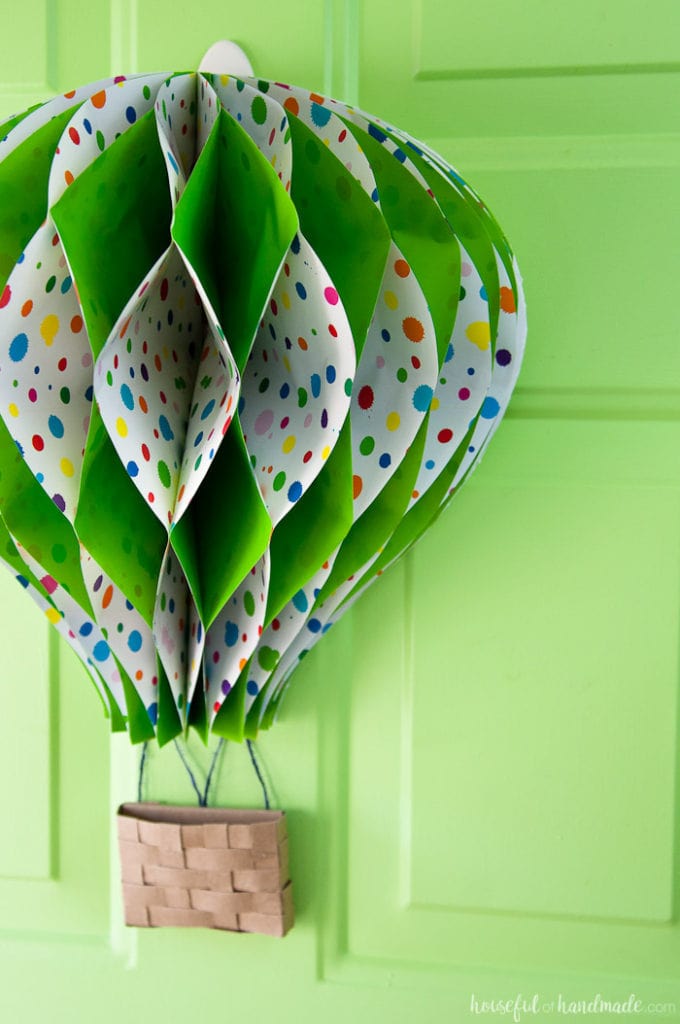
As a kid I always loved seeing hot air balloons in the sky. I remember driving the ever-so-long (but really only 2 hour) drive to visit my grandparents and getting so excited when we say hot air balloons peeking over the mountains.
It just seemed like a fairy tale to me. And what is spring but the same fairy tale of warm after a long winter.
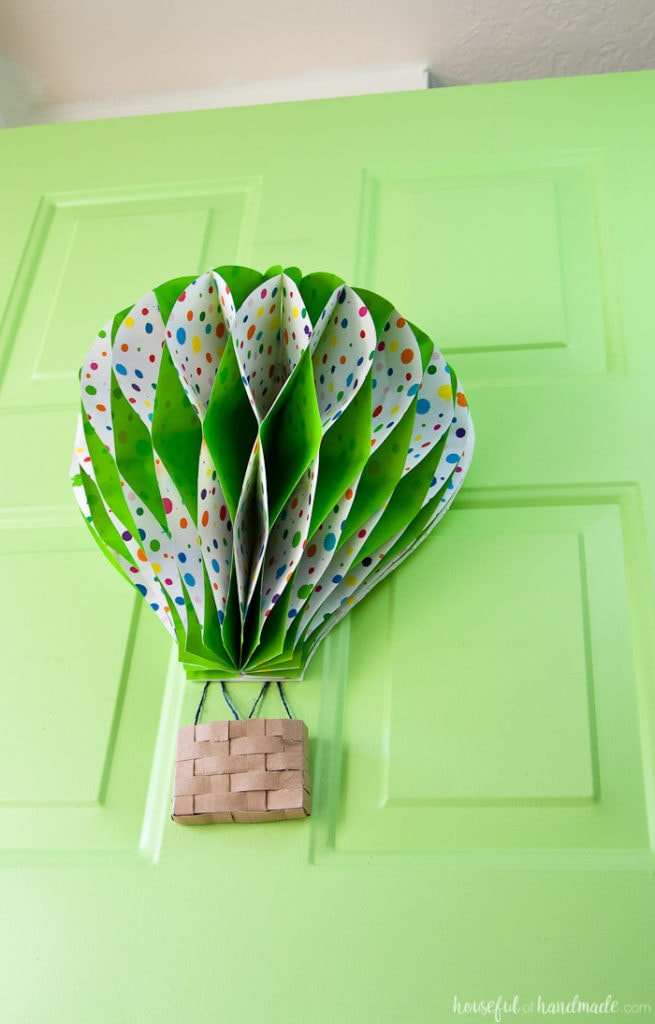
And while this looks like a complicated wreath, it really was so easy to make. It only took me about an hour and then I had a beautiful hot air balloon spring wreath to welcome in the sunshine!
But don’t be fooled, it was still cold, but at least the sun was shining. I think that is a good sign that spring is on it’s way.
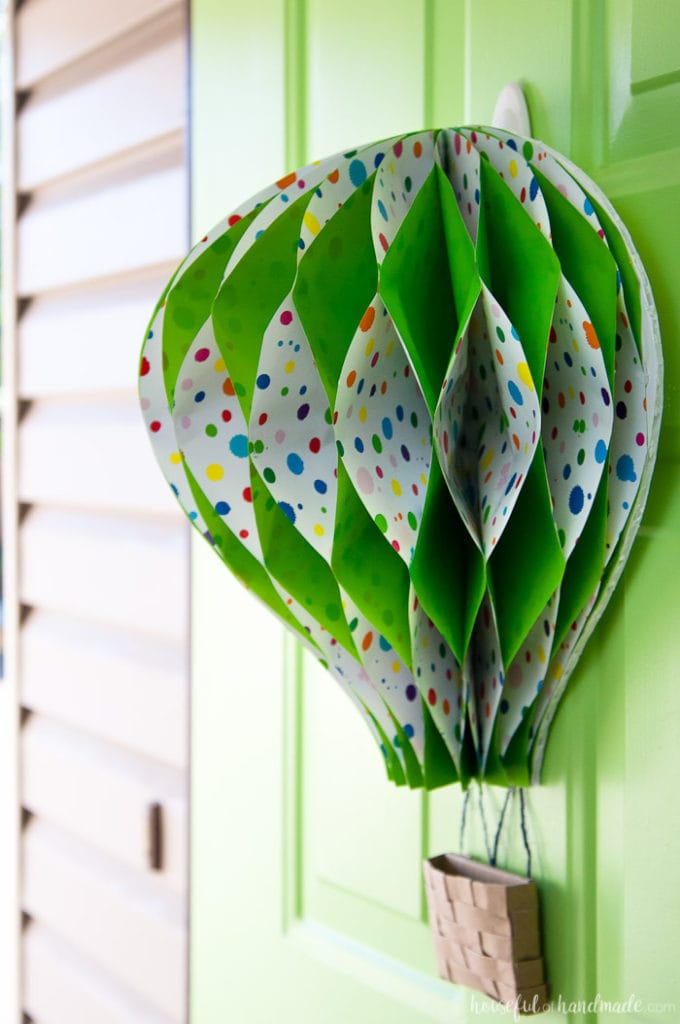
How to Make a Paper Hot Air Balloon
Supplies needed:
- Balloon template
- I am sharing the template for free in my Subscriber Library. Click here to subscribe to my newsletter and gain access to all the freebies. If you already have your password, click here to go to the library download them.
- Double sided wrapping paper
- Glue dots
- Foam core board or cardboard
- Glue
- Brown paper
- String
Cut out the Pieces
Start by printing out the balloon template. It is on 2 different pages, so you will need to tape it together.
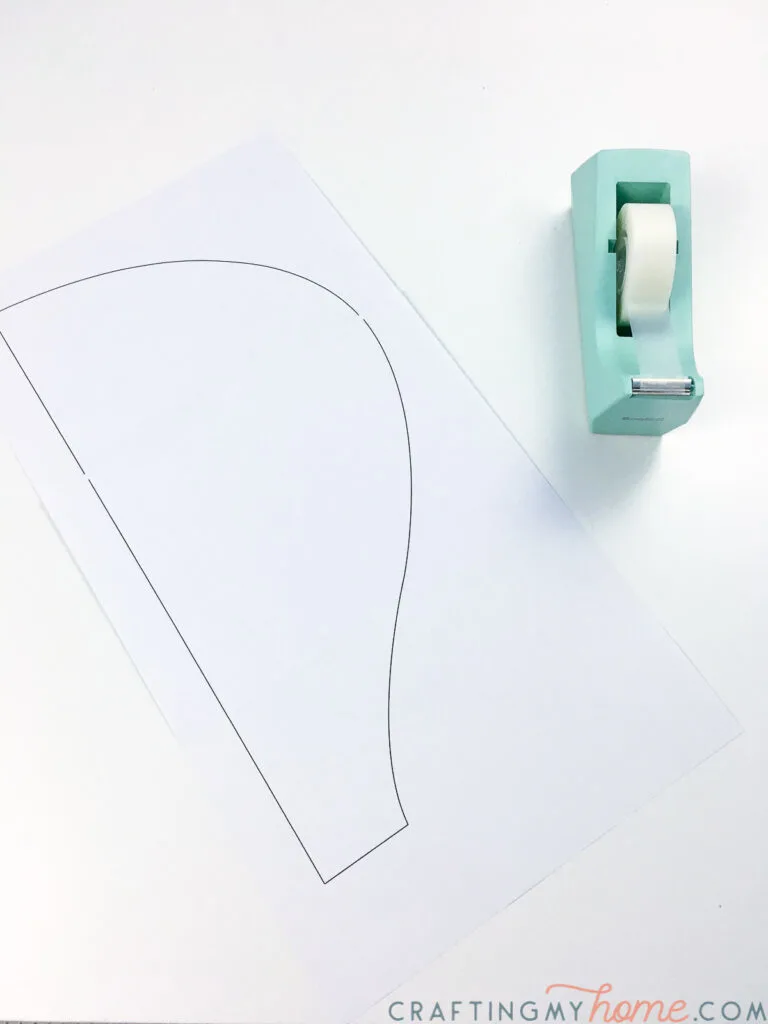
Cut out 12 of the hot air balloons pieces on the fold. The easiest way I found to do this was to first fold the paper in half at about 6 1/2 -7 inches, then line the template up on the fold and cut around it.
On a regular roll of wrapping paper, you should be able to get 2 pieces cut out of each folded section. You will need 6 1/2-7 feet of wrapping paper to get all 12 balloons.
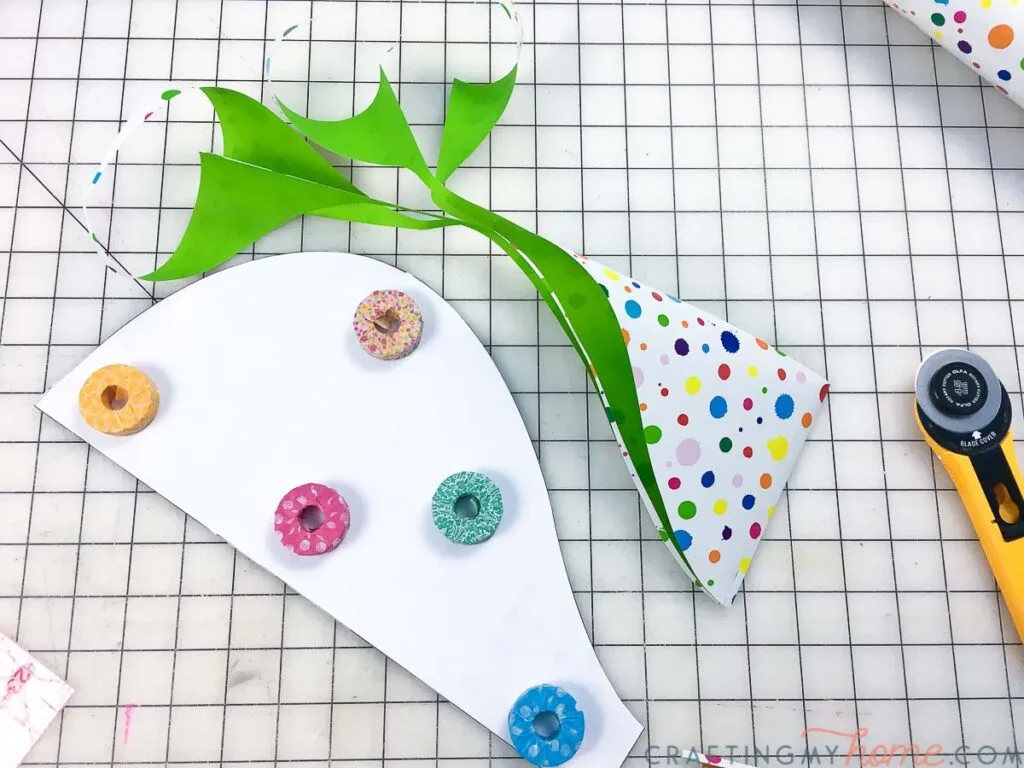
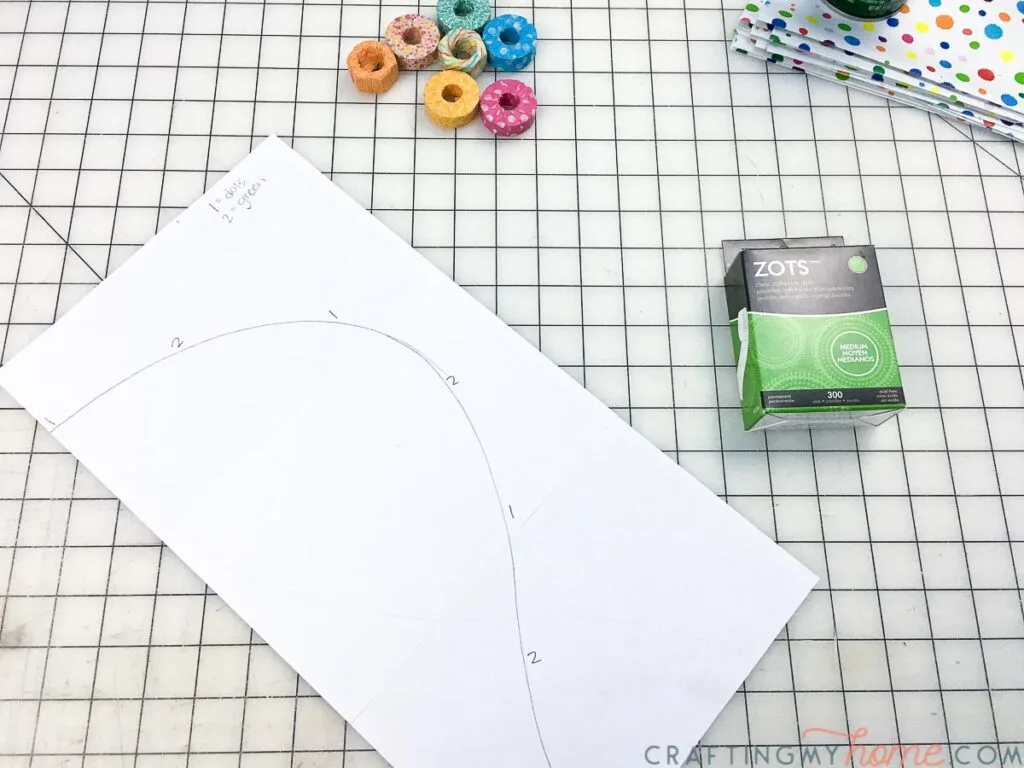
Once all the pieces of wrapping paper are cut out, trace the template onto the back of a scrap paper (or two taped together). This will be your glueing template.
Alternate writing 1s and 2s along the edge of the balloon template about 3 inches apart like you see in the picture.
Assemble the Hot Air Balloon
Now lay your first folded piece of wrapping paper down on the template. Open it up and place a glue dot next to each of the number 2s along the side of the paper up against the template. Then fold the paper back over and press to secure it at the glue dots.
Put glue dots next to all the 1s on the top of the folded piece of paper. Line up a second piece of folded paper on top of it and press at the glue dots to secure.
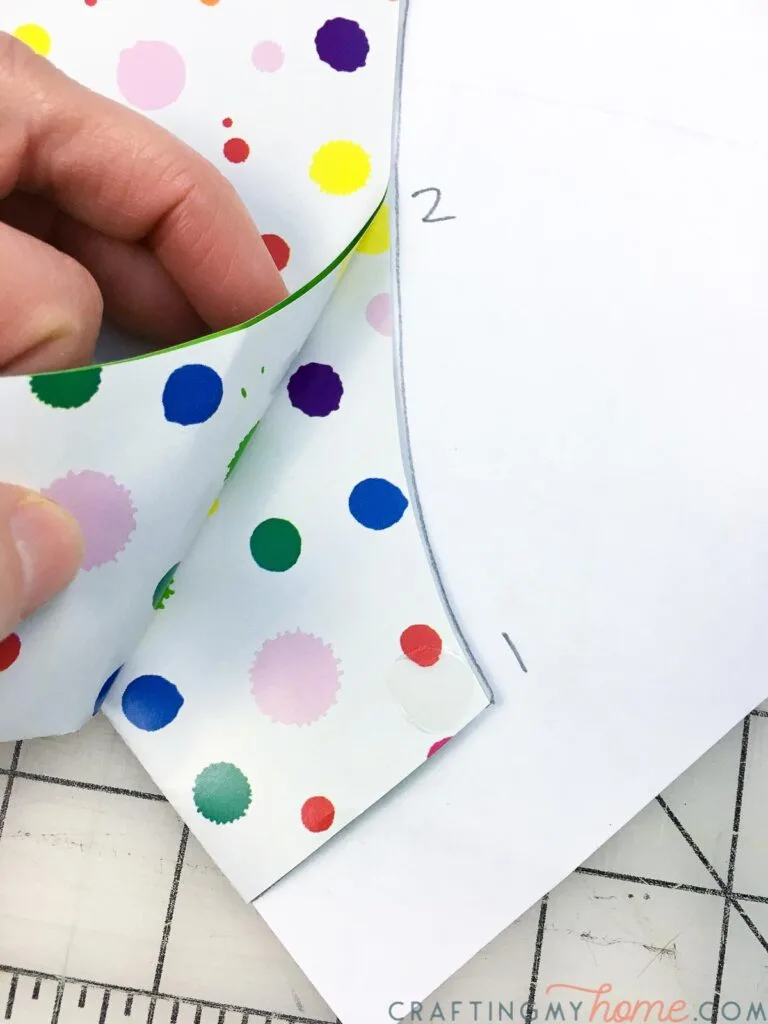
Open the piece of paper up and place glue dots at the 2s. Fold, press.
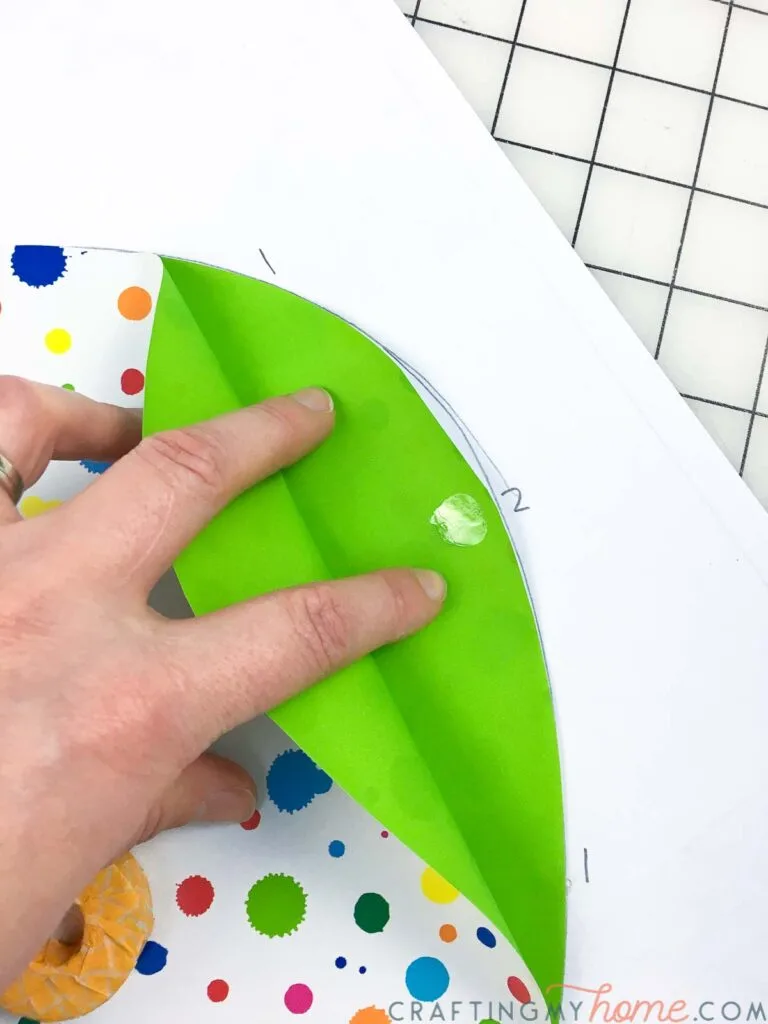
Repeat over and over, glueing at the 2s inside the folded paper and at the 1s to attach two pieces of paper together, until all 12 pieces of wrapping paper have been glued together in a big stack.
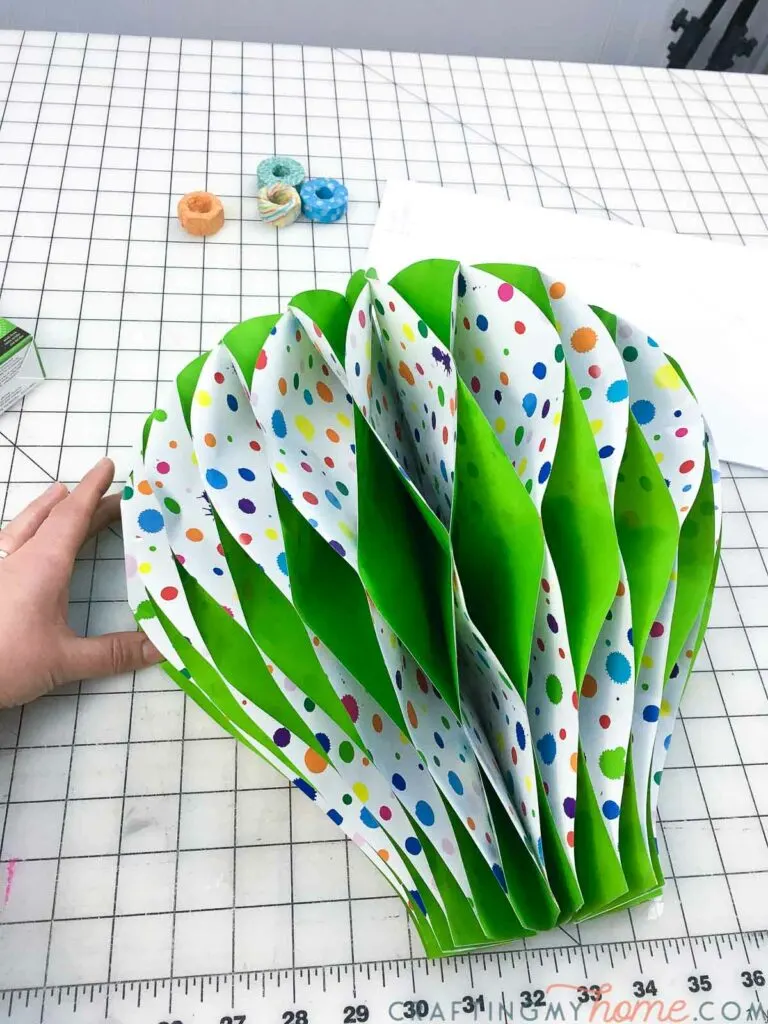
Now you are going to need a sturdy piece of something to secure your hot air balloon to so it will stay open when hanging it up. I used a piece of foam core board, but you could also use cardboard (you just might want to paint it to match your paper).
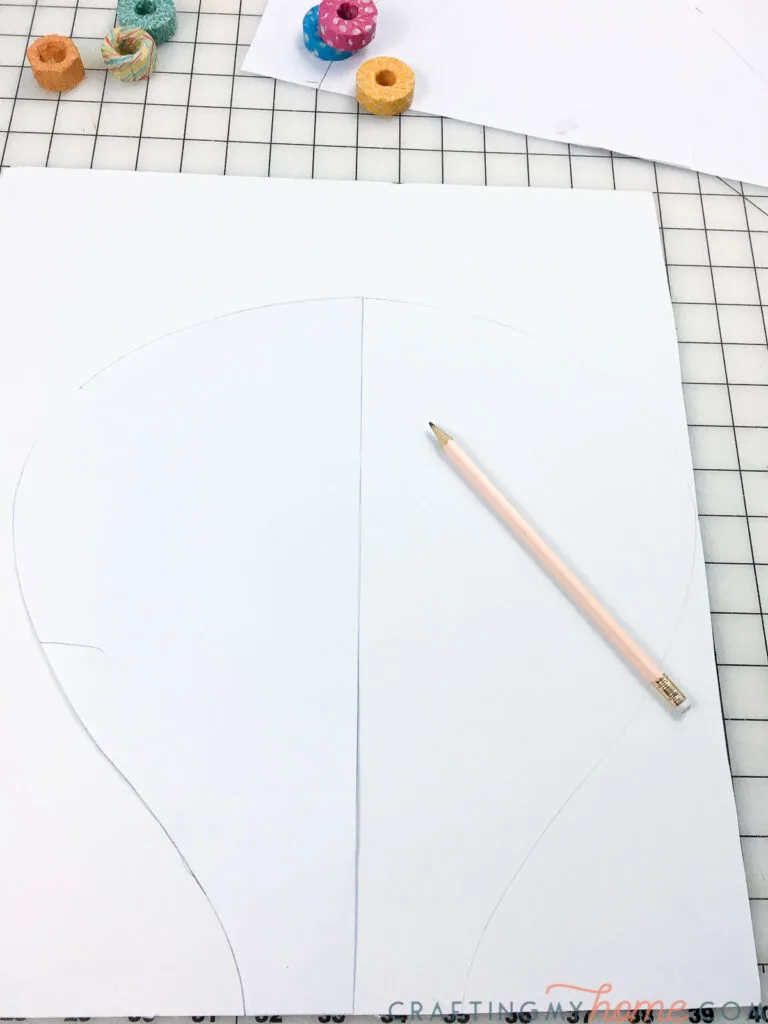
Trace the template on the board, then flip it and trace the other half so you have a full balloon. Cut it out.
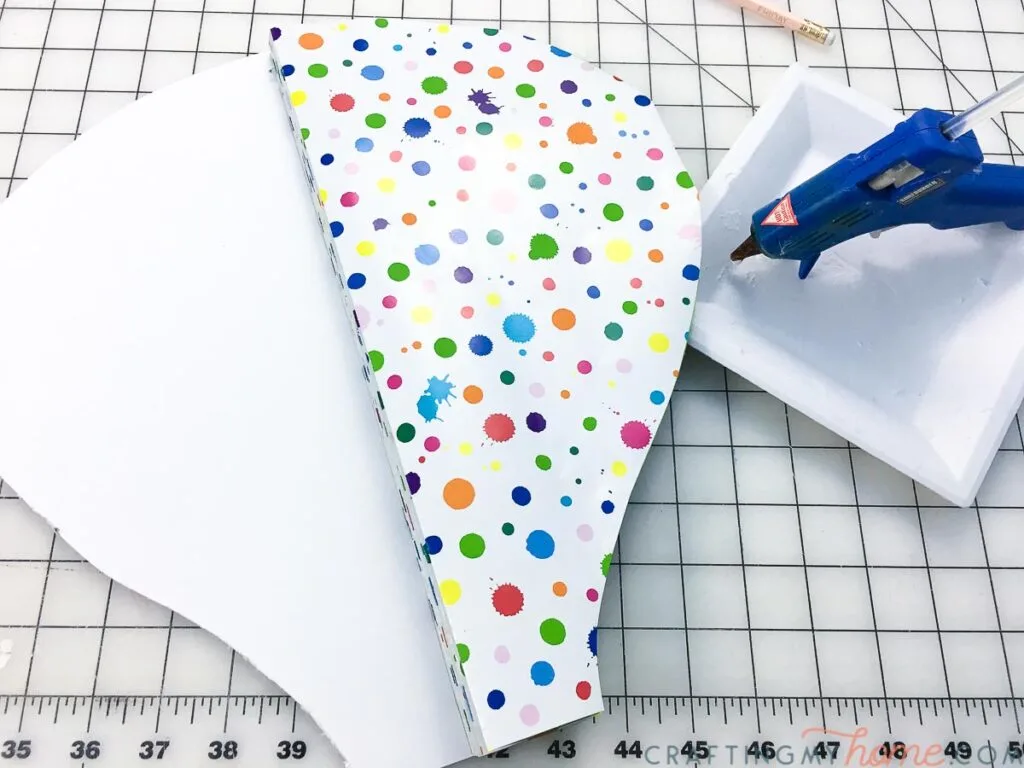
Glue one side of the hot air balloon decor to the first half of your board. Then carefully open it up so the paper spreads apart, except where you have glued it together.
The second side should lay flat against the other half of your board. Secure it with more glue.
Make the Basket
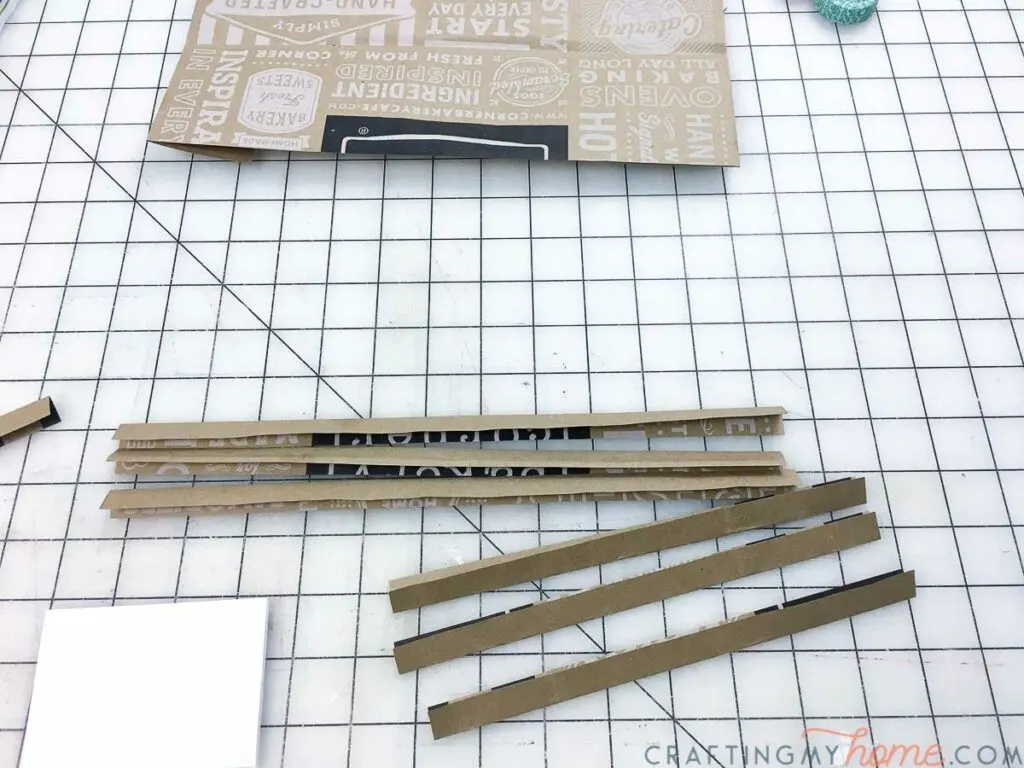
To make the little basket, cut a piece of your board to 3 1/2″ x 2 1/2″. Then cut about 1″ wide strips of brown paper (or a brown paper bag). Fold them in half so you are left with thicker, 1/2″ strips.
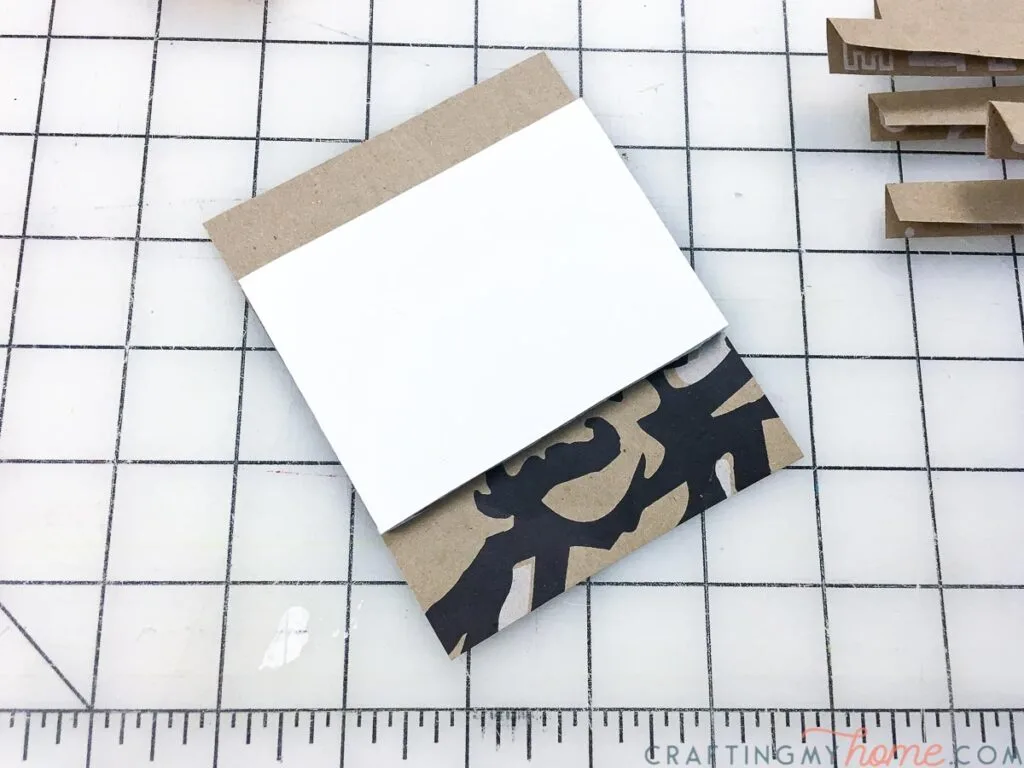
Cover the front of your piece of board with a piece of the brown paper. Fold it over the top and secure with glue.
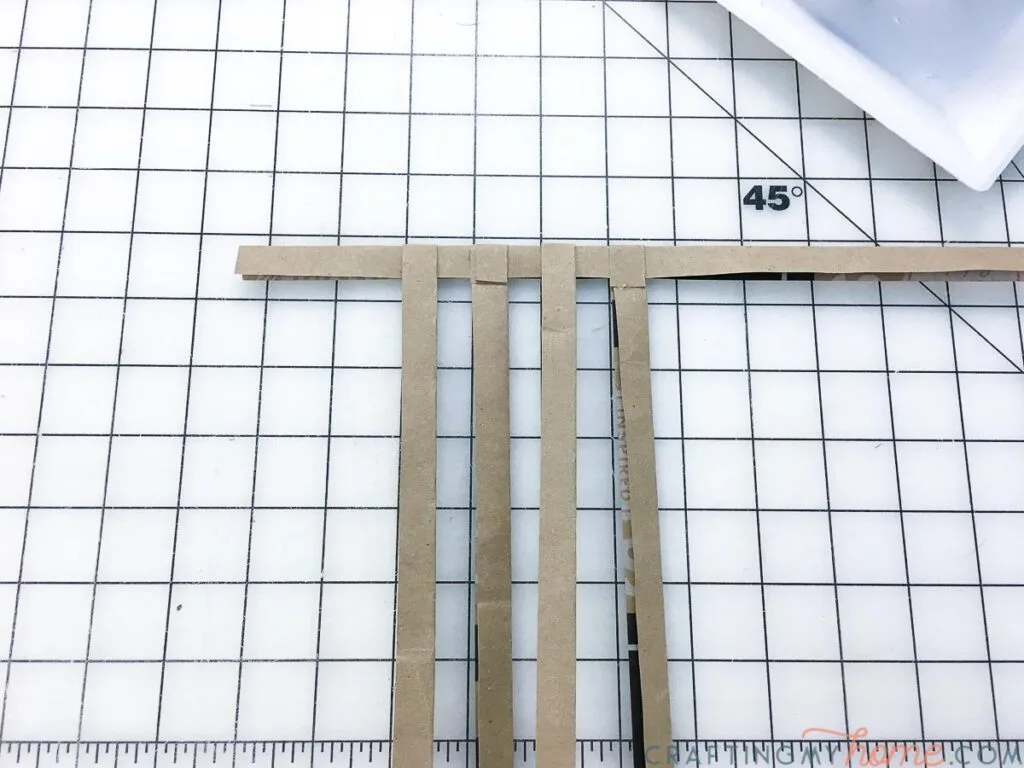
Start weaving the brown paper strips together. Fold over the tops of the vertical strips and secure with glue. This will be the top of your basket.
Once you have enough pieces woven together to cover your piece of brown paper covered board, you will want to glue the horizontal strips to the back. But make sure to leave some slack in the basket so it doesn’t look flat. Mine sticks out from the board about 1/2″.
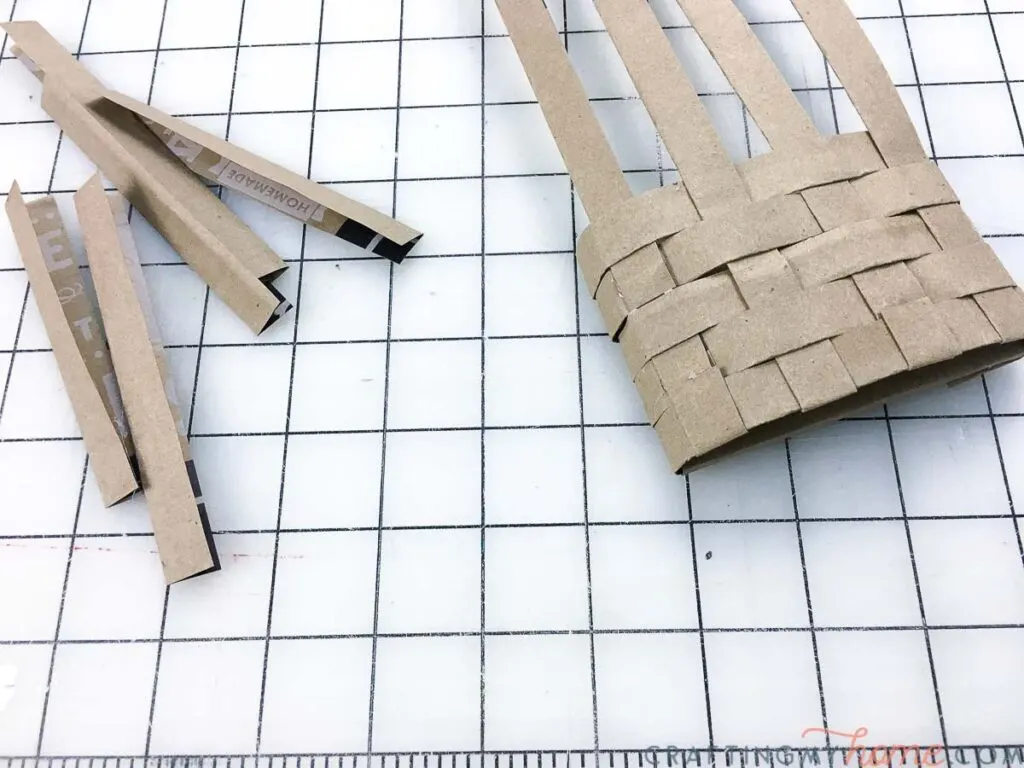
Take a final piece of brown paper and weave it into the bottom of the basket. Secure it with glue on both sides. Then secure the bottoms of all the vertical pieces to the bottom back of the board.
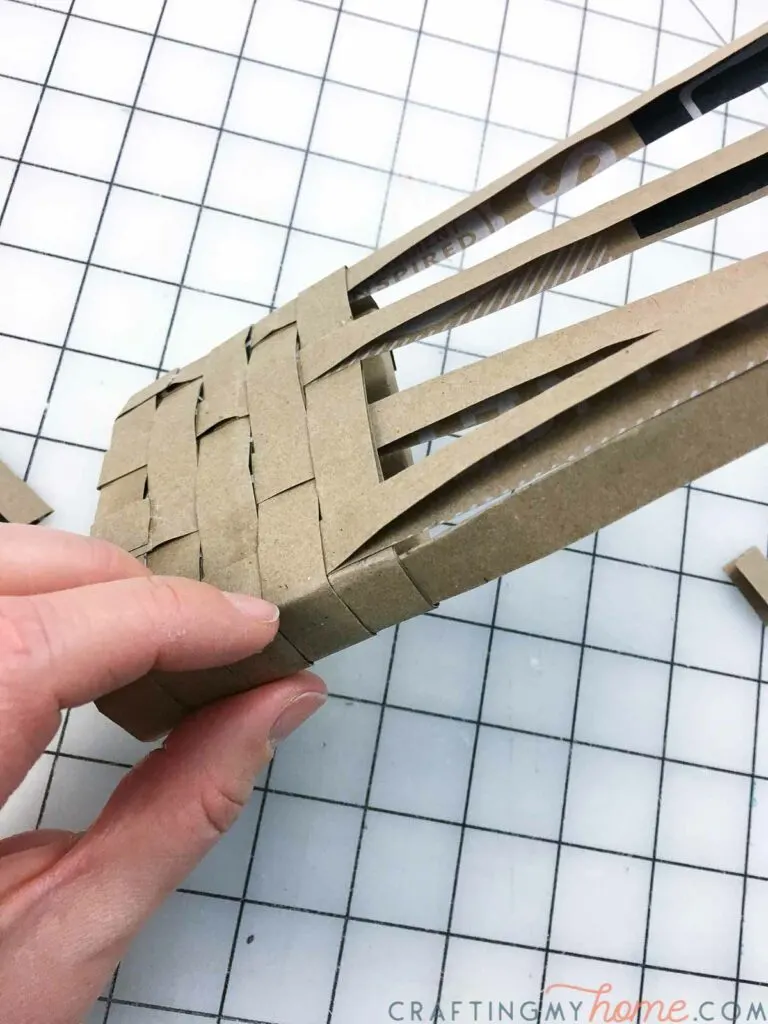
Attach your hot air balloon basket to the hot air balloon decor with some string. Hot glue to the string to the back of the balloon and the back of the basket.
To hang my balloon, I glued a piece of string to the back of the balloon and use it to hang on a command hook on my door.
Now sit back and admire your hot air balloon decor!
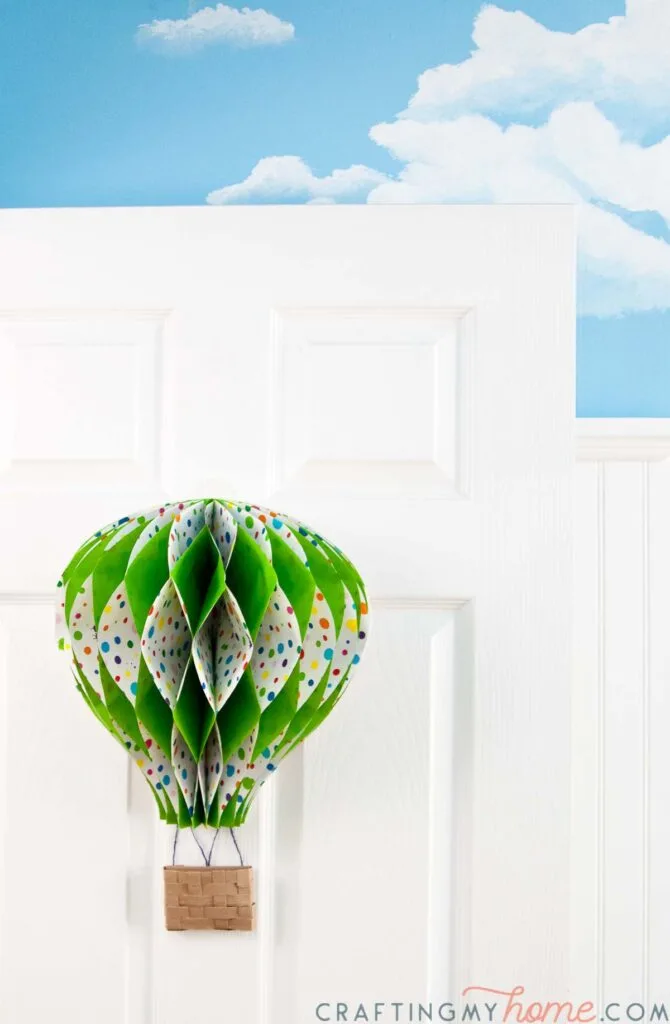
I love it for my front door this spring, but it would also be perfect in a nursery, or really anywhere you want to enjoy some bright, fun decor.
And maybe if we all wish together really hard, spring will be here quick this year!
This post was originally featured on Oh My! Creative.
Deanna
Saturday 6th of October 2018
Thank you Kati for the great idea! I just made your balloon for a diaper cake! Wish I could send you my picture! Thanks again... it turned out beautiful!
Kati
Tuesday 9th of October 2018
That sounds amazing Deanna! I love this idea. If you post it on social media, you can always tag me so I can see it (just make sure the post settings are not private). And you can always email me pics kati (at) housefulofhandmade (dot) com.
Jeannee~Shepherds and Chardonnay
Sunday 26th of February 2017
That balloon wreath is so pretty and unique! I just love it and especially that it is so bright and cheerful ! Thanks for sharing ! #HomeMatterParty Jeannee
Kati
Monday 13th of March 2017
Thanks Jeannee! I love that it is a bit different too.
Lorelai @ Life With Lorelai
Friday 24th of February 2017
Hey, Kati! Just wanted to let you know that we loved your Hot Air Balloon Spring Wreath so much when you shared it at the #HomeMattersParty last week, we've FEATURED it THIS WEEK! Hope you can check it out when you get a sec. Happy Friday!!! http://lifewithlorelai.com/2017/02/23/home-matters-linky-party-124/
~Lorelai Life With Lorelai / Home Matters Linky Party
Kati
Monday 13th of March 2017
Thanks so much Lorelai! That made my day.
Liz
Friday 24th of February 2017
What a great idea! It looks so fresh and spring-like! Love the color of your door, too!
Kati
Monday 13th of March 2017
Thanks! I love the door color too, perfect for spring.
Christene Holder
Thursday 23rd of February 2017
Oh my gosh!! What a cute idea I love this! So unique. I think I need one of these on my front door this spring!
>> Christene Keys to Inspiration
Kati
Thursday 23rd of February 2017
Thanks Christene! It definitely makes my front door seem more like spring, even though it is surrounded with snow right now!