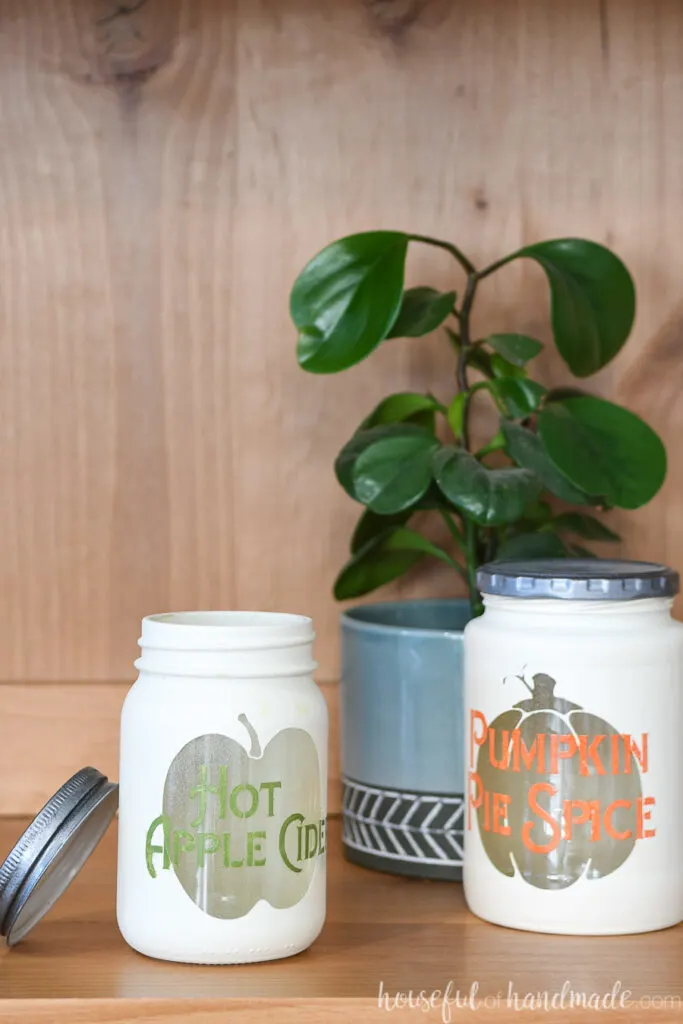
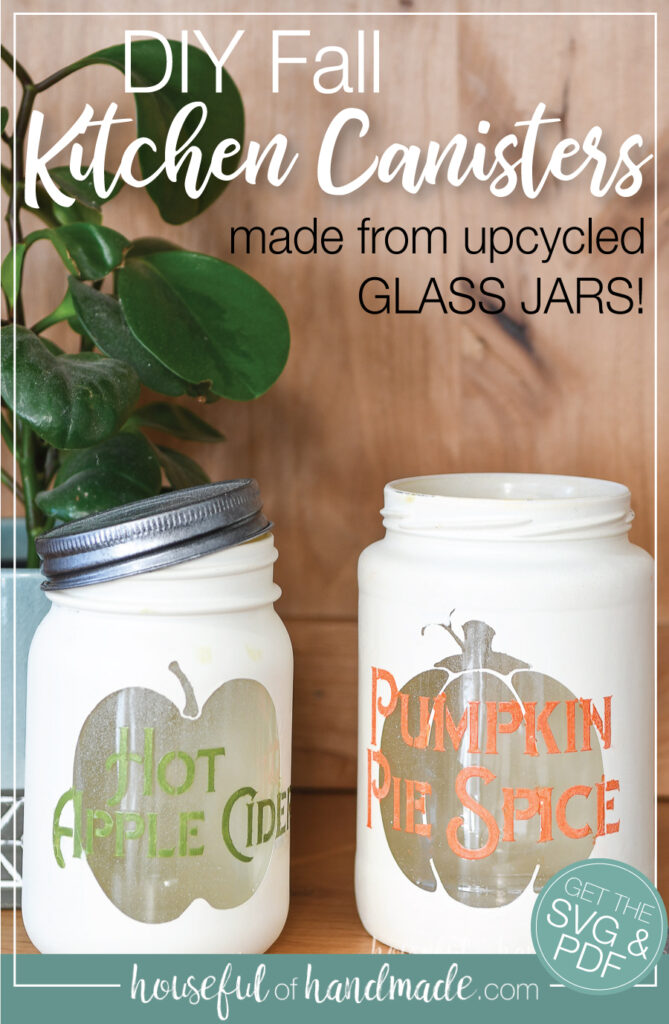
Make these decorative kitchen canisters from upcycled glass jars to bring fall to your kitchen.
It’s Day 2 of the 5 Days of Pumpkin Crafts! Already my house is feeling so cozy and fall like.
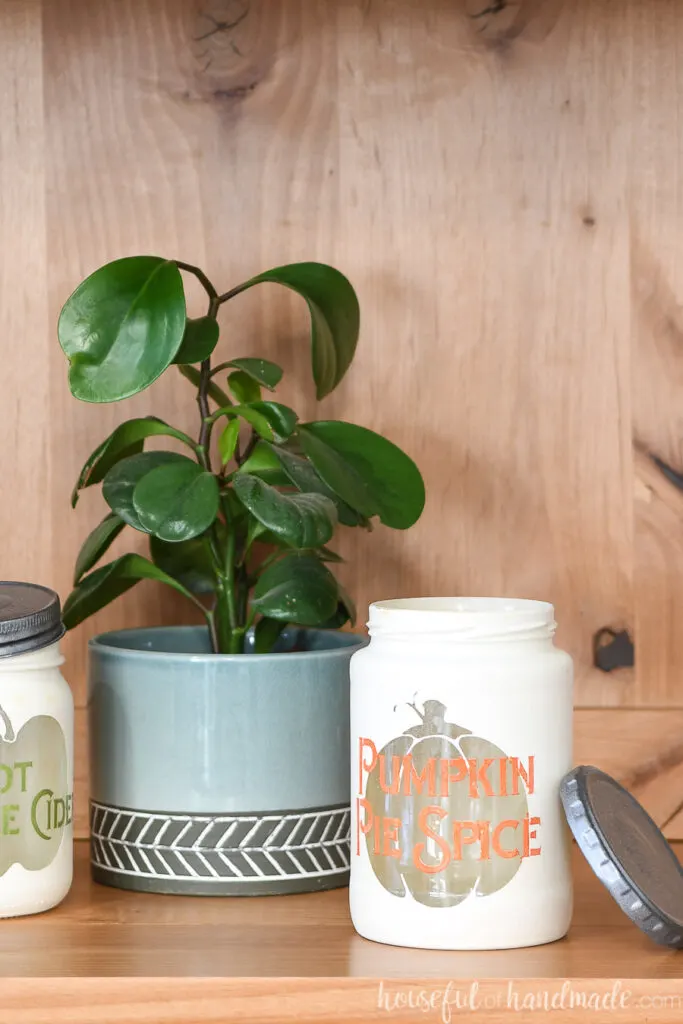
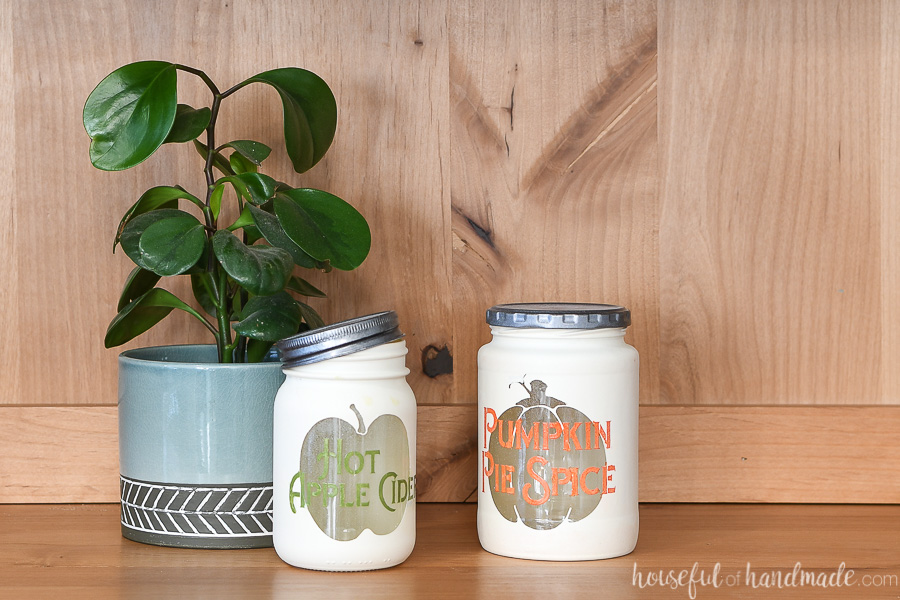
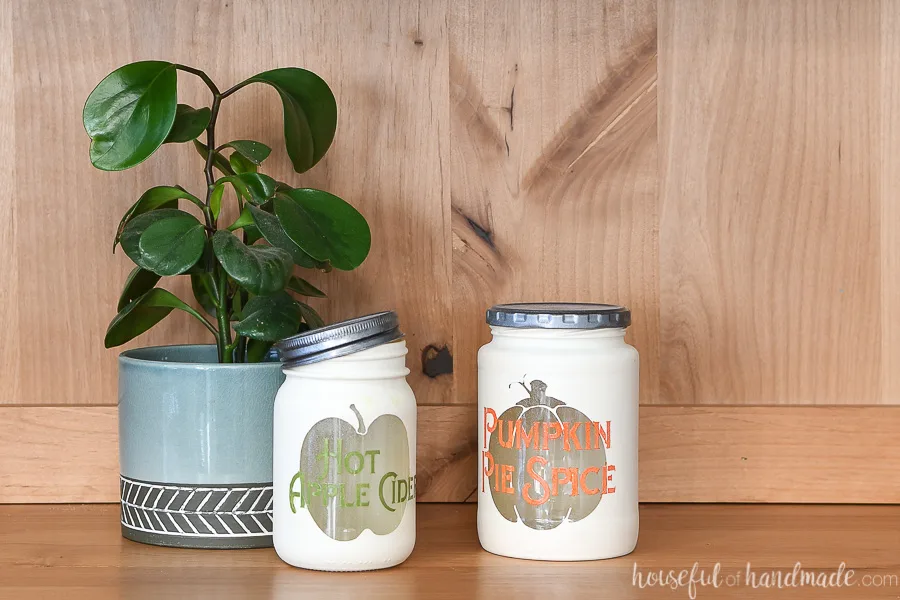
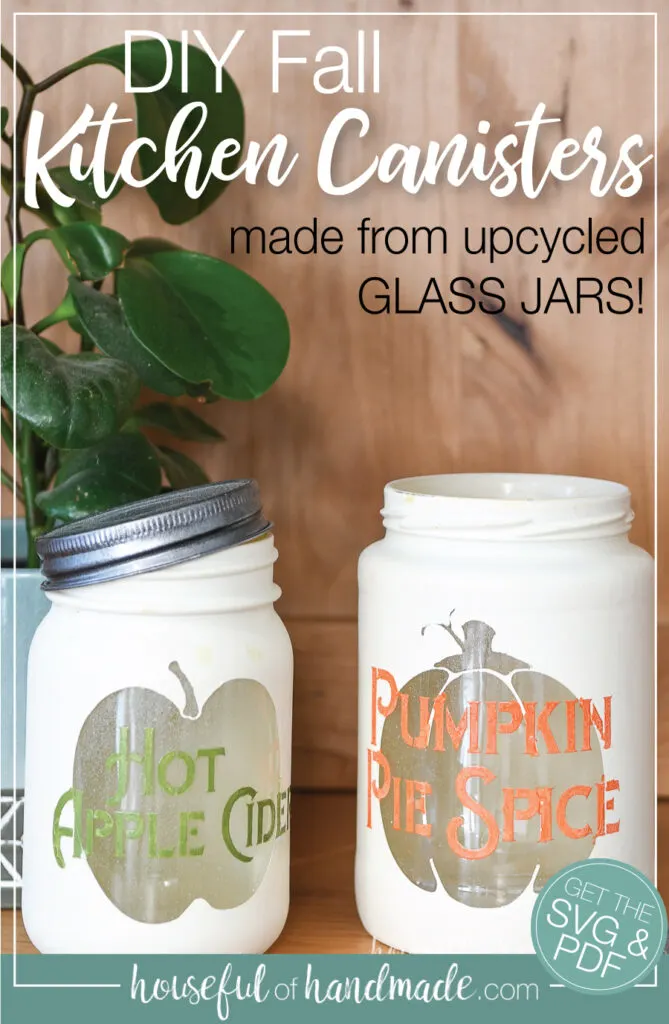
For today’s pumpkin craft, I decided it was time to use up some of those old glass food jars I have been saving. And I turned them into beautiful kitchen canisters with a fall twist.
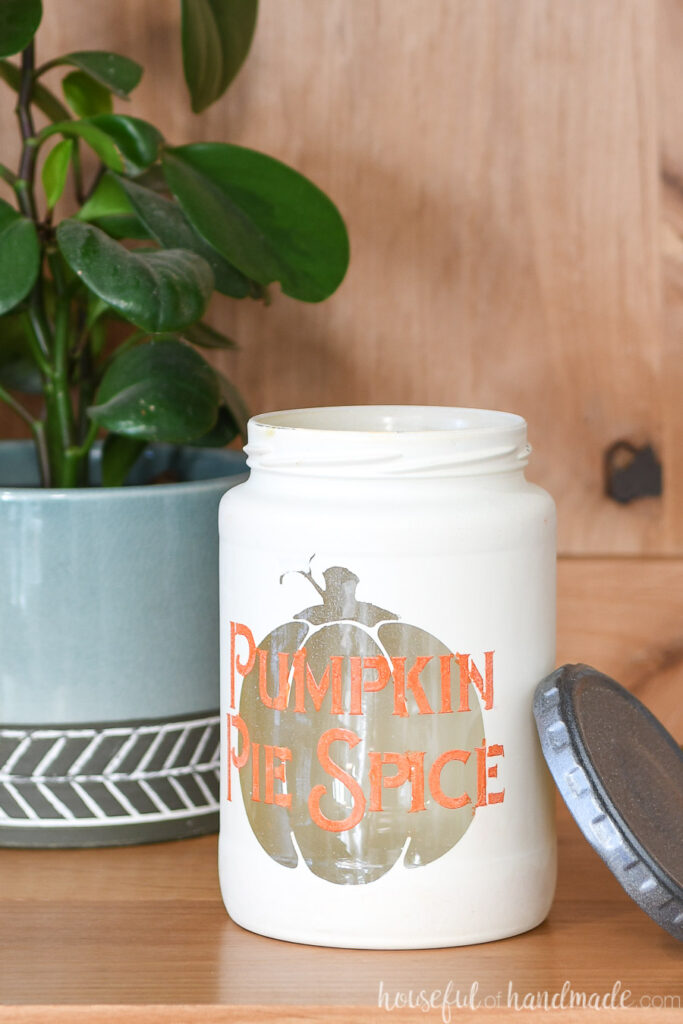
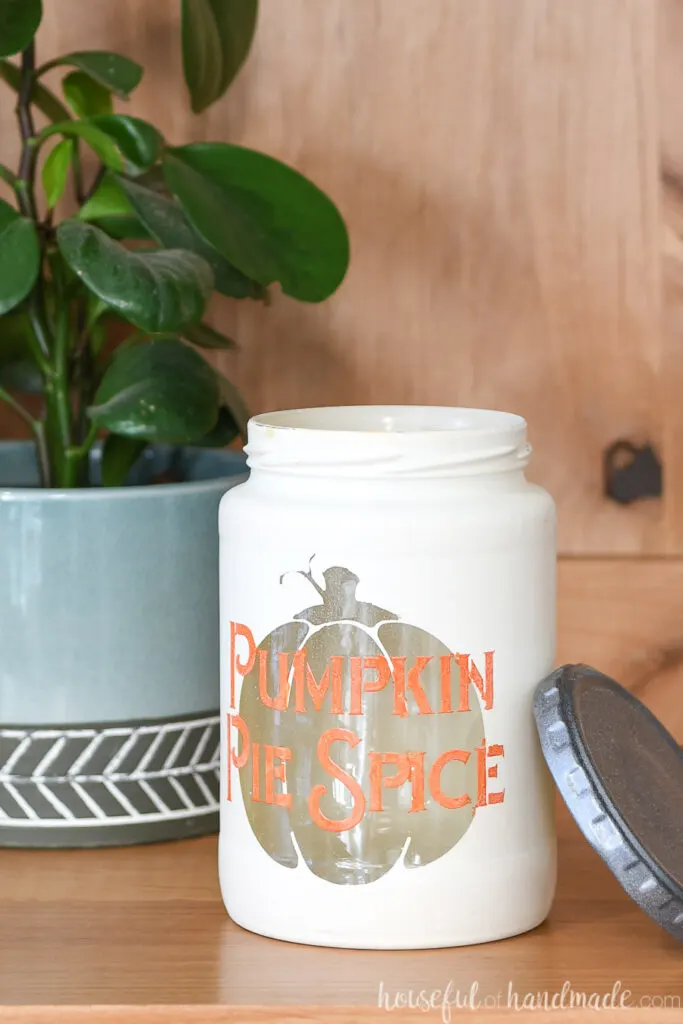
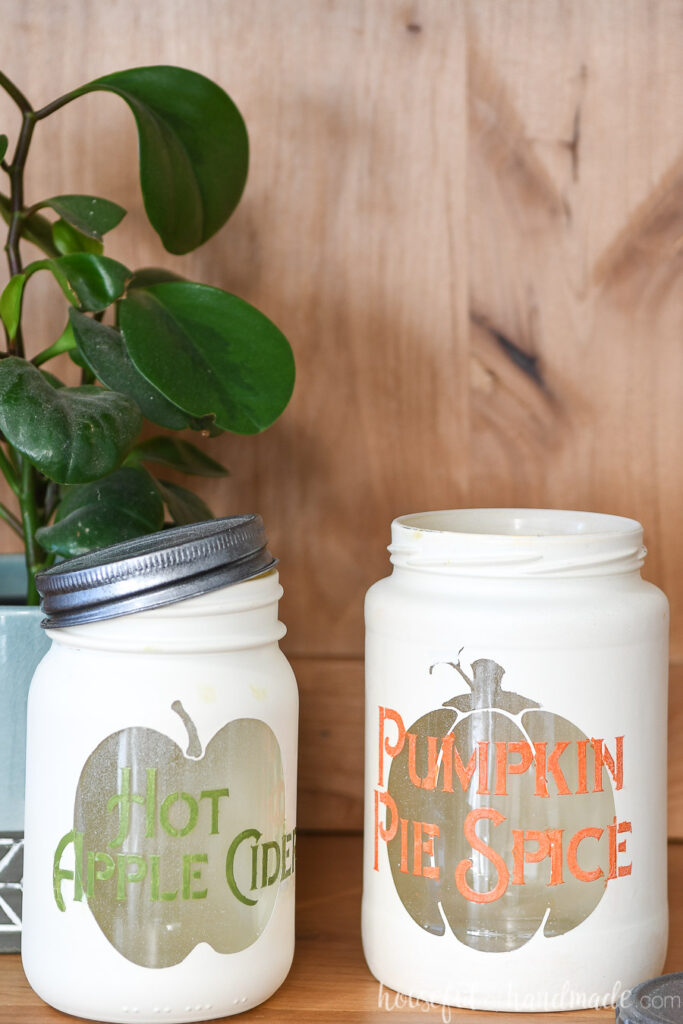
You would never guess these fall spice themed canisters started out as a pickle jar and a salsa jar!
This post may contain affiliate links. As an Amazon Associate I earn from qualifying purchases. Click here to read my full disclosure policy.

DIY Kitchen Canisters
Making kitchen canisters from recycled jars is not new to me. I made these fun french bakery kitchen canisters a while back and still love them. So I decided it was time to make more.
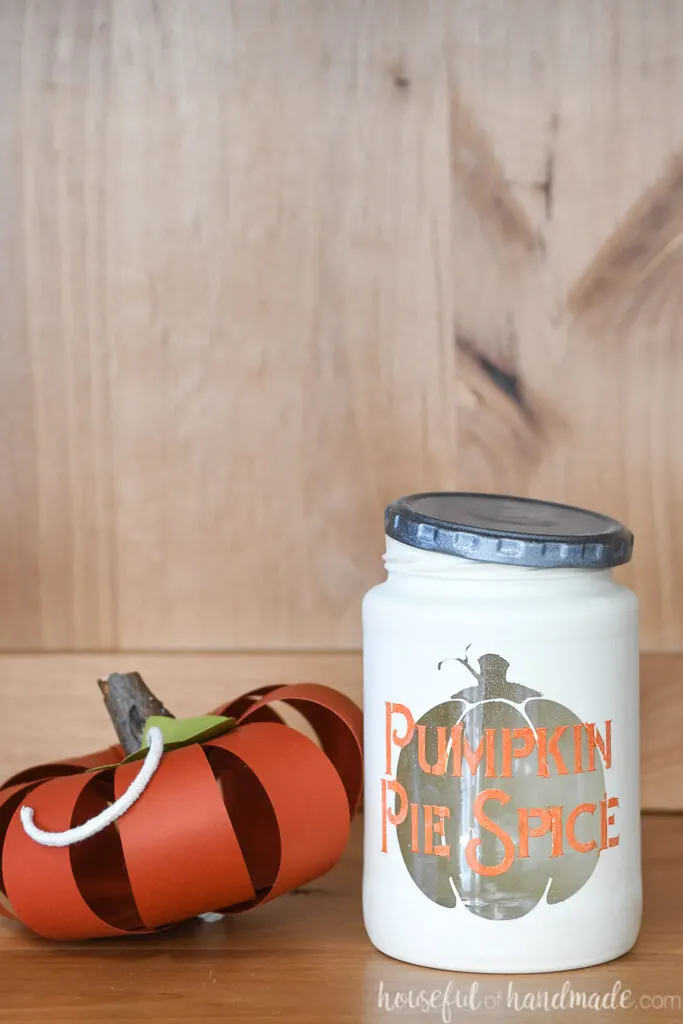
To make these new kitchen canisters perfect for fall, I decided to use some of my favorite fall flavors on them. What is fall without some pumpkin pie spice and hot apple cider?
I am pretty sure I don’t need a canister this large to actually hold my pumpkin pie spice… even though I do go through a good amount in the fall months.
Instead, these fall canisters would be perfect for holding your favorite fall teas or treats on the kitchen counter. Or use it to hold a pumpkin pie spiced hot chocolate mix. I am sure my kids would love that!

And turning plain glass jars into beautiful porcelain looking canisters is easier than you might think. I have discovered that the Rustoleum Chalk spray paint is the perfect paint to give a smooth canister look to something that was destined for the trash!

How to Make Kitchen Canisters for Fall
Supplies:
- Fall jar templates
- I am sharing the SVG cut files & PDF for these canisters in my subscriber library until 10/11/2020, then they will move to the shop. Click here to subscribe to my newsletter and gain access to all the freebies. If you already have your password, click here to go to the library download them.
- Vinyl for stencil
- Chalked spray paint in Chiffon Cream
- Colored spray paint in whatever color you want for the wording/lids
- Vinyl transfer tape
- Optional: Electronic cutting machine
- I used my Silhouette Cameo to cut out the vinyl stencils, but you could also cut them out with an X-acto knife if you don’t have one.
Prepare the jars
Before you can use any old jars for this craft, you need to completely remover the label and all the glue. The easiest way to do this is to soak the jar in water so the label is completely covered for at least an hour.
After the label has soaked, rub off the label and as much glue as will come off with your fingers. Then use a little dish soap with dish scrubber and scrub the surface. This removed all the left over glue. Dry with a clean towel.
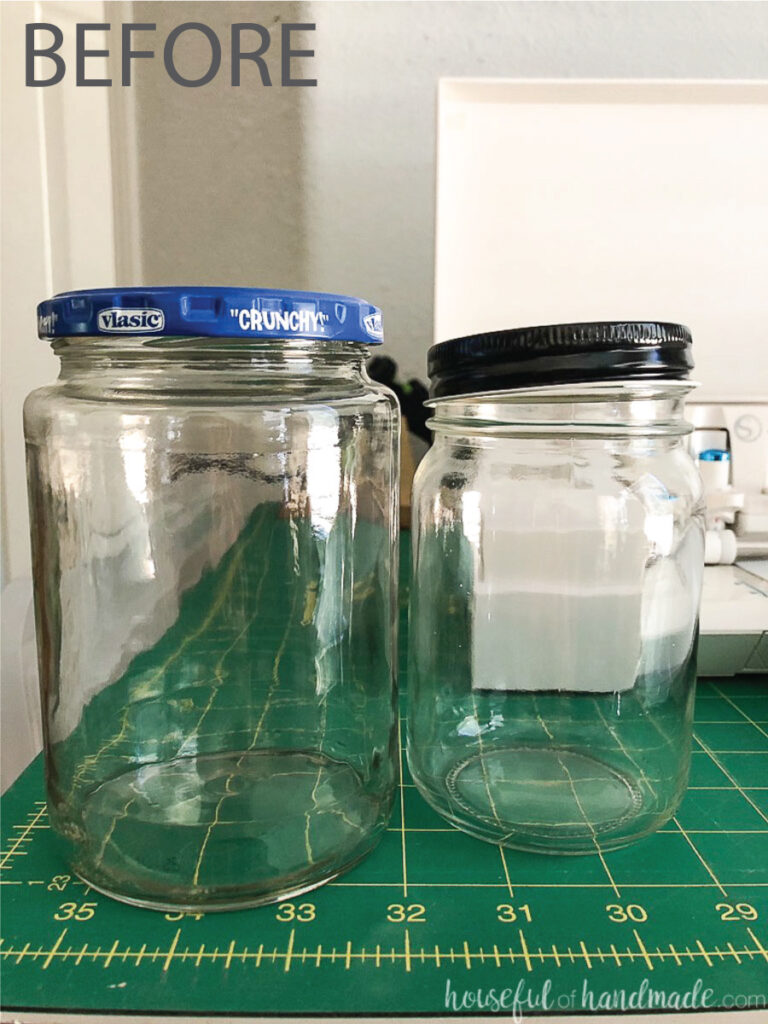

Since you just used dish soap to clean the jars, you should not have to do anything else before painting. But if you removed the label and it has sat for a while, you can give it a quick cleaning with some rubbing alcohol to make sure there is not grease/oil that will prevent the paint from adhering.
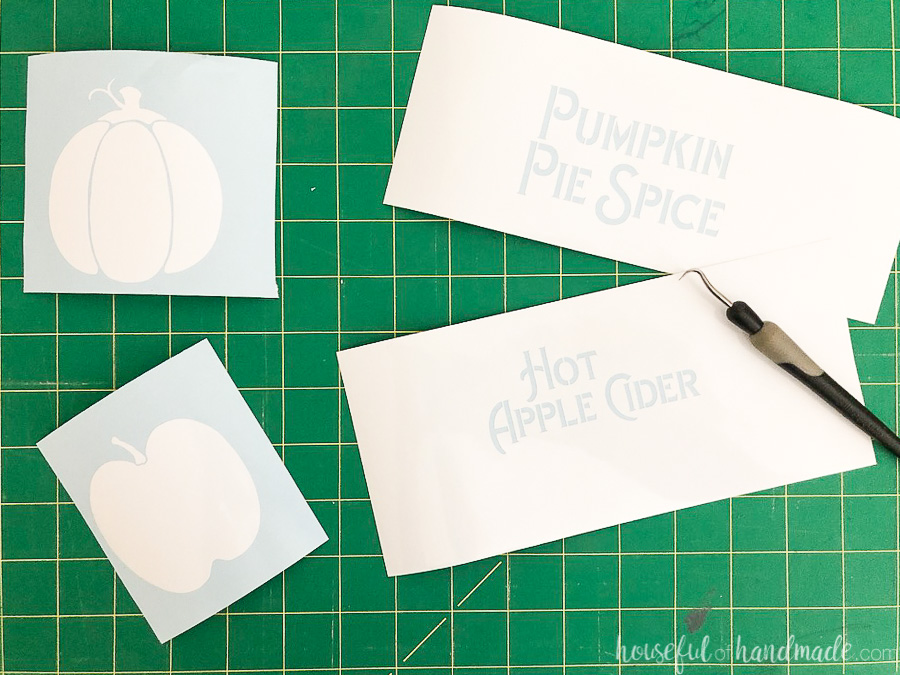
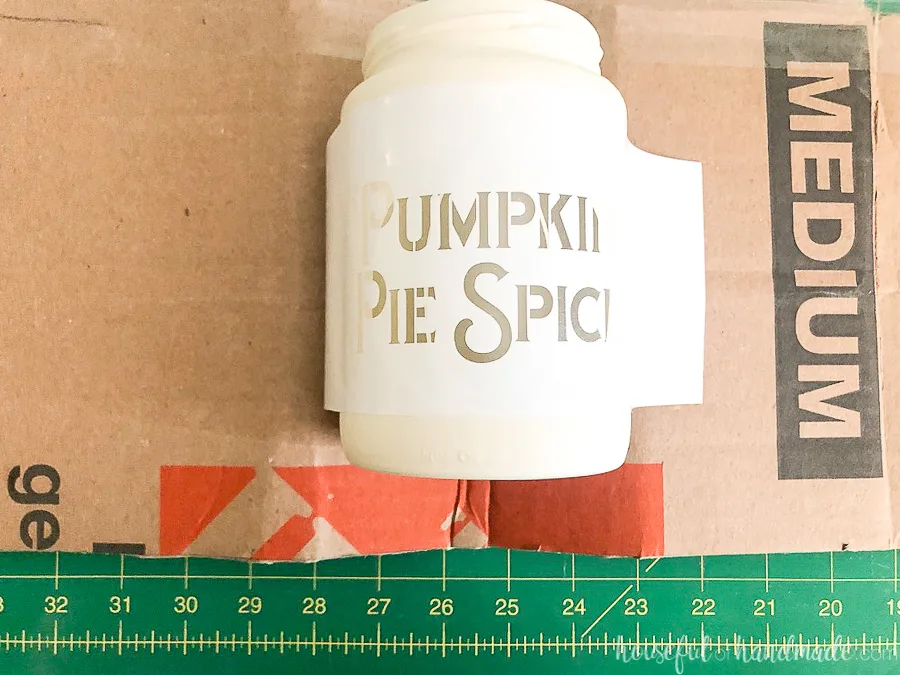
Cut out the stencils
Cut out the stencils for the fall spice labels out of vinyl. Size them to fit your glass jar (mine ended up being 3″ or 3 1/2″ tall).
You will need to separate the text from the background shape and cut them out separately to do a 2 color spray. Leave lots of room around the text stencil to help with over spray.

Using transfer tape, place the background shape in the center of your clean jar. Press it firmly to the glass then remove the transfer tape.

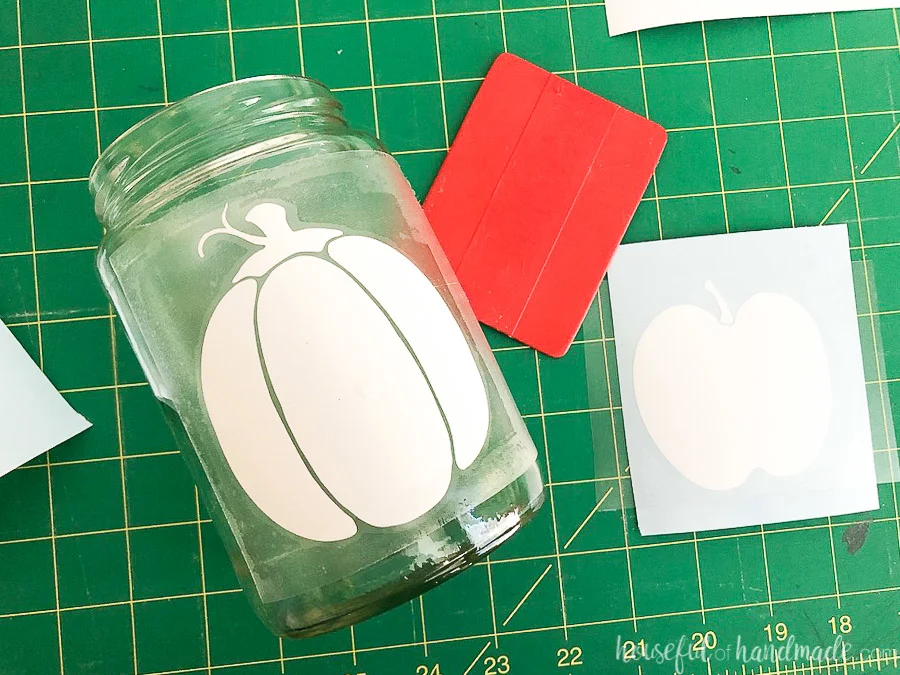
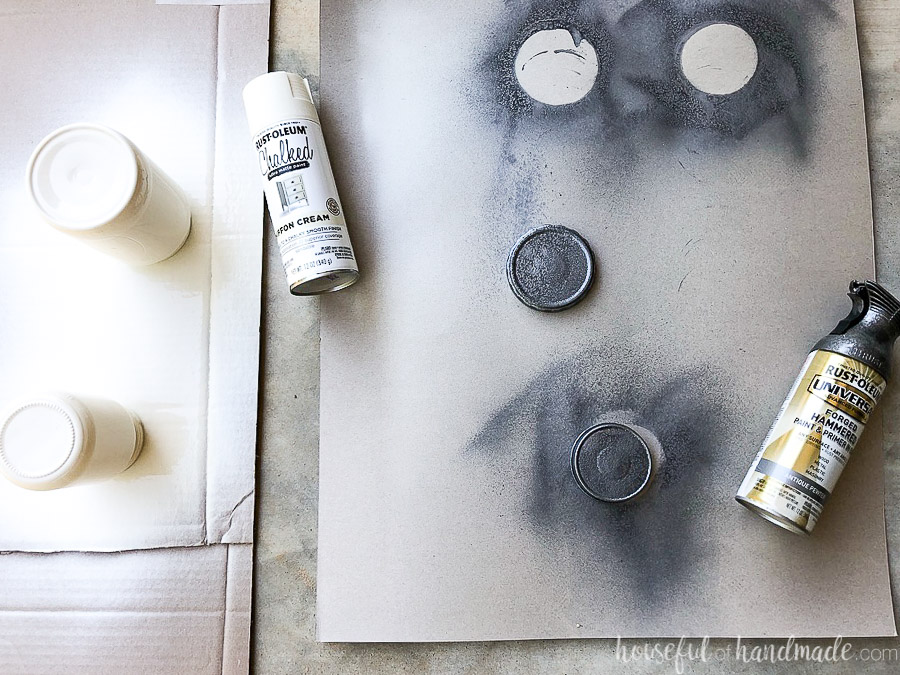
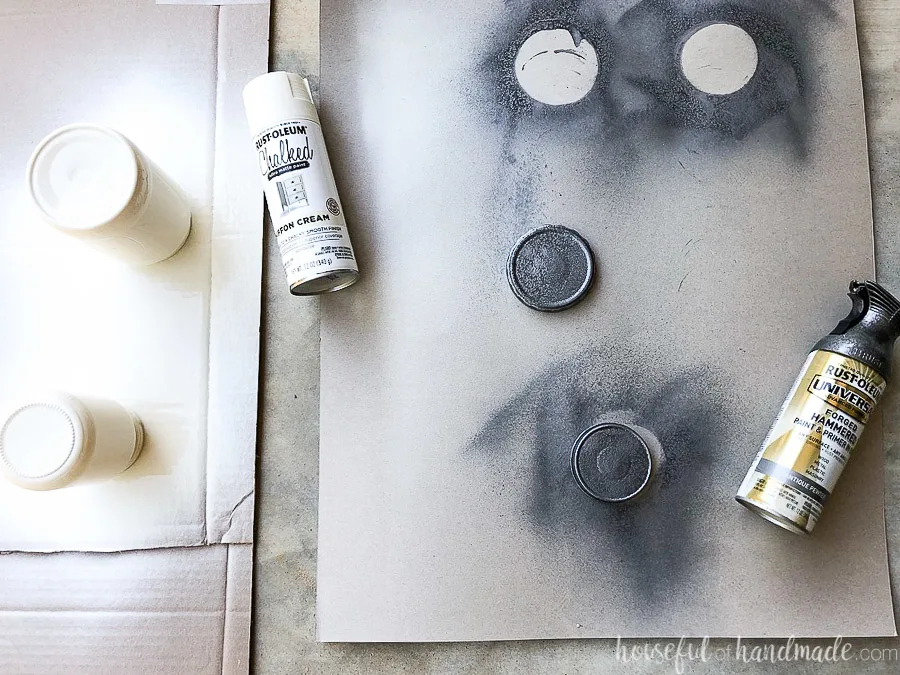
Spray the jars
Place the jar top down on a piece of cardboard or tarp, spray the entire jar with 3-4 light coats of the chalked spray paint. Let it dry 10-15 minutes between coats.
After the last coat, let it dry just until it is not tacky, then remove the background stencil carefully. If you press too hard on the paint it will leave indents or move it around the jar, but if you wait too long the paint will peel up with the stencil.
Let the jars dry at least overnight before adding the next layer.
Use the transfer tape to put the second stencil on top of the sprayed jar. Press it lightly (you do not want to pull up the previously dried paint).

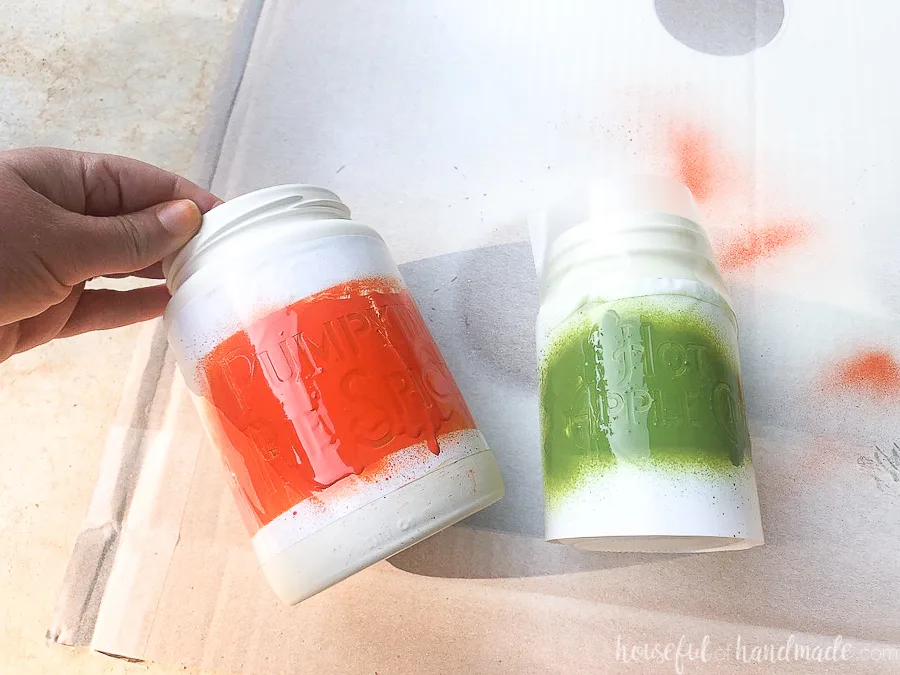
Spray a first coat with the chalked spray paint, this will give the colored spray paint a white background so it is not transparent. I did not do this and you can see the paint is slightly see-through in the photo.
So I did my second coat the chalked paint and then finished with a third coat of color.

Let it dry for just 10-15 minutes and then remove the stencil. The paint is not fully dry so be careful.
I had some issues with the lines between the pieces of the pumpkin when I sprayed the second layer, so I removed them to create a better stencil for you!
But in case you still need it, touch up any spots where the paint bled or the stencil might have stuck to the paint. I did this by spraying a small pool of the chalked spray paint on a piece of cardboard and then painting it on the areas that needed a little touch up.
Let your jars fully dry then enjoy your new fall decor! I love that you can see inside the canisters with the apple and pumpkin shapes. It’ll be perfect for seeing when it’s time to refill!

And don’t forget it is only Day 2 of the 5 Days of Pumpkin Crafts series. Three more fun projects coming your way!
- Day 1: Easy Paper Pumpkins
- Day 2: Fall Kitchen Canisters
- Day 3: 3D Paper Pumpkin Lanterns
- Day 4: Wood Pumpkin Wreath
- Day 5: Paper Jack-O-Lanterns
Happy Crafting!
Shirl
Tuesday 6th of October 2020
Very cute! Will be making one for my husband's favorite Kurig hot cocoa pods and one for my pumpkin spiced coffee pods. They will be perfect on the coffee station! Made the paper pumpkins last night, a trio of them. So much fun. They are adorable.
Kati
Tuesday 27th of October 2020
These would be perfect for Keurig pods! And great coffee station decor. So glad you are enjoying the pumpkin projects ;)