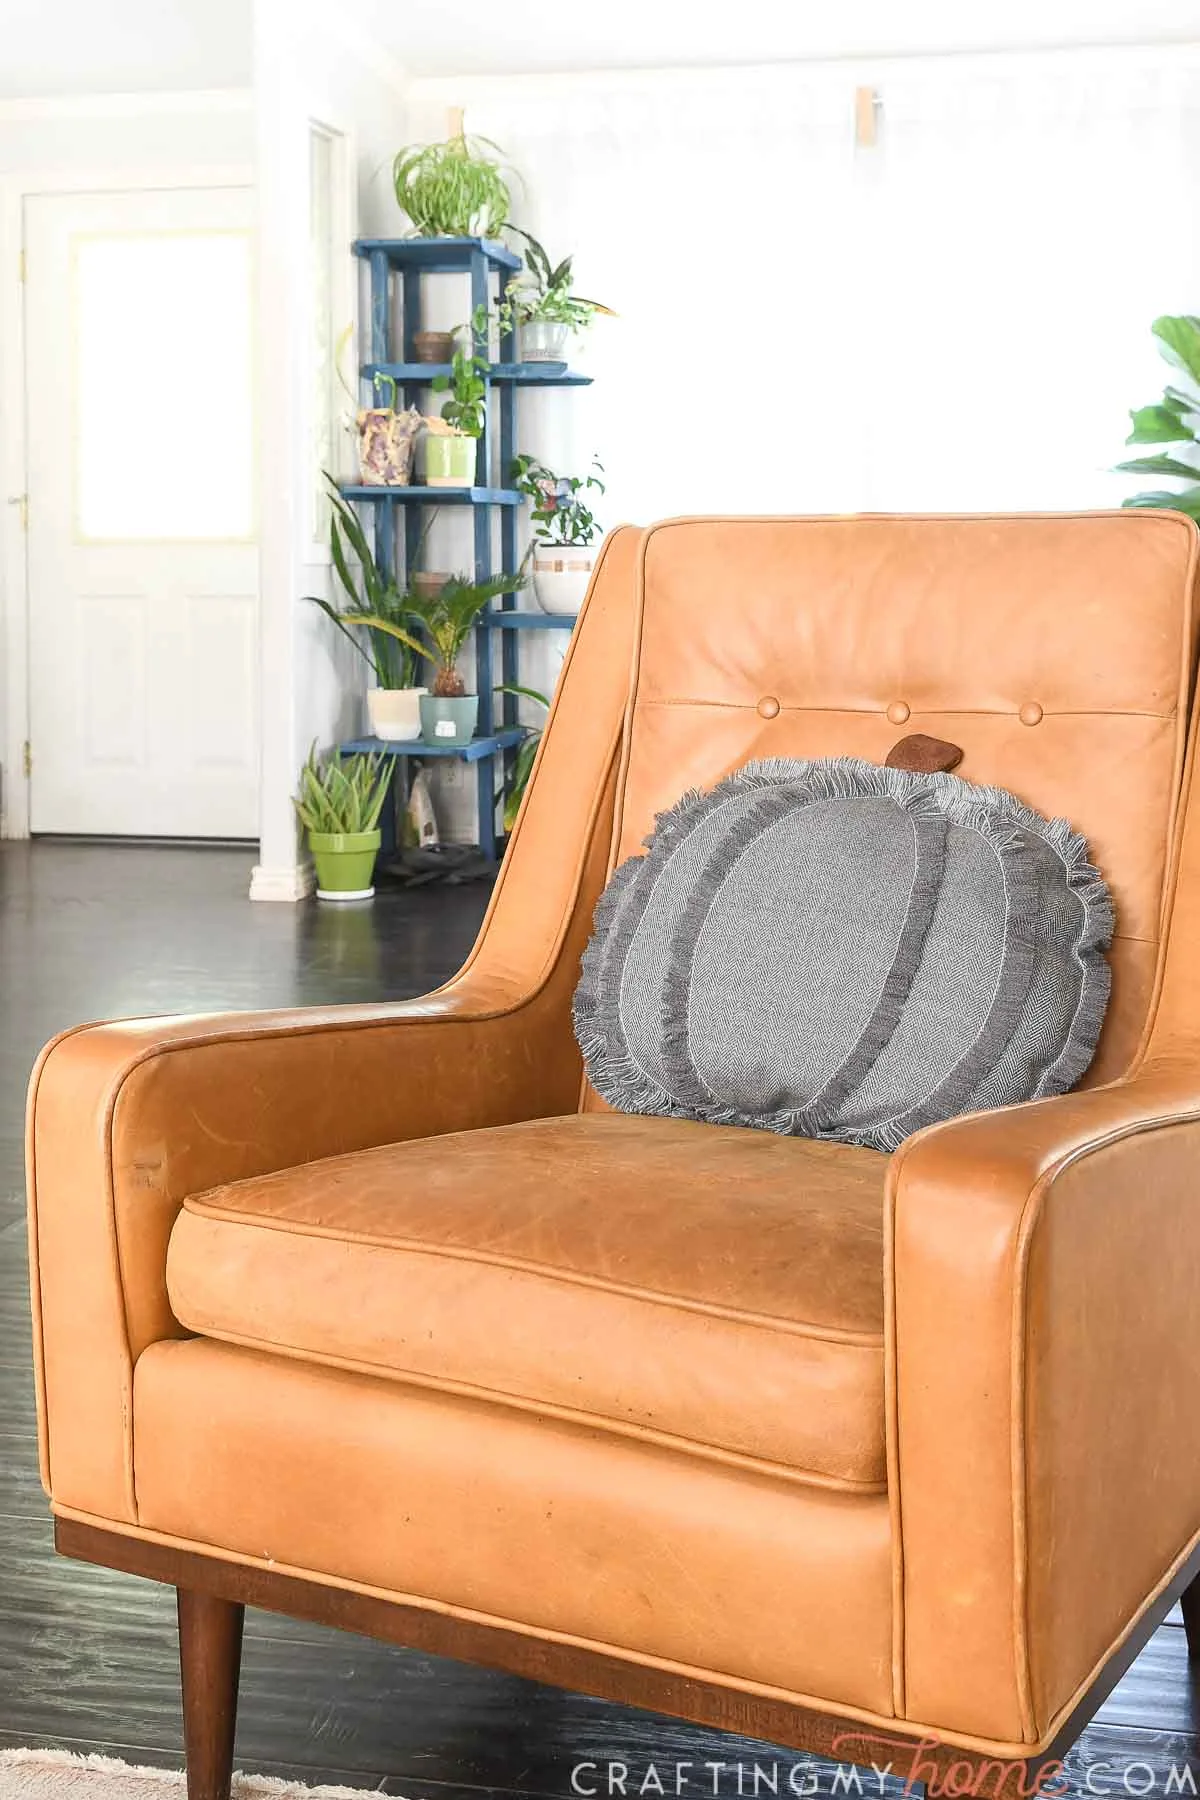
Add touches of fall to your home with this beautiful pumpkin throw pillow.
Throw pillows are the perfect way to add seasonal decor to your home. So of course I needed to create a pumpkin pillow for the 5 Days of Pumpkin crafts series.
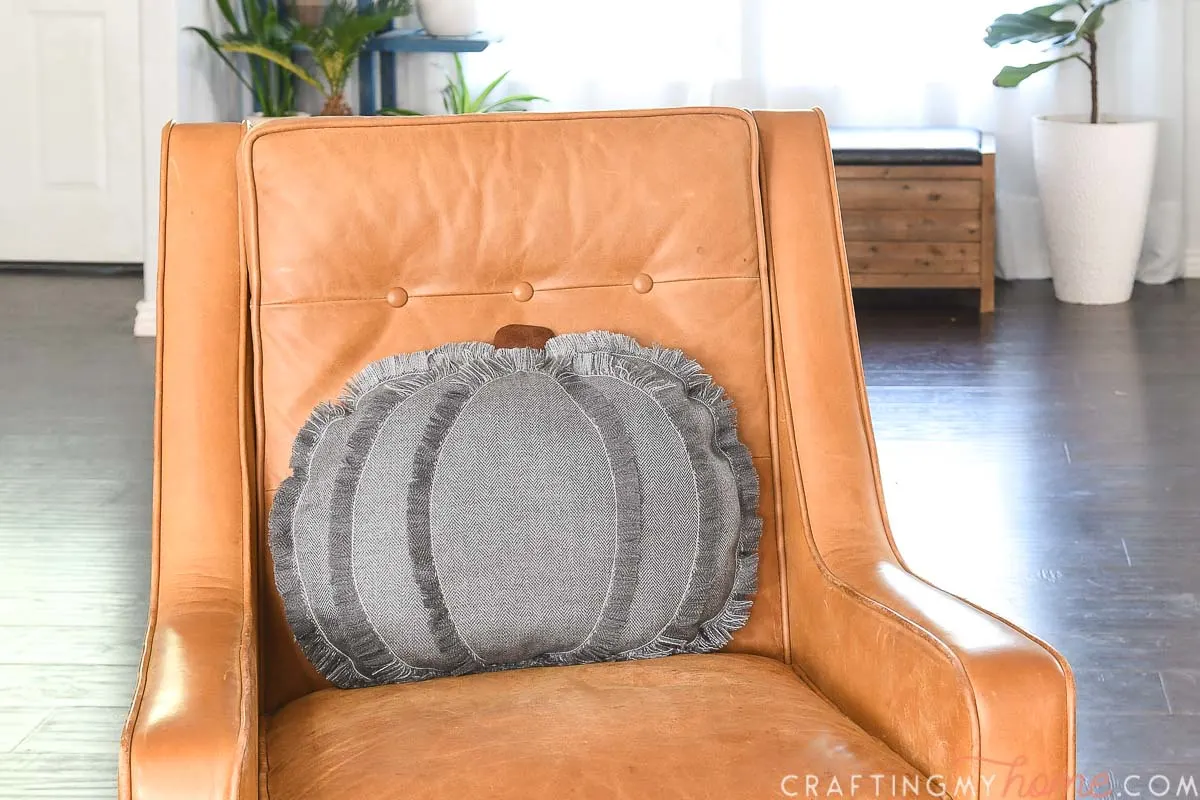
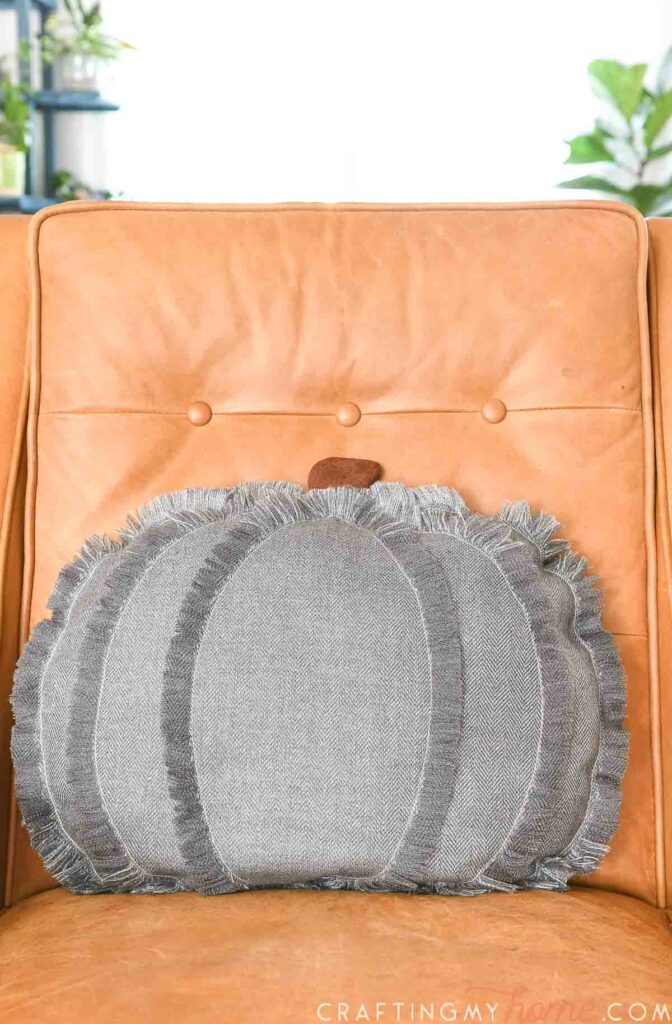
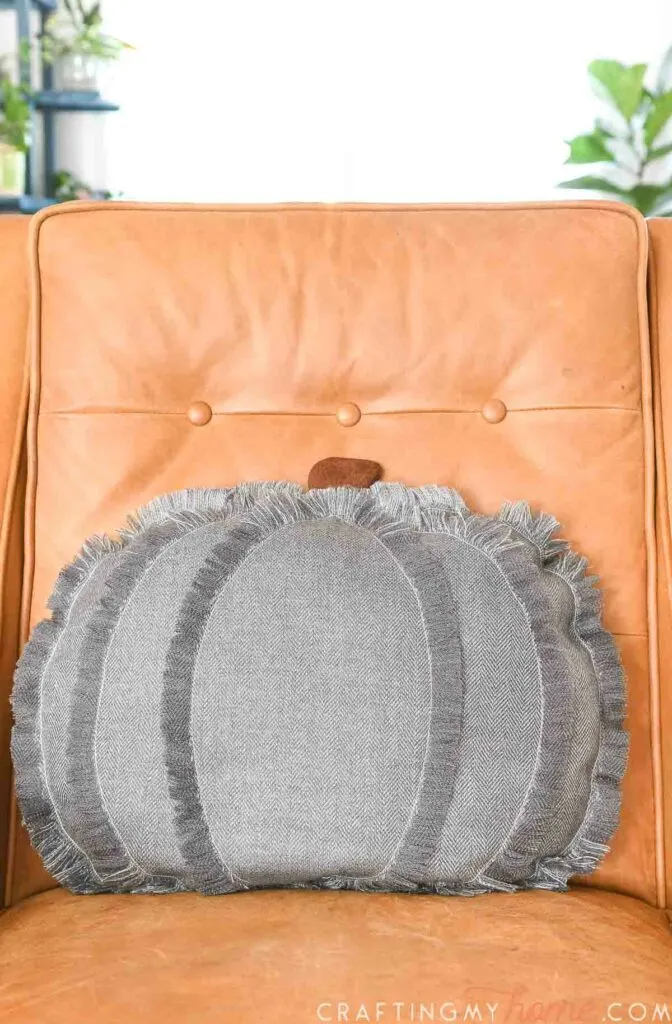
This simple to sew pillow is given lots of pumpkin style with fun frayed edges. They create the look of a pumpkin on a basic pillow.
You can sew together a whole pumpkin patch of pillows to toss all around the house. They are as good as a pumpkin spiced latte for fall 😉
This post may contain affiliate links. As an Amazon Associate I earn from qualifying purchases. Click here to read my full disclosure policy.

These pumpkin shaped pillows can be made out of any fabric that can be frayed. Stay away from knits and felts.
I used a woven wool fabric I had left over from making a pair of slacks. The non-traditional pumpkin color gives this pumpkin pillow a truly modern look.
Fraying the edges does take some time. It is not hard and you can do it sitting outside soaking up the crisp fall air.

To save time, you can find a fabric that frays easily. A fabric with a larger thread and looser weave will fray easier than a tight one.
I did consider using drop cloth to sew my pumpkin shaped pillow (I love drop cloth craft projects). It frays very easily. But I did not have any pieces large enough.
Or you can turn your left over fabrics into the perfect fall decor, even if they are not traditional fall colors.
5 Days of Pumpkin Crafts
Today is the last day of the 5 Days of Pumpkin Crafts series. These amazing pumpkin crafts for adults are the perfect way to decorate your entire home.
Make sure to check out the rest of the pumpkin crafts below:
- Day 1: Hello Pumpkin SVG
- Day 2: Easy Wire Pumpkin Wreath
- Day 3: Tapered Paper Pumpkin Lanterns for Fall
- Day 4: Easy Pumpkin Planter for Fall
- Day 5:Cozy Modern Pumpkin Pillow
How to Sew a Pumpkin Pillow
Supplies:
- Pumpkin pillow sewing pattern
- I am sharing the PDF sewing pattern in my subscriber library until 09/11/2022, then it will move to the shop. Click here to subscribe to my newsletter and gain access to all the freebies. If you already have your password, click here to go to the library download them.
- Printer
- Tape
- 1 yard fray-able fabric
- Small scrap fabric for stem
- Fabric scissors
- Sewing machine
- Seam ripper
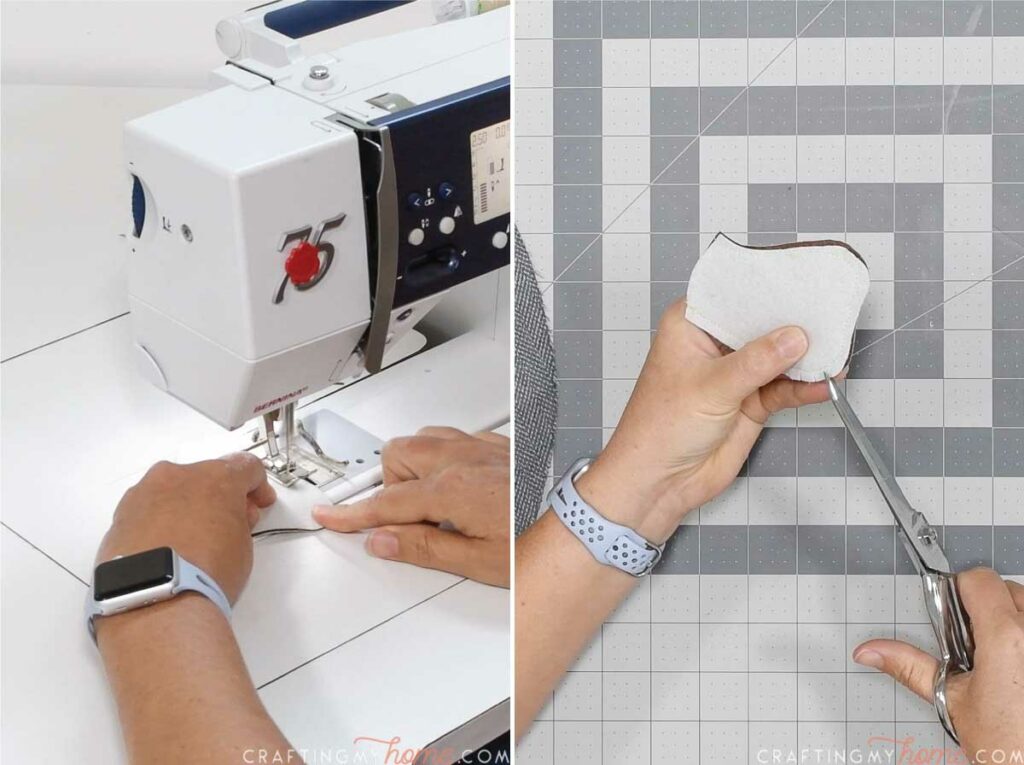
STEP 1- Cut out the pieces
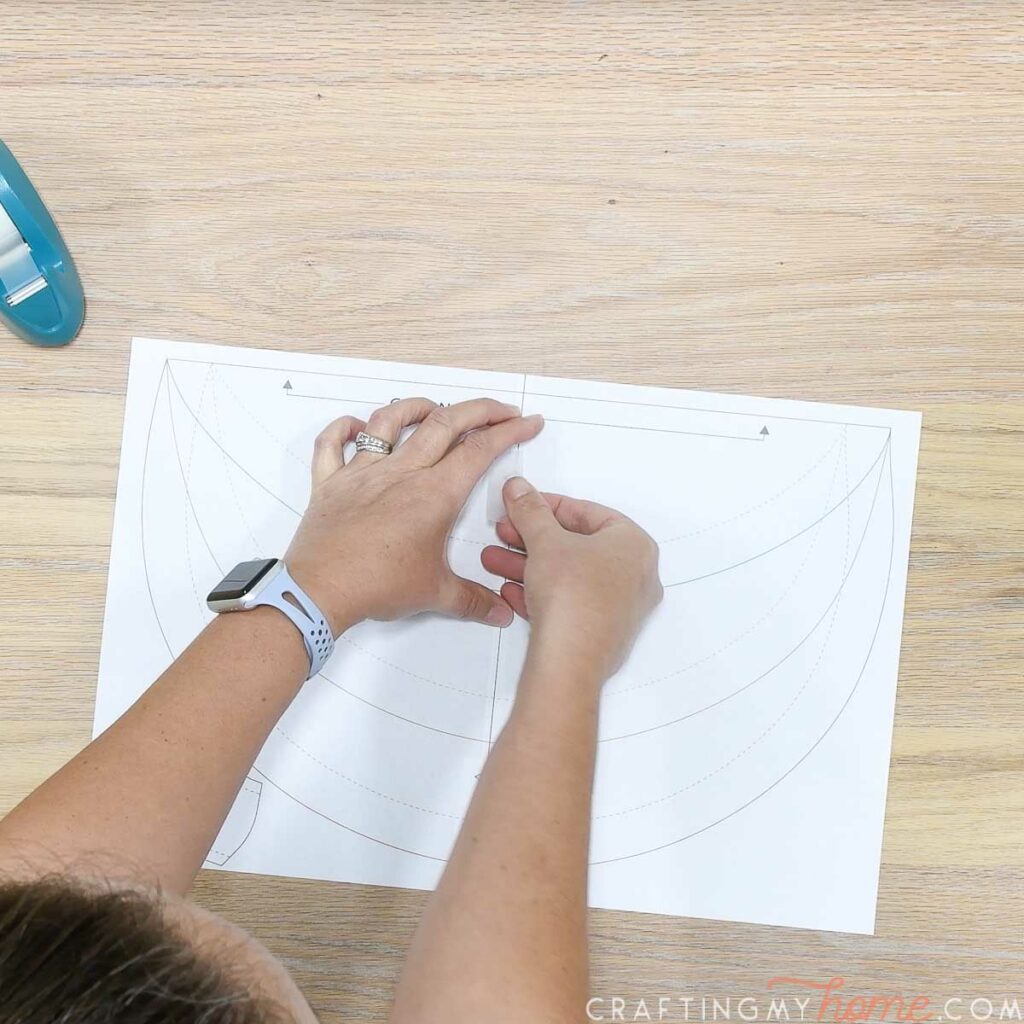
Print the PDF pattern.
Line up the diamonds on the inside line and tape together. Trim around the two pattern pieces.
Do not cut the pumpkin pieces apart, you will do that as you cut them out of fabric.

Lay the pumpkin piece on you fabric so the flat edge is along a fold.
Pin it in place.

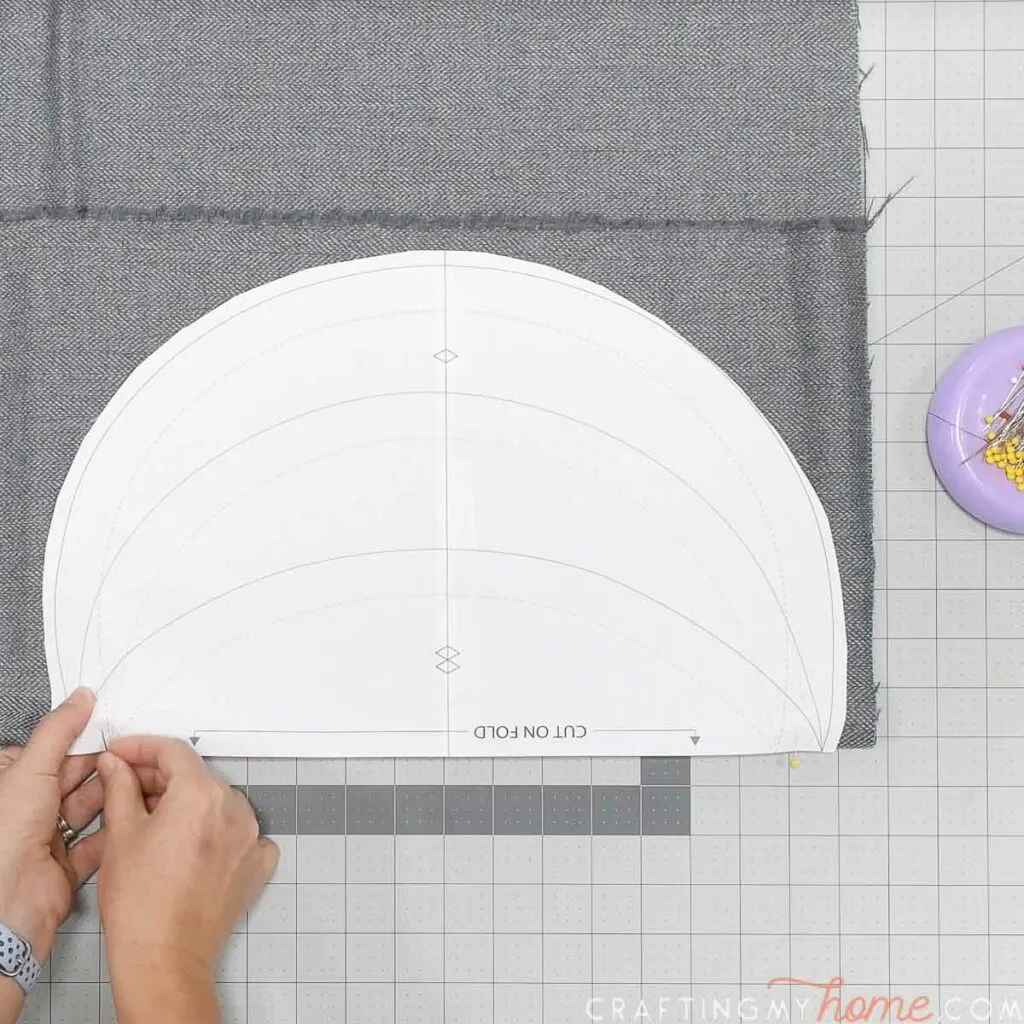
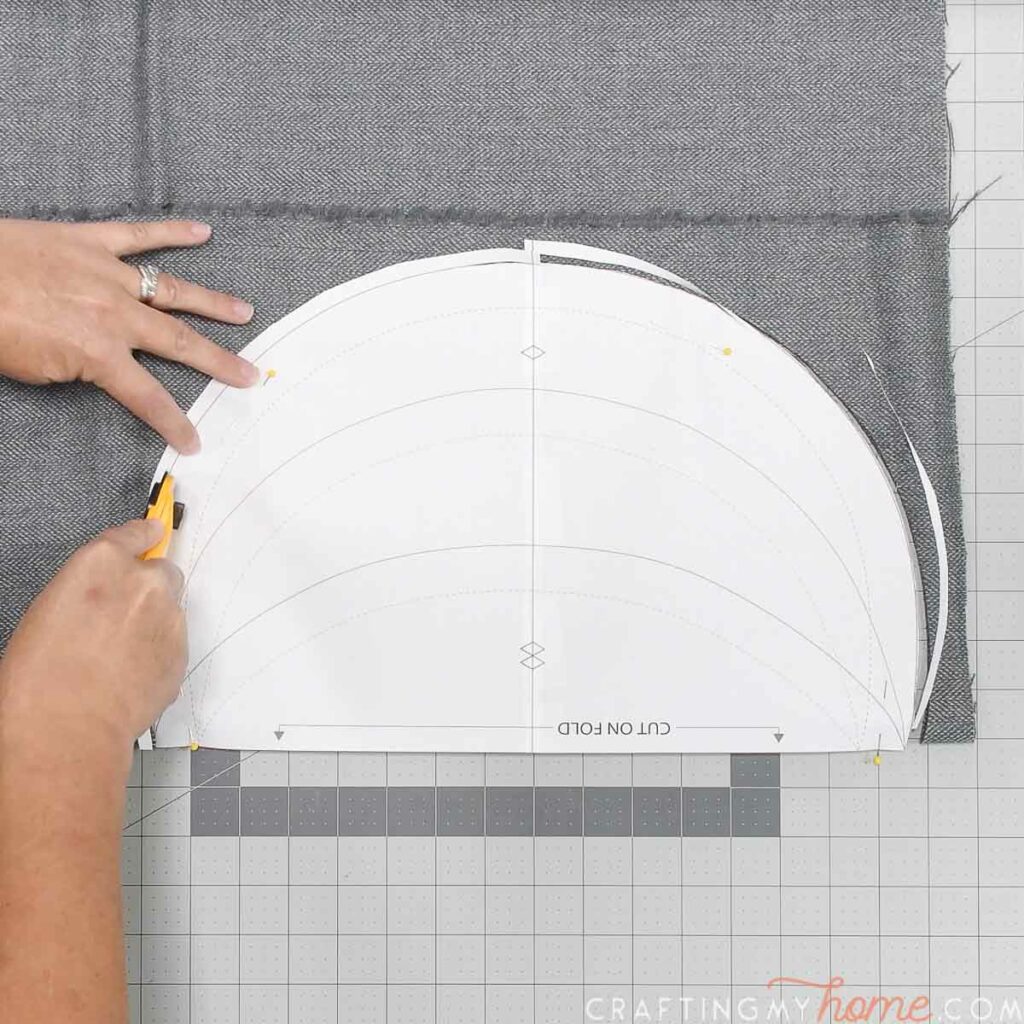
Cut the piece out along the solid line.
Repeat so you have 2 of the larger pieces.
EXPERT TIP:
You can double up the fabric (don’t forget the fold) and cut both pieces out at one.

Trim away the large piece off your pattern. Cut out the medium pieces, again on the fold.
Then trim that away that section of pattern and repeat for the smallest piece.
You can cut out 1 or 2 of these pieces. If you cut two, you will have a pillow that is the same on the front and back. If you cut 1, the back will be solid with no frayed lines.


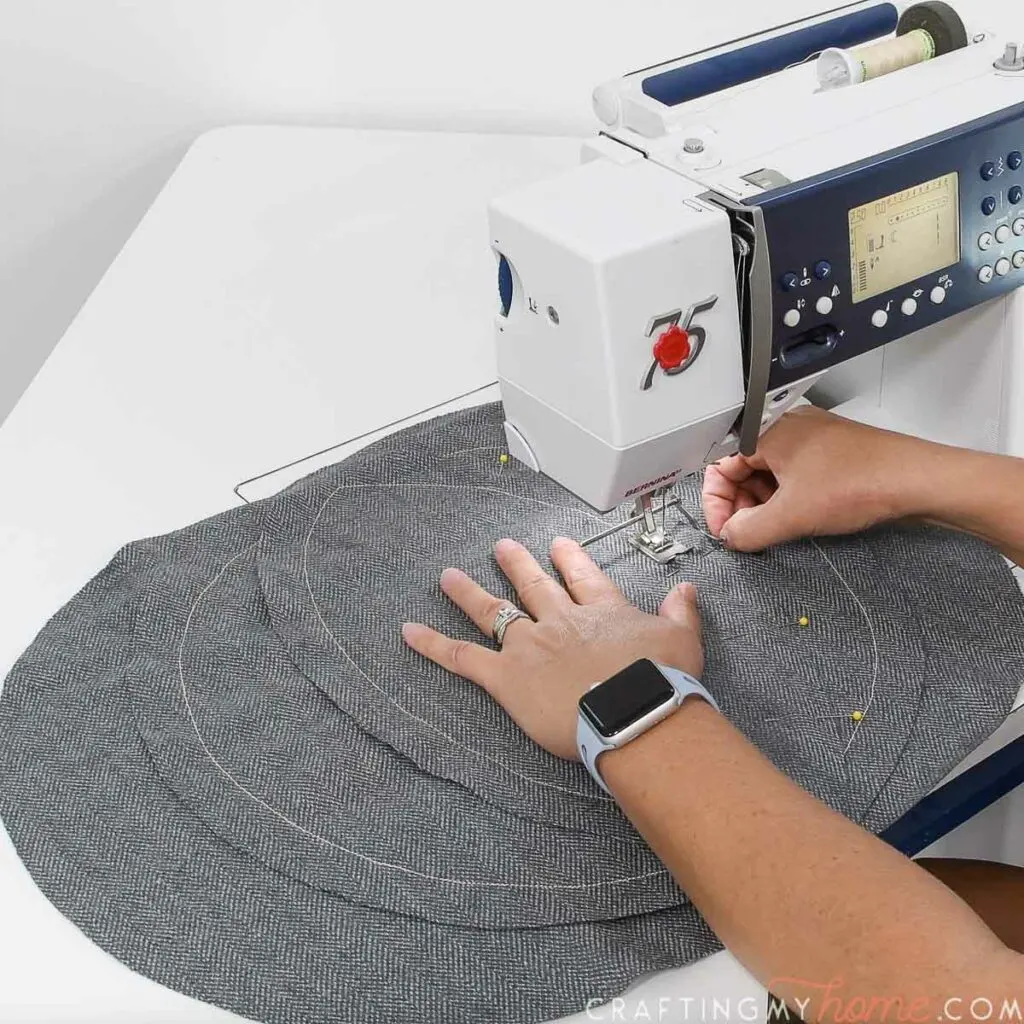
STEP 2- Sew the pumpkin details
Lay out one of the larger pieces so the right side is facing up.
Lay a medium piece on top of it so it is centered and lined up at the top and bottom points. Pin in place.
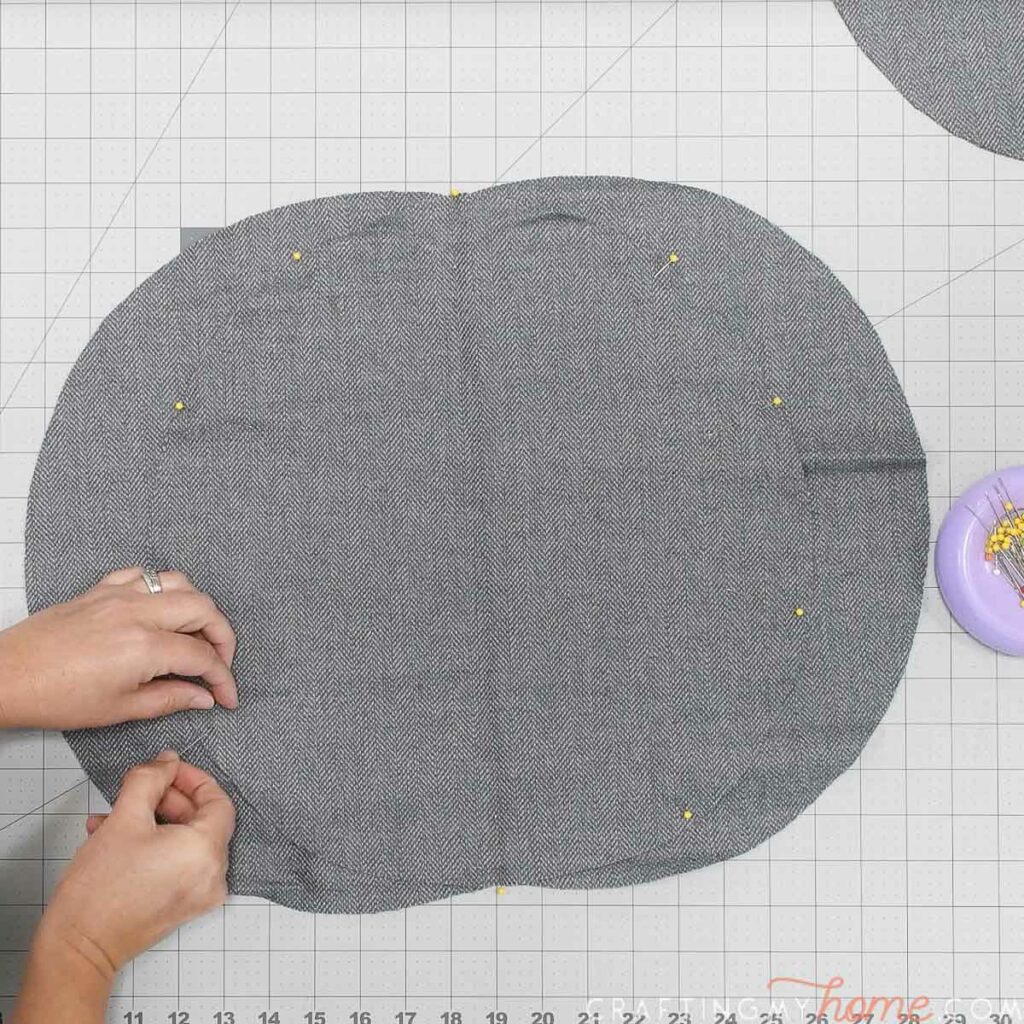
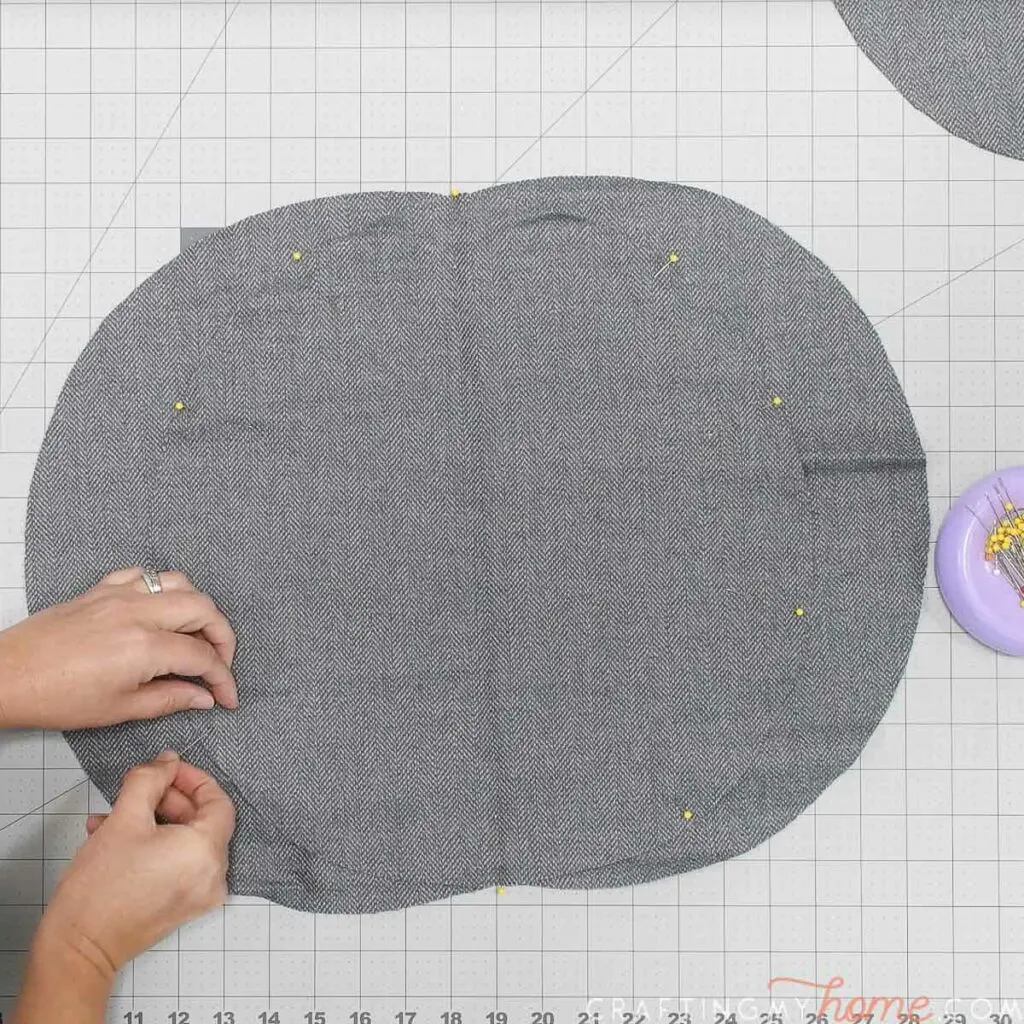
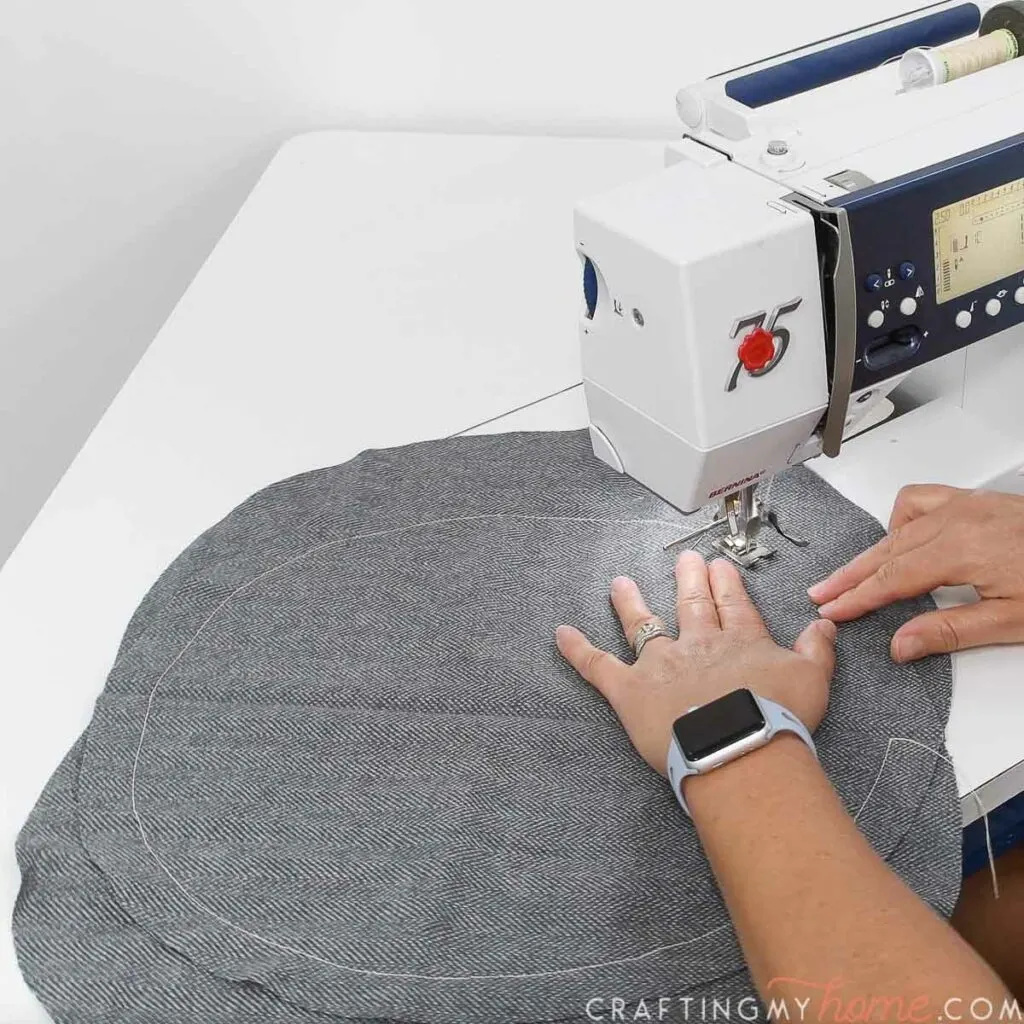
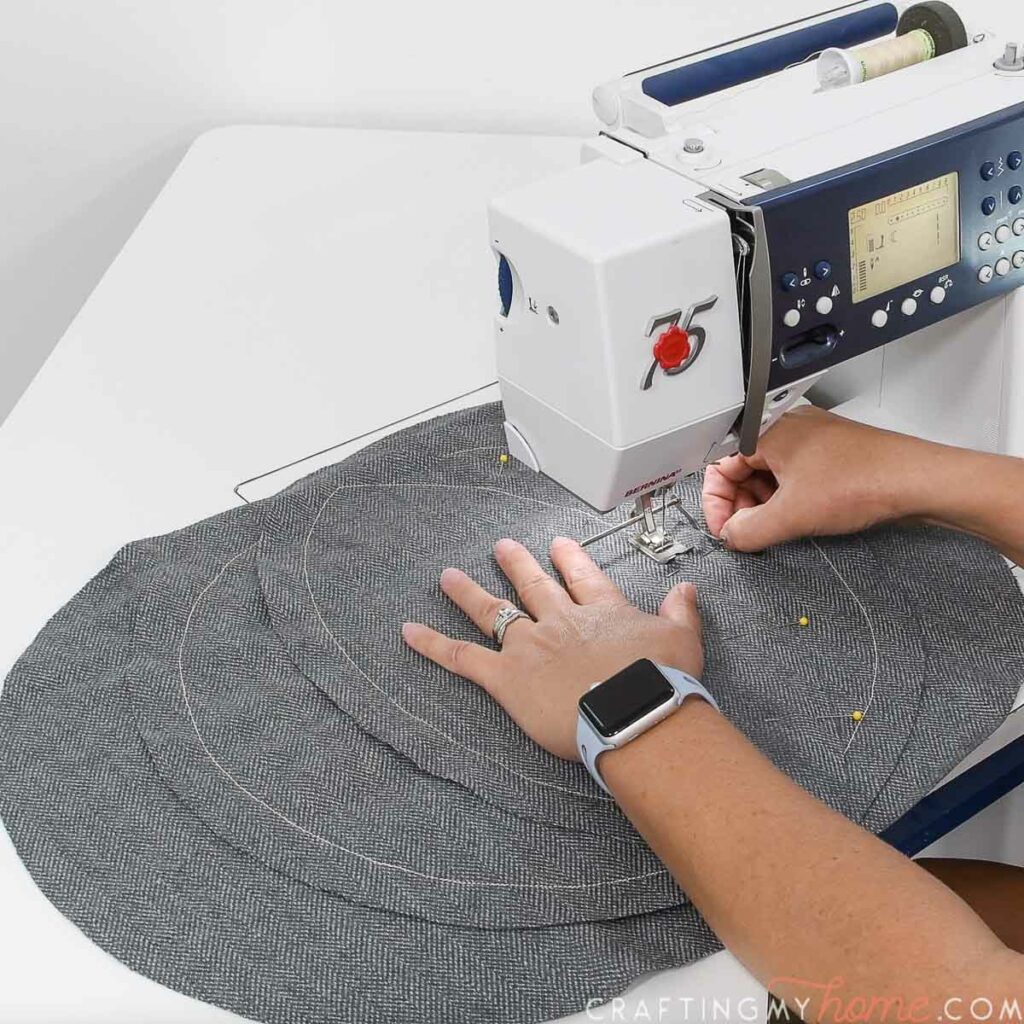
Sew the two pieces together with a 1″ seam allowance.
You can use a coordinating or contrasting thread to sew them together.
If it is coordinating, it will vanish into the fabric. If it is contrasting, it will stand out.

Lay the two pieces down, right sides up, and center the smallest piece on top.
Pin it in place so the pieces line up at the top points.
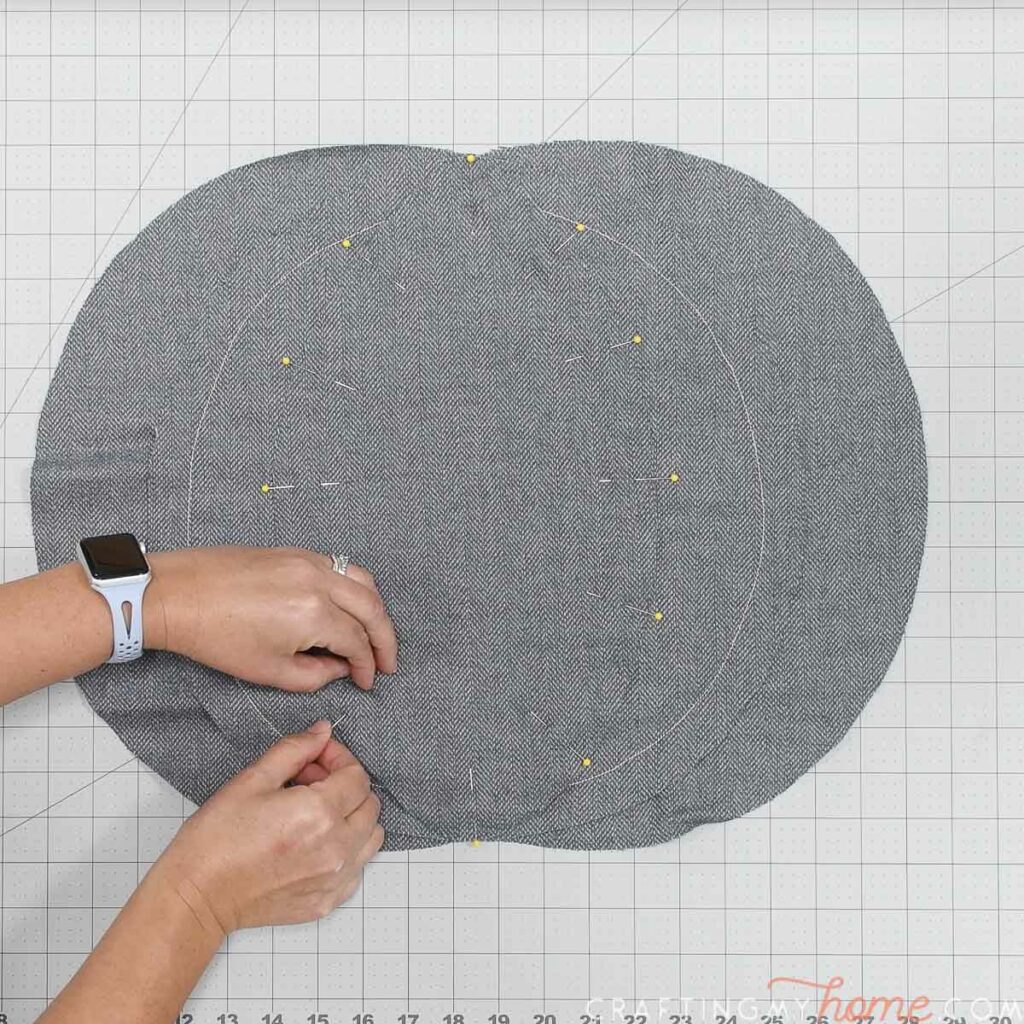

Sew this in place with a 1″ seam allowance.
The seam lines should intersect (or be very close) at the top and bottom points.
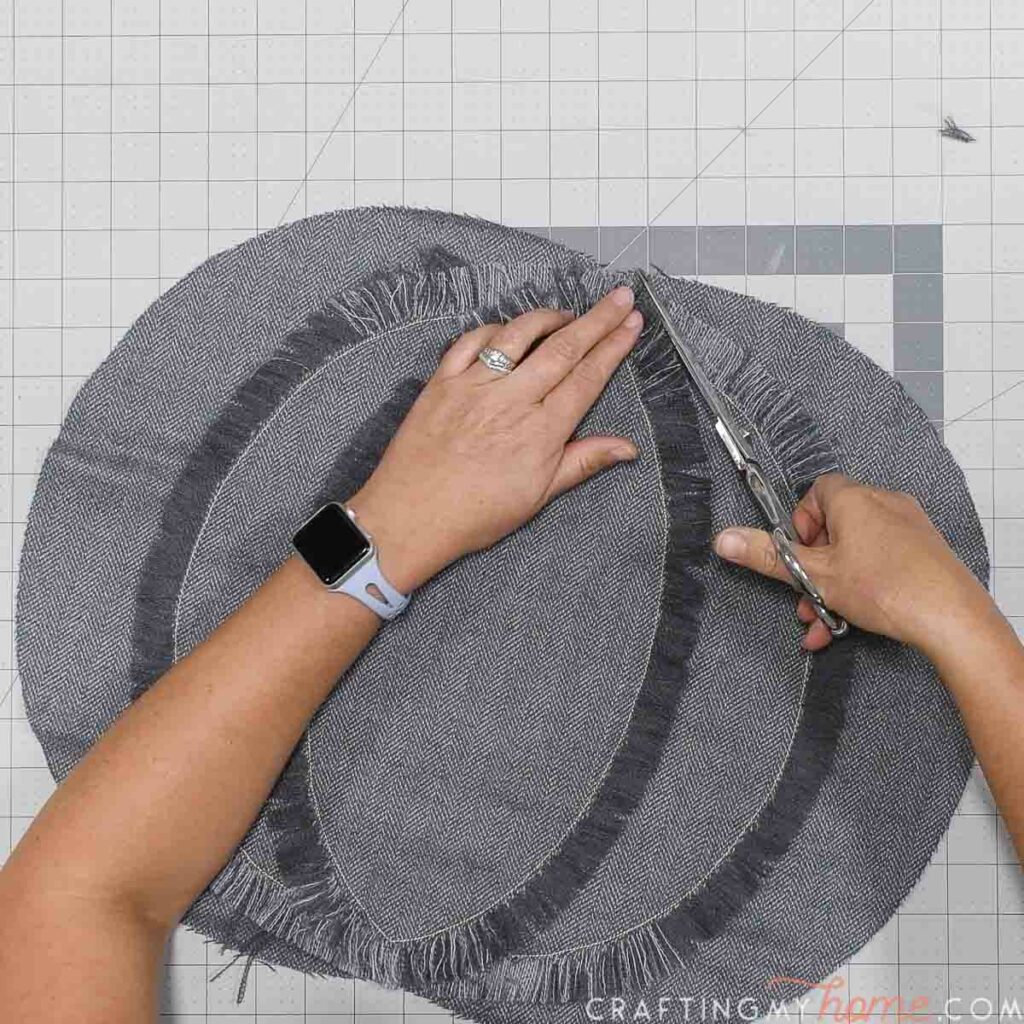
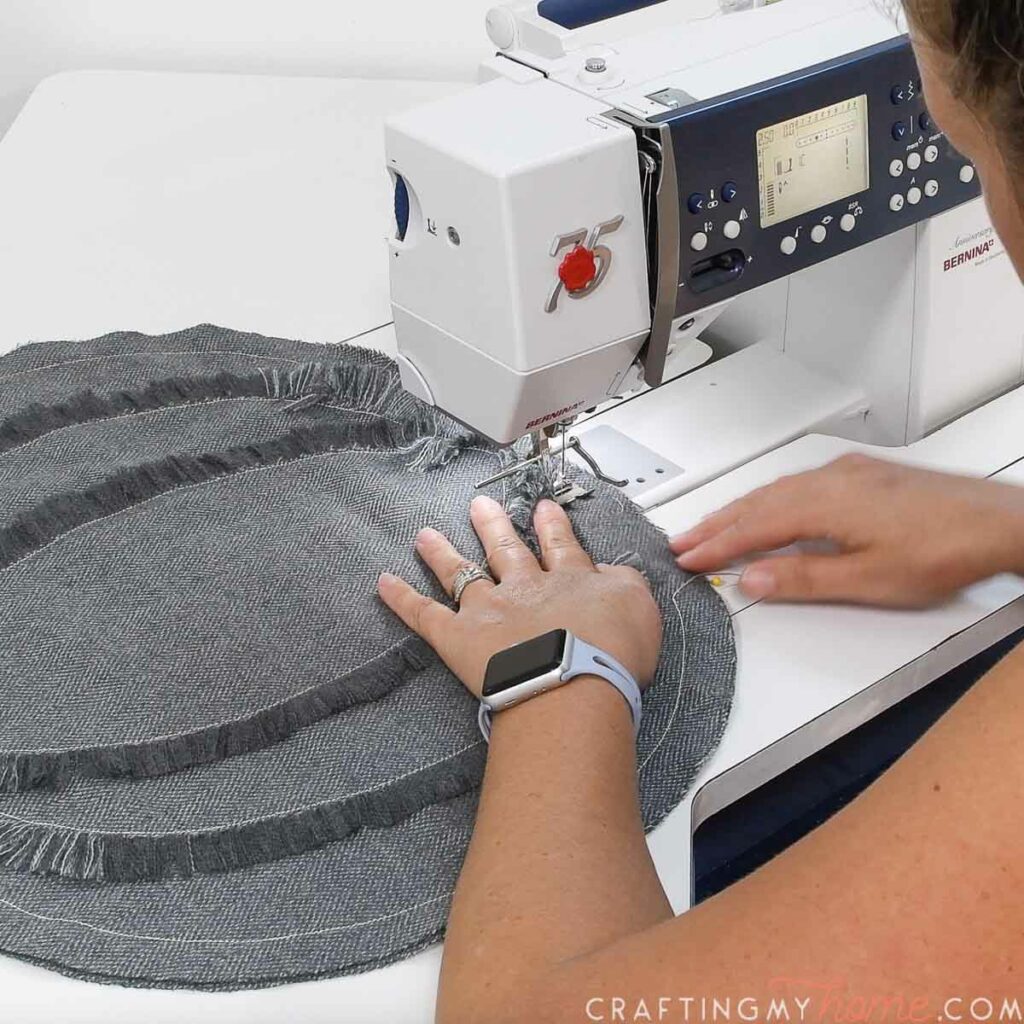
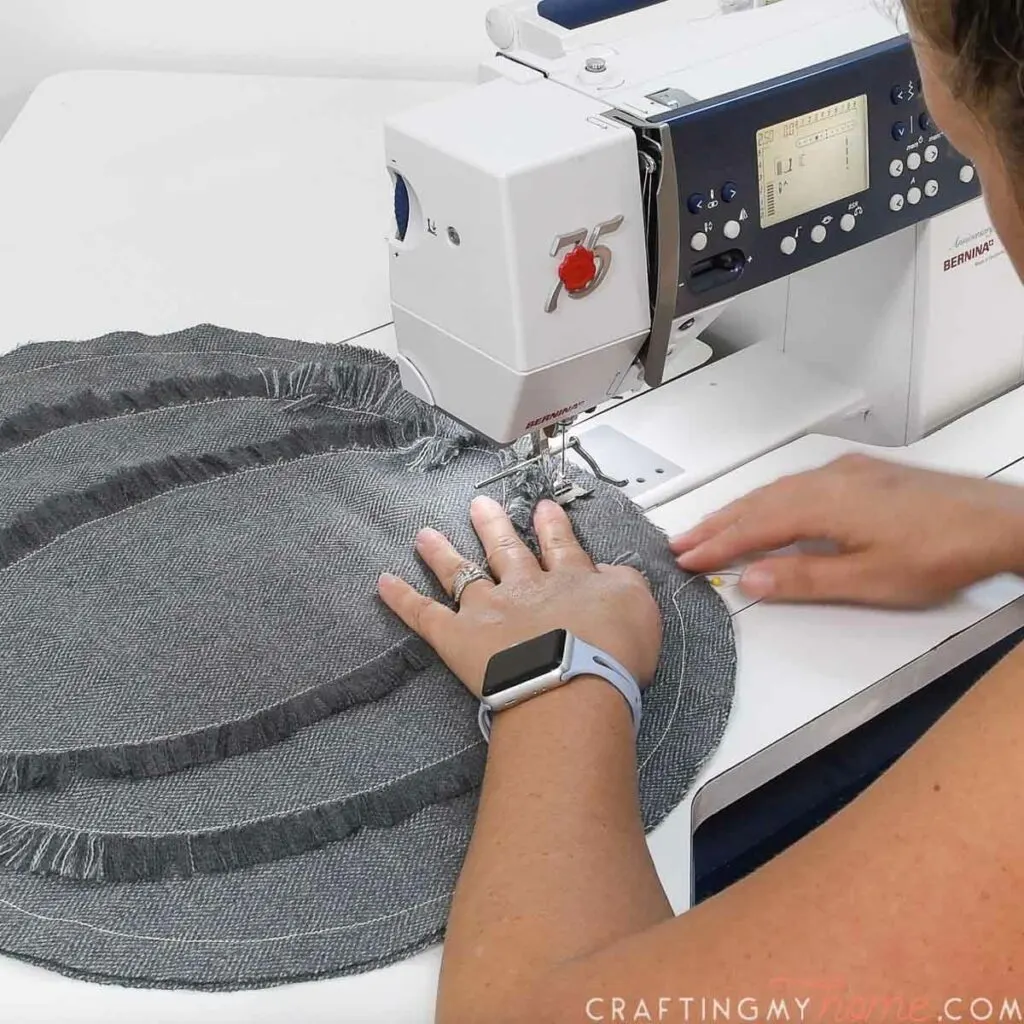
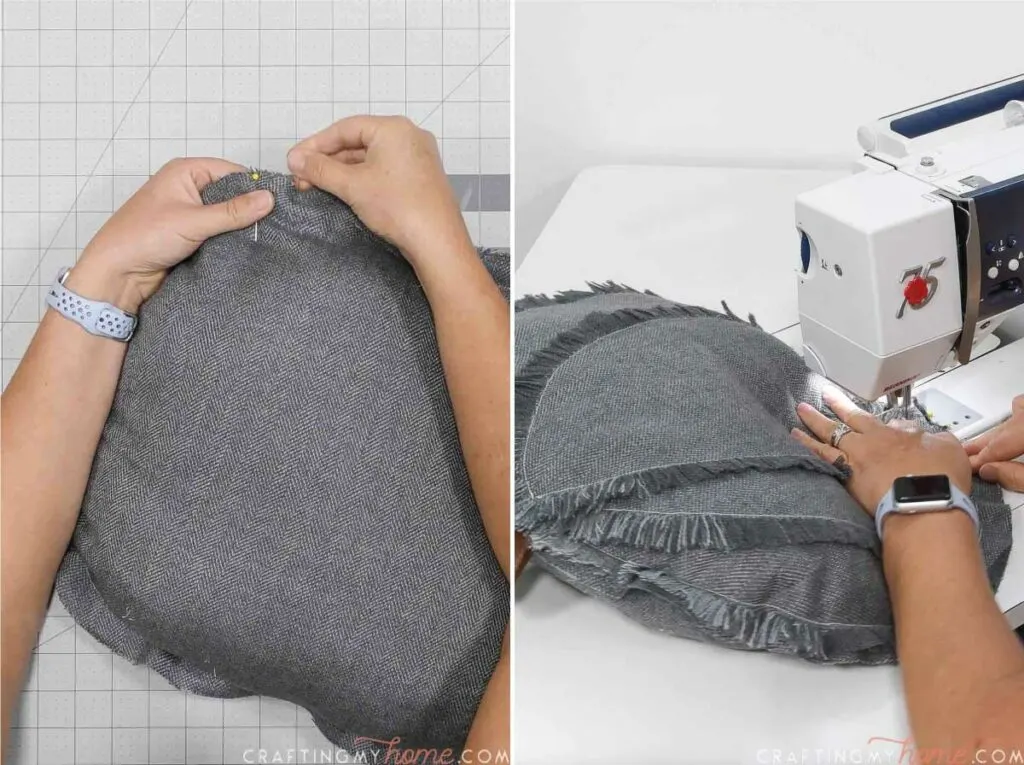
Fray the fabric on the outside of the seam.
Since the seam is curved, you will need to cut away the warp or weft threads as you start to fray around the curves.
When you get to the point where the frayed threads are getting perpendicular to the seam, don’t cut any more threads, just fray both the warp and weft threads.
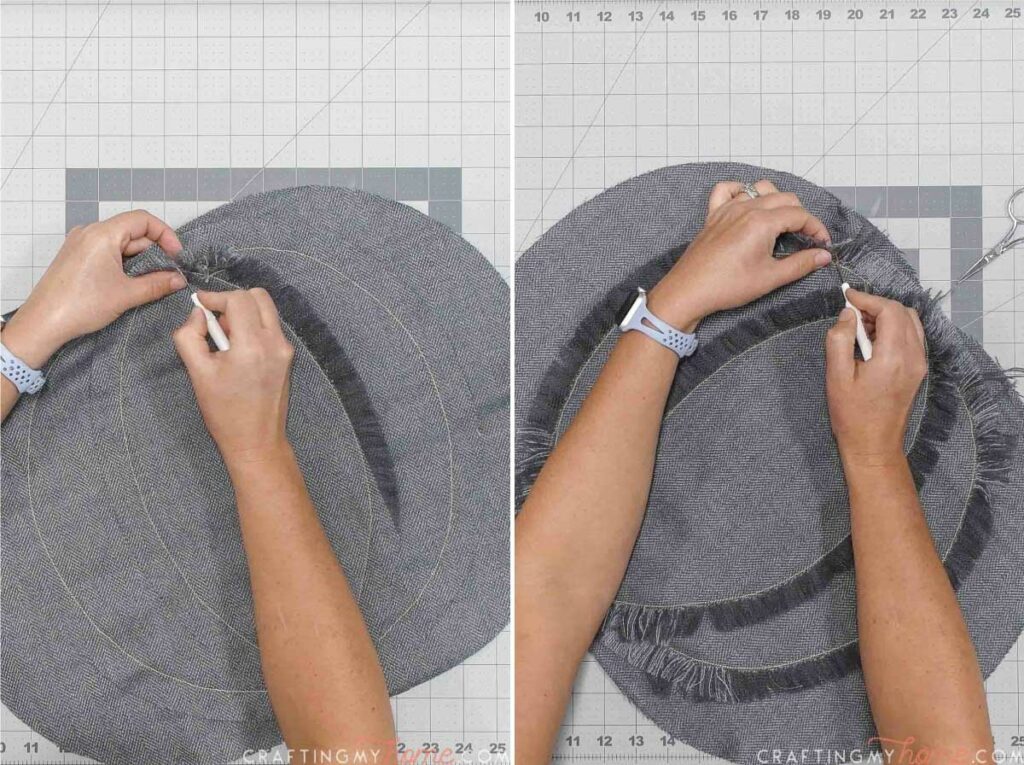
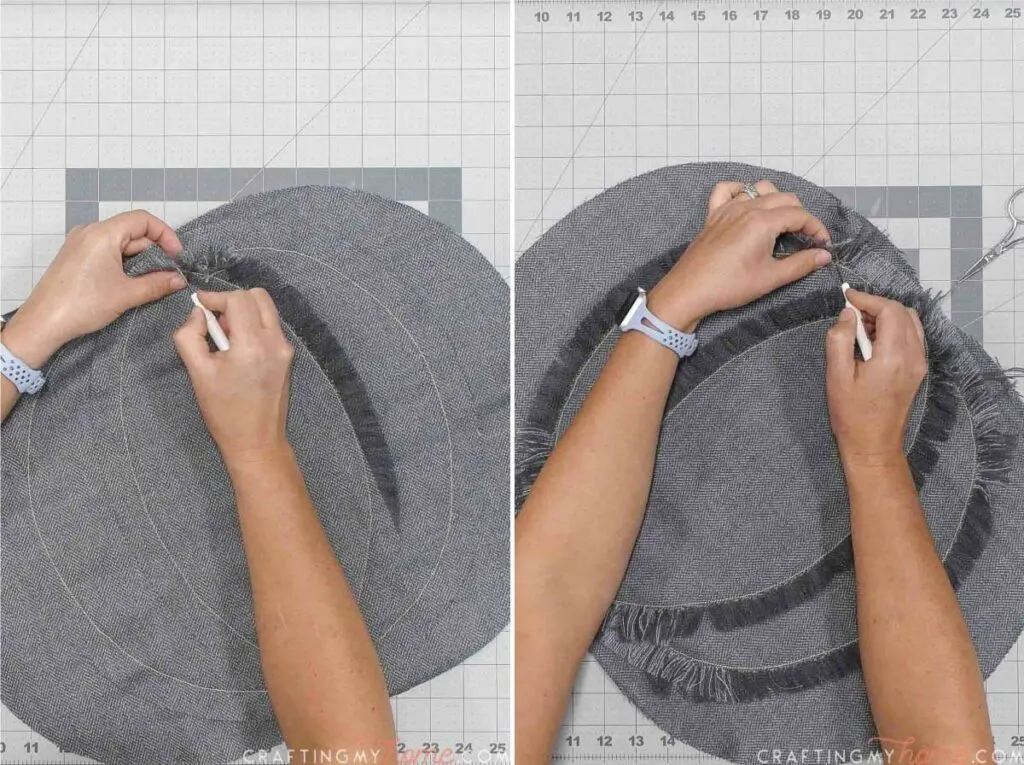
Comb the frayed threads away from the seam.
Trim any longer threads. You will only have these on those curves where you did not cut the warp or weft threads.

If you want the back of the pillow to match the front, repeat for the other pieces.
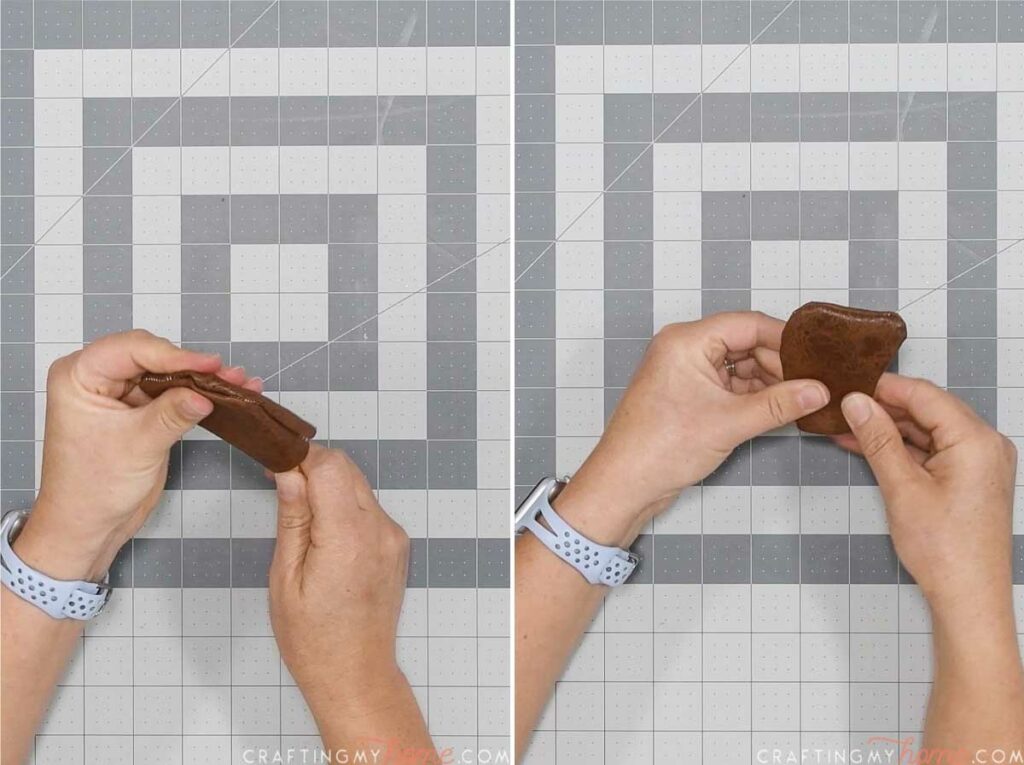
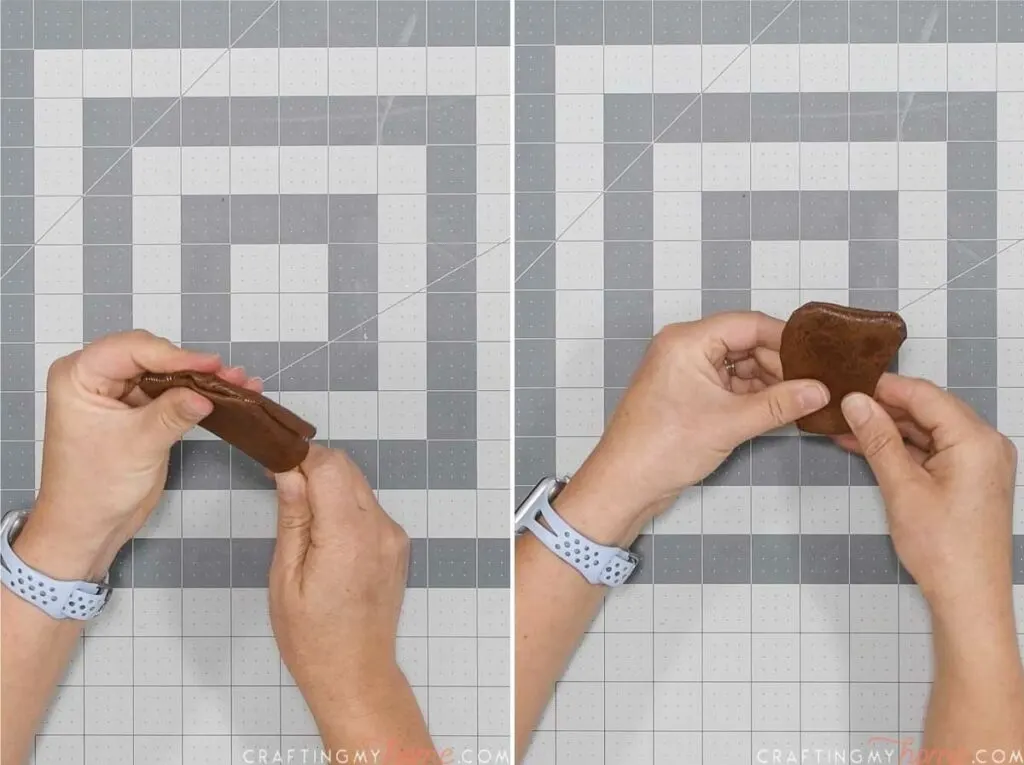
STEP 3- Sew the stem
Cut 2 stem pieces out of the fabric using the pattern.
I used a faux leather fabric. It is harder to work with, but gave the pillow a modern look.
Sew it along the dotted lines (a 1/4″ seam allowance) leaving the bottom open.
Clip the seams around the curves.

Turn the stem right-sides-out. Use the back end of a pencil to press the fabric into the seams.
Iron if your fabric allows. If not, just press the seams firmly to flatten the best you can.
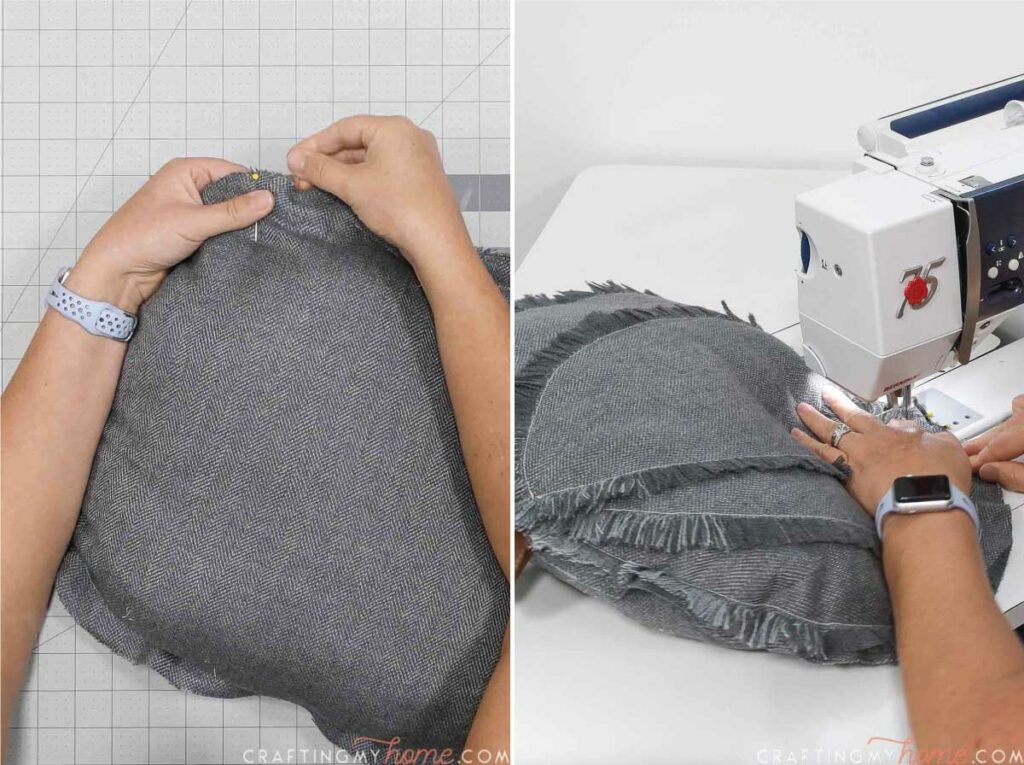
STEP 4- Sew the pillow together
Lay the second large piece with wrong-side-up.
Pin the finished stem in to the center of the top. Make sure it is far enough down that the entire thing will be sewn into the 1″ seam.

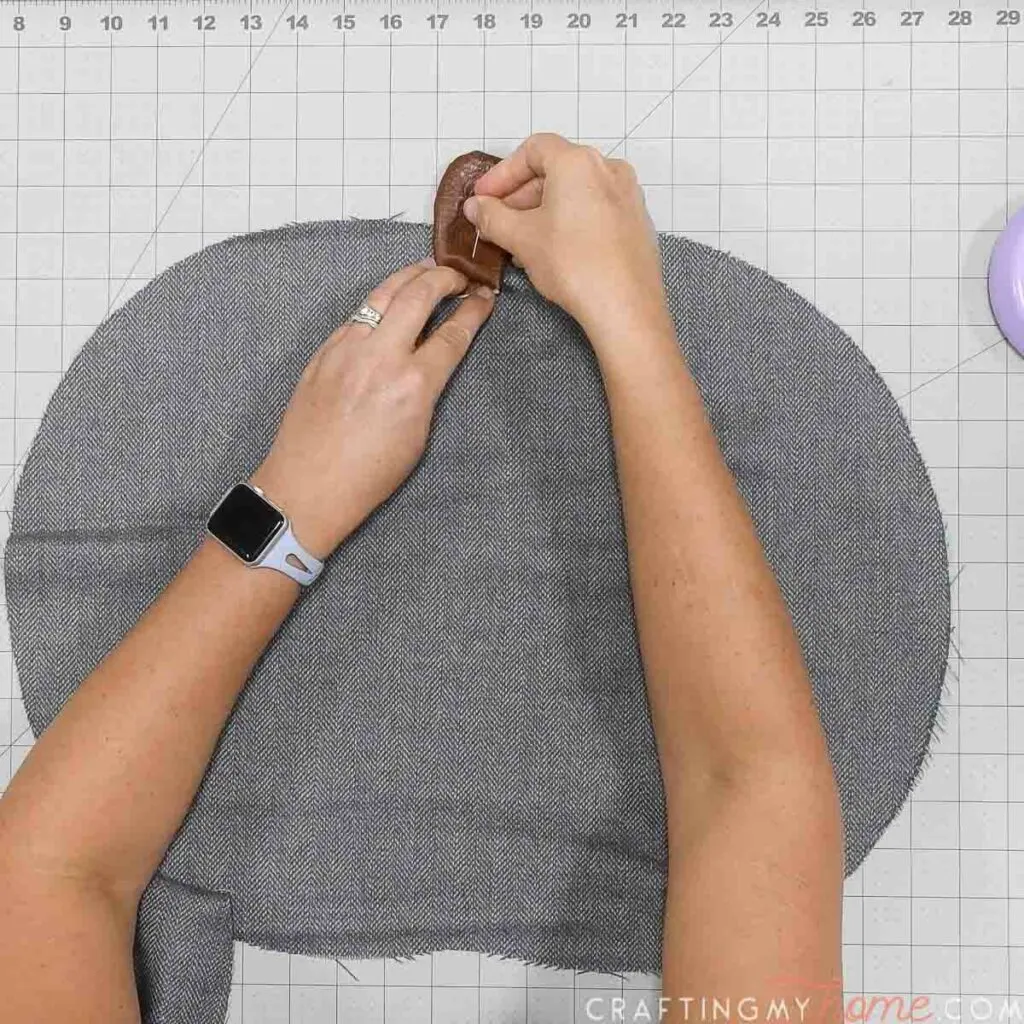
Lay the top piece of the pillow on top, right-side-up.
Line up the outside edges and pin.
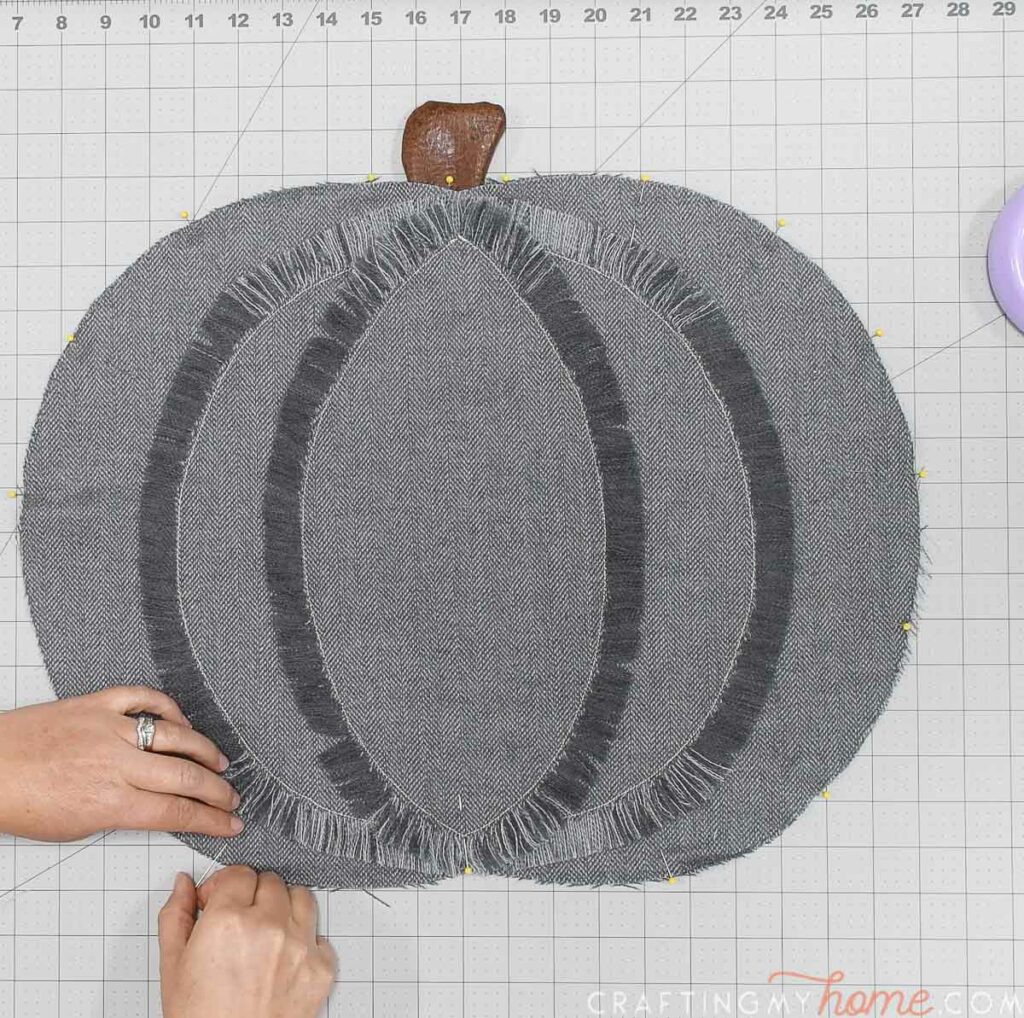

Sew around the perimeter of the pillow, except for a 4-5″ section.
Fold back the frayed edges when sewing across the top and bottom so they are not caught in the seam.
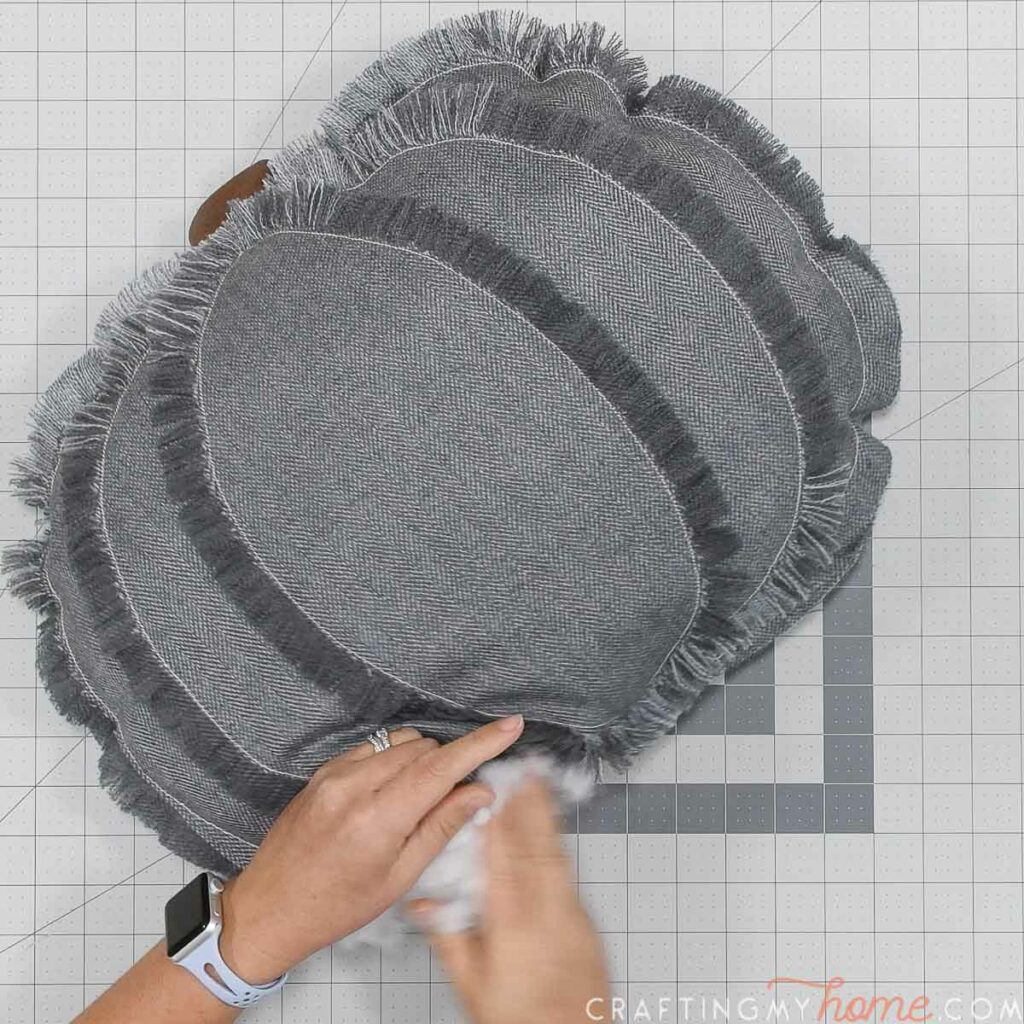
Fray the edges of the pillow. But do not fray around the opening yet.
You can wait to fray the entire pillow, but I found it was easier to fray it not-stuffed.


Stuff your pillow with your favorite pillow fill.
Don’t over-stuff it or you will loose the pillow shape.

Pin the opening closed.
Sew it to secure. Make sure to back-stitch on the other seam to knot it well.
Finish fraying the pillow around the opening.
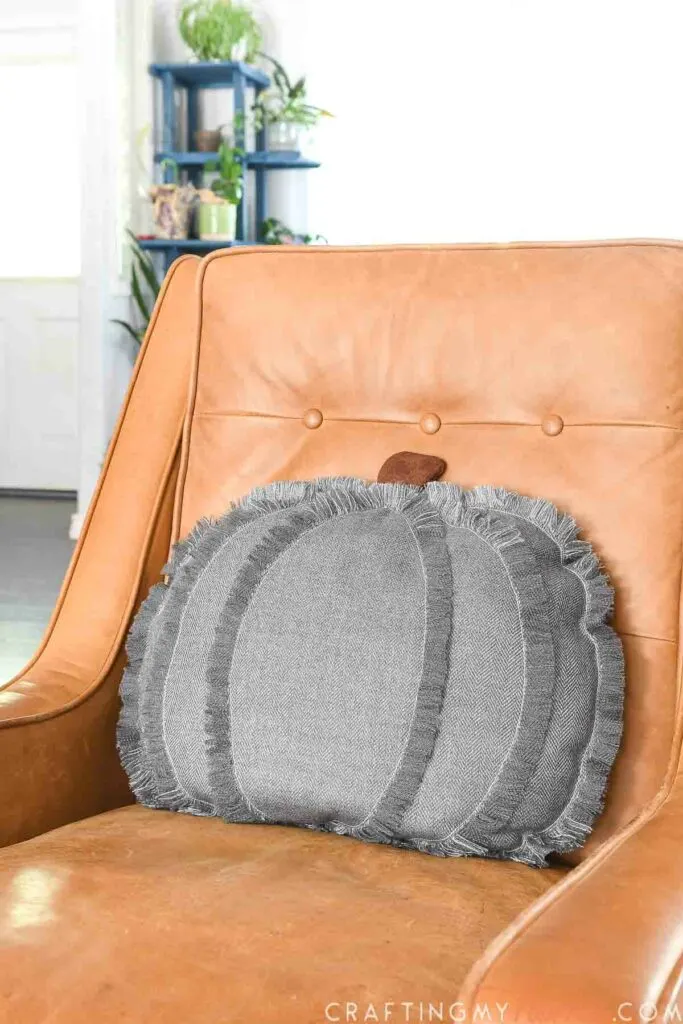
Then all that is left is to find the perfect place to display your new pumpkin pillow!
I love the modern look and colors on this camel leather chair in our living room. It is the perfect touches of fall!

Now I need to sew more pumpkin throw pillows. Fall pillows on my bed sound like fun too!
Where would you display your new pillow?
Happy sewing!