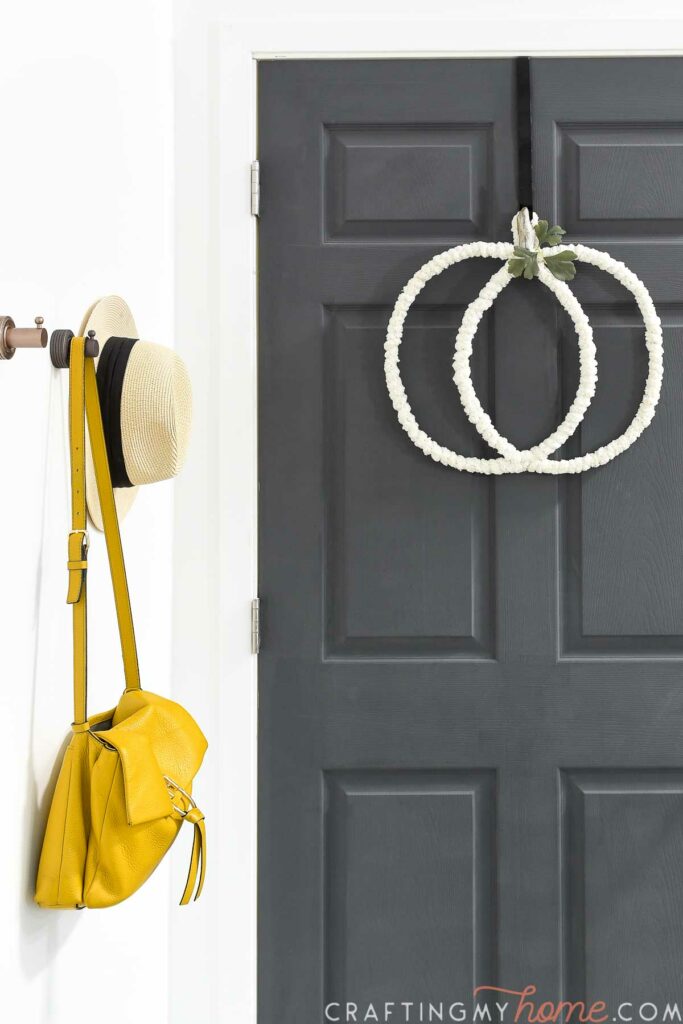
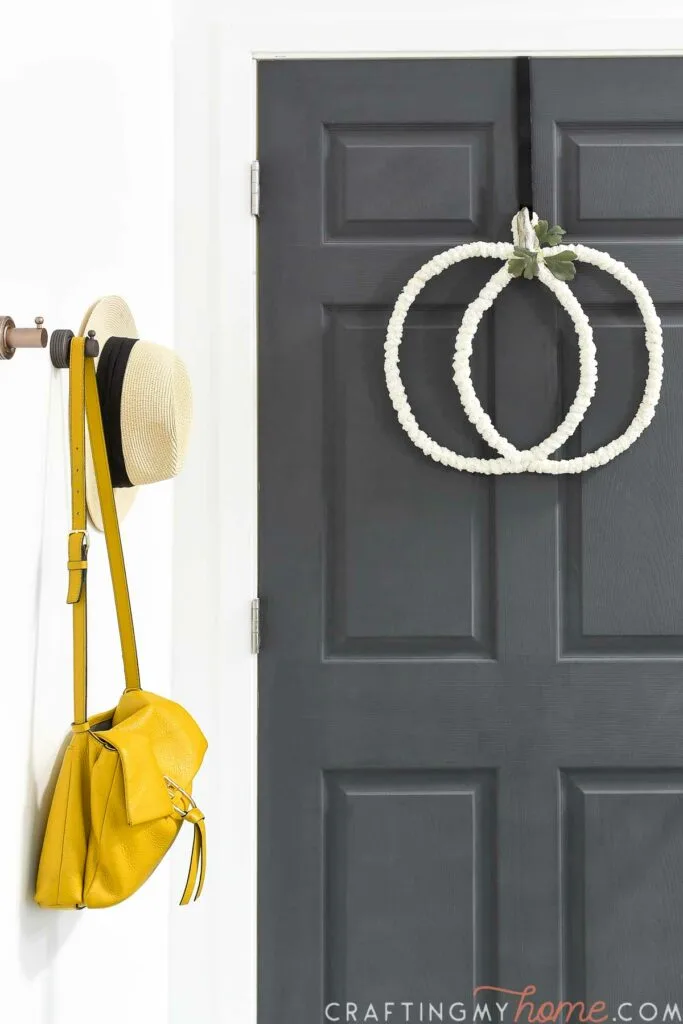
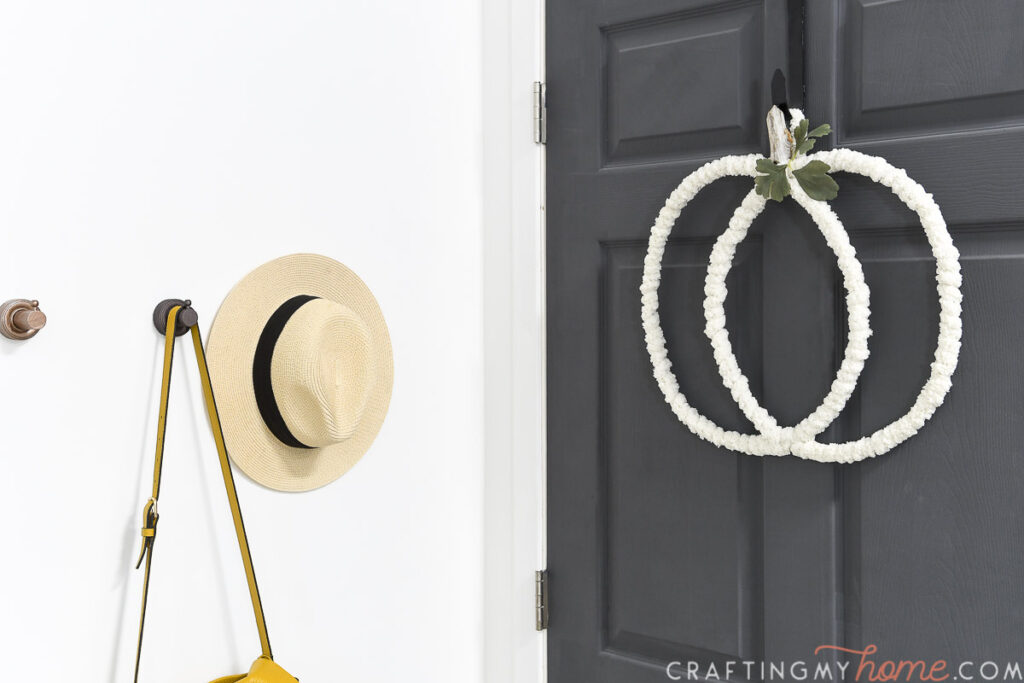
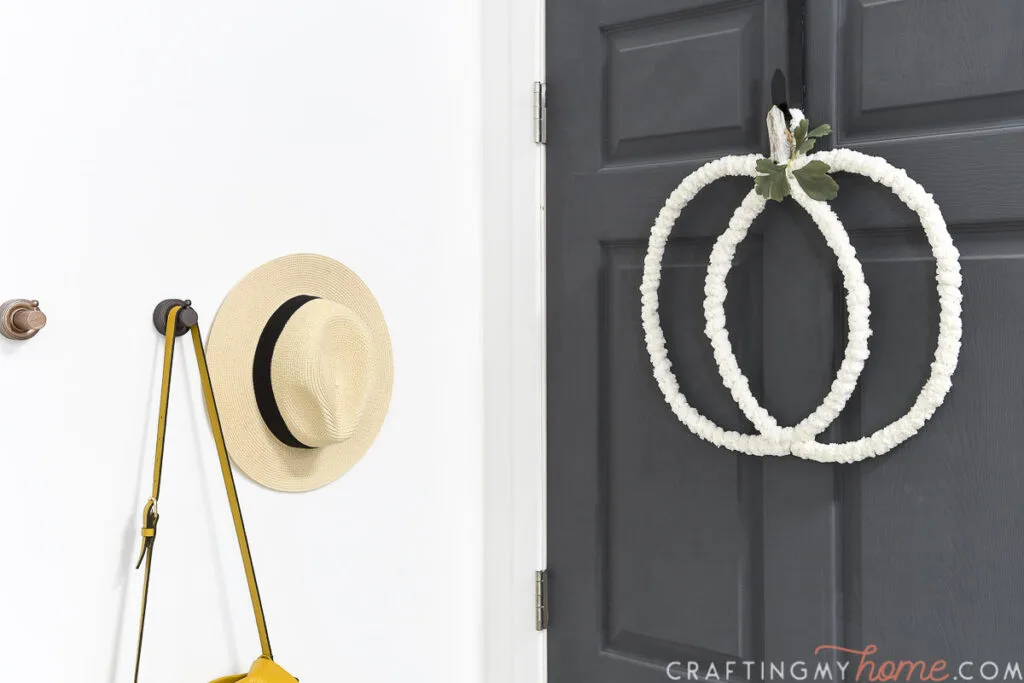
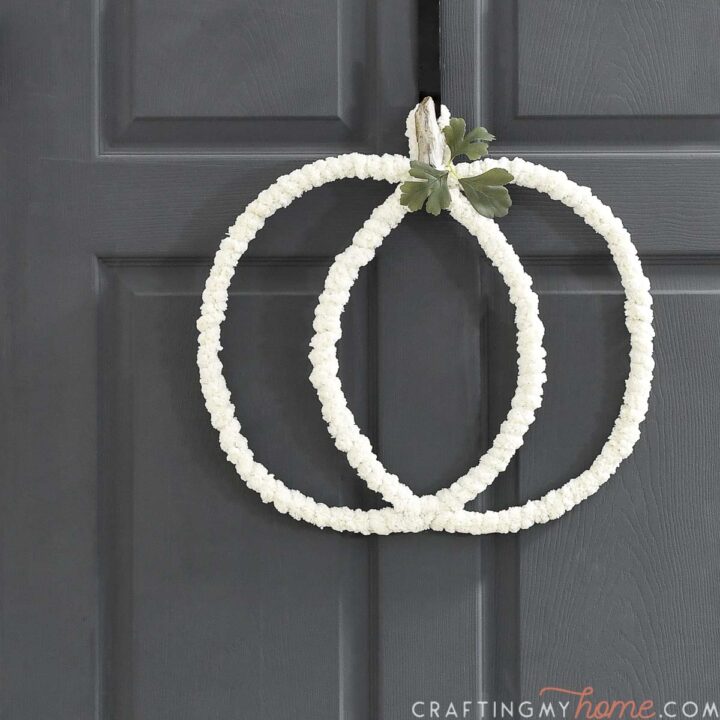
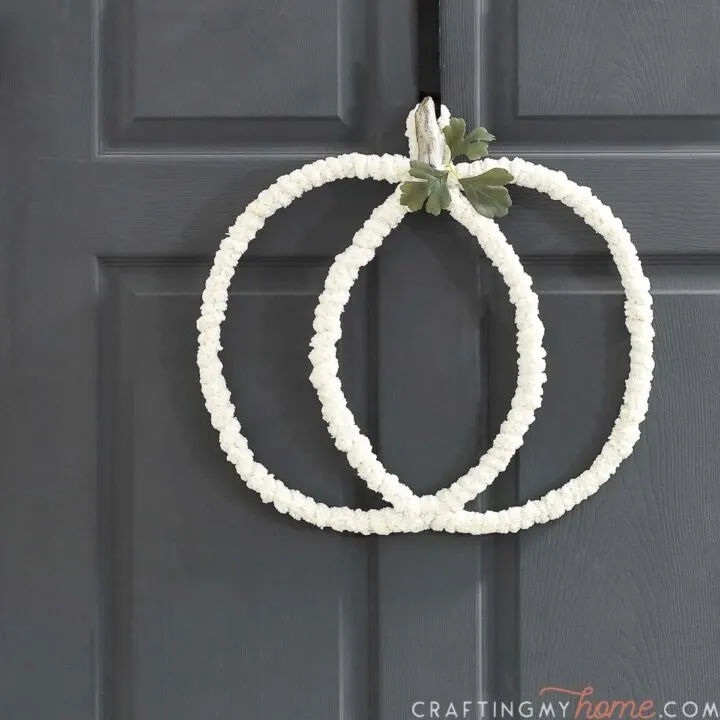
Decorate your door for fall with this easy to make wire pumpkin wreath.
It’s the second day of the 5 Days of Pumpkin crafts series! Even though it is still almost 100 degrees outside, it is feeling like fall with all the pumpkin crafts.
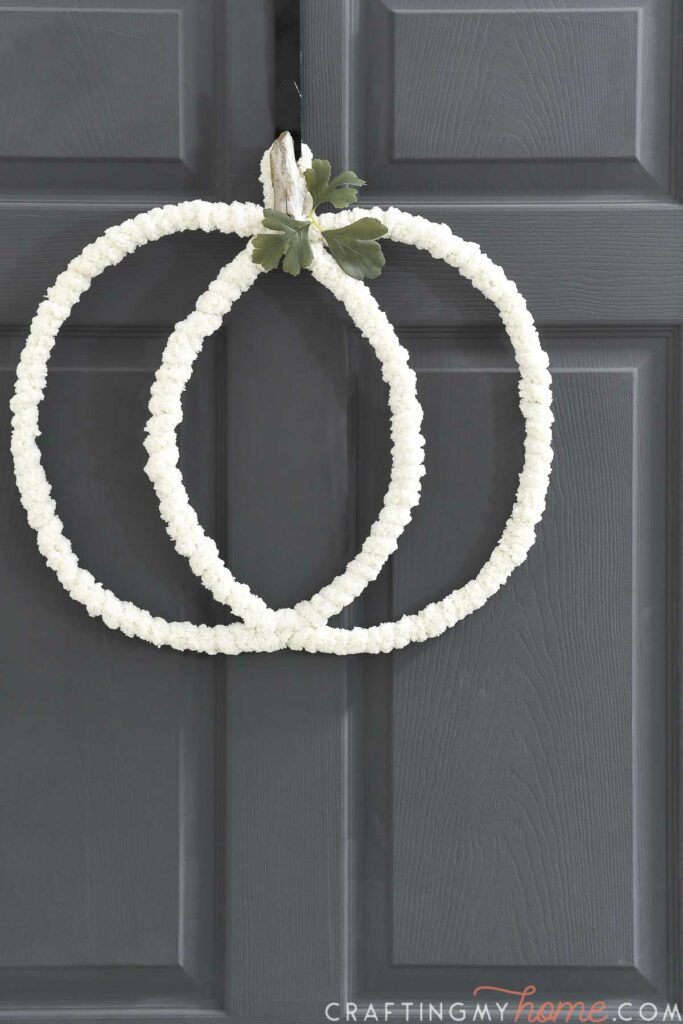
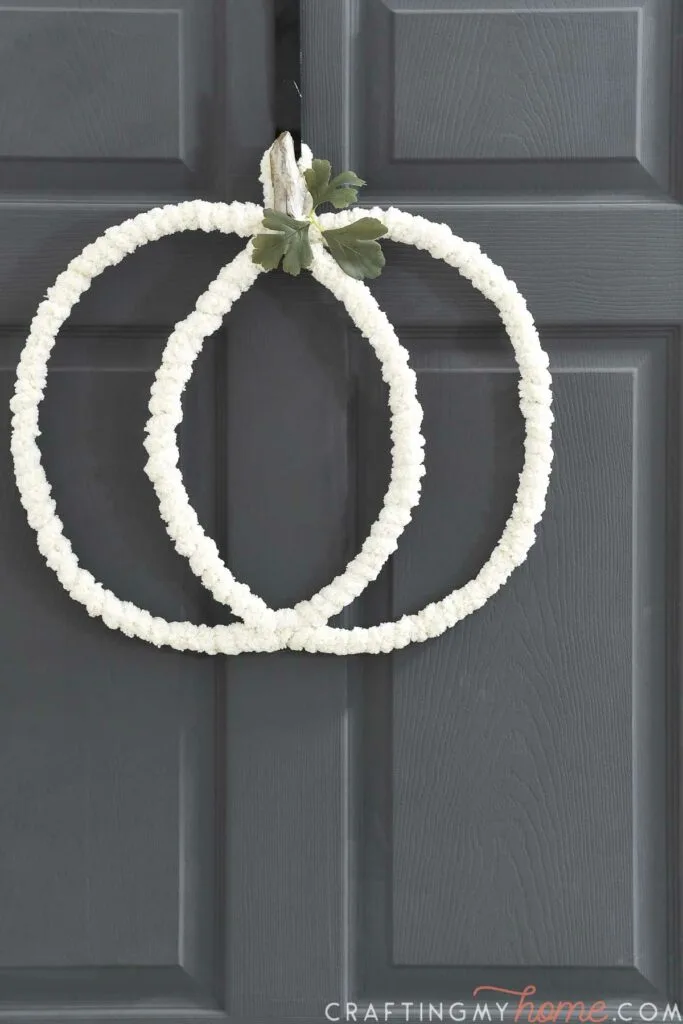
Today’s pumpkin craft is a new pumpkin shaped wreath for your front door. This wreath is super quick and easy to make.
You will love how fun and fast you can make your own wire pumpkin wreath. You may want to make even more than 1 😉
This post may contain affiliate links. As an Amazon Associate I earn from qualifying purchases. Click here to read my full disclosure policy.
The shape for this wreath is made by twisting wire into a simple pumpkin silhouette. I used bendable craft wire that is strong enough to hold its shape, but really flexible.
I chose a classic pumpkin shape for my wreath, but you could do any size or shape of pumpkin. Just think how cute a gourd or tall pumpkin would be.
You can get some other pumpkin shape ideas from these modern pumpkin SVGs.
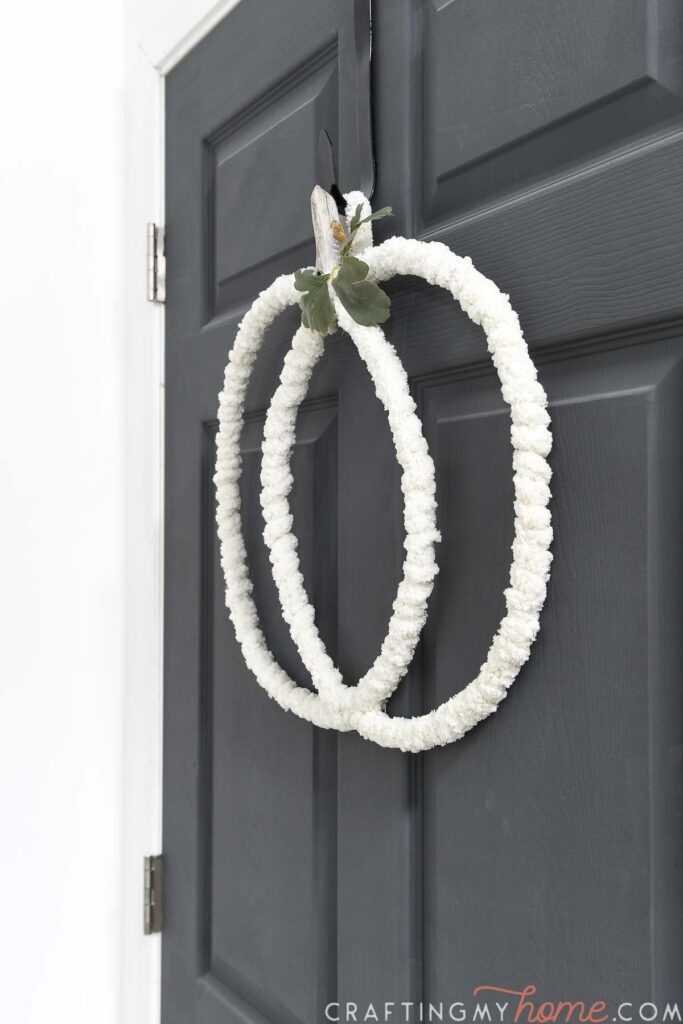
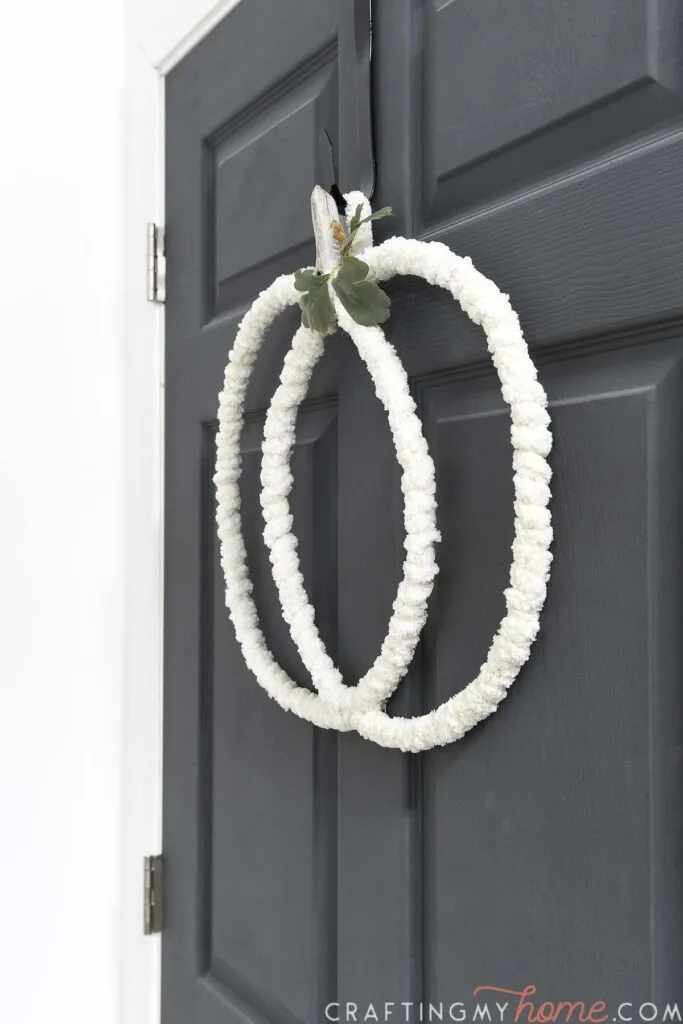
Once you have decided on the perfect pumpkin shape, you cover the wire frame in chunky chenille yarn.
This is the large yarn you may have seen people arm knitting with to make chunky blankets. The large yarn is perfect for quickly covering the wire frame.
I love that the yarn gives the wire pumpkin wreath a softness to it. And it adds color to the wire.
I used a cream yarn to be the perfect pumpkin for my charcoal colored door. But you could also use orange to contrast a lighter door or add even more fall vibes.
5 Days of Pumpkin Crafts
This is the second project for this years pumpkin crafts for adults series. Make sure to check back every day as I share new crafts for you to decorate for fall.
I will update the list below as the new pumpkin crafts go live:
- Day 1: Hello Pumpkin SVG
- Day 2: Easy Wire Pumpkin Wreath
- Day 3: Tapered Paper Pumpkin Lanterns for Fall
- Day 4: Easy Pumpkin Planter for Fall
- Day 5:Cozy Modern Pumpkin Pillow
How to Make a Pumpkin Wreath
Supplies:
- 3mm bendable craft wire
- Chenille yarn
- Needle nose pliers
- Hot glue gun and glue sticks
- Small stick
- Silk flower leaves
STEP 1- Create the wire frame
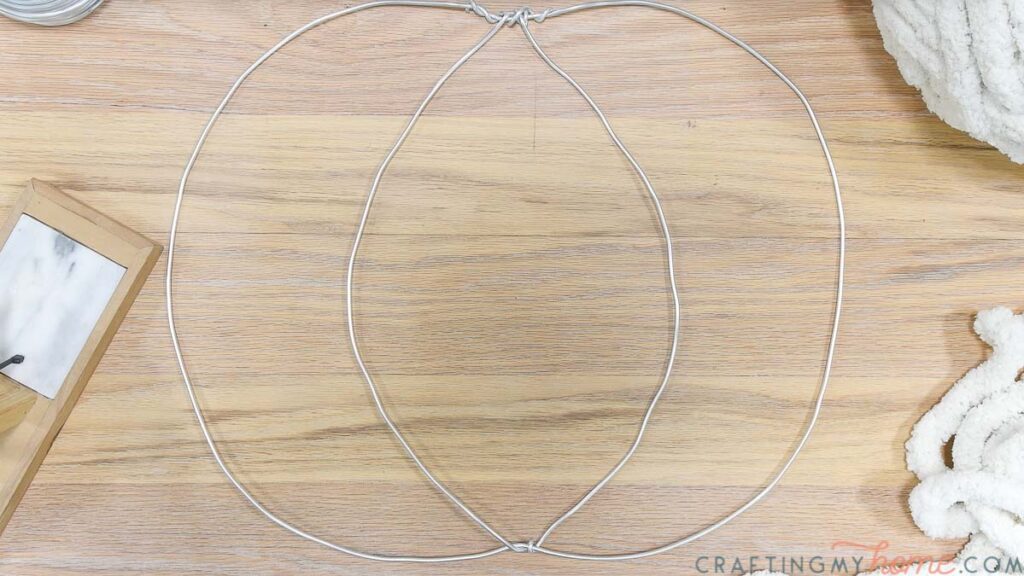
Cut a 56-58″ piece of wire. This wire was easy to cut with a pair of needle nose pliers.
Curve it into an oval with dents in the top and bottom like a pumpkin.

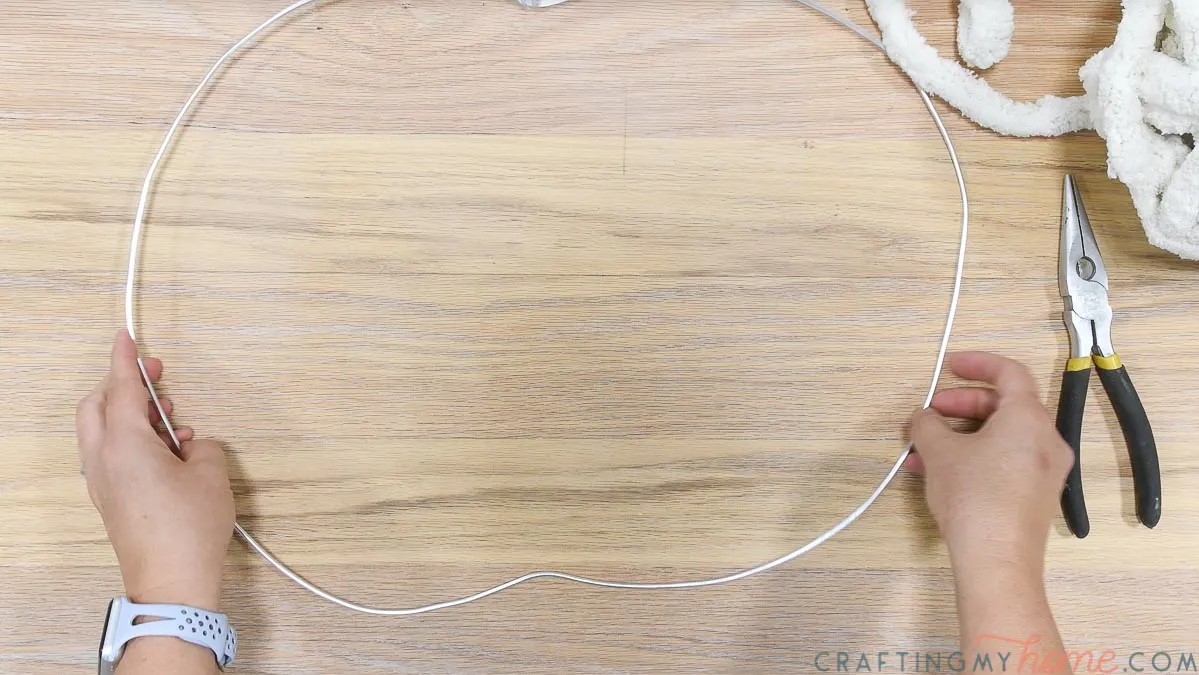
Wrap the wire around itself to close it. Pinch with the pliers.
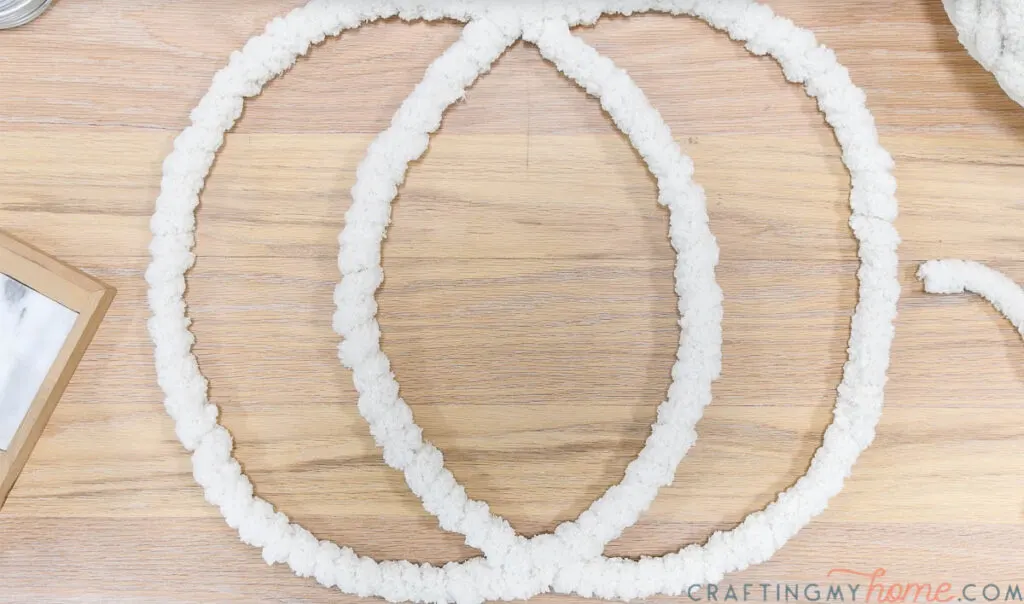
This created an approximately 18″ wide by 15″ tall pumpkin shape. You can make your pumpkin wreath bigger or smaller by using a longer or shorter piece of wire.


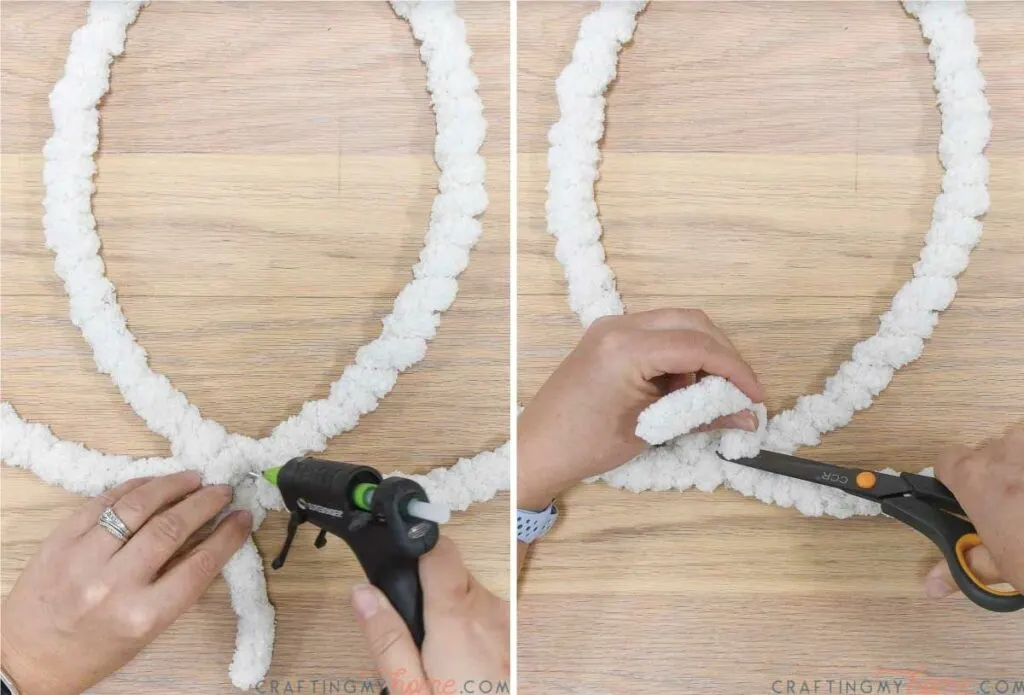
Wrap a second piece of wire around the top dent. Curve it toward the bottom dent.
Wrap it around the bottom dent and squeeze with pliers. Then curve it back up toward the top.
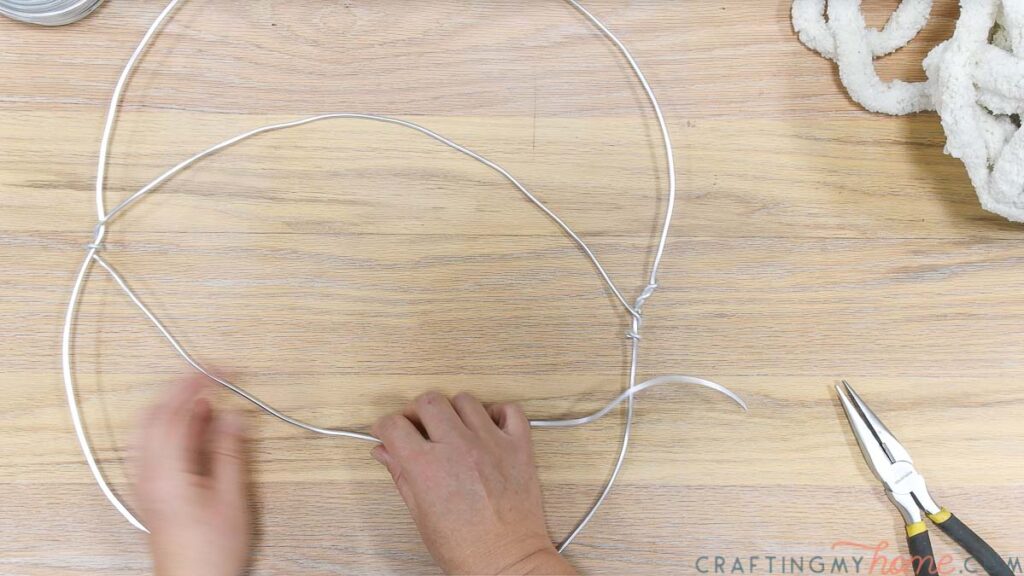
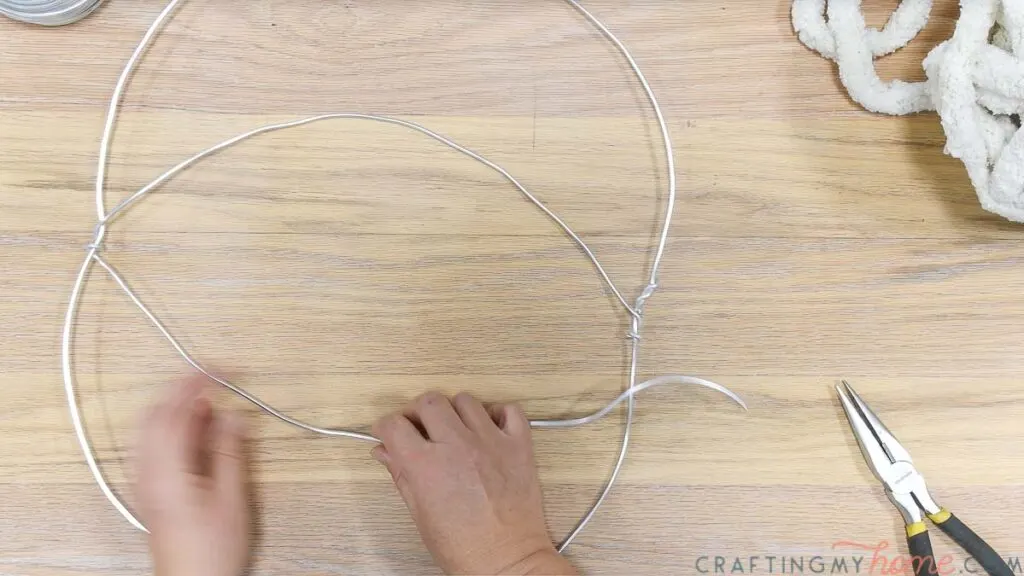
Cut the wire and twist it closed at the top.
This is the completed wire pumpkin frame. It does not have to look perfect and smooth. The yarn will hide imperfections.

STEP 2- Cover wire with yarn
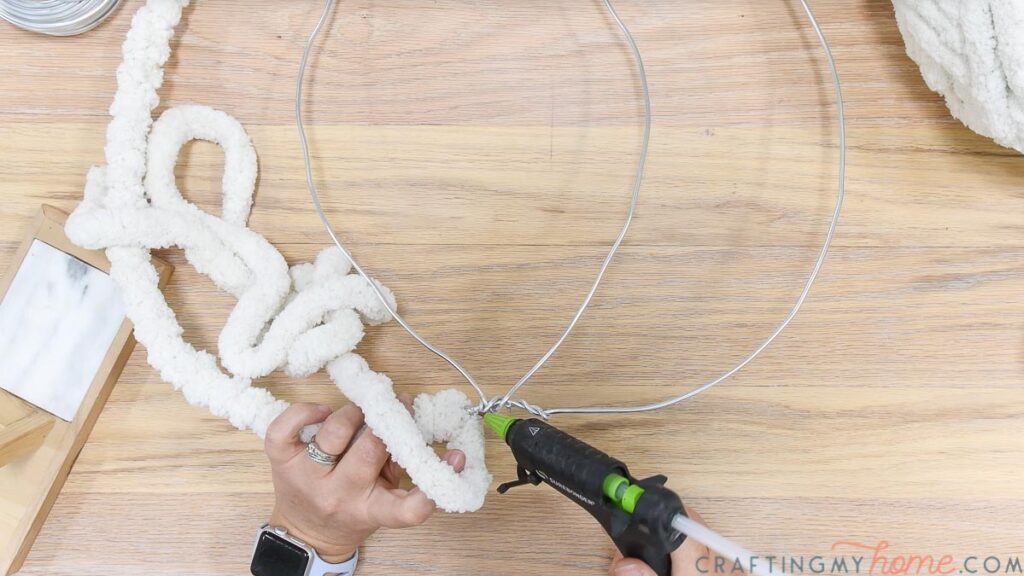
Unroll a 1-2 yard section of yarn and cut it off.
Add some hot glue to the wire in the bottom center and secure one end of the yarn. Then start twisting the yarn around the wire.
Add glue every 4-5 twists, making sure the yarn is snug against the wire but not pulled too tight. You want it to still look fluffy.

Continue wrapping the outside wire piece all the way to the top, hot glueing every 4-5 twists.
Once you get tot he top dent, secure it with glue and then start twisting down the center wire.
When you run out of yarn, secure it to the back of the wire. Cut a new piece of yarn and glue to the other one, then continue twisting the wire.

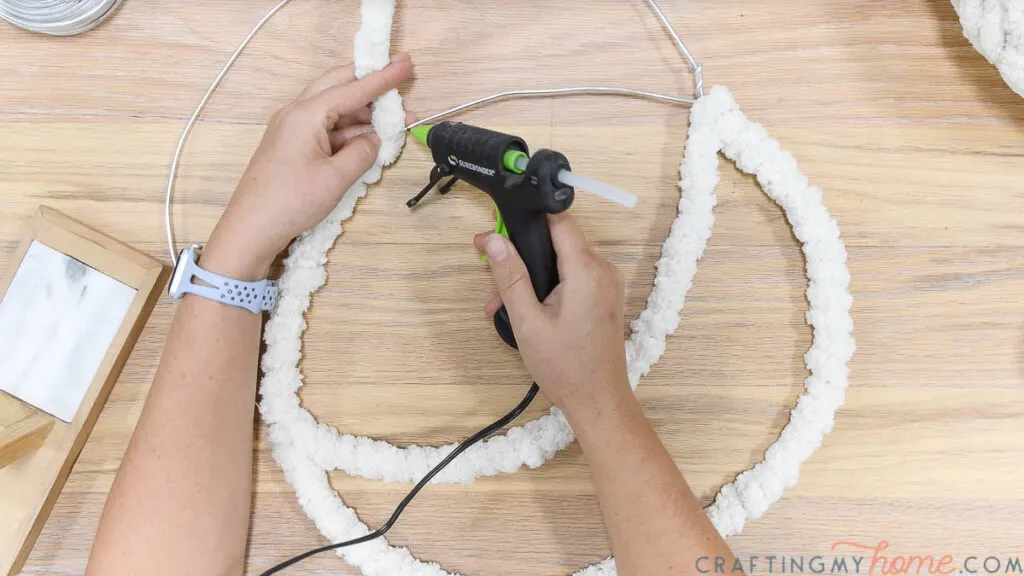
The chunk chenille yarn covers the wire frame rather quickly. It only took me 2 pieces of yarn to completely cover the wreath frame.
When you get to the end, hot glue the yarn to the back and then trim off any excess.

Your beautiful wire pumpkin wreath should look something like this! You can bend the wires as needed to adjust the pumpkin shape.
But remember, pumpkins do not grow perfectly symmetrical so it is okay if your pumpkin wreath is not symmetrical too!

STEP 3- Add stem and leaves
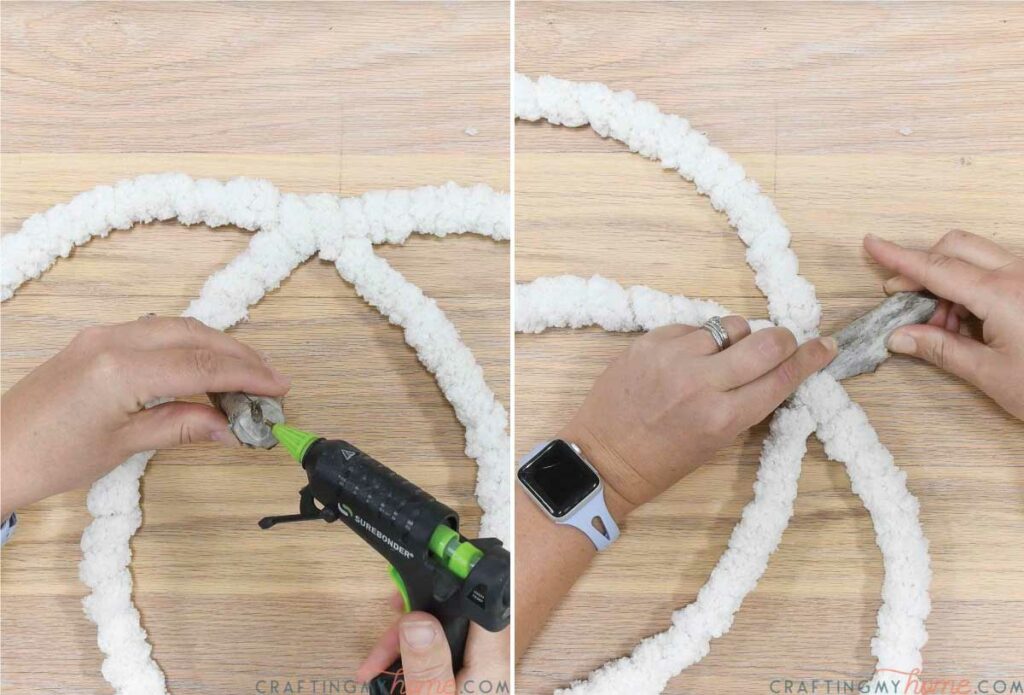
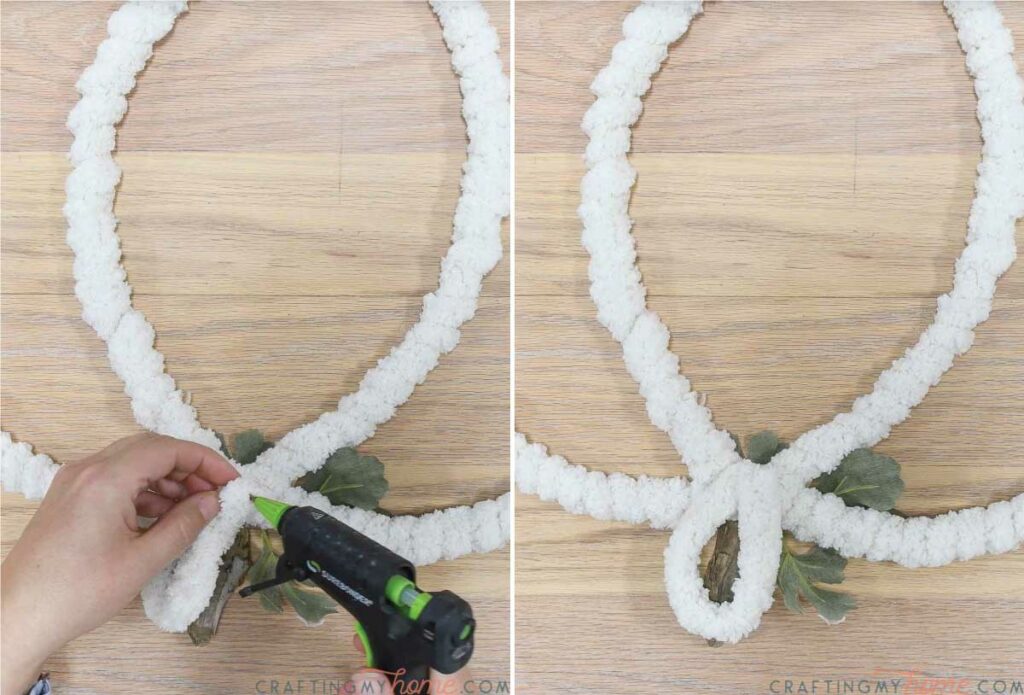
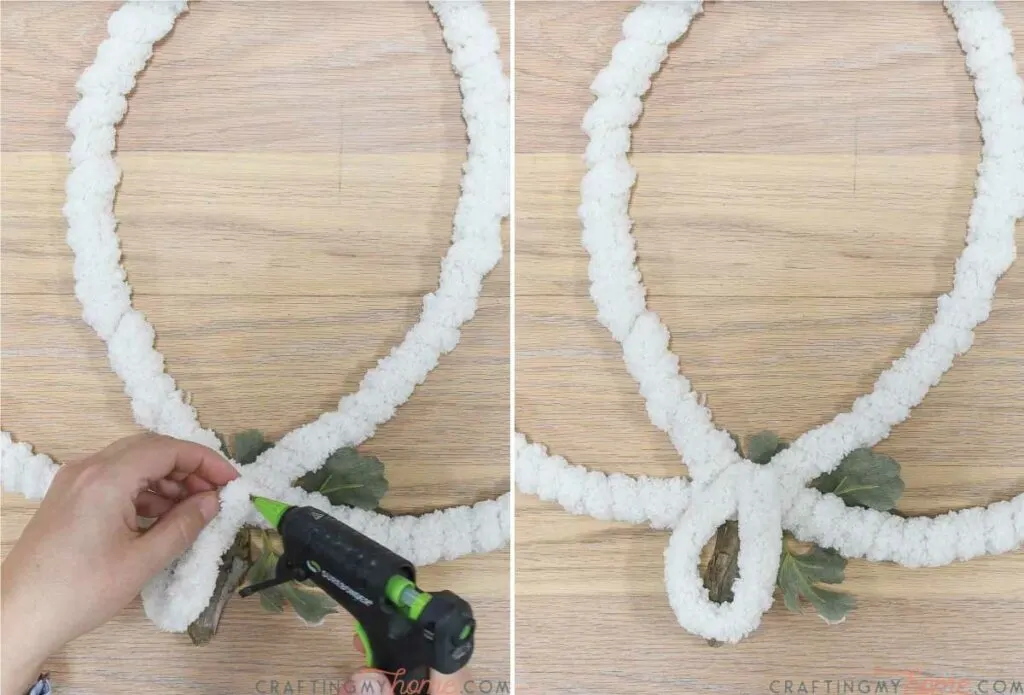
Find a stick in your yard and trim it if needed.
Add hot glue to the end and press it into the top dent of the pumpkin wreath. Reinforce the stem with additional hot glue around the base as needed.

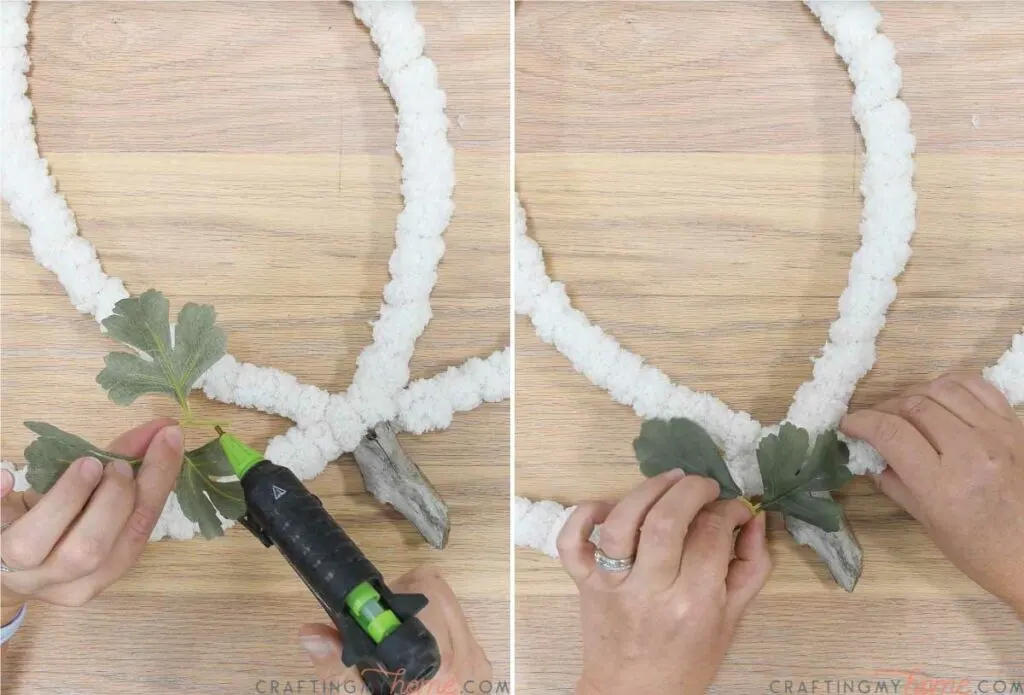
Add a silk flower leaf (I think mine came from a peony flower).
It does not matter if it looks just like a pumpkin vine. The green just adds some additional color and texture to the wreath.
Secure it behind the stem with hot glue.

Cut a small piece of yarn to create a loop to hang your new wreath.
Hot glue it to the back of the wreath to secure.
Now all you have to do is hang your new wreath on your door!
I absolutely love the way this one turned out. And I have lots more wire left over to create even more fun wire wreaths… what should I make next?
Happy crafting!
Easy Wire Pumpkin Wreath
Decorate your door for fall with this easy wire pumpkin wreath craft.
Materials
- 3mm bendable craft wire
- Chenille yarn
- Glue sticks
- Small stick
- Silk flower leaves
Tools
- Needle nose pliers
- Hot glue gun
Instructions
- Cut a piece of wire and curve into an oval with dents at top and bottom.
- Wrap the ends of the wire around itself, pinch with pliers.
- Curve a second piece of wire to add pumpkin details.
- Secure yarn to bottom of wire frame and twist around frame adding hot glue periodically.
- If you reach the end, secure to back and trim off excess. Then glue new piece of yarn and continue wrapping.
- Glue stem to top.
- Glue faux leaves to stem.
Recommended Products
As an Amazon Associate and member of other affiliate programs, I earn from qualifying purchases.


