Add Halloween decor to your home with this simple halloween sign craft.
You can’t decorate with pumpkins without making a craft for Halloween too! So for the last day of the 5 days of pumpkin crafts series it was time to create a pumpkin themed Halloween project.
Last spring I made some simple Easter signs for the 7 Days of Paper Spring Decor series and they were a hit. So it made sense to also make some for Halloween.
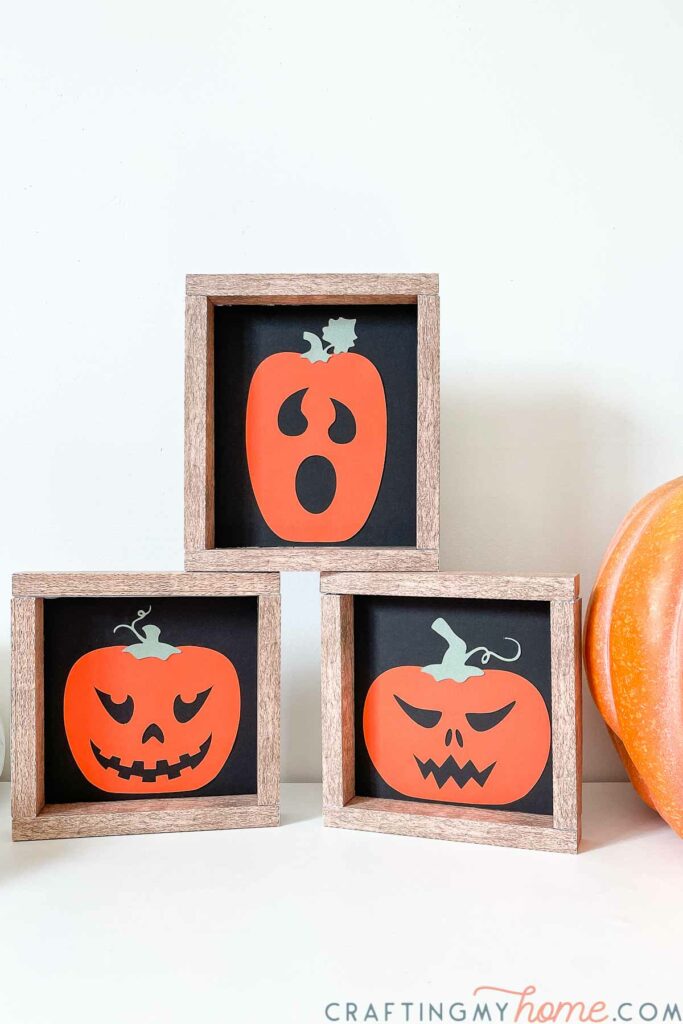
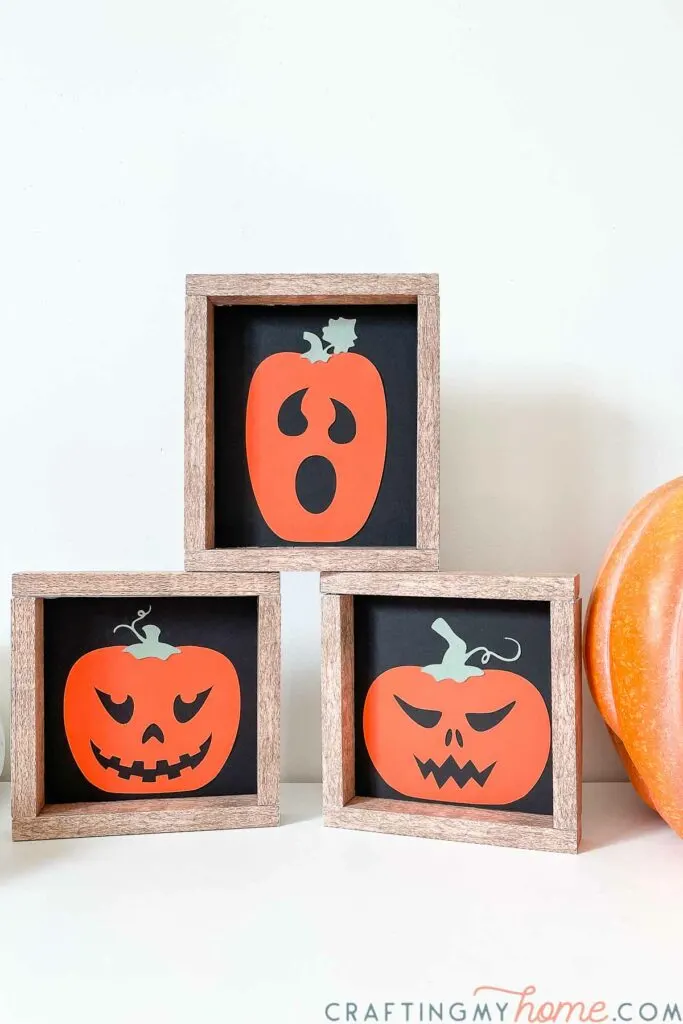
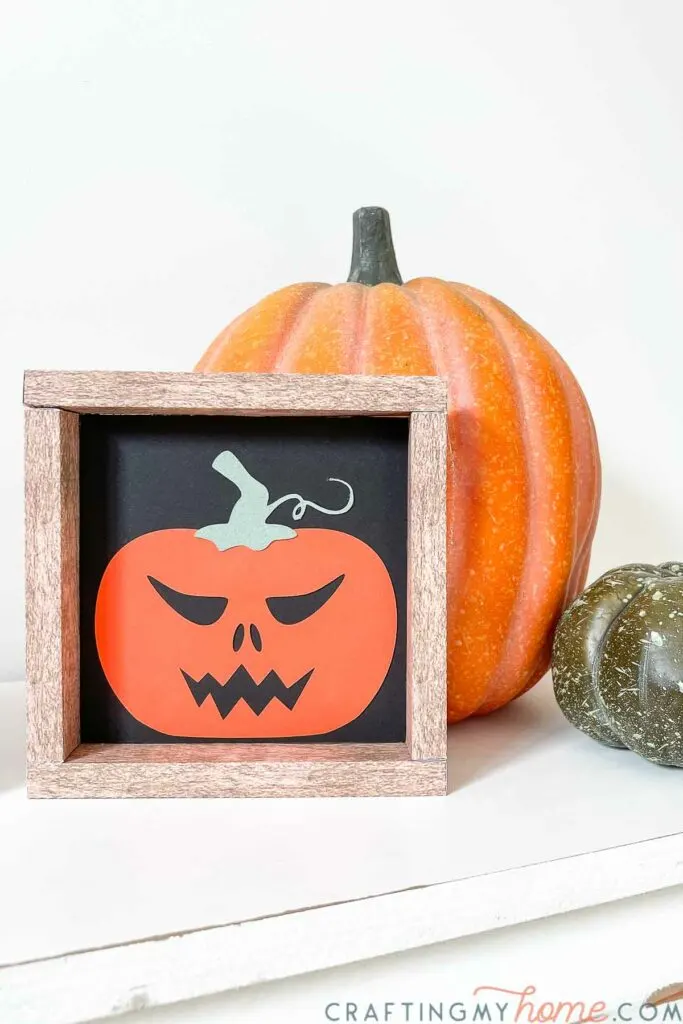
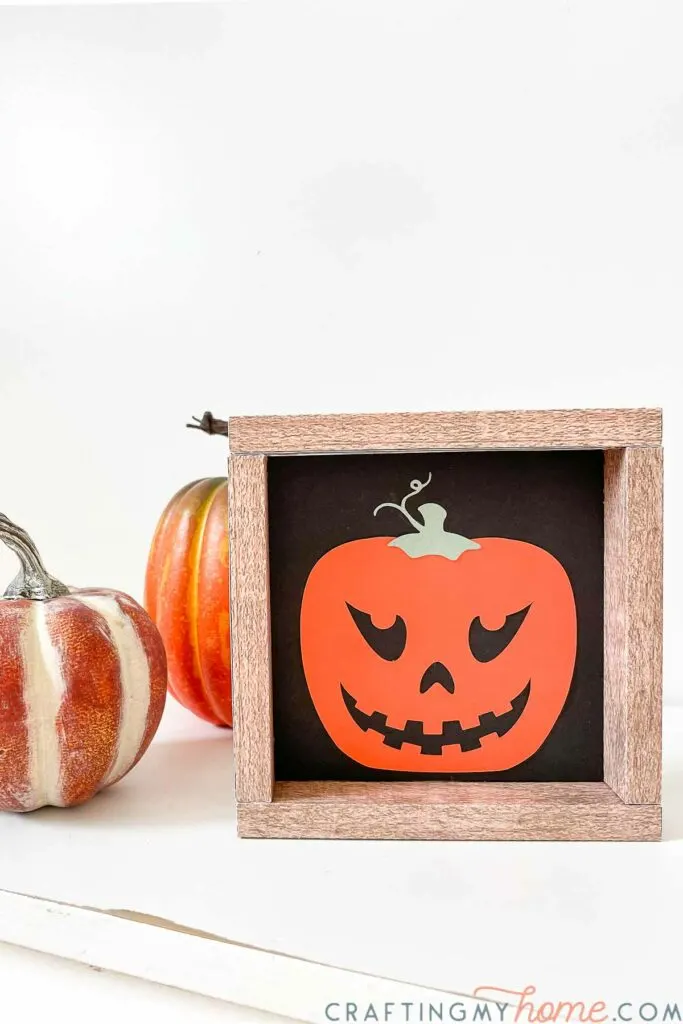
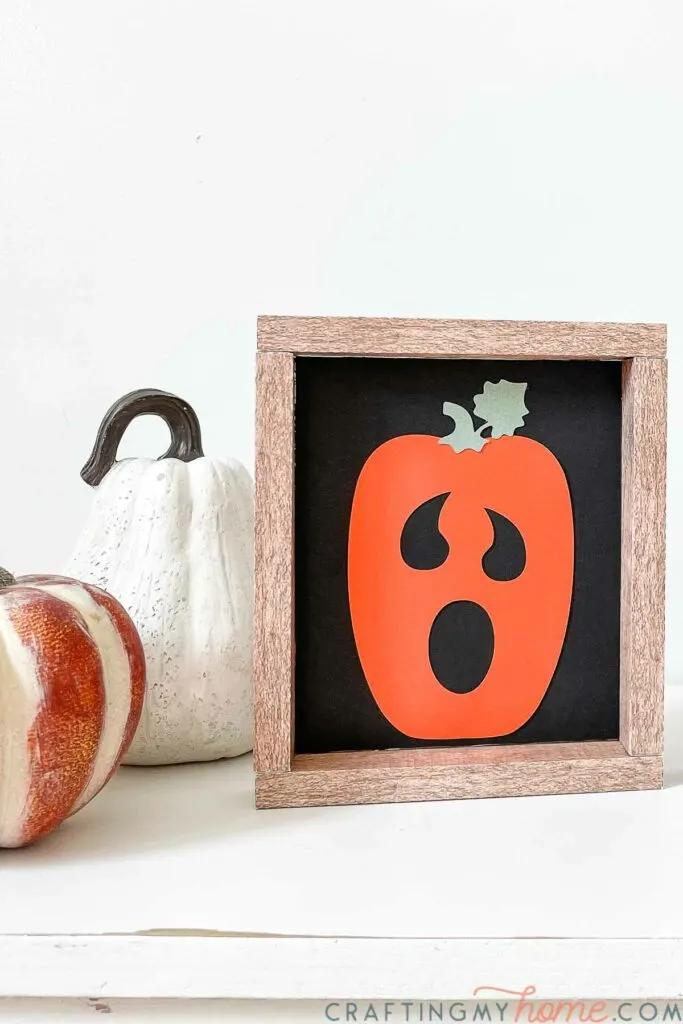
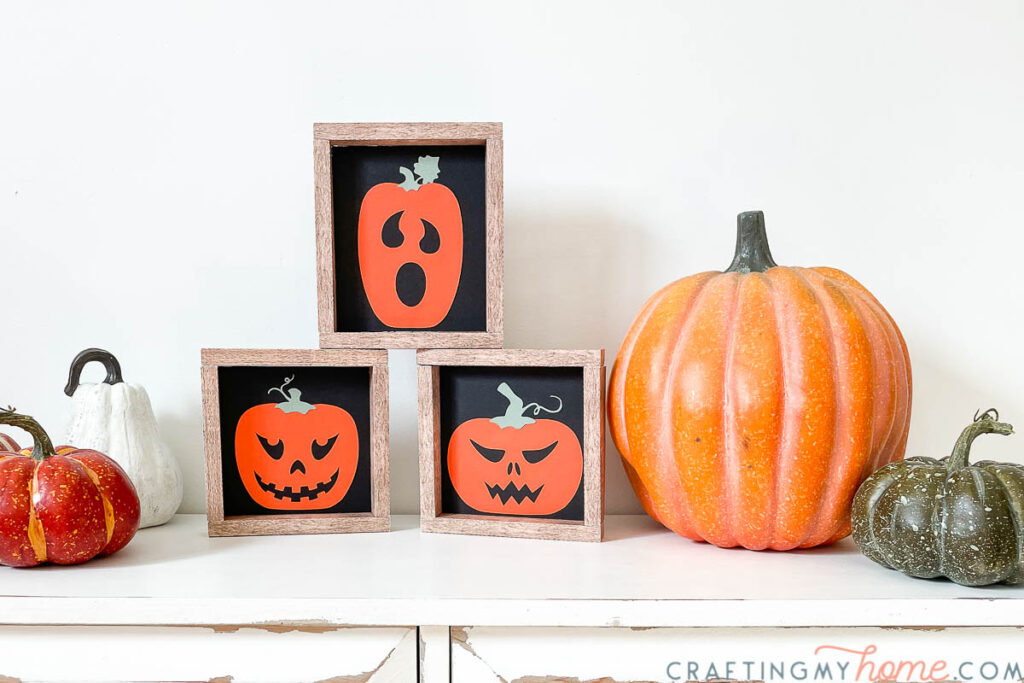
These simple Halloween signs look like little wood framed signs with spooky jack-o-lanterns on them. The bright colored pumpkins really pop on the black sign backgrounds.
This post may contain affiliate links. As an Amazon Associate I earn from qualifying purchases. Click here to read my full disclosure policy.
Jack-o-Lantern Paper Signs
You may recognize these spooky faces from last’s years Halloween pumpkin craft: Paper Jack-O-Lanterns. I loved them so much I knew they would be perfect for creating the Halloween signs.
Jack-o-lanterns are so fun to decorate for Halloween. They can be as scary or non-scary as you want.

Since I still have kids, we have to err on the side of not-too-spooky. And these faces are the perfect option.
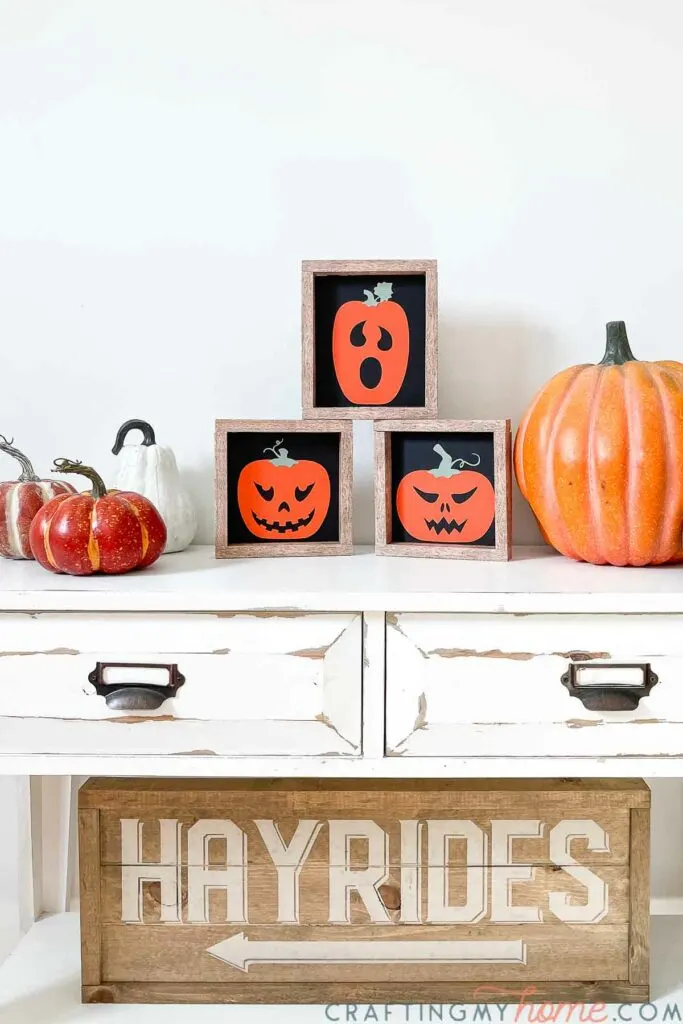
The three different shaped pumpkins have 3 different jack-o-lantern faces. They are classic, spooky, and a little ghostly too. The perfect trio for Halloween signs.
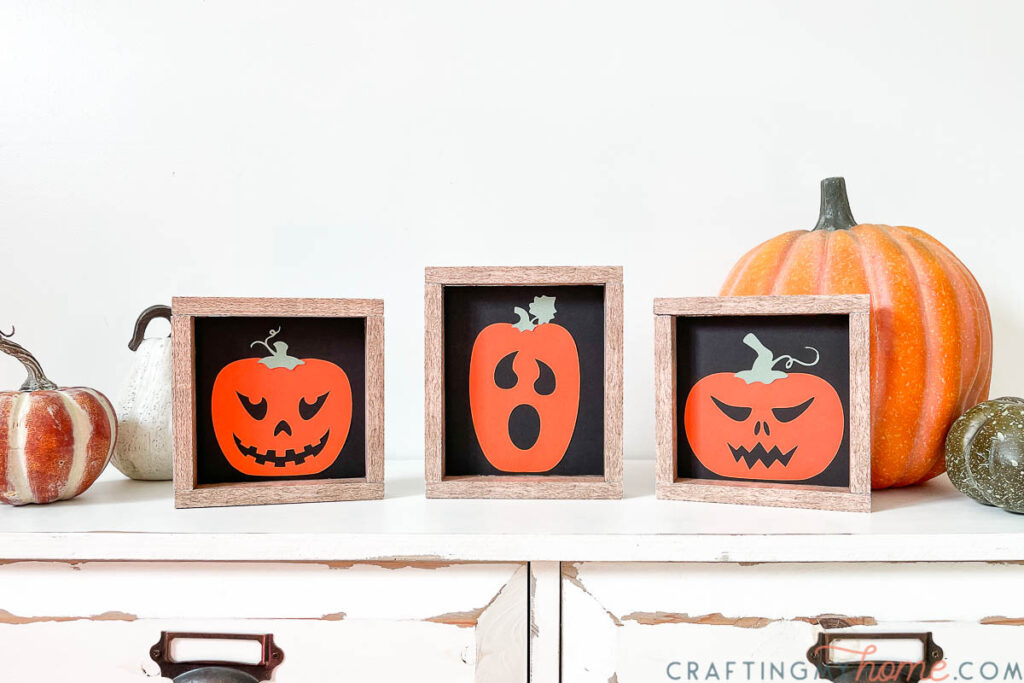

You can create all three Halloween signs or just pick your favorite.
Use all three signs in a stack or row. Or have fun putting one here and there. You can easily add them into a bookcase for lots of Halloween fun.

5 Days of Pumpkin Crafts
It has been so fun creating these amazing pumpkin crafts all week. I hope you have had fun making them with me.
Now our homes are all decorated for fall and Halloween!

If you missed any of this year’s paper crafts, make sure to check them out below:
- Day 1: Modern Pumpkin SVG
- Day 2: Beautiful Paper Pumpkin Lanterns Craft
- Day 3: DIY Pumpkin Tea Towels
- Day 4: Neutral Pumpkin Patch Printable Art
- Day 5: Simple Halloween Signs from Paper
And if you are not ready to say good-bye to all the fun crafts for adults, make sure to check out all the amazing pumpkin crafts here.

How to Make Faux Wood Halloween Signs
Supplies:
- Halloween signs template
- Cardstock
- Printer
- Hot glue gun and glue sticks
- School glue
- Ruler & X-acto knife
- Optional: Electronic cutting machine like a Silhouette Cameo or Cricut Maker
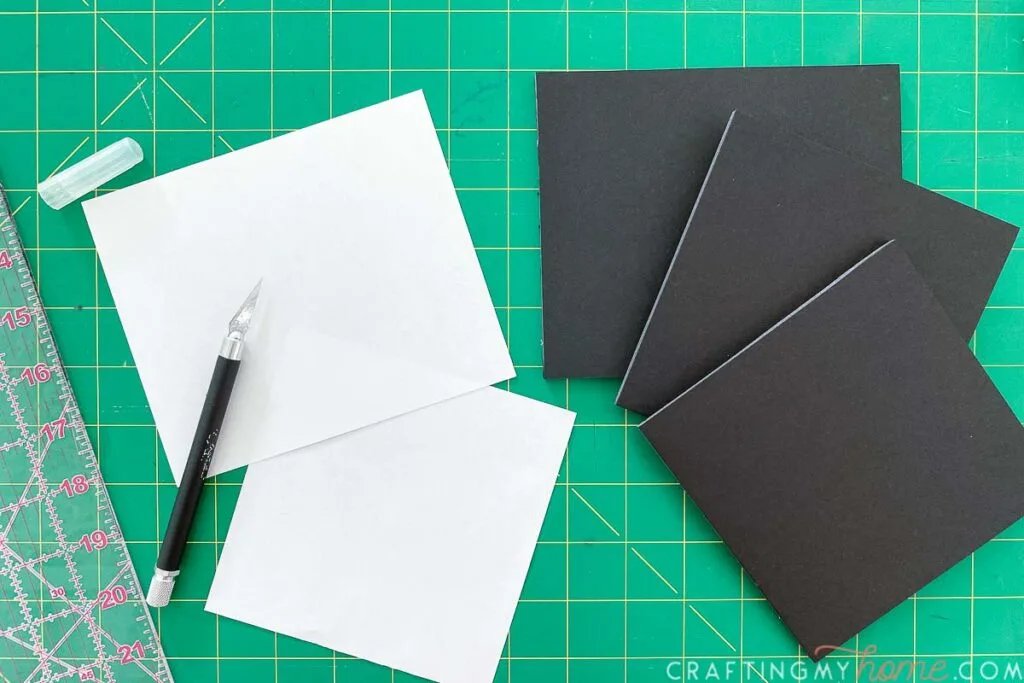
Cut out the pieces
For each sign you will need to print 2 frame pieces on cardstock. If using an electronic cutting machine, use the Print & Cut feature.
Please note that some printers automatically shrink files to fit inside their print border, make sure your printer is set to Print Actual Size or your frame pieces may not match the foam board pieces.
If you printed them and the size is off, you can easily adjust the size of foam board to match the actual size of your frame instead.
Cut the jack-o-lantern pieces out of colored cardstock. Use the same colors for each or have fun mixing it up.
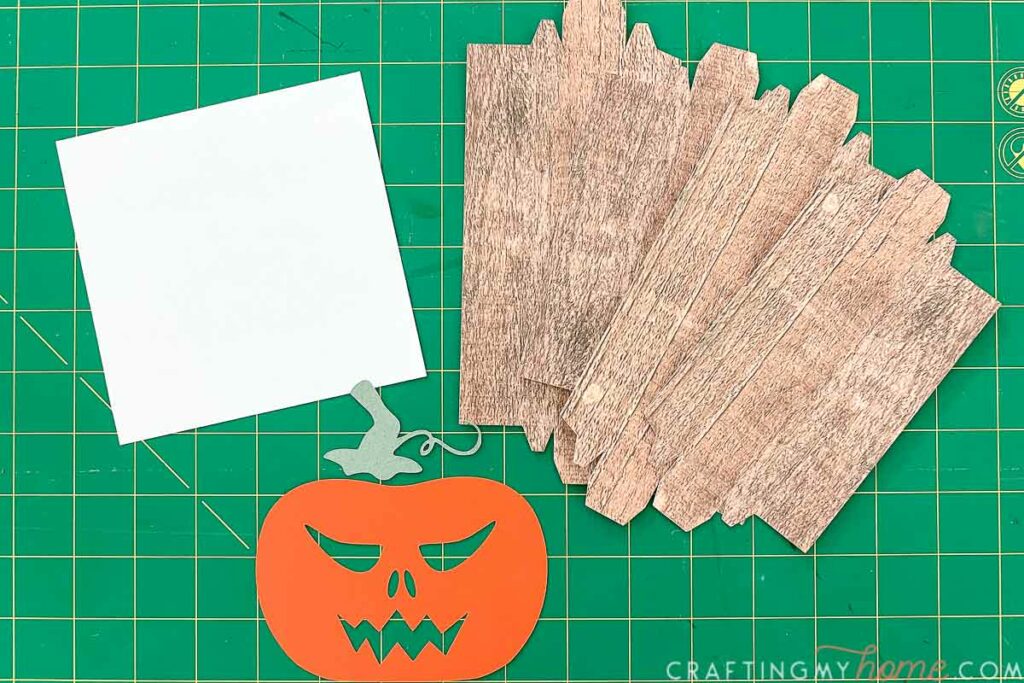

Use the background template piece to cut out a piece of black foam core for each sign. I find an x-acto knife and ruler give me the cleanest cut on the foam board.
The two smaller (square) signs are cut out of the same background template. The larger template is for the tall jack-o-lantern sign.

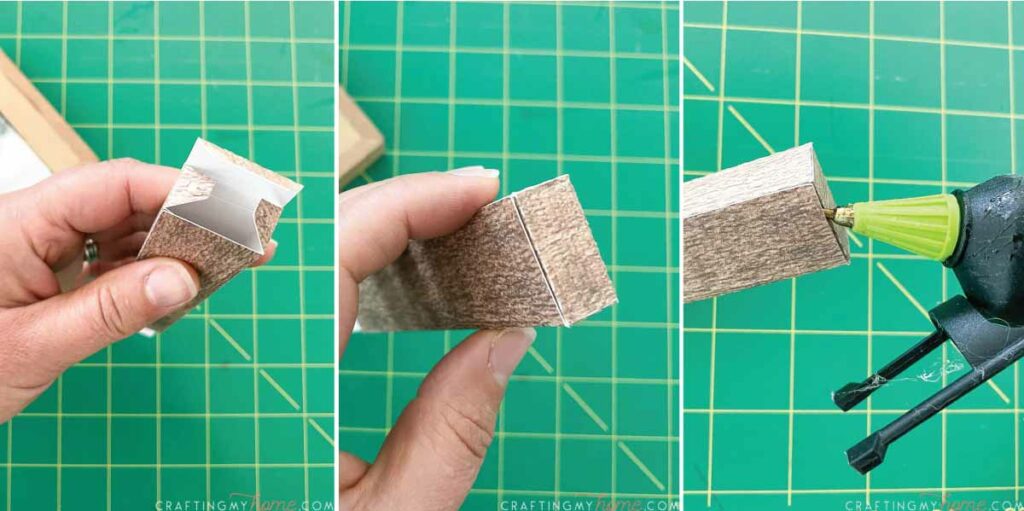
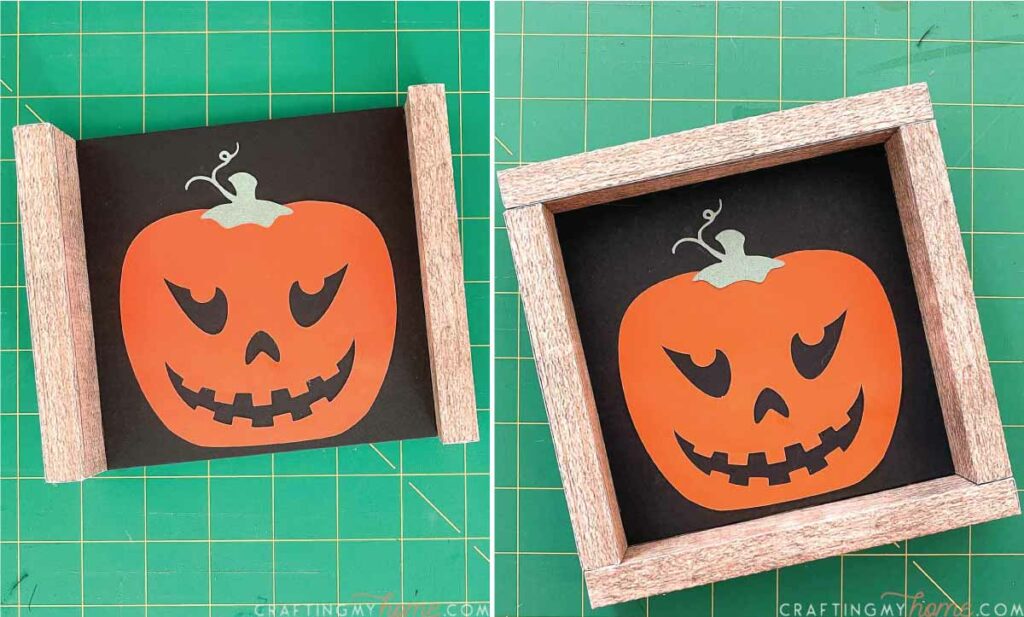
Glue together the frame pieces
To assemble the frame pieces, fold along the dotted lines.
Then glue the tabs to create a faux wood piece. Start by glueing the long side tab.
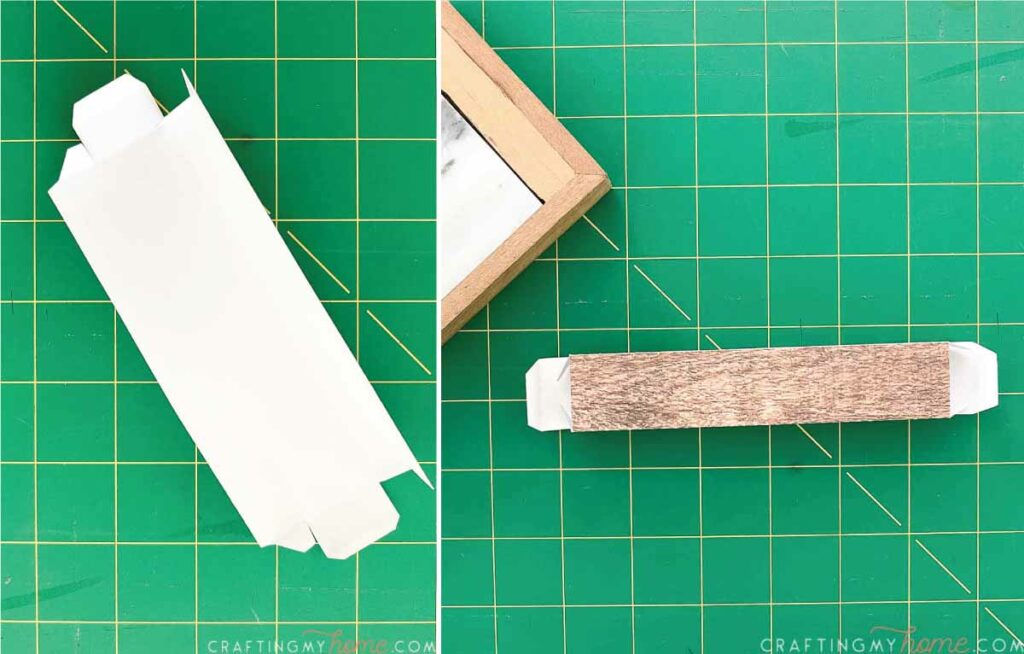

Next, fold the tabs at the ends in and secure with glue.

Assemble the signs
Glue the jack-o-lanterns and stems to the pieces of foam board.
Use the hot glue for the larger sections of the decor pieces. Use the school glue to stick down the smaller loops on the stem.

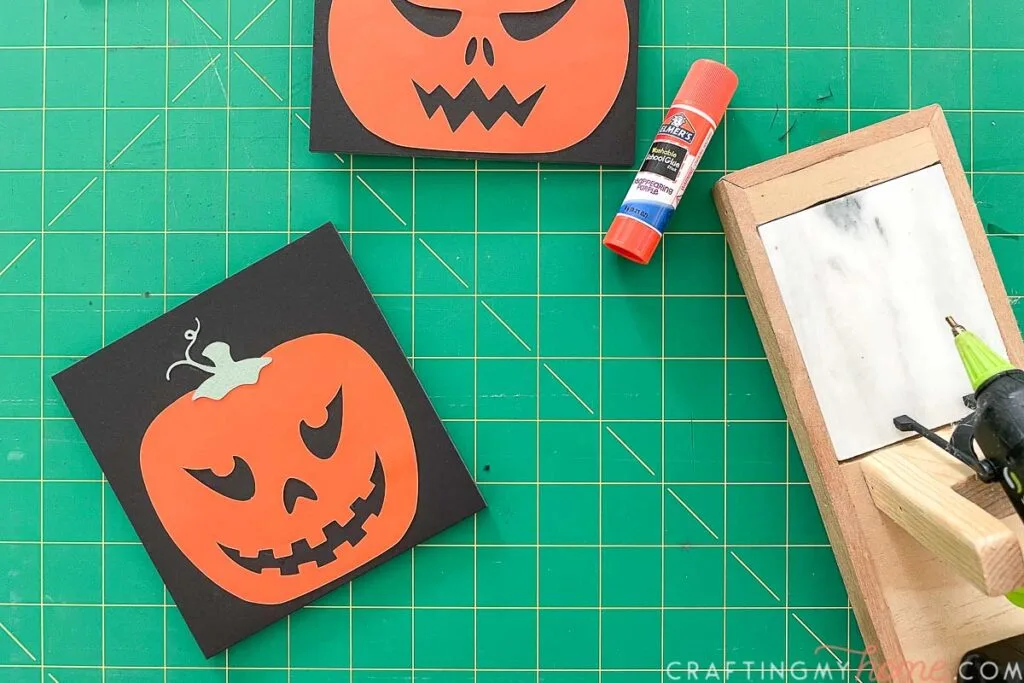
Start assembling the Halloween signs by first glueing the short frame pieces to the sides of the foam board. I kept the back of the foam board flush with the back of the frame board.
Then glue the longer frame boards to the top and bottom. Make sure to add glue to the frame pieces and foam board to secure it.

Repeat for the other signs and then your cute new Halloween signs are all done!
Have fun sprinkling them all around the house or stack them together for a bigger impact.

Tamara
Saturday 23rd of October 2021
Looked for the cut files for the cute pumpkins in frames but there is no link with the picture in the library - bummed!
Kati
Sunday 24th of October 2021
So sorry, I forgot to hit save after adding them. They are in the library now!
Lisa
Saturday 23rd of October 2021
Cut files aren't in the library for the frames.
Kati
Sunday 24th of October 2021
So sorry, I just fixed this and they will be there for a couple more days!