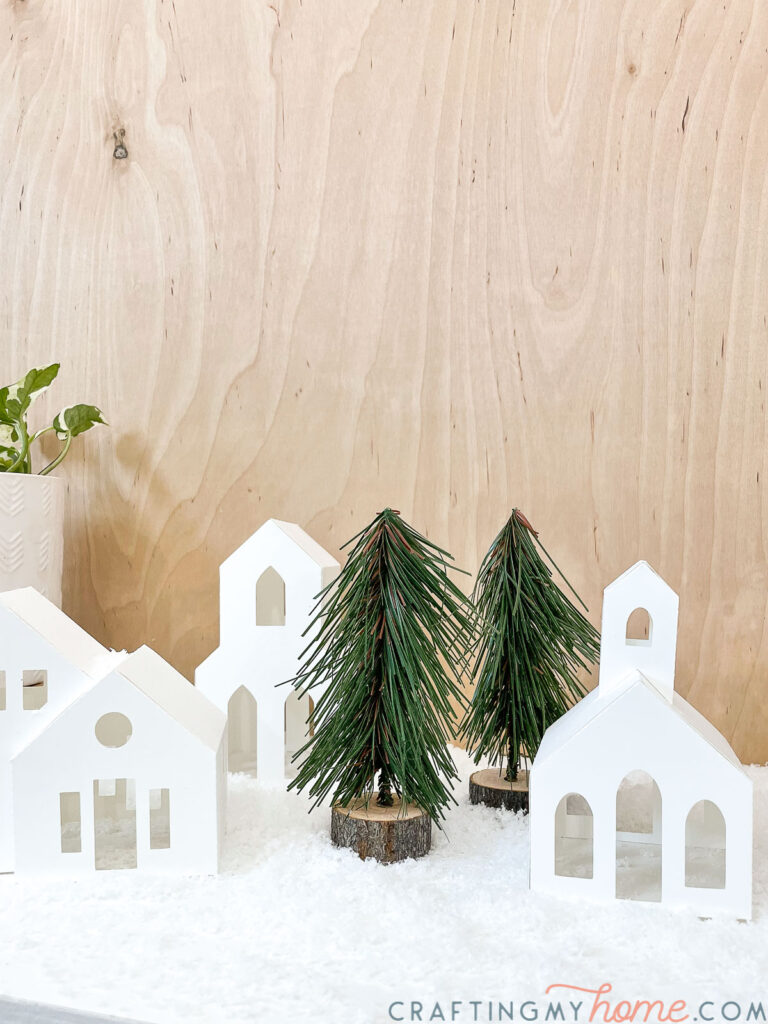
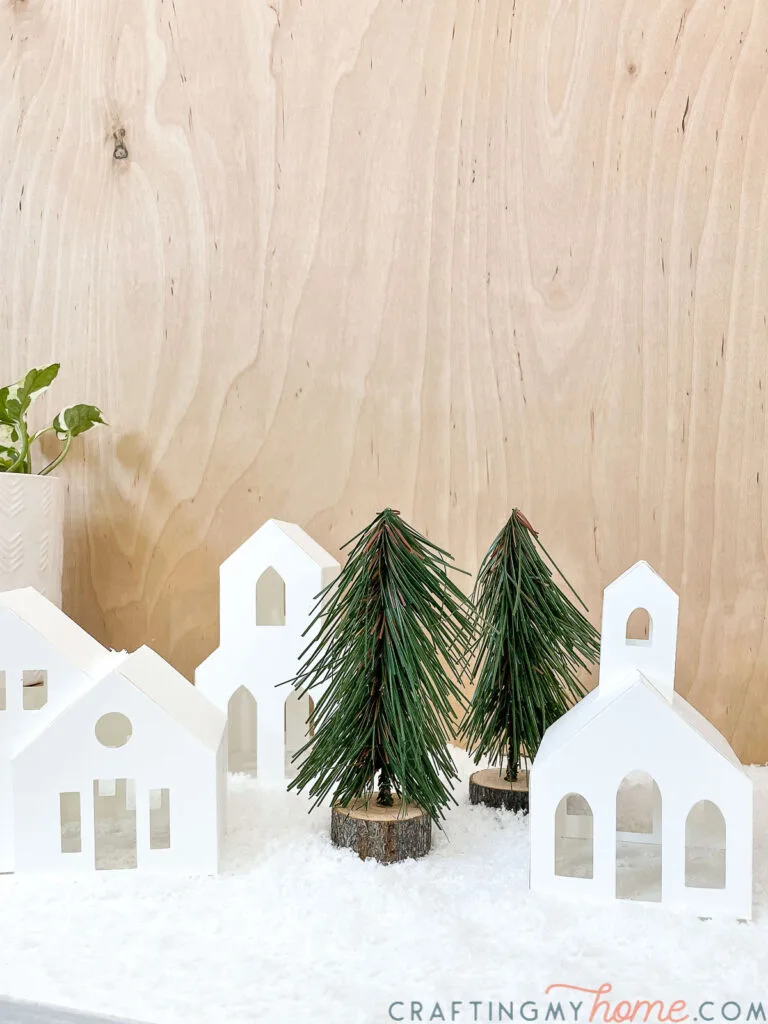
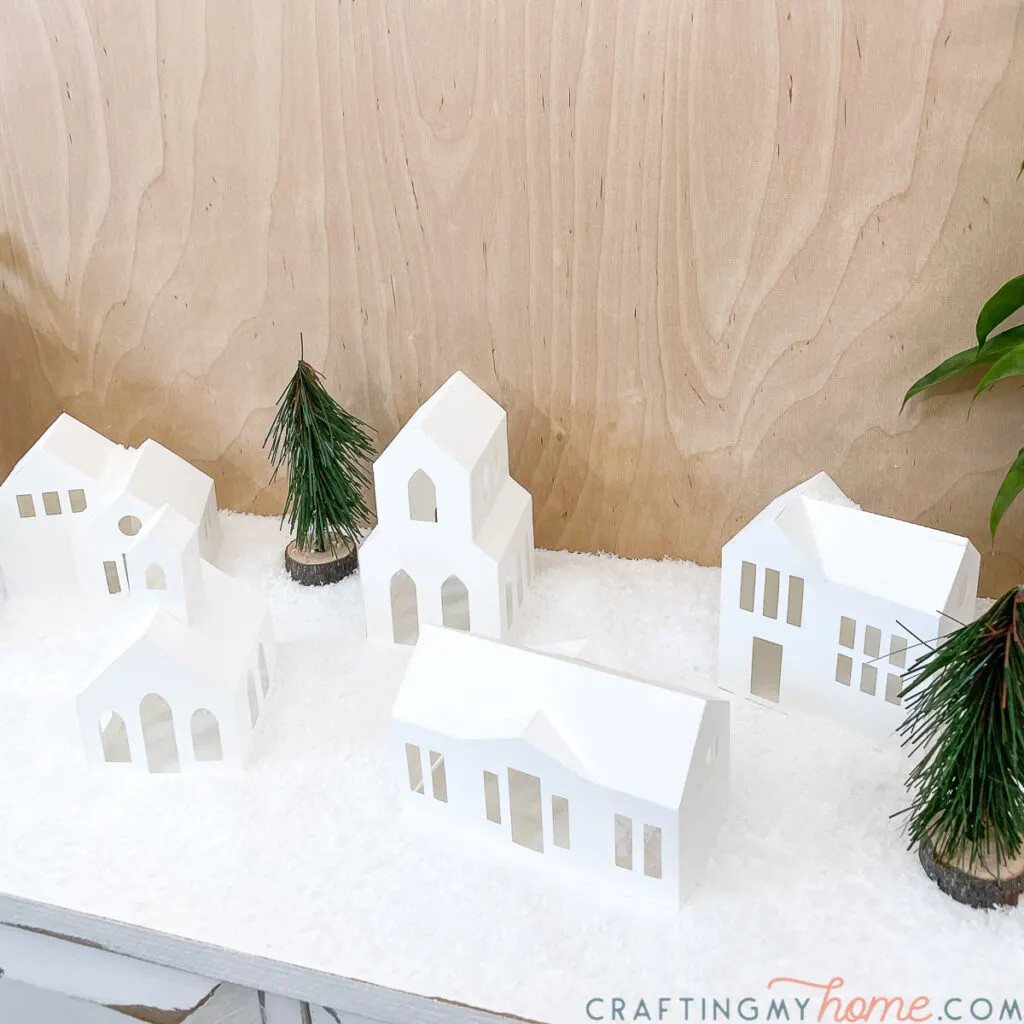
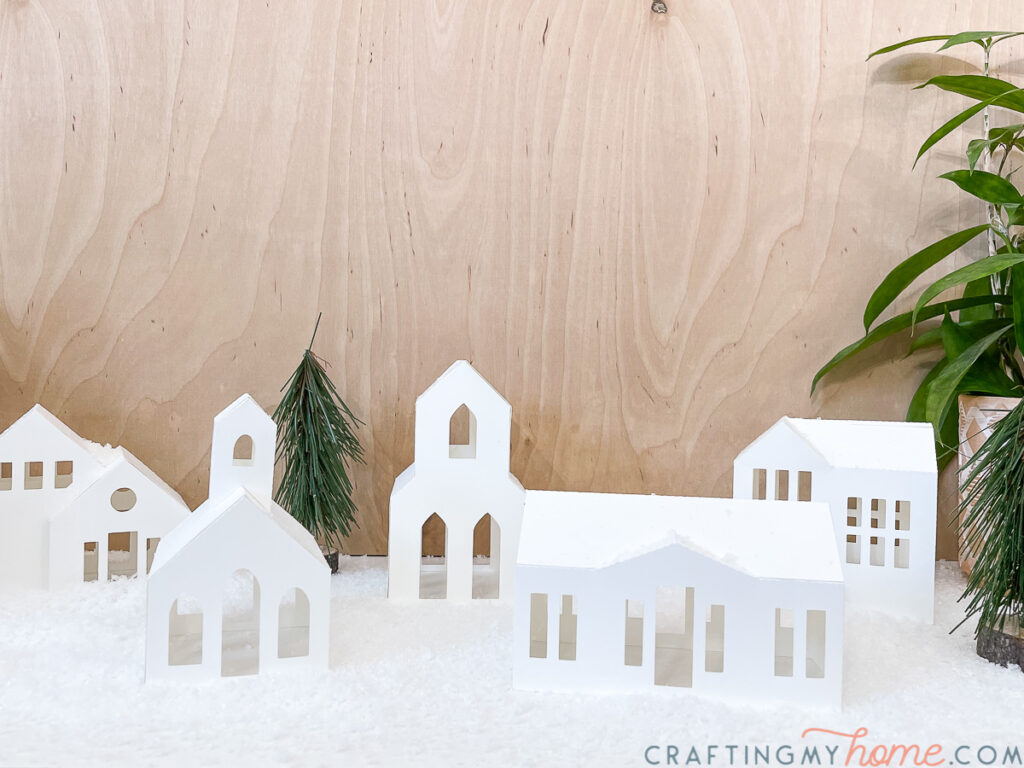
This white paper Christmas village will set the mood for a winter wonderland in your home.
One of my favorite Christmas decorations are Christmas villages and houses.
We have a ceramic Christmas village with all the details that the kids love putting together every year. But you can always have more than one Christmas village in your decor!
And for this year’s snowy ski lodge themed 7 Days of Paper Christmas decor, I knew I needed a white paper Christmas village. It looks just like a small mountain town covered in snow.
This post may contain affiliate links. As an Amazon Associate I earn from qualifying purchases. Click here to read my full disclosure policy.
Paper Christmas Houses
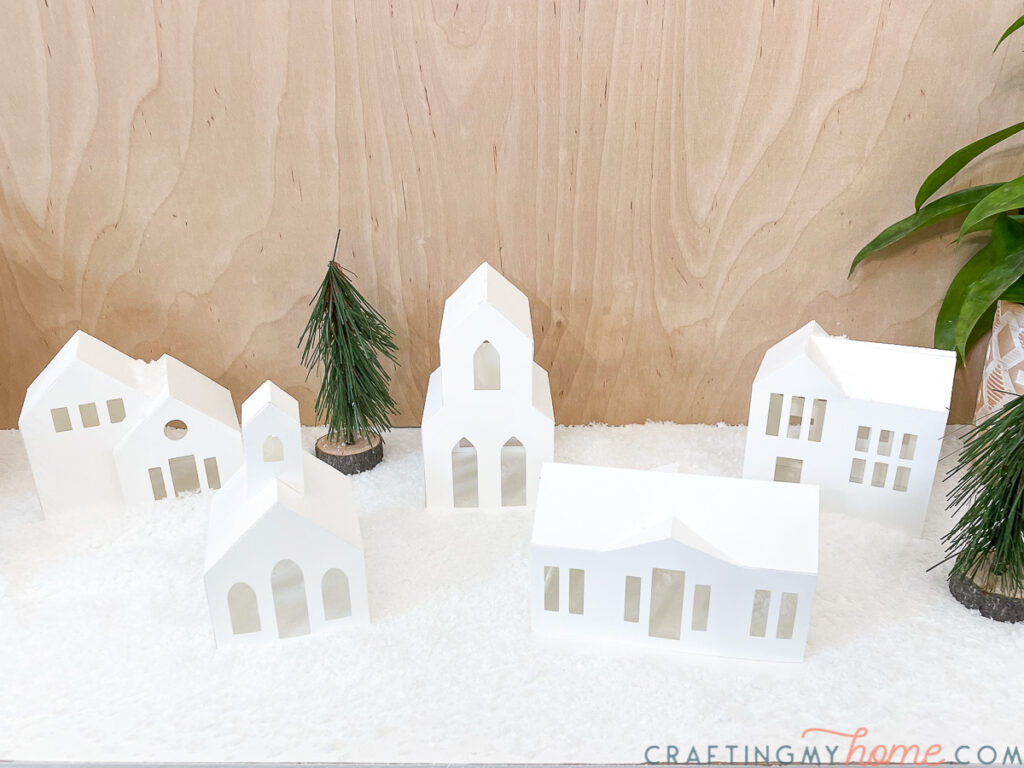
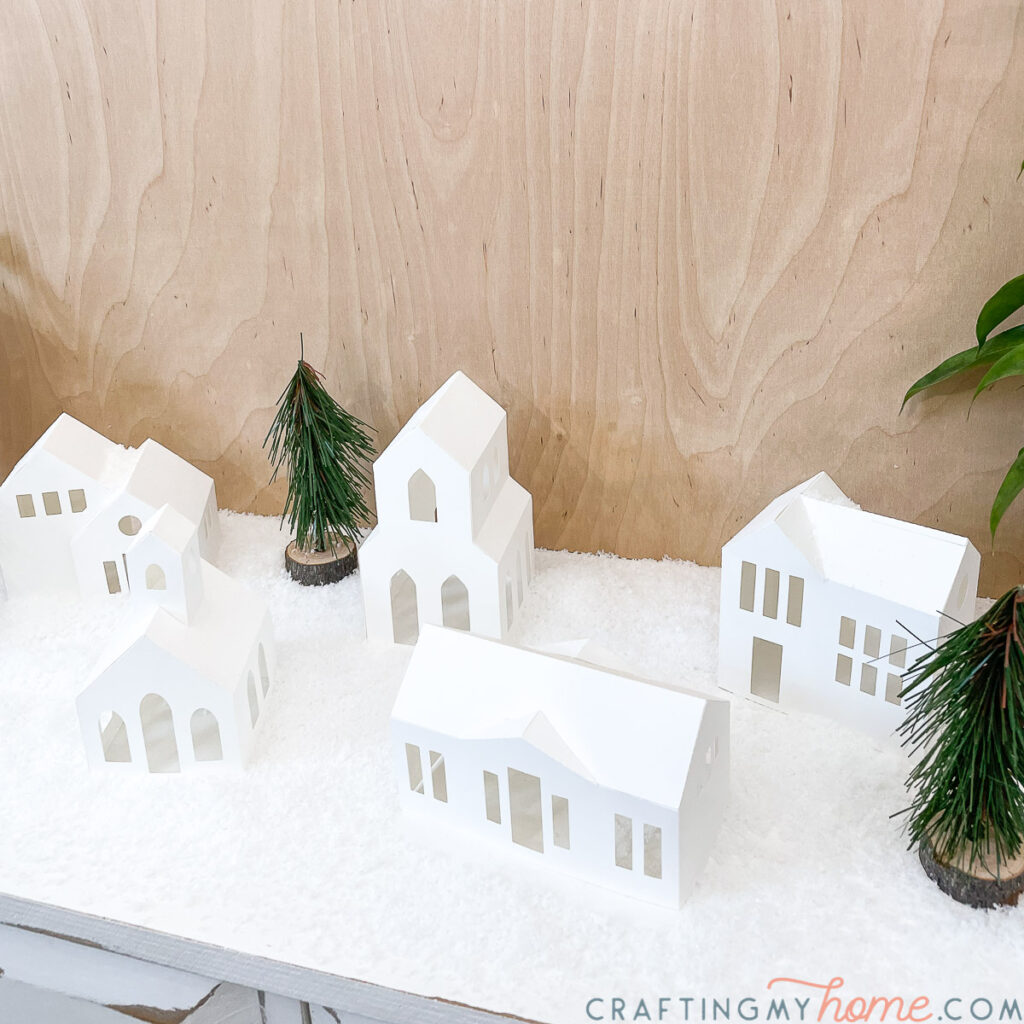
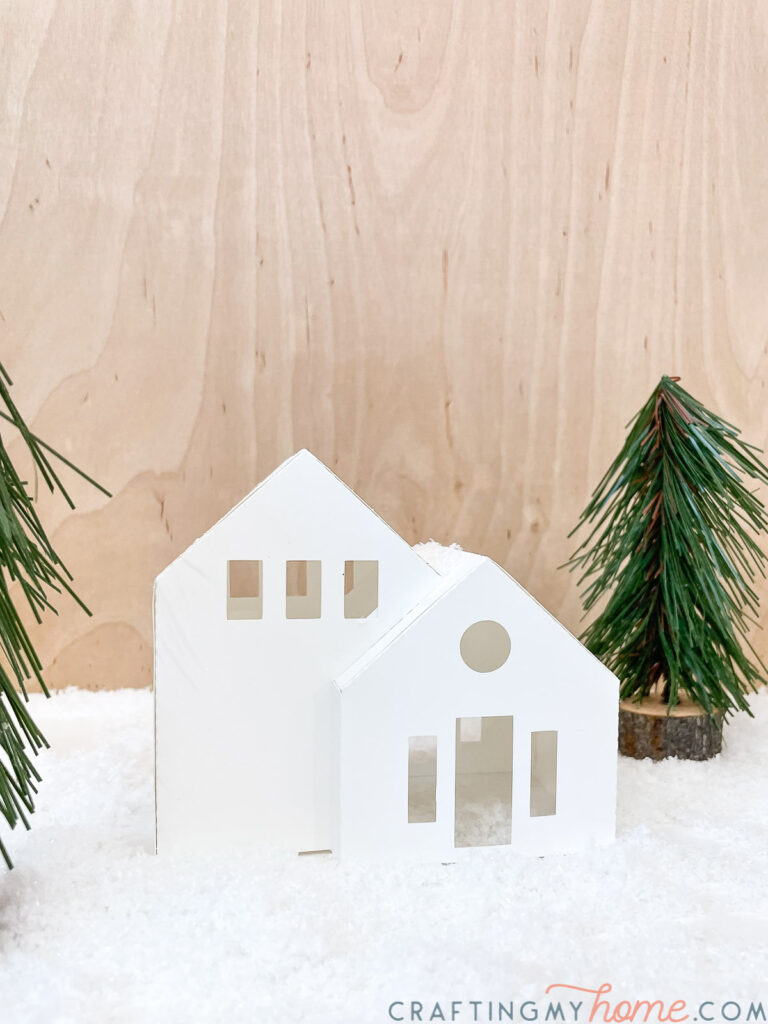
No village is complete without a variety of cute Christmas houses. For this paper Christmas village, I kept things simple and created a 5 different styles.
The 5 paper houses look like a variety of homes or churches. If you want to make a larger Christmas village, you can always duplicate your favorites.
All the houses have open windows and no bottom. If you want them to light-up, you can place flameless tea lights inside or a string of fairy lights around them.
And to turn your paper houses into a white winter village, sprinkle faux snow around them. But don’t forget to also add it to their roofs!

7 Days of Paper Christmas Decor
This easy paper Christmas village is part of the 7 Days of Paper Christmas decor series. For one week leading up to Thanksgiving, I share a new paper Christmas craft that you can use to decorate your home.
This year’s theme is all about snow and cozy. I call it snowy ski lodge them!
Here are the rest of the paper crafts in case you missed any:
- Day 1: Easy Paper Snowflake Ornaments
- Day 2: Rustic Paper Christmas Tree Craft
- Day 3: Anatomy of a Snowflake Printable Art
- Day 4: Plaid Paper Food Trays
- Day 5: Easy Wooden Ski Christmas Ornaments
- Day 6: Beautiful Paper Christmas Village DIY
- Day 7: Decorative Wooden Sled Paper Craft
How to Make a DIY paper Christmas village
Supplies:
- Paper Christmas village templates
- I am sharing the cut files & PDF for these paper Christmas houses in my subscriber library until 11/25/2021, then they will move to the shop. Click here to subscribe to my newsletter and gain access to all the freebies. If you already have your password, click here to go to the library download them.
- Cardstock
- Hot glue gun and glue sticks
- Printer or Electronic cutting machine like a Silhouette Cameo or Cricut Maker
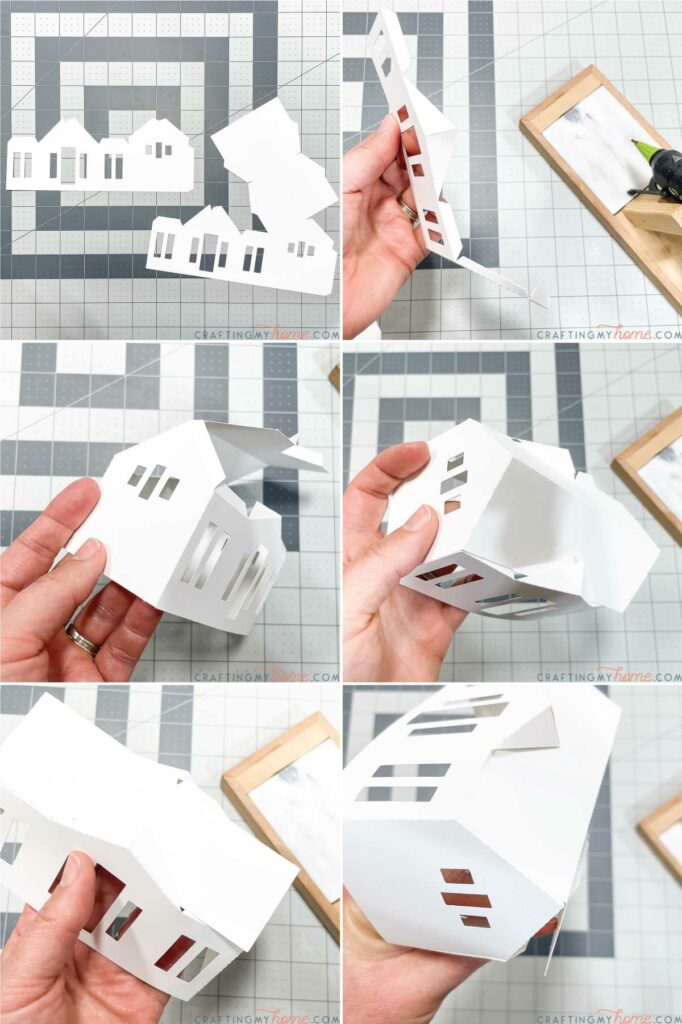
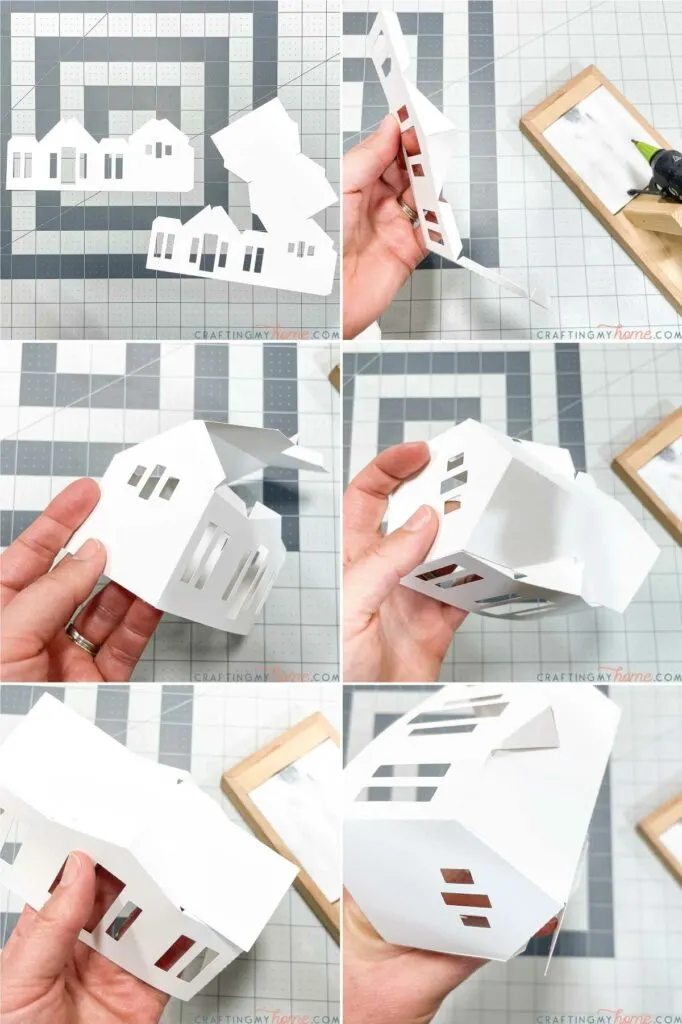
Cut out the pieces
Each Christmas house is cut out of 1 piece of cardstock. If you are using the PDF, the houses are slightly smaller in order to allow for a print border.
If using a cutting machine, you can scale them larger if you want by cutting on multiple pieces of paper or a 12×12 paper.


Assemble the houses
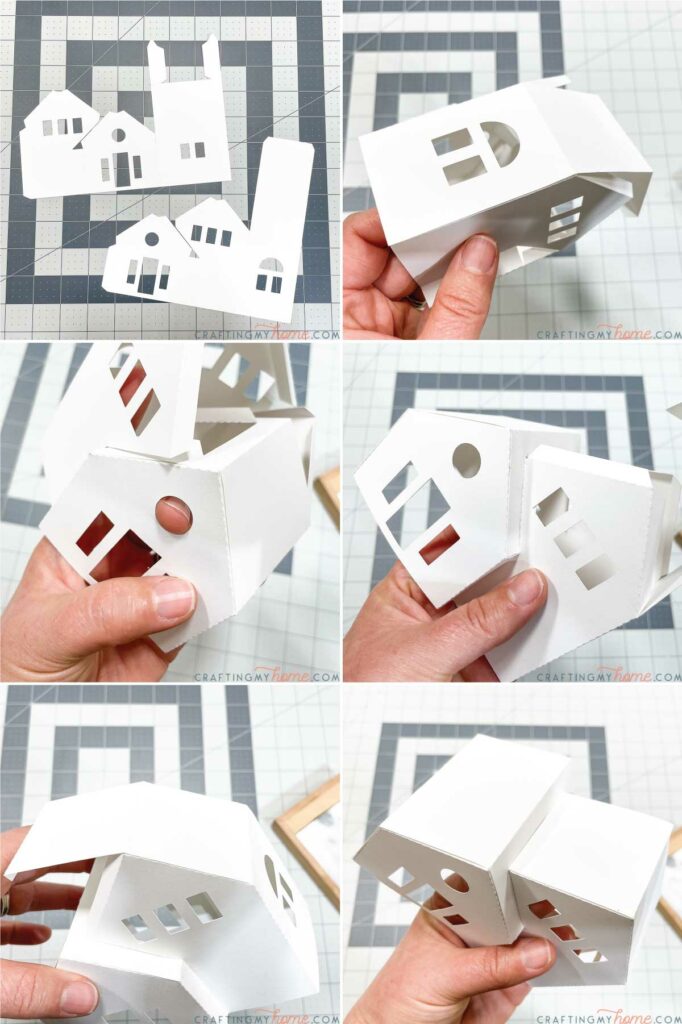
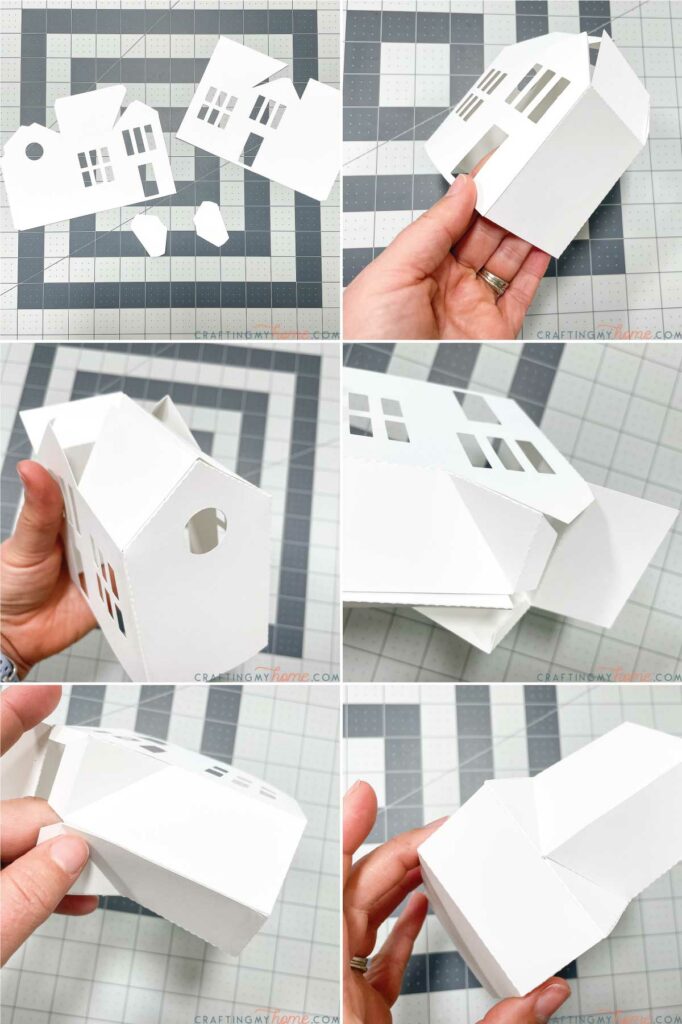
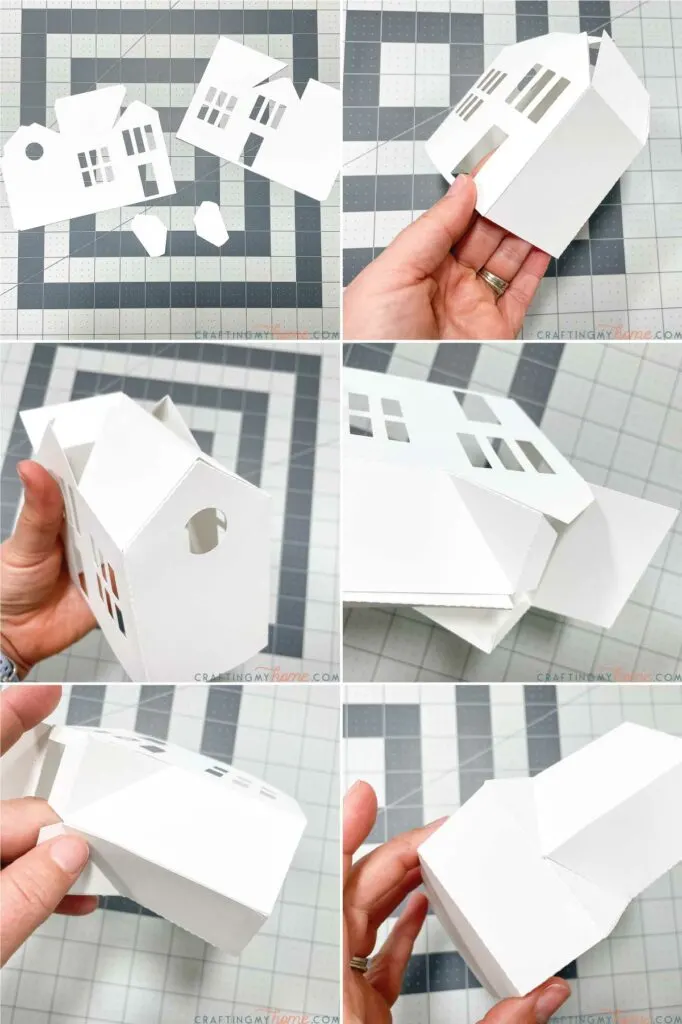
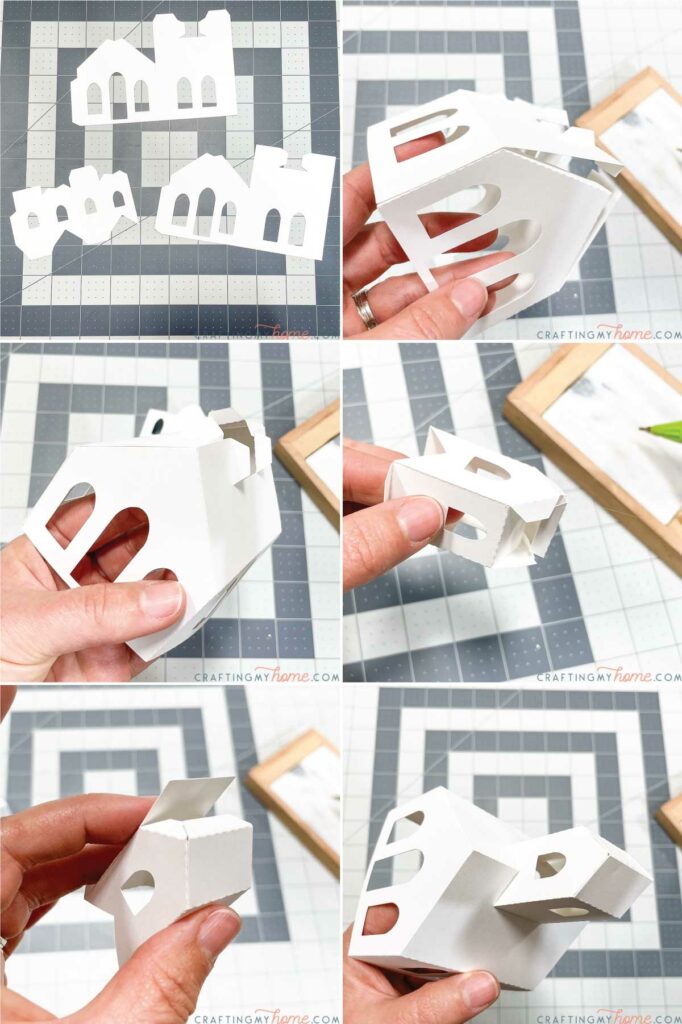
Each house is slightly different to assemble based on the different eaves and shapes. I took pictures of each one to show the steps.
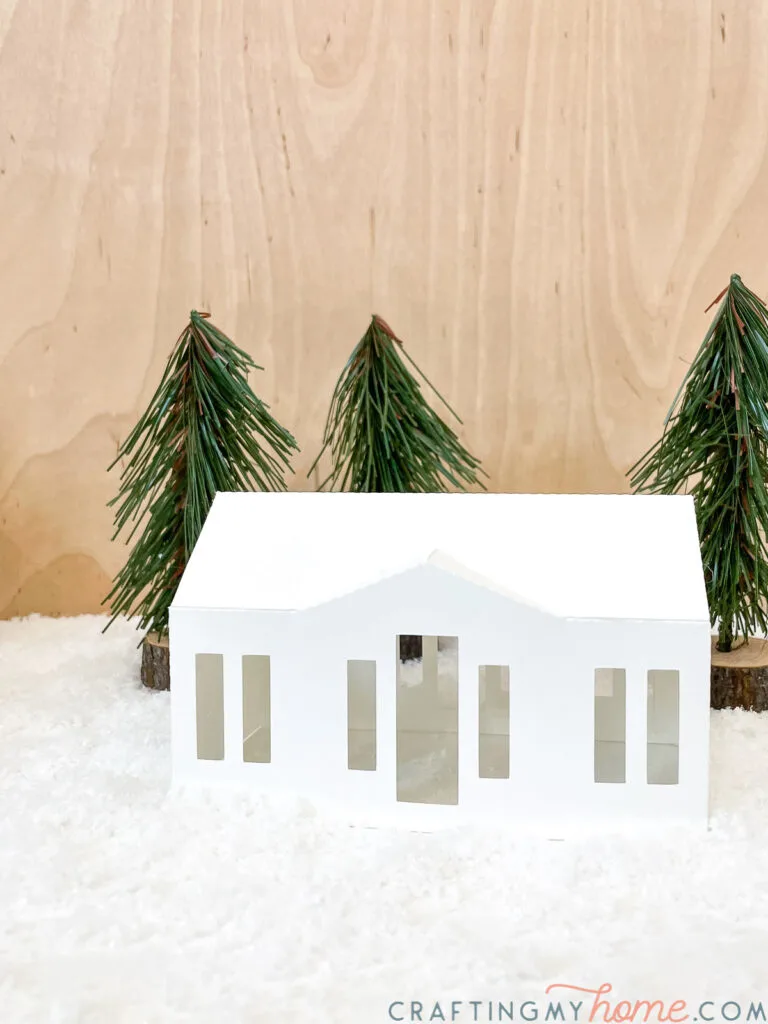
House #1
This house is a modern ranch style home. The large windows will make it perfect to have lit from the inside.

To assemble:
- Cut out the pieces and fold along all the dotted lines.
- Glue the tab to create the porch roof.
- Glue the side tabs to create a rectangle shape.
- Glue the roof on one side of the house.
- Tuck the roof tabs under the porch roof and secure.
- Secure the roof to the other side of the house.
- Glue the reaming tabs from inside the house to secure.
House #2
This house is a simple suburban home. We had neighborhoods full of these simple houses all around our last home.

To assemble:
- Cut out all the pieces and fold along the dotted lines.
- Glue the tabs on the sides to create a rectangle.
- Fold over the lower roof and glue to secure.
- Fold over the upper roof and tuck the tab under the lower roof.
- Glue the roof tabs to secure.

House #3
This house is a classic two story house. This traditional house offers height to the paper Christmas village.


To assemble:
- Cut out the pieces and fold along all the dotted lines.
- Glue together the sides to create a rectangle.
- Glue the roof to the side peak.
- Glue in the porch roof eaves piece on both sides.
- Secure the roof top tab.
- Glue down the side roof to the tabs.
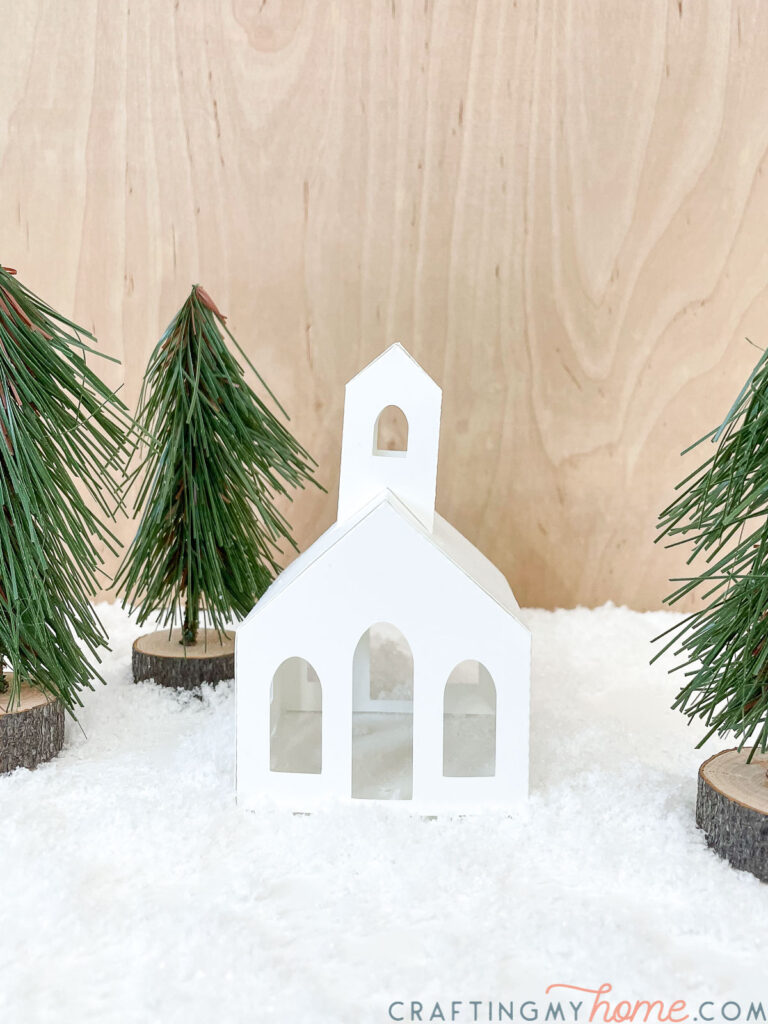
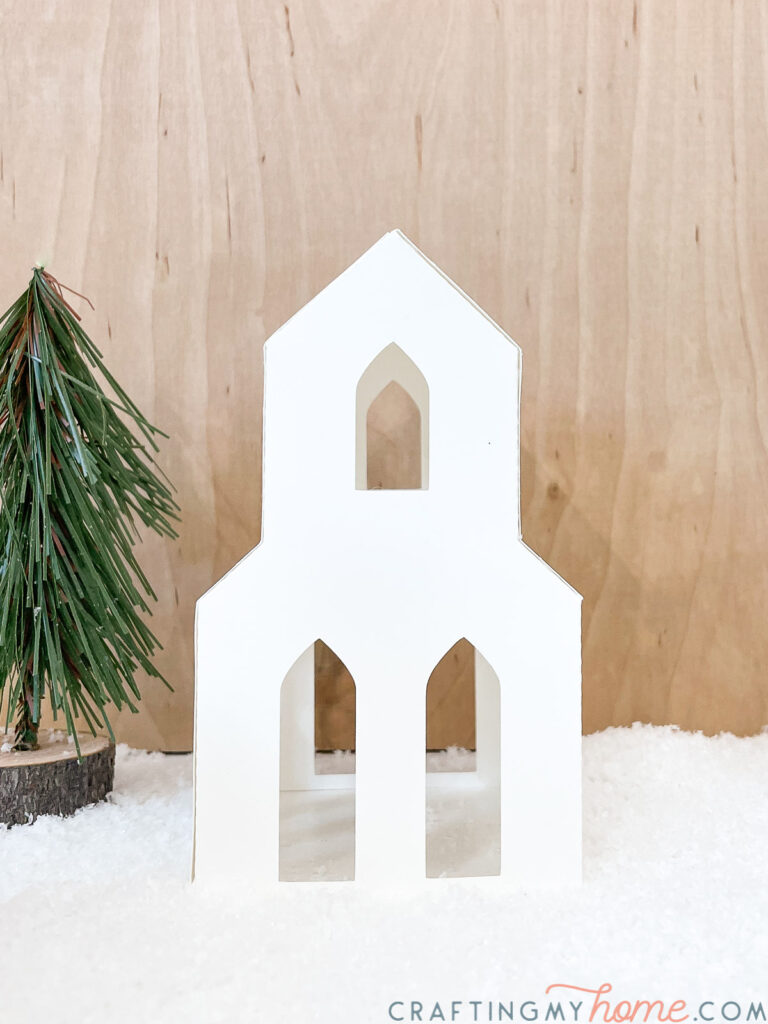
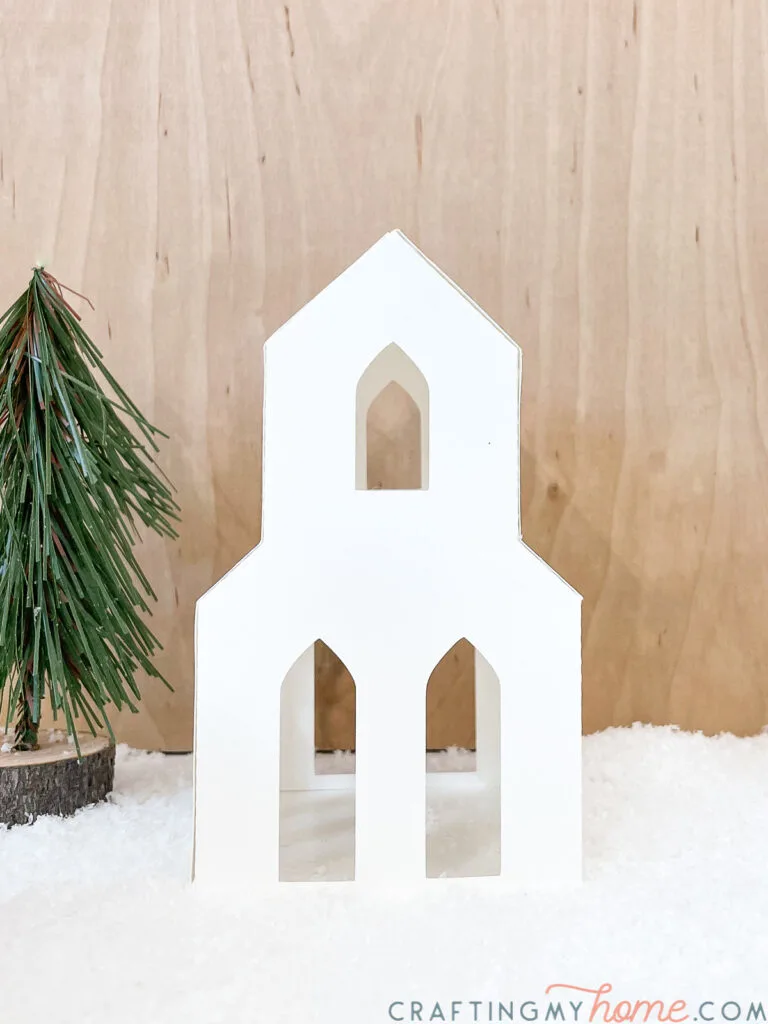
Church #1
No mountain Christmas village is complete without a little chapel. This is the perfect little white chapel with s steeple.

To assemble:
- Cut out the pieces and fold along the dotted lines.
- Glue the tabs on the sides to create a square.
- Secure the roof by glueing the tabs to the peak.
- Assemble the steeple.
- Tuck the steeple into the opening at the top of the roof.
- Glue the tabs to secure the steeple.
- Some tabs you will have to clue from inside the house.

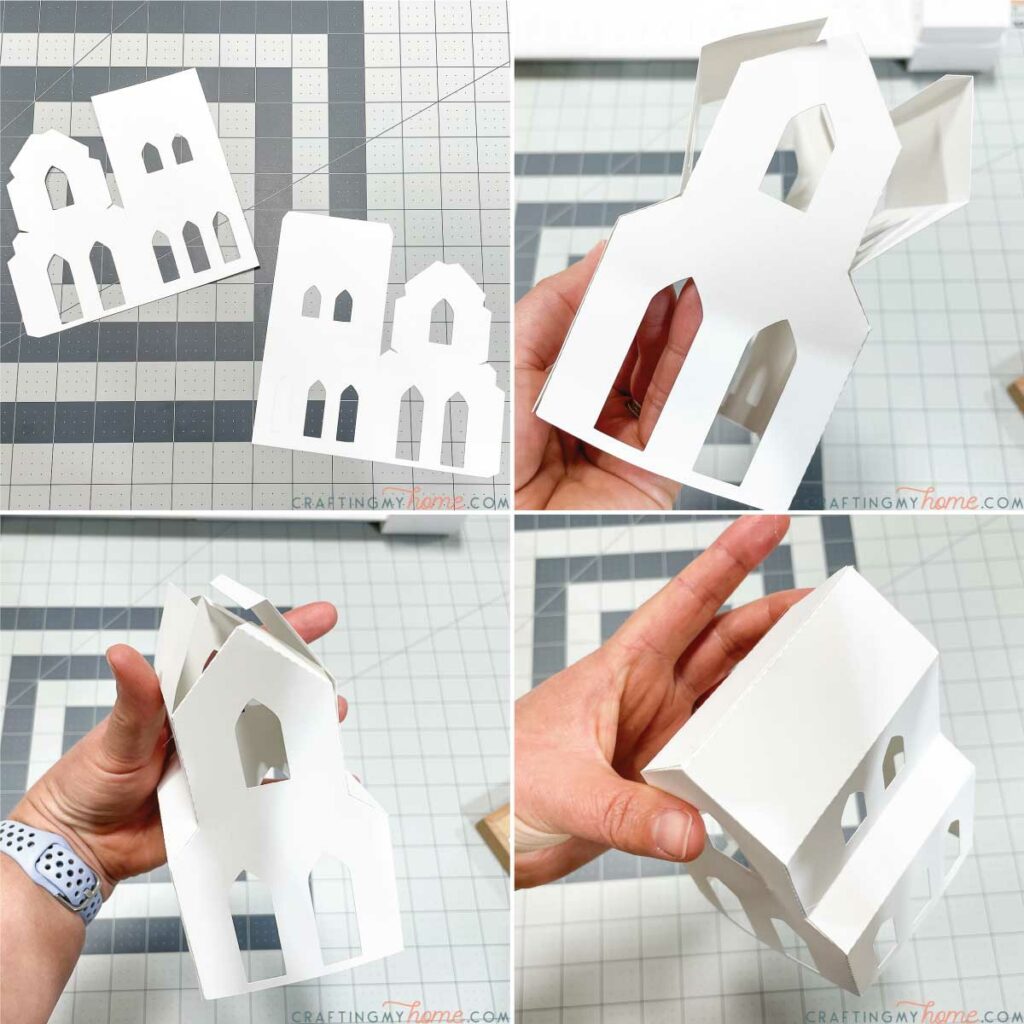
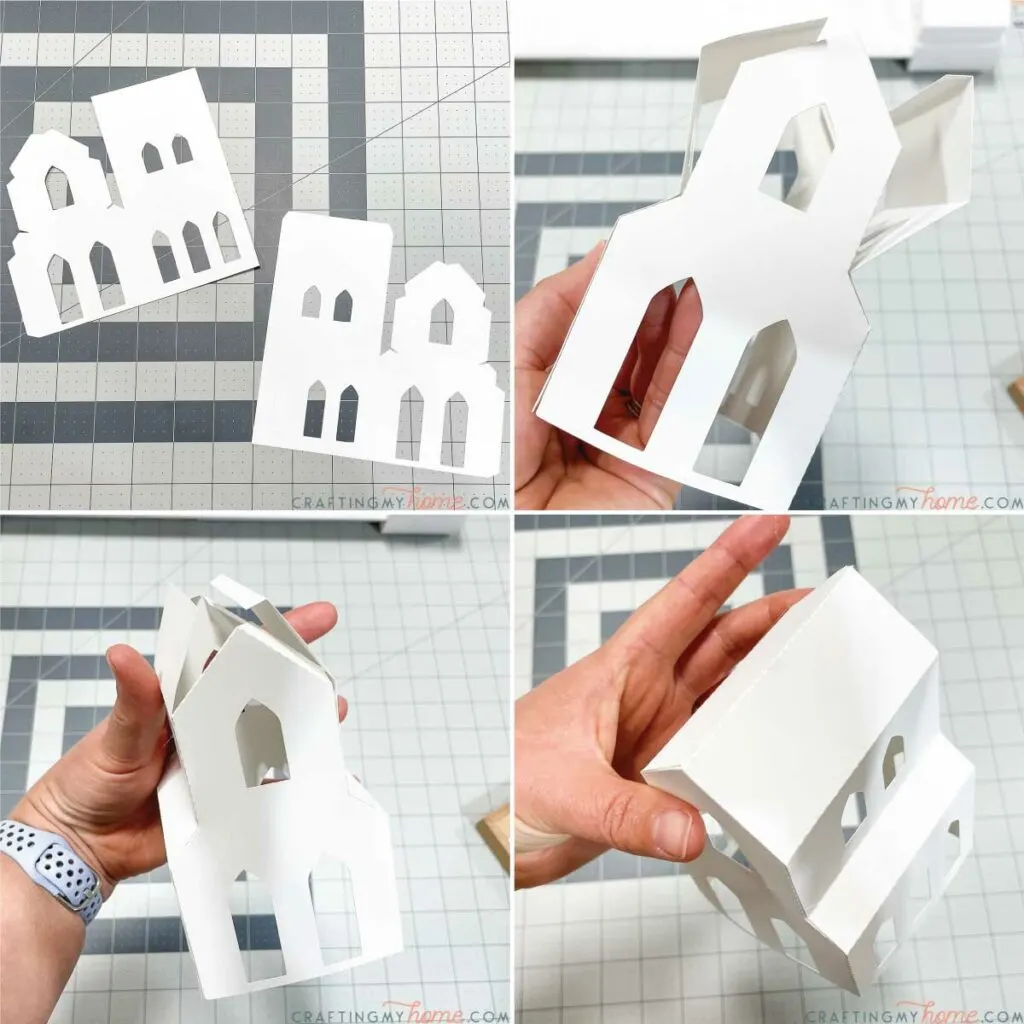
Church #2
The final piece of our winter Christmas village is the large church. This two story church has arched windows and is the perfect centerpiece for your Christmas display.
To assemble:
- Cut out all the pieces and fold along the dotted lines.
- Glue the side tabs to create a rectangle.
- Work your way up the front to attach the roof to the lower roof and second story side.
- Finish by glueing the top of the roof.
And now your entire Christmas village it done!
Have fun creating a sweet Christmas scene anywhere you need some more Christmas cheer. This smaller village is great for placing in smaller areas.

Happy crafting!